Signed the contract and looking at products:)

THANKS! Love all of the pics but the ones of the kids and Dad are the best! SO cute! Dad with the dogs :super:

This is the time in your build I share some links with you. It is a lot of info. so take it slow and a bite at a time. It will all start to make sense when you start using it:

Print these out:
Pool School - Basic Pool Care Schedule

Pool School - Recommended Levels

Bookmark these:
Pool School - Recommended Pool Chemicals

http://www.troublefreepool.com/calc.html

Pool School - ABCs of Pool Water Chemistry

Make sure to ask any and all questions you might have no matter how small! We have all been where you are at one point.

Please ask you PB what test kit he is providing. Let us know so we can fill in any holes it might have.

:hug: for sharing your build and taking time out to share the awesome pics! I bet they had a blast playing with the cars in there!

Kim:kim:
 
I'm going to read the links this afternoon. Also need to sign up as a supporter and order a test kit from here per my husband. We love this forum:). He will be handling the pool Chem but as he travels for work I definitely need to understand it and do it myself:)

SWEET! You will have fun doing the tests. We have videos and have some tips how to make it easier to do as well!

Kim:kim:
 
Just got caught up on this thread. Looks great so far. I'm glad things worked out well with the PB. Looking forward to seeing the finished product. :)
 
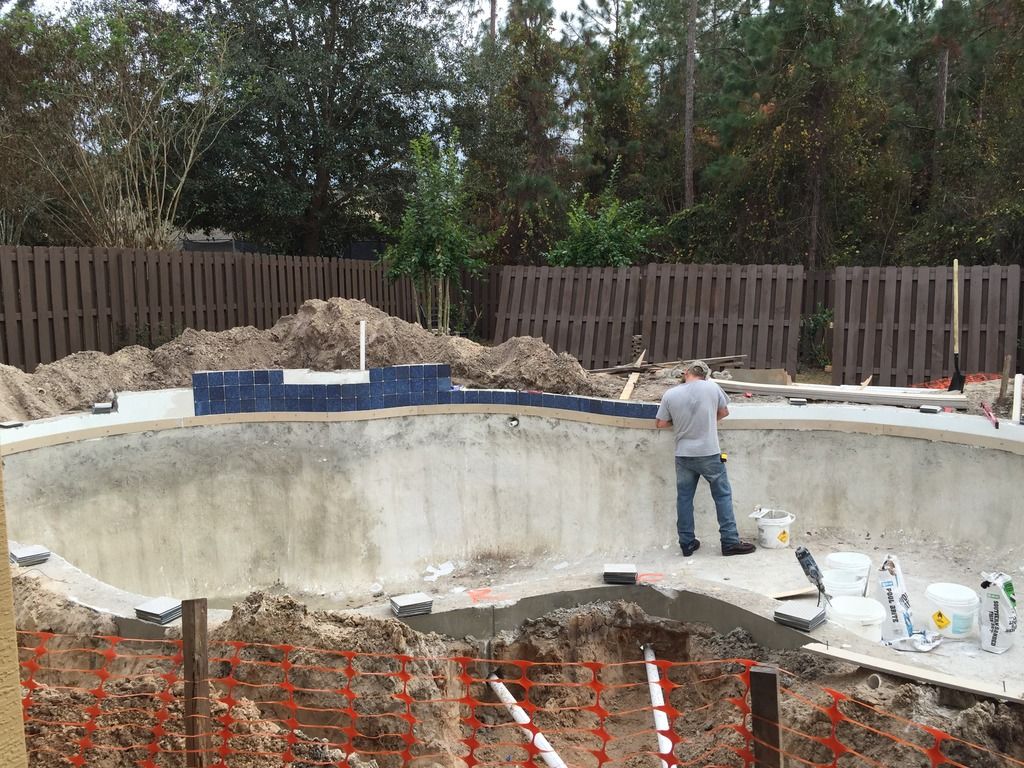
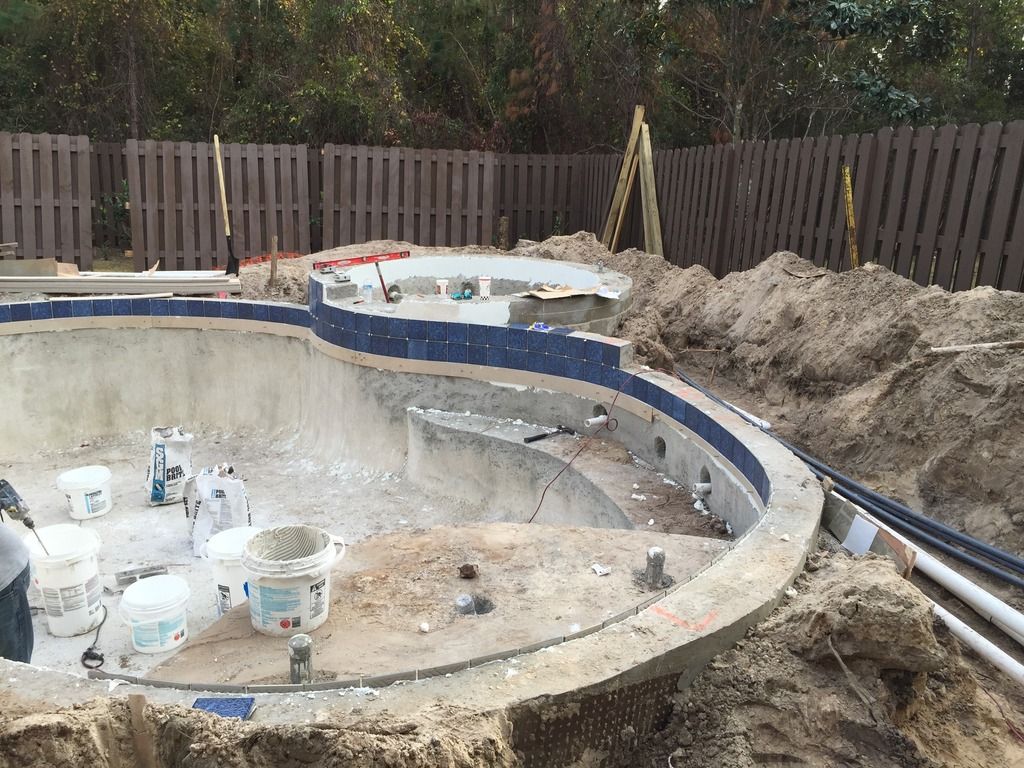
The plumbing and tile guys have been here this week and will finish tomorrow plus they will cover the trenches and do the pool cage footers as it takes a few days to cure. The progress has been fantastic:) I'm putting a reminder on my phone Kimkats to ask about their test kit. We are very pleased with the company's responsiveness and their subs and in-house crews. Polite and hard working plus they are kind to my dogs and are super tolerant of all our questions. Here's a few pix...


- - - Updated - - -

Thanks Nectarologist:)
 
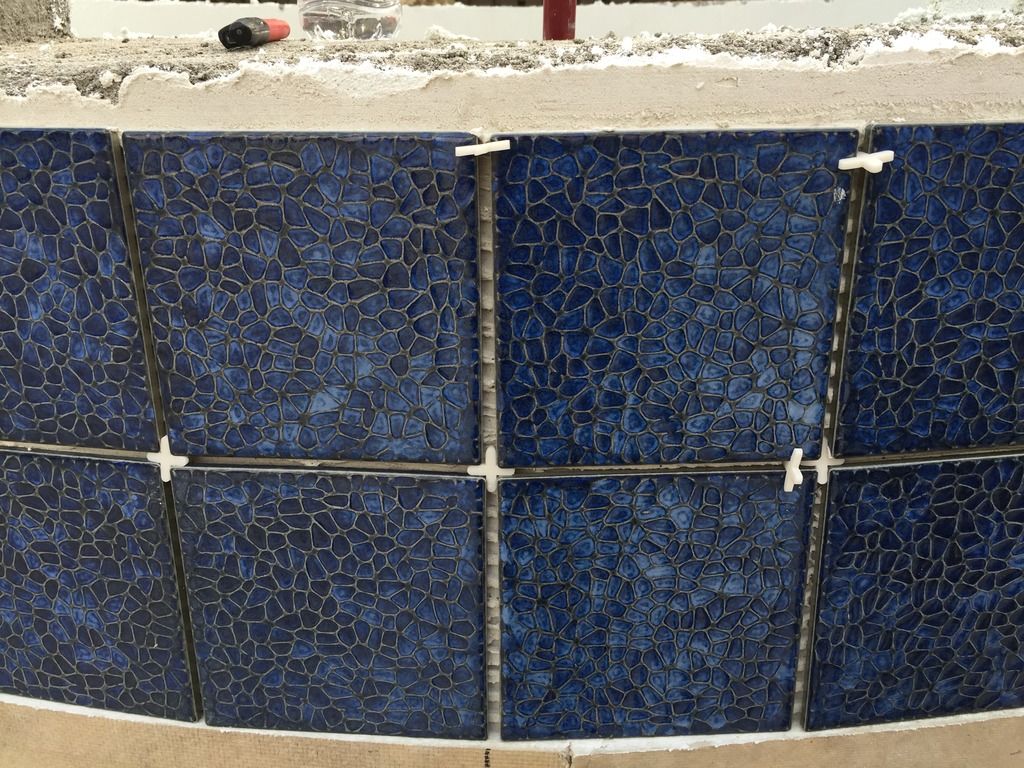
That is a rich looking tile! LOVE it! What color of grout are you using?

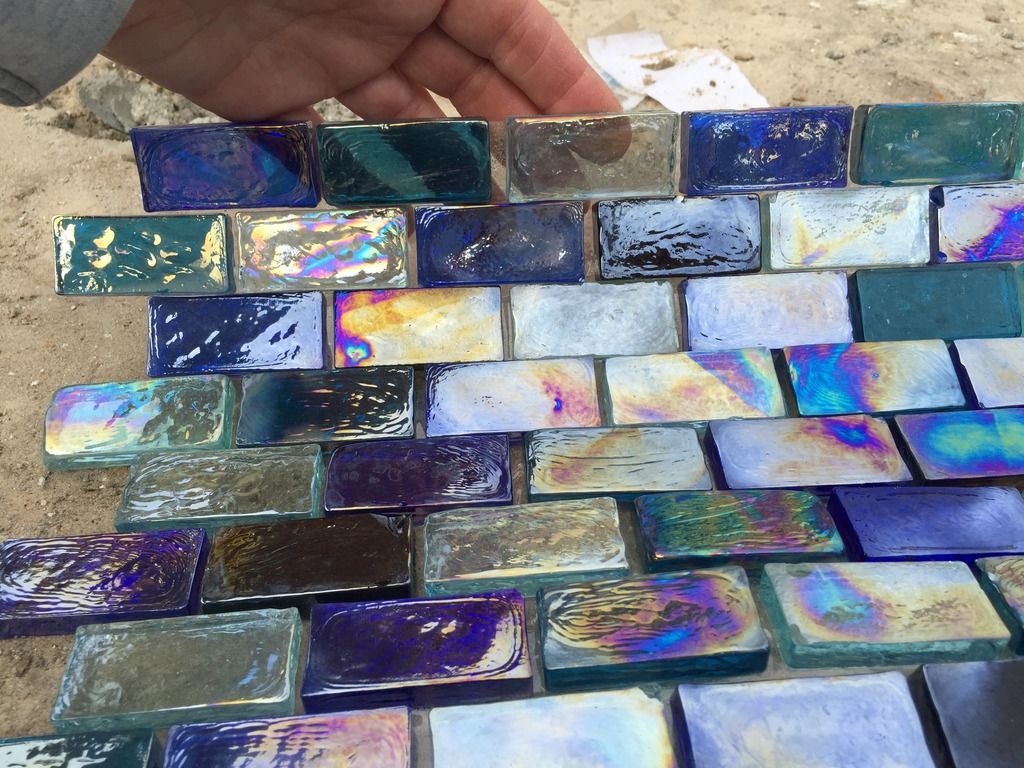
For that glass tile make sure to check what color of thinset they will use as the different colors will change how the glass looks. Again ask about grout colors.

LOL on the phone notes. Glad to see I am not the only one! Have to write it down or it does not happen.

Kim:kim:
 
The tile is really pretty, Kimkats. It's part of the Old World Series by Noble Tile. We went with white grout...hoping it's not going to be difficult to keep up...lol!
I'm not sure what color grout we opted to use on the glass step tile. I'll check with the PB when I see him today.
Here's a link to our build. It's fairly up to date. The rebar for the cage footers were approved yesterday by the county. Footers should be poured tomorrow.


Pool Build Pre-grade thru Gunite - YouTube

hope it works:)
 
Re: Signed the contract and looking at products:)-Video added of pool build to date

I added a link a couple of days ago of the build up to that point (thank you GoPro and my awesome husband for putting it together!) Part of the electrical (grounding of the pool) and the concrete footers for the cage were added yesterday. We should have a county inspector on Monday to check the grounding wire and then some cleanup on the footers and more electrical. Pavers and coping should be delivered next week and coping will go down then pavers.
Our PB noticed our spillover spa was done correctly but he advised it didn't look as good as it could so he's going to have the tile/concrete guy change it some to give it a better flow and have a better appearance.
i love our pool builder. Had some rough moments with sales but the real workers are amazing. Any issues we've had they have been super responsive, someone has been working here every day, foreman is always stopping by, they email us every morning to tell us what's on the schedule. Great experience:)
 
So we need to order a test kit. The builder said they provide a Taylor K1000 (??). I've looked around some and noted there are a few different levels of Taylor kits available on the web and on here. Do you recommend getting the kit from here with the wall whale brush etc and being a supporter? That's the way we're leaning now:)
 

Enjoying this content?

Support TFP with a donation.

Give Support
There are SO many reasons to become a supporter of TFP. Let me list them for you:

-Discounts! You get a discount on the best test kit out there (TF-100) and other stuff. You also get a discount from INYOPOOL.com (AWESOME Cust. Service and can find any part you might need).

-Tax write off-ll donations to TFP are now tax deductible and you will receive full details needed to deduct these donations on your tax returns.

-More photo storage! We all win as we LOVE pictures!!!!

-It helps us keep the lights on for you and others-win-win again-someone needs help and we get to help!

:hug:

Kim:kim:
 
So we hit a couple of rough patches with the footer that was poured for the pool cage. Some wood forms were left in after the pour and it rained over the weekend. The wood swelled and a couple of cracks came up on the area around the spa. After some discussions with the pool builder and the tile/footer team the cracked area was cut out and had rebar tied in and new concrete poured. Looks great but with the holidays we are a bit behind our NYE pool completion date. Looks like we should have the pavers down in that area and the cage put in this week. Next week will be clean up and the 3 day finish part. We're almost there!!!!
We have pavers down and it's so awesome after all the dirt and mud over the last two months. I'll take some pix tomorrow when the finish the pavers by the spa:) can't wait to see it:)
 
Catching up on behalf of my sometimes tech challenged wife. ;)

Here's a copy/paste from 12/20:

Still making reasonably good progress with the pool build. Coping dude came out yesterday and started the job. It's sorta cool watching him work... he goes through and pre-cuts all the coping and then blends the cut pieces in with full pieces as he works around the pool. All the coping is set in cement and then grouted in with cement so they're unlikely to pop off down the road.

31767053345_c2f0aa352b_h.jpg


30925574034_ec80676e7e_h.jpg


As part of the process, it's inevitable that some of the pavers are a little "tighter" to their neighbor than others. In an effort to get even grout lines between the pieces, he goes back over the entire coping with an angle grinder/diamond blade and opens up the gaps by hand. I thought his approach to working in the water was awfully smart and easier than dragging around waders or rubber boots. :lol:

31394738050_d4c004f011_h.jpg


The guys doing the pavers were absolutely killing it. A crew of ~6-7 dudes descended on the area like a well-oiled machine. They knocked out almost all of the deck the first day they were on site.

31729780896_7bd8aec471_h.jpg


31650893301_365347ae72_h.jpg


31620250022_1665e6c46b_h.jpg


31620771892_43841a5428_h.jpg


- - - Updated - - -

Now some additional time lapse video links and descriptions along with the status as of the middle of last week:

Next time-lapse is after the shell is done and really just the plumbing and initial water line tile:

https://www.youtube.com/watch?v=8pQMT6_h3Bw


Some more updates...

Part 3 of the time lapse is more tile work, putting in the forms for the screen footer, and then pouring the footer. Unfortunately the camera fogged up during the footer pour so the video goes crappy for a little bit. Stuff to watch for is the wood that's left in the footer concrete over by the spa. The dude messed up and didn't come back to get it out before the concrete set up. The result was concrete encased pressboard/mdf... which got rained on... and then expanded... and then cracked the footer. He got the joy of tearing out the entire corner of the footer over there and repouring it.

https://www.youtube.com/watch?v=5EpPMey3uzY&t=262s

Part 4 of the time lapse is primarily coping and pavers. If you look closely around 2:00, you can see the termite guy come out and spray the surface before they put the rest of the pavers down. In the background during the same section of the video is the dude trying to dig the wood out of the concrete over by the spa... later in the video he starts the demo work of taking that entire section out.

https://www.youtube.com/watch?v=Ig3-UNYcF9o


Them taking off the corner... there was a crack that had propagated from the swollen wood and wrapped all the way down the footer. The sub tried to "promise" it'll never move... I wanted it torn out and our pool builder agreed 100%. I don't know how much it cost the guy to repour it but I'm sure it wasn't super cheap. At least he also spent probably 4 extra days onsite fixing his mistake.

31105036114_7ae8a3109b_h.jpg


The crack at the far top of the picture was a secondary one that formed after the wood had gotten rained on a couple more times. It was also the point where the entire side of the footer cracked after they started beating on it.

31797361042_36ccdb376e_h.jpg


Continuing to make little rocks out of big rocks.

31105036354_02d315eb1f_h.jpg


31907774176_c7fd399f96_h.jpg


31944820535_0b4083e02d_h.jpg


Earlier today as they were reforming the section and getting ready for concrete.

31571854700_f10d9d5ab0_h.jpg


One nice thing was that it gave the kids (and us) a chance to put our hand prints into it. Of course it's going to get more concrete and then pavers on top of it but it was fun for them to know that they got to make their mark on the pool.

31105037234_1e8fd832ec_h.jpg


And finally, here's the overall project as of today. Looking like we should have the last part of the pavers and coping done Friday and then it'll be screening and the finish next week. :)

31135967473_84445d4f62_h.jpg


- - - Updated - - -

And that brings us to current... the remaining pavers and coping were installed last Friday and then Monday. Screen supplies were dropped off today with the expectation that the install will begin tomorrow and take 2-3 days. Next up will be the finish late this week or beginning of next week. The finish should be 1 day of prep, 1 day of application, and then 1 day for the acid wash. The plan will be to fill it shortly thereafter. :)
 
Love, love, love the pic update with the "story" for them all.

That guy using the buckets........SMART man and has to be easier to get and a whole LOT cheaper LOL

:shock: on the crack......4 days????to fix?? OUCH! I bet he won't be doing that again any time soon!

You are SO close to being done!

Kim:kim:
 
Yup, the sub spent several half-days trying to chip/hammer out enough of the footer to get the wood out. Ultimately, he punted on it when it became obvious that the crack wasn't a surface or minor stress crack and, instead, went through/around the entire pour. From that point it took another 1.5 days to demo the thing by hand and haul it all offsite. The final step was the half day for framing and half day for the re-pour and trowel work.

It was a horribly time consuming fix since it had to be done 100% by hand and hauled off with wheel barrows (limited access). This also meant that the re-pour was labor intensive since they used wheel barrows for it as well. They went ahead and poured the whole corner solid vs double framing it so there was quite a bit of product needed.

We're for sure in the home stretch at this point. Even with the setback, it's looking on track for completion within 8 weeks from the initial kickoff. Given that we lost time for Thanksgiving, Christmas, and New Years, I think we've made solid progress. :)
 
He was reasonably adult about it. I feel like the fix got dragged out as long as he could get away with putting it off but, ultimately, it got fixed. If the build had been stalled for 4-5 weeks, I'd be so far up the PB's rectum that he'd mistake me for his proctologist. :lol:
 

Enjoying this content?

Support TFP with a donation.

Give Support
Thread Status
Hello , This thread has been inactive for over 60 days. New postings here are unlikely to be seen or responded to by other members. For better visibility, consider Starting A New Thread.