Owner Builder SLC - Slow and steady progress

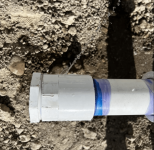
Got most of the plumbing done, still a little to wrap up though. I plumbed each return independently, and had planned on using tee's to connect them all. Unfortunately I measured with 1-1/2" tees, and was going to use 2" tees, which are larger and now the distance it too small between valves 🤦‍♂️

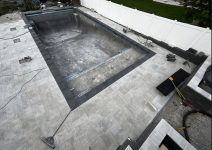
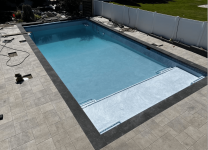
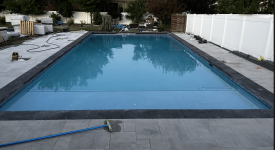
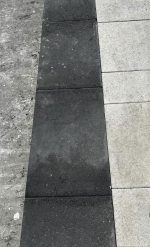
Also finally grouted my coping with epoxy grout and I think I made a mistake. I thought I cleaned it up pretty well, but now that it's dry it's obvious where it was applied and has a much darker look to it. I've tried epoxy grout haze remover, which didn't seem to do much. I'm guessing they're just too porous and I'm unable to get in a scrub it. Any ideas on how to fix this? Will it fade/wear off?

Hard to tell exactly from the picture, but around the joints there's a wet/sealed look to it vs the lighter 'dry' look in the middle.

1654536434072.png
 
I wondered the same thing, but couldn't find any answer in googling. Really hoped the haze remover would have worked. Honestly considering just coating it all the rubbing it off so it's at least consistent looking. I'd rather not do that though, so maybe I'm just back to time & sun. I tried power washing it too, which looks like it may have made a small difference. Maybe that's the best path forward - a good power washing and just leave it to (hopefully) fade.
 
  • Like
Reactions: kimkats
Got most of the plumbing done, still a little to wrap up though. I plumbed each return independently, and had planned on using tee's to connect them all. Unfortunately I measured with 1-1/2" tees, and was going to use 2" tees, which are larger and now the distance it too small between valves 🤦‍♂️

Also finally grouted my coping with epoxy grout and I think I made a mistake. I thought I cleaned it up pretty well, but now that it's dry it's obvious where it was applied and has a much darker look to it. I've tried epoxy grout haze remover, which didn't seem to do much. I'm guessing they're just too porous and I'm unable to get in a scrub it. Any ideas on how to fix this? Will it fade/wear off?

Hard to tell exactly from the picture, but around the joints there's a wet/sealed look to it vs the lighter 'dry' look in the middle.

View attachment 419940
Your pavers, coping and plaster are beautiful. Definitely making me reconsider my choice to go with a concrete pool deck (that and the cement powder shortage in Utah that's pushing my deck out at least another month).
 
Your pavers, coping and plaster are beautiful. Definitely making me reconsider my choice to go with a concrete pool deck (that and the cement powder shortage in Utah that's pushing my deck out at least another month).
Yes, I'd imagine cement is going to delay it quite a while. Luckily I don't need any more :). I do love the look of pavers, not quite done, but it's coming along nicely. Good luck with yours!
 
Plaster is officially delayed :( It was supposed to be last Tues, but it looks like maybe the 22nd now. Not a lot of communication from them - it's been very frustrating. Slow progress on the rest of the pool. Got the drain in along the back edge of the deck, and finished a good chunk of the pavers up to the wall along that side. Looks and feels really nice to have it actually finished in some parts!

1655132732874.png
 
The plaster company called this morning to confirm we were ready for thurs. I told him we were ready any time, and it actually got moved UP to Monday :D. There are a few things that I actually have to finish over the weekend before they get here, but the whole family is ready to start filling it up! :swim:
 

Enjoying this content?

Support TFP with a donation.

Give Support
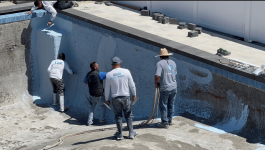
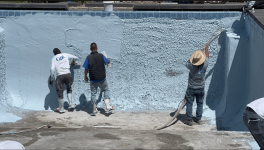
Plaster day! I thought they would be here early in the morning, but just one guy came to prep things. The full plaster crew will be here after lunch and he said it should only take about 3 hours.

Finally finished my plumbing just in the nick of time :D
1655822209888.png
 
Last edited:
  • Like
Reactions: Mdragger88
Now run out there with some socks or dish towels to put on the ends of your water hoses. They will help filter the water a bit and keep the metal ends off the new plaster. Make sure the hoses are put at the lowest part of the pool and do NOT turn off the flow of water once it starts filling. Doing so could make a ring around the pool that is almost impossible to remove.
 
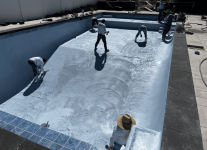
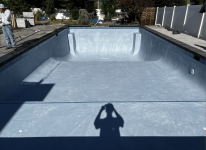
Plaster is done, and the pool is filling up! They weren't kidding, these guys were quick - I guess I was expecting it to be like the gunite and take all day, but it was probably less than 3 hours. We ended up changing from Pebble Sheen to Pebble Fina Bella Blue but I'm really loving the color as it fills up.

I tested my water, and it looks like the PH and TA are high, and I'll need to bring those down. Reading through this article, sounds like i should probably add muriatic acid to lower my PH first, then test TA again to see where I'm at? Still not totally sure I'm testing correctly, but I think these are what my current levels are:

PH - 8.2
TA - 130
CH -200

Also, what is recommended to add CYA on a pool startup like this?

Here's some pictures of the plaster progress and this morning with it half full:

1655830288577.png
1655830307162.png
1655830340320.png
1655830360577.png
1655830408772.png
 
Finished filling the pool up last night. Got up early to get the pump running an it was tricky to prime it. My equipment is about 4 feet above the pool, and it just couldn't pull the water up. I ended plugging up the skimmer one at a time, and filling up the pipe through the pump basket. Once it was full of water I closed off the valve, and filled the other one the same way. Then I filled my basked up, closed it all up and turned on the pump. As soon as it started priming I opened one of the skimmer valves to let it start pulling in the water. Once I had one all the way open, I slowly opened the second. Worked pretty well, but was a bit of a process. After both skimmers were going I very slowly opened the main drain valve. First time I tried I lost my prime, but got it the second time, so we're up and running.

I have one small leak in my plumbing, but it should be relatively easy to fix. More annoying than anything. Now I'm starting to brush, and get my water in balance.

1655915411449.png
1655915422048.png
 
Some good progress the last couple of days. Brushing twice a day and vacuuming- which takes a while, but is also soothing in a way. Kids got in and have been playing a bit, but we’ll probably wait a little bit until we let too many friends/people in it.

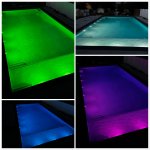
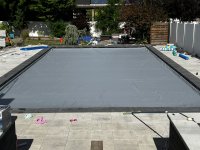
Got the cover installed today, and finally got the lights hooked up. I ended up doing 9 microbrites - 3 on the shelf, 6 along the long edge. I was a little worried that they would have trouble reaching to the other side, but I’m really happy with how they turned out!

E43C2EF1-211A-414D-B6F2-4ABC87B844CE.jpeg

Didn’t get great picture of the cover, but this isn’t too bad.
E288E604-238B-43A7-AB7E-6DA65ECAE864.jpeg
 
Good to know. When we’re home I don’t think that’ll be a problem :D, but I’ll have to make sure when we’re on vacation someone does that.
 

Enjoying this content?

Support TFP with a donation.

Give Support
Thread Status
Hello , This thread has been inactive for over 60 days. New postings here are unlikely to be seen or responded to by other members. For better visibility, consider Starting A New Thread.