Newbie Build - 27' Round AGP - Help Me build This OR ELSE
- Thread starter stringer77
- Start date
You are using an out of date browser. It may not display this or other websites correctly.
You should upgrade or use an alternative browser.
You should upgrade or use an alternative browser.
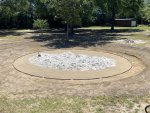
Well today i thought i would have the bottom track and pavers leveled. Ill be honest that bottom track was a PAIN. The track kept coming out of the plates or getting pushed into plates too far during adjustment etc. Ive got it staked together now, and pool is DEAD ON round, plates and track all in perfect position. measurements taken from each upright several times. Also carved out more of an area for small retaining wall on high side.
for areas i can see daylight under the track, i assume i just push soil into this area to fill the void?
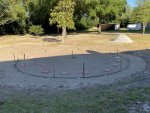
i suppose ill mark the lowest spot for upright and install a paver with gravel, sand, and tamp to level. Ill then go to the highest spot and use the transit level to make it level with the first, and level the rest the same way. ill also use a rubber mallet and a torpedo level to get them just right. sound like a plan?

It sounds like you are taking many wise yet PITA steps. This is the sucky part. Everybody likes the BAMM and the cannonball parts.sound like a plan
I borrowed a 1k bosch laser transit level and got all the pavers within 1mm of each other, about as close as humanly possible. All tamped down with gravel and paver sand. Lots of inconsistencies in pool floor bottom so I lasered in that little stone you see in the center of pool, to dig down level. That was alot of work and im really hoping it gets more exciting from here 
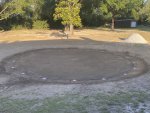

Its amazing how fast things go once this step is complete. Looking good!I borrowed a 1k bosch laser transit level and got all the pavers within 1mm of each other, about as close as humanly possible. All tamped down with gravel and paver sand. Lots of inconsistencies in pool floor bottom so I lasered in that little stone you see in the center of pool, to dig down level. That was alot of work and im really hoping it gets more exciting from hereView attachment 137678
My husband looked over my shoulder and sayw that AWESOME work and said..........NOW that is level!!!!got all the pavers within 1mm of each other, about as close as humanly possible.
It will be so worth it in the end!!!Lots of inconsistencies in pool floor bottom so I lasered in that little stone you see in the center of pool, to dig down level. That was alot of work and im really hoping it gets more exciting from here
Oh it will be a lot more *exciting* when you try to put up the walls........make sure there is NO wind and a couple/few friends that can follow directions (bet that knocked a couple of them out LOL).
Kim

Thanks!Its amazing how fast things go once this step is complete. Looking good!
My husband looked over my shoulder and sayw that AWESOME work and said..........NOW that is level!!!!
It will be so worth it in the end!!!
Oh it will be a lot more *exciting* when you try to put up the walls........make sure there is NO wind and a couple/few friends that can follow directions (bet that knocked a couple of them out LOL).
Kim
Thank you! Def looking forward to getting wall up!
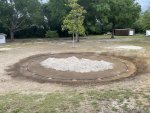
The pool floor was pretty close, but not perfectly level so I fine tuned that up a bit to a point where i'm happy with it. I removed the center stone and tamped down level. Nutsedge killer labeled for 6000sf is now under 600sf of pool. 3.75 yards of masonry sand (assuming they delivered exactly 4 yards as contracted) seems like the perfect amount and I carted it to the inside of the circle.
Last edited:
Or so I thought!Great job, you're on the home stretch now!
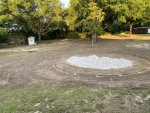
Pool had high soil surrounding entire area, and also worried about roof runoff. So for $80 I had the tractor man scrape soil around yard so water does not pool up around swimming pool. Hoping this will help avoid future problems. Tons of ants in my mason sand already, suppose ill spray it with insecticide?. More groundwork;
Well done! I like your thinking......that should take care of that problem.So for $80 I had the tractor man scrape soil around yard so water does not pool up around swimming pool. Hoping this will help avoid future problems.
So lets talk about more work for you but it is along the same idea........avoiding future problems.
-hard plumb the equipment to the pool.
-use unions on either side of every thing so you can quickly and easily remove it.
-put good valves under the skimmer and the return
-IF the filter does not have a "send to waste" feature make one.
-under the skimmer and return you will want to dig down about 2 or 3" under them and around so that just in case there is an overflow problem. Fill in the dug out part with gravel THEN put steppers/pavers under it with a slight slant away from the pool wall to send the water away from the pool. All of this will help make sure you do not risk water washing out your pool bottom.
ill spray it with insecticide
Well done! I like your thinking......that should take care of that problem.
So lets talk about more work for you but it is along the same idea........avoiding future problems.
-hard plumb the equipment to the pool.
-use unions on either side of every thing so you can quickly and easily remove it.
-put good valves under the skimmer and the return
-IF the filter does not have a "send to waste" feature make one.
-under the skimmer and return you will want to dig down about 2 or 3" under them and around so that just in case there is an overflow problem. Fill in the dug out part with gravel THEN put steppers/pavers under it with a slight slant away from the pool wall to send the water away from the pool. All of this will help make sure you do not risk water washing out your pool bottom.
Yes I have 40ft of 1.5" schedule 40 pipe (non dwv), a bag of elbows and connectors, primer & heavy duty clear pvc cement, as well as some grey krylon fusion spray paint i will use on uv exposed pvc. I went through my manuals a couple weeks ago and ordered all needed various hayward unions for the equipment, and have 2 jandy neverlube 2 port valves to use under skimmer and return. Thanks for the info about equipment pad.
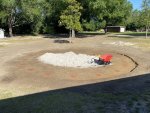
Final boring groundwork photo (im hoping), as I've arranged some extra hands to install the pool wall tomorrow. I had to remove the bottom track and plates, and wash them bc they were just caked in dirt so I will reinstall tomorrow. Also filled in and tamped down the gaps around patio stones from where they were cutout to keep them from sliding around.
Do you have a ladder- pool or "real" ? Do you have a table you can stand on? Do you have cardboard?
Ladder legs on the cardboard inside the pool. Table on the outside for you to transfer to and stand on to get the ladder out.
Ladder legs on the cardboard inside the pool. Table on the outside for you to transfer to and stand on to get the ladder out.
kne
Gold Supporter
- Jun 26, 2015
- 428
- Pool Size
- 7600
- Surface
- Vinyl
- Chlorine
- Salt Water Generator
- SWG Type
- CircuPool RJ-30 Plus
Just have to say, all that work on your pad and it looks perfect. That is a result that people should aim for.
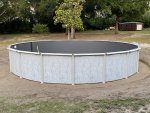
Thanks all! Havent had a whole lot of time to work on things, but here is where im at. Looks 100% level, hoping it stays that way when it gets filled. Figured id spray some roundup in the circle and spread the sand next. Then coat the bare metal edges on skimmer and return with self etching primer and rustoleum enamel.

I forgot to tell you an other tip.......see if you can take the post off that is covering the bolts and spray there as well. That is where we had a lot of rust.
I know it wasn’t fun or easy, But that looks amazing. 12 years from now when you haven’t had a thought about it in 11 years and 11.5 months....... yeah. So worth it. Plus the story of how much it stunk gets funnier each time you tell it at get togethers.
Thread Status
Hello , This thread has been inactive for over 60 days. New postings here are unlikely to be seen or responded to by other members. For better visibility, consider Starting A New Thread.


