New AG build in NC

aboykin2269

0
LifeTime Supporter
Jun 3, 2015
339
Pittsboro NC
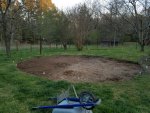
Hello all my fellow TFP'ers! I have been a member for several years now, and have found this site to be nothing short of the best pool care site/community anywhere in the world. Since finding TFP, I have not only gotten more enjoyment out of my pool, but when we moved from the suburbs out into the country, we had no reservations about upgrading to a larger, more permanent pool. We started with a 16' Ultra Frame pool and now are upgrading to a 24' Venture Salt Hybrid. I am doing the install myself, and knowing how much this community likes pics, and a good pool build, I thought I would share.
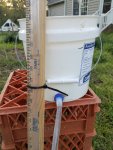
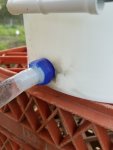
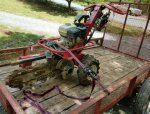
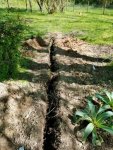
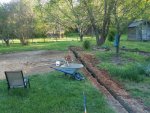
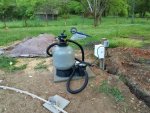
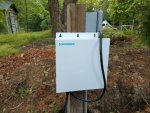
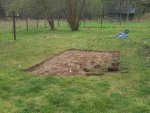
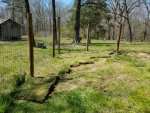
I actually started several weeks ago and it has been a chore. The only equipment I rented was a trencher for electric (yes, I hired and electrician and got a building permit from the county). The rest has all been done by hand. Turns out I'm not a spring chicken anymore. 10 years ago, this would have been a light workout for me. Now it's lost of Ibuprofen and rest LOL.
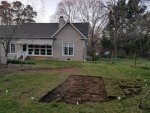
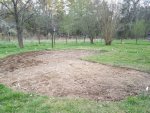
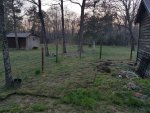
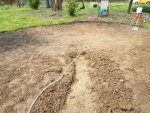
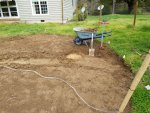
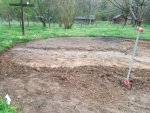
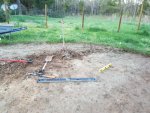
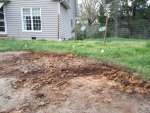
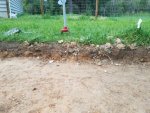
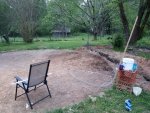
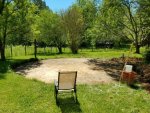
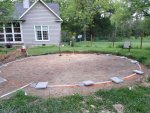
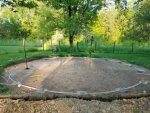
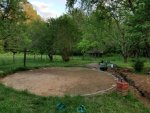
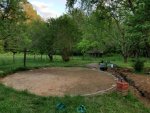
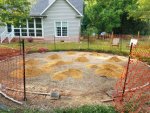
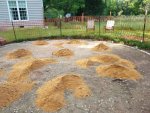
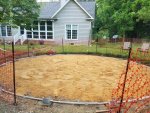
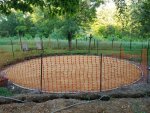
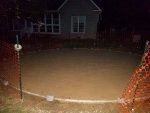
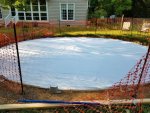
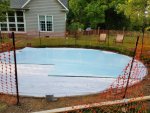
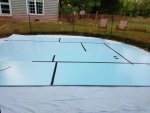
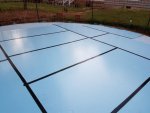
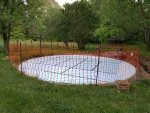
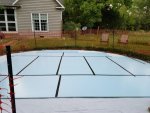
So here are a few pics and I will post more later as we get closer to actually setting up and filling the pool. Again, thanks so much for all the help this community has given me over the years. I'm sure I will need more help in the future. Until then, enjoy!
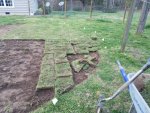
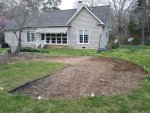
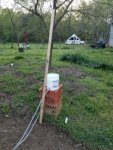
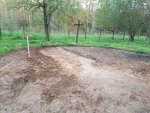
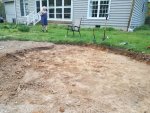
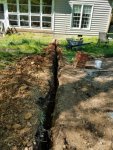
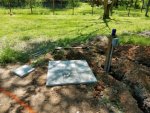
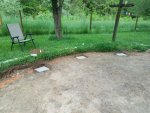
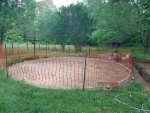
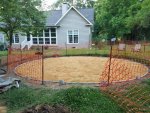
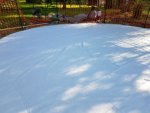
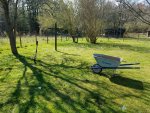
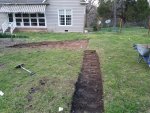
BTW, the fourth one is where our Doggie has destroyed the grass, so I transplanted the sod as I was removing it.
 

Attachments

  • A.jpg
    A.jpg
    726.8 KB · Views: 39
  • B.jpg
    B.jpg
    688 KB · Views: 36
  • C.jpg
    C.jpg
    485 KB · Views: 37
  • D.jpg
    D.jpg
    728.1 KB · Views: 38
  • E.jpg
    E.jpg
    568.9 KB · Views: 40
Nice! :wave: I can relate to the Ibuprofen. Ugh. Funny about the digging. We have six dogs. Whenever I'm doing a project that requires me to dig, I wonder if they get together and think .... "Hey, why does HE get to dig and we get in trouble?" :)
 
I feel your need for Advil just thinking about that work. I did about 70ft of electrical branch through very rocky soil last summer and it was nothing less than back breaking. Actually broke the handle on my pick axe on that trench.

I bought myself a super garden tractor for future projects, of which there are still many.
I actually had to do 2 trenches. The first one, I rented an 18" trencher thinking I could dig an 18" trench. I was wrong. I was lucky to get it down to 12". Then I hit roots. Major roots like the size of the tree trunk to our main shade tree. Couldn't cut through it without killing the tree. So I abandoned that one, and re-routed. I rented a 24" trencher and barley got to 18" and STILL hand to dig a lot of it with a pick axe through solid rock and hard clay. I just kept thinking, end result is going to be worth it....
 
Here are some more pics. This got me to the point of having all the sod removed and transplanted. At this point I was ready to start leveling the site. It took me a little over a week to remove all the sod.
 

Attachments

  • F.jpg
    F.jpg
    488.6 KB · Views: 16
  • G.jpg
    G.jpg
    443.3 KB · Views: 15
  • I.jpg
    I.jpg
    639.2 KB · Views: 15
  • J.jpg
    J.jpg
    604.6 KB · Views: 17
  • K.jpg
    K.jpg
    486.7 KB · Views: 19
  • L.jpg
    L.jpg
    473.3 KB · Views: 18
So the next phase was beginning to level the site. While it looked fairly level, all the experts said "don't trust your eyes". So using my homemade level, determined I had to dig out a little over a foot on the high side to match the low. I have to tell you, I NEVER knew there was so much hard clay and rock in my ground here. I tried to break it up with a hand tiller and then ultimately went to a pick axe. It rained a lot, so that helped make it softer, but it also made it messy. When it did stop raining, the longer it went before rain, the harder the ground got. Here are a few more pix:
 

Attachments

  • Q.jpg
    Q.jpg
    83.7 KB · Views: 15
  • R.jpg
    R.jpg
    70.1 KB · Views: 15
  • S.jpg
    S.jpg
    73.2 KB · Views: 14
  • T.jpg
    T.jpg
    80 KB · Views: 14
  • U.jpg
    U.jpg
    61.8 KB · Views: 14
  • V.jpg
    V.jpg
    79.3 KB · Views: 14
  • Y.jpg
    Y.jpg
    74.9 KB · Views: 16
  • Z.jpg
    Z.jpg
    72.4 KB · Views: 16

Enjoying this content?

Support TFP with a donation.

Give Support
A few more pics. Getting close now. Going to start on the sand and base after work today.
 

Attachments

  • AA.jpg
    AA.jpg
    121.3 KB · Views: 18
  • BB.jpg
    BB.jpg
    102.6 KB · Views: 18
  • CC.jpg
    CC.jpg
    92 KB · Views: 16
  • DD.jpg
    DD.jpg
    74.1 KB · Views: 19
  • EE.jpg
    EE.jpg
    71.7 KB · Views: 19
  • FF.jpg
    FF.jpg
    82 KB · Views: 19
  • GG.jpg
    GG.jpg
    78.7 KB · Views: 19
  • HH.jpg
    HH.jpg
    68.3 KB · Views: 28
  • II.jpg
    II.jpg
    73.1 KB · Views: 24
You aren't too far away from me. I've built 2 AG pools. From my experience:

1. You are brave for grading yourself. The first pool I learned pretty quickly that it was much more effective to get a guy in with a skid steer. He both graded the site and moved the excess dirt to somewhere else I wanted to build up. He was much faster and more accurate than me. The second pool, I didn't even try, just had him come back. I was under some time crunch (my wife) though, maybe you aren't.

2. make sure the pads that the pool wall legs will stand on are level. I don't know if you plan to do this or not, I dug mine out and set them so the tops were level with the ground.

3. move the sand in before you erect the wall - wait till the wall is up to grade the sand out

4. Invite lots of friends over to have a wall building/liner installation party. The more people you have the easier it will go. Consider having water trucked in, if you have the budget and are on a well. I've had less problems with this pool having water delivered, though now I probably have about 25% well water in it.
 
  • Like
Reactions: aboykin2269
You aren't too far away from me. I've built 2 AG pools. From my experience:

1. You are brave for grading yourself. The first pool I learned pretty quickly that it was much more effective to get a guy in with a skid steer. He both graded the site and moved the excess dirt to somewhere else I wanted to build up. He was much faster and more accurate than me. The second pool, I didn't even try, just had him come back. I was under some time crunch (my wife) though, maybe you aren't.

2. make sure the pads that the pool wall legs will stand on are level. I don't know if you plan to do this or not, I dug mine out and set them so the tops were level with the ground.

3. move the sand in before you erect the wall - wait till the wall is up to grade the sand out

4. Invite lots of friends over to have a wall building/liner installation party. The more people you have the easier it will go. Consider having water trucked in, if you have the budget and are on a well. I've had less problems with this pool having water delivered, though now I probably have about 25% well water in it.
Great advice above and I'm already ahead of you. I leveled the blocks and made them all level with each other using my homemade water level. They are all within 1/16" (or closer). Once I had them level, I had to do more digging. 5 of them on the high side ended up being too low in the ground meaning I didn't dig out that side far enough. It's all level now and the track is solid on the ground. I am starting with the sand today and have help coming on Thursday to put up the wall. Hanging the liner on Friday and having a tanker deliver water on Saturday. I'm going to start adding water and salt on Friday so I can get the wrinkles out before the truck arrives. I have a Doggie that LOVES digging in sand, so I am putting up Landscape metal stakes (which I plan to use to help hold up the wall) and stringing 4' high x 100' of orange temp fencing to keep the her out until I can get the wall up. Knock on wood, it looks like the weather will cooperate with me this week and I hope to have the skimmer and return installed and the pump running by Saturday evening.
 
Good luck on the weather... the radio today said we've had rain 16 of the last 19 weekends. For the plumbing... keep the pump and filter far enough away from the pool that you can walk between them and the pool wall. Bury the plumbing lines. My first pool I did this. My current one I did not, and I regret it. Some day I will bring in more fill to build the area up enough to move the pump and filter further out.

For the wall, wind will be your enemy. The best technique I found was keeping the wall upright and unrolling it as you go. it helps to have 2 3x3 or 4x4 sheets of plywood. keep the wall on the plywood, as you unroll it and move it around the track, move the plywood so you are always unrolling onto another piece of plywood. the wall will spin more easily.
 
That 1-2" ended up being like 8 more wheel barrow loads. And it was through solid, hard clay.

That's another reason I paid somebody to grade it. What's even more fun than clay in July is clay with rocks. Rocks were in abundance at my old house and the current one. The plumbers had to bring in a small track hoe to dig the trenches for water lines when my house was being built. Too many rocks for a trencher.
 
That's another reason I paid somebody to grade it. What's even more fun than clay in July is clay with rocks. Rocks were in abundance at my old house and the current one. The plumbers had to bring in a small track hoe to dig the trenches for water lines when my house was being built. Too many rocks for a trencher.
I had rocks too. I mean lots. Some of them looked like actual brick, like fired clay. Good ole Northern Chatham clay. At least I know it's sitting on solid ground.
 
Got the sand spread out, leveled and screeded. Then wet it down and tamped. Finished after dark last night. Tonight the foam board is going on and the wall gets set up Thursday after work!
 

Attachments

  • A.jpg
    A.jpg
    75.9 KB · Views: 18
  • C.jpg
    C.jpg
    82.4 KB · Views: 18
  • D.jpg
    D.jpg
    76.9 KB · Views: 16
  • E.jpg
    E.jpg
    79.1 KB · Views: 14
  • G.jpg
    G.jpg
    78.9 KB · Views: 13
  • H.jpg
    H.jpg
    53.2 KB · Views: 13
  • I.jpg
    I.jpg
    80.8 KB · Views: 18
  • J.jpg
    J.jpg
    35.7 KB · Views: 20
  • M.jpg
    M.jpg
    71.6 KB · Views: 23
  • N.jpg
    N.jpg
    39.3 KB · Views: 20
Made more progress last night. Got the Elephant Pad down and most of the foam floor done. Seems are doubled taped with 2X Gorilla tape (that's 2 whole rolls right there). The walls are going up tonight!
 

Attachments

  • 2.jpg
    2.jpg
    38 KB · Views: 16
  • 3.jpg
    3.jpg
    66.4 KB · Views: 16
  • 9.jpg
    9.jpg
    63.7 KB · Views: 18
  • 11.jpg
    11.jpg
    36.9 KB · Views: 17
  • 12.jpg
    12.jpg
    32.9 KB · Views: 17
  • 15.jpg
    15.jpg
    72.6 KB · Views: 18
  • 14.jpg
    14.jpg
    46.6 KB · Views: 16

Enjoying this content?

Support TFP with a donation.

Give Support
Thread Status
Hello , This thread has been inactive for over 60 days. New postings here are unlikely to be seen or responded to by other members. For better visibility, consider Starting A New Thread.