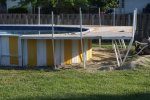
Just bought a used Esther Williams 15x30 Carousel

I'd been told to look for a rubber backed carpet instead of the jute or whatever the other backing used on outdoor carpet is. Another stumbling block is color. There doesn't appear to be tons of choices. I'd like a blue to go with the liner color. But we're (her) afraid it would get too hot. I kinda thought that's what flip flops were for. But I also thought a tan or grey would look ok with the yellow when viewed from the side. We have some samples we need to lay out and give the foot test after sitting in the sun.

Kim, he has a different size. But thanks for the assist!
 
Ok enough slacking! Time for pictures. Busy, busy, busy in the summer. Add in a project or two. Add in a A/C unit failing, a R/O system blowing a line, and a dryer not drying clothes keeps Chief a busy guy.

When I last left off picture wise I showed the functioning plumbing. Then I moved to putting on the top coping. Welllll..... in the instructions it clearly says to put it on after setting the liner and adding water and the skimmer/return fittings. What isn't so clear is to NOT fill it yet. Out in the hot sun and FINALLY getting the stupid thing filling with water I guess my reading comprehension isn't so keen. In fairness thought, the instructs do not make VERY important points real clear. No worries. Here's what happens when you fill it early: We have to back up to the shot of the plumbing since I didn't take any pictures of the problem as I was too disgusted at that hour of the night.
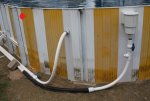
IMG_4445 w dot.jpg

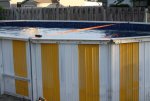
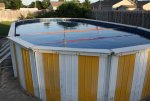
Kinda visible to the left is the last upright bowing out of line. I highlighted it with a fancy red dot. You see, the four uprights which have buttress supports stay vertical once the water is added.
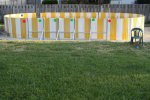
IMG_4369 w dots.jpg

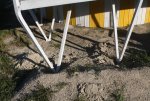
The end uprights (once again red dots) have no angular support. They are only attached at the bottom rail and the stiffening rib. So they can bow out a little bit which causes the coping to not even begin to fit. The supported uprights (fancy green dots) are rock solid. Ya know. The instructions could have made this point! Maybe bold print? Highlighted? Oh well. here we are what to do? Break out the trusty 'ol ratchet straps!
IMG_4449.jpg

IMG_4450.jpg

Pa pow!! Problem solved. "Note to self. Stay out of the path of flying hook if said strap should fail!!" Once the sides were brought back straight it was possible to now add the coping.
IMG_4455.jpg

A point not made earlier. This only affected the long side coping and to an extent slightly the angle end pieces which join to the side pieces. Once the long sides lined up I could put the #10 sheet metal screws in each end and the screws I didn't realize I didn't have (which the previous owner didn't have in) some #10 x 24 carriage bolts in the 8 x2 spots between the ends. Try finding that small of stainless carriage bolts locally. I can find them where I ordered my other bolts online but I decided a SS pan head #10 x 24 would work just fine.
IMG_4453.jpg

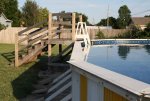
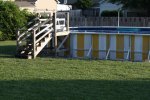
With the help of a friend we moved last years steps over to make this thing usable!! Since the area where the 1st step is is higher than the plane the pool is on (and was on last year) some slight modifications to the step section and handrails were in order. A little note about the gate. There was fear that the resident dog would venture up and into the pool so a gate was added. I had this old gate laying around and the dimensions worked so it was used. It is from my great and great great grandmothers home. It may look out of place and "rustic" but it evokes memories of that house.
IMG_4452.jpg

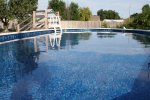
Ready for a nice swim. The thermo says 88 degrees. It swims well.

IMG_4451.jpg

The bottom is pretty. I wish I could shoot a pic of the walls underwater. The walls are sectional and that translates to a vertical pattern in the sides that is kinda cool when viewed under water.
IMG_4457.jpg

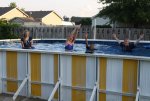
The kids and friend give it 2 thumbs up!! That's all I could ask for, right?

IMG_4459.jpg


And with much trepidation (after I thoroughly inspected them and cautioned the kids) I let them dive for glo sticks left over from the 4th. They are pretty when glowing in the darkened pool. I know. I know. Many potential problems possible if they leaked or the glass inside came out. I inspected them after removal and all were intact. And I resumed breathing better.

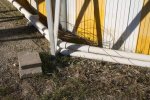
Now back to assembling the walk and patio. These are additional upgrade items and not covered by my instructions. And so far I haven't been able to find anything online either. Bummer. I'm running into a problem with the brackets. I didn't take enough picture of them and they are kinda confusing. They connect to the pool uprights and the fence uprights. There are about 30 brackets. There are 5 different shapes. 2 are for the end supports where the long coping meets the patio. Then there are 8 2 sided pieces and 22 L or R pieces. But of these there are 14 and 8 L & R's. I'm not so sure that the previous owner had them completely right either. I'll get some pictures and save 1,000 words. I guess I'd better get moving. More to follow............
 
Last edited:
LOVE the smiles! You know you did a good thing to get those smiles!

Those glow sticks look neat under the water! I am sure you were worried but I bet they loved it and tried their best to be careful!

The rest.........think of it as a puzzle. Once you get the first piece on the rest should follow (said very hopefully).

So are you saying the past owner did not have those screws/bolts on the pool? Scary!

Got to love ratchets for work like that BUT you said one failed?????? BONG and duck! :shock:

That gate is purrfect! It does the job and looks neat AND the memories..........My Grand has one just like that :angel: so sweet!

:kim:
 
I wasn't so worried about "our" kids. I was more concerned about their friend (a friend of ours granddaughter) who is report-ably not always as respectful of things. We've never had issues but hearing of other behaviors just kept me on "alert" while she was here. No problems were had and there was probably no reason for concern. But you know how it is around a new baby. No. No failure of any strap. They really didn't feel that stressed. We were physically pushing the wall back into shape by hand and just couldn't keep it in place to get it all bolted up. Using 2x4's to wedge it wasn't working. I was just paranoid. With all my other snarls I didn't need another! I think I'm figuring the braces out. But with the young ones here we've been busy swimming, fishing, cooking out and it being 95-100 degrees I just haven't spent enough time on it to get a plan. I've got events the next two weekends so it has to be worked on in the evenings. Once I get the plan the walkway will go up in a couple of hours tops. The patio? It will take a bit longer.
 
I SO hear you on the "other" kid...........until they prove them self you will be on alert for sure. Glad all had a good time!

I have NO doubt you will figure it out and it will be done the safest way for all and last forever!

:kim:
 
Just a quick update. We sure have been enjoying the use of the pool! It took awhile to get my FC to stay up where I want it during the hot, sunny days. I did the usual OCLT test and it was only .5 but just in case I SLAM'd it. Just to be on the safe side. Since there were a few days (3-4) where I had water in the pool but the plumbing wasn't functional yet and I added bleach and used a net to mix it around. Our 10 year old nephew was staying with us and over at grandma's where the pool is and he was my chemist in training. I showed him how to run the FC test with the speed stir and he aced it after 1 time showing him. So I'd had him run the test morning, noon and when we'd go over in the evening I'd do it. He enjoyed learning and this shows just how simple it is to do proper correct testing yourself! He'd give me the readings over the phone and I'd tell grandma how much bleach to add. Worked out smooth. I bumped up the CYA to 35-40 and all other readings were we like them. So depending on the sun (or rain) it used on average 50-70 oz of 10% per day once it settled down. A bit higher than I expected but from what I read on here not too out of the ordinary for a 12 hour of direct sun per day pool. I'd say it averaged 3-4 FC loss per day on average. No CC and clear sparkling water!
Now that it's cooling off I want to get the bonding done so we can get some gravel to go around the pool. For now pump off while swimming. I am surprised how clean it stays. I vac the bottom once or twice a week and it hardly needs it. I was worried about the skimmer and return placement as there were no clear placement instructions but it seems to circulate well. 88 degree water sure feels better tha 78-80 water. Brrrrr!
 
No doubt Kim!! He loves too swim and really enjoyed taking ownership in it with the testing. We went to KC Chiefs training camp in St. Joe Missouri and HAD to swim in the pool there at the hotel. I resisted the temptation taking a water bottle sample of their water to test. LOL.
 
Hello everyone! The "off season" sure didn't seem to last long. This real early spring warm up is putting me behind on most of my outdoor projects! Argh! I have ordered the things I wanted to replace or add from last year. Like the water bonder device, a new Multiport valve, a new eyeball ( I couldn't get the ball "socket" out of the fitting last fall so no plug could be installed) and I ordered my refill kit from TFTestkits while it's on sale. Once I get my rear in gear I'll post up some pictures and update the progress. I've heard from a few people who have old EW pools and I've given and received help. That's pretty cool! I've never left a pool up over the winter so this will be new to me. I checked the water temp Thursday night when I was down there and it was 55-60 deg! Oooops! I gather 50 deg is the magic number for closing and opening. Good thing the weather has taken a cool spell for what looks like the next week of so. Maybe the water temp will go down and help me out a bit. Luckily the evenings will be light for another hour starting Sunday so maybe I can get it cleaned out and up and running this next week. Fingers crossed. Who want's green if a guy can avoid it? I could use a stunt double. Anyone know of a good cloning service? Off topic alert!: Send good thoughts and prayer out to my cousins in western KS. They live in Clark Co where the wildfires were/are. 75% of the entire county burned. Land, houses,animals and livestock. Luckily my cousin who lives in the county (not in Ashland like his brother and sis do) where the fire burned through used good 'ol thinking and filled his ag sprayer with water and kept the grass around their house wet and saved his house and a building or two. They are physically ok. I haven't talked to them just getting updates from another cousin. And I think I have problems! Sorry for the tangent.
 
WOW on your cousin! Good thinking on his part but so sad for others that were not that quick thinking or overrun :( How scary that had to be.

My pool will be her Spring tune up this week-deep clean the sand filter and add CYA to get it back up to normal levels. I have been able to keep ahead of the leaves so all is good there.

I am glad you have been able to help some others. That is what TFP is all about!

Kim:kim:
 

Enjoying this content?

Support TFP with a donation.

Give Support
Hello again! No, I didn't drop off the face of the earth. Still busy as usual. I thought I'd post a quick update on my spring progress. Of course this year has been rain constantly again. After last year I was hoping for a break but to no avail. So my progress has been slow again. I have always taken down my intex pools over the winter. No so with this big monster. So last fall I did the closing routine and used a skimmer "plug" to keep my level up. I also attempted to plug my eyeball outlet. Long story short. My eyeball wouldn't come out so I put a cap plug in it.

IMG_4564.jpg

Well I found this floating in the pool a short time later along with my cap plug. So much for those ideas. Don't spend the money on the plug. It won't stay in. My water stayed just below the eyeball return all winter. I had a bit of leaves and detritus in it this spring. Not too terrible though.

IMG_4561.jpg

IMG_4563.jpg

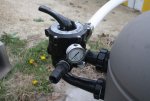
A bit of net work and those were out. I installed a new multiport valve as the old one had a leak and was creaky. By the time I bought a few parts to service it I was half way to the price of buying a new one. So I did that. I also installed a nice TFTestkits gauge while I was at it.

IMG_4565.jpg

I installed a waterbonder in the location I'd left for it. I have the majority of the bond wire in the ground and need to make the connections to the pool, bonder, and pump still.

IMG_4566.jpg

With a bit of man and woman power we wrestled the 4 deck sections into place and temp bolted it in place.

IMG_4567.jpg

The legs are hard to locate being on angles so I decided to get the deck in place and then put the footings where they are needed under the legs. Instead of the blocks placed under the legs I'm going to cut sections of 8" Sonotube and place under the feet and pour concrete in them. Easier to place and not such a pain to get the bottom smooth and level for the blocks. Plus they will be stronger. I'll post this process as I do it.

IMG_4568.jpg

Some are in areas I have to dug a bit more than others. But without the deck up there was little way to know where I had to do the extra work.

IMG_4569.jpg

Of course I just knew I'd have a traffic jam wherever I put my plumbing last year. No biggie. PVC is cheap and easy to work with. Plus I have some of the 2" flexible pipe left which I can use to make a gentle bend around the corner and dodge the leg. Visible are the two plugs I installed in the pipes to drain in the fall. Also visible is the bonding wire I have left to bury a few feet yet. Since the deck is aluminum I'm going to attach it to the bond ring in a couple of places also. It is bolted to the metal of the pool so in effect it is already connected but I feel better adding it in on it's own.

IMG_4572.jpg

IMG_4571.jpg

I still need to shift the pieces a bit to get correct alignment as evident by the gap on one seam.
My other pictures are on another camera which is where the pool is and I'll have to add later. I hopped in the pool last weekend and gave it a good vacuum and scrubbing. It's running about 76-78 deg and it wasn't too bad. I was determined after last year to get some Memorial Day swim time in and I did! Go me! I have been really pleased with the pool water and it's stability this year. I'll discuss it on the next post. Enjoy some splashing!!
 
Last edited:
You are going to love having the deck up! What is so nice now though is you can do some dirty work then jump in the pool to cool off! You have such a good handle on what needs to be done and are doing a great job! That is some clean work there.

I can see where you would really need the deck up to show you where to put the leg! I wonder if they have a template or such when they do it new? Whatever as you have found a good way to get it done! :party:

Kim:kim:
 
Kim, the instructions I have are for the pool only. The deck is an additional item a person would buy and I have no instructs for it. Although you really don't need any as it's pretty straightforward. My biggest problem is the pool is not at my house so I can't pop out and spend a few minutes in the evening finishing up a thing or two. So usually I go down on the weekend and do what I can. The rain has killed a few of my weekends when I was actually was motivated and bodily able to get some things done. But yeah, it's usable so I don't fret over the lost times as much as I did last year. I do want to get the deck and carpeting done, the walk around and railing finished along with some gravel and "landscaping" finished. I does feel good to splash into it when I get hot from working. But the problem with that is I don't want to get out! My bird "friend" still mocks me from the electric pole but now I can cool off in the water and it's insults are like water on a ducks back. (most days) Luckily the MIL doses it daily with my prescribed amount of bleach and I will pop down mid week until I feel confident the FC loss is predictable and can be monitored just on weekends. My levels are surprisingly good. CYA at 35-40, FC 3-5, ph 7.5-8.0. I'm getting the ph to stay at 7.5 longer than last year. Adding the muratic is lowering my TA from 120-130 slowly and helping keep the ph down where I'd like it. Not having aeration is a hindrance I haven't tackled yet.
 
yeah the popping and work on it every once in a while would make it harder/longer to get done.

Aeration-can you turn the return up so it rolls the water pretty good? that is what I do. The cats hate it but LOL it gets the job done.

Those are some good numbers though!

Kim:kim:
 
We are in the process of installing this exact pool and of course we have no instruction manual. We took the pool down so we have a pretty good idea of how it goes back together but we are stuck in one part and I am hoping maybe you can help me. We are having trouble remembering if the wall goes inside or outside of the bottom wall angles on the rounded ends. Can you give me any insight on this?
 
SonjaH, sorry for the delay. It's been a crazy week. The wall panels should go to the outside. The curved sections are basically 90 deg angles with one plane sticking up and the other flat side facing out. (the angles won't go any other way the way they're formed) the wall panels sit on top of the flat horizontal side of the curved "special wall angle". Also, once it's all assembled the screws which go through the uprights and the clips which join the curved sections are to be left kinda loose. "This nut is to be hand tightened only." And under each clip which fasten the "special wall angles" together there should be a 2" patio block. If you need anything else clarified just let me know. I'll be MIA starting Monday til Friday due to work. I was down swimming and cleaning the pool and just happened to see KK's IM. I really need a robot to keep up. The Kansas wind has really kicked up alot of dirt and it ends up on the bottom....
 
Hello all! Just doing a little image replacement and an update. Since Photobucket stopped free hosting I, like others, find the images on here not visible when reading the thread. With a thank you shout out to Kimkats for guiding me on how to replace the images with TFP site stored pictures which are now able to be viewed. What helped was a Firefox add-on which allowed me to view the pictures in each of my posts which made it easy to see what went where. 80'ish pictures later all should be able to be seen. I have a bit of down time to do this and do a bit of updating since I'm on the mend after shoulder surgery. Luckily it was on the left and I'm right handed. It does make typing challenging.

So I don't see any pictures of the bonding work I got going last year. Reading the good, informative threads on TFP plus reading the code got me squared on what to do.

View attachment 73938

Wire, (solid 8ga.) split bolts, and lay in lugs were bought. In post #131 above in picture #5 you can see the water bonder. And in picture #8 the wire is visible coiled up under the deck by the wall. For the most part it is buried completely around the pool 18"-24" from the wall buried 4"-6" deep. I left it uncovered where my connections to the pool structures will be joined in with the split lugs.

Most of my time was trying to get the massive deck to align properly. I did get another member to shoot me pictures of the walk around brackets and bracing.

View attachment 73939

View attachment 73940

View attachment 73941

These are the different brackets involved. Silly me. I failed to get pictures of each and every walkway bracket on each and every support while tearing it down. Must have been the heat....

View attachment 73942

View attachment 73943

View attachment 73944

View attachment 73945

So this is the awesome diagram and pictures sent to me from Speedpx of which I'm so grateful!! This helps so much since there are odd numbers of the different brackets. I was close but this answered all my questions and got me going again! This is why I keep updating and fixing the images on this old long thread. Like I might have said in the beginning. I created this and add to it to help anyone with one of these old pools. They seem to last forever and go up for sale often.

So I got hung up trying to get this odd 4 piece deck to line up with the curved end of the pool. Like the coping it too probably would been easier to get play in the walls without the pool being full of water. The challenge is 2 of the deck sections are kinda triangular and mate with the pool which is in effect 1/2 of a decagon (10 sided polygon) since there are 5 straight planes to get to all line up.

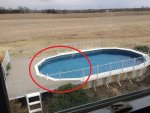
Pool overview with circle.jpg

Easier pictured if seen from one of my 1st images. The big platform on the left mates with the pool. After much mumbling it just seems like it needs a thin spacer to go between a couple of deck sections to make the outsides of the deck align with the long walkways on each side of the pool and the railing too. This picture with the junction circled kinda shows it.

View attachment 73950

What I did was get a piece of composite decking and ripped a spacer which should do the trick. When I get back to it I will shoot a picture of it and how I ultimately solved the problem. Well to much physical therapy this morning and typing now causes my shoulder to tell me to stop for now.
 
Quite a labor of love and care! That pool will be using and enjoyed by many in your family and many here at TFP if/when they want to set their own up!

Now go put some ice on that poor shoulder and take a pain pill to make it happy again! :hug:

Kim:kim:
 
Hello,
Love the pics, brings back memories. We did he same thing and move the pool from one yard to another. First time I've had to replace the liner (came with one) and I'm having trouble finding a liner for the Carousal 15x 30 with 48-inch walls. Can you tell me where you bought yours and which one worked for you? I'd really appreciate it!
Dawn
 

Enjoying this content?

Support TFP with a donation.

Give Support
Thread Status
Hello , This thread has been inactive for over 60 days. New postings here are unlikely to be seen or responded to by other members. For better visibility, consider Starting A New Thread.