- Dec 4, 2024
- 6
- Pool Size
- 10000
- Surface
- Plaster
- Chlorine
- Salt Water Generator
- SWG Type
- Pentair Intellichlor IC-60
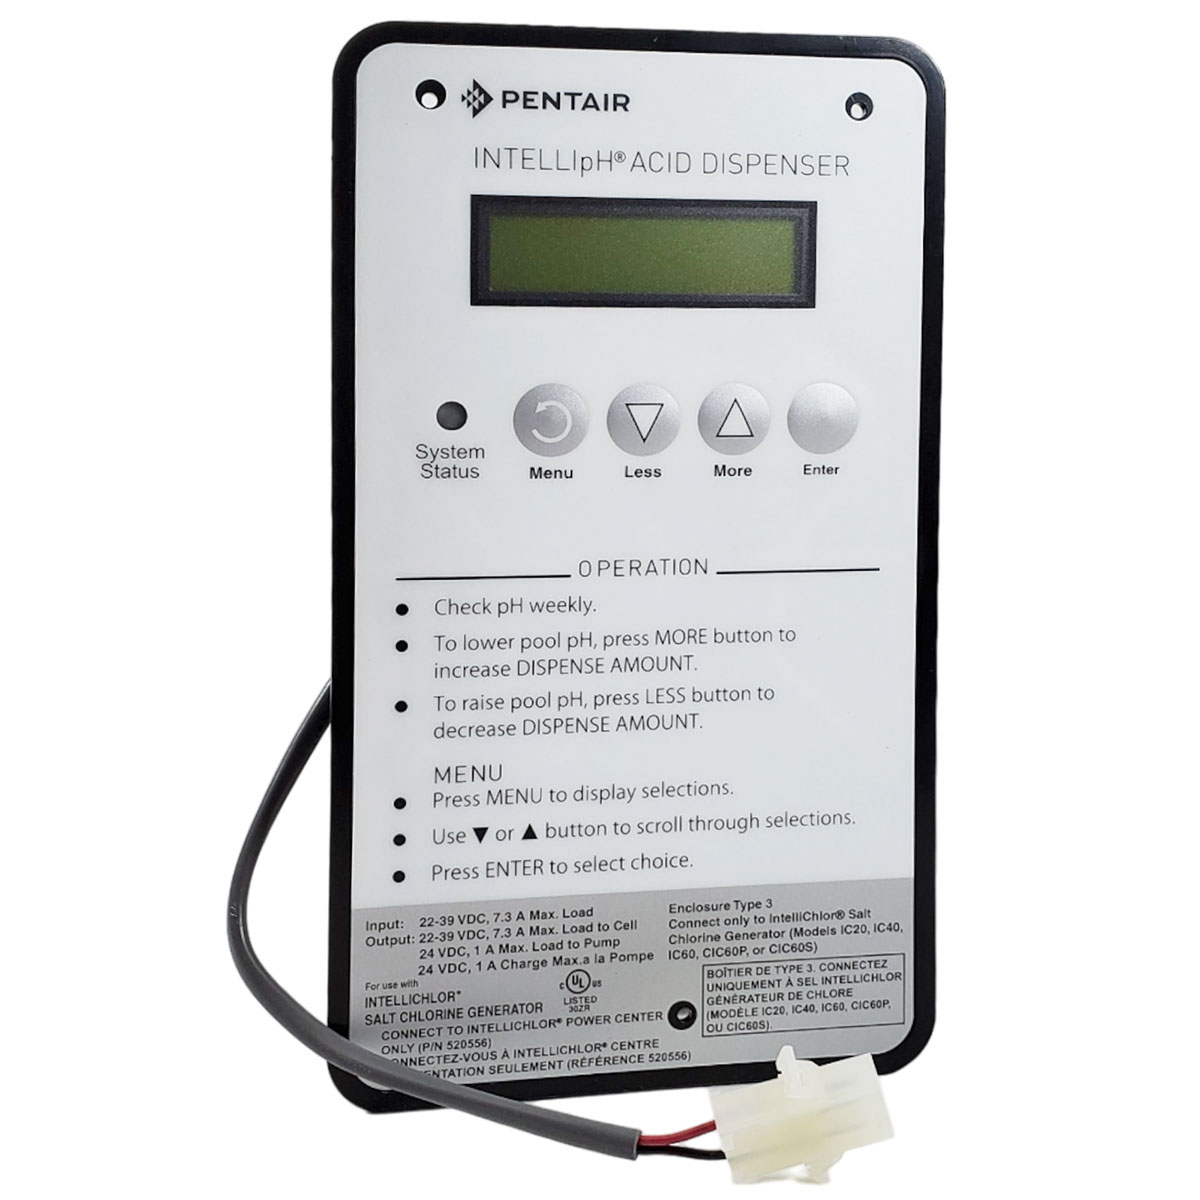
@Dirk Thank you so much for your post, this along with the other posts about the IC and the IPH not communicating really helped me troubleshoot my problem. I do have a question - this is on an IC40 (your soldering solution) correct? Is this a possible solution to an IC60 with an IPH? I didn't know about the incompatibility (excess power draw). I originally had it setup with an IC20, but it really wasn't keeping up (we have a lot of hot, sunny days here in Arizona), so, instead of going with the IC40, we figured we'd just go with the IC60 - which is why we didn't know about the incompatibility (power draw). If this is not a viable solution to the problem, do you have another recommendation for connecting the IC60 thru the IPH or is this not even possible? Thank you in advance for all your help! (I basically have the same issue as "Oakwater" in a series of posts from March 2022 - IC and IPH don't communicate, IC is almost brand new, opened up the IPH and it appears there is scorching on the connector by the red & black wires). - K.So I had this all working last year for about a week or two, but then my IC died. I thought maybe something I had done had fried my IC. Well, I was not happy, because they're about 8 bills now. But then the water got cold and I just ignored the whole mess. The Winter Mode was working, though, so I got to enjoy auto-acid-dispensing all winter. But then spring sprung and so last weekend I knew I had to see what I had done.
I remembered from another thread here that there was a known issue with the IpH and IC. Something about the IC drawing too much power through the IpH, and then pooping out. I thought I could fix that problem, or if not, the IpH controller is a cheaper replacement than the IC. So I crossed my fingers. But then I uncrossed my fingers because I couldn't work the screw driver. I disassembled the IpH controller and there it was, just as I had seen in someone else's post:
View attachment 394966
Pentair is well aware of this issue. I think they now state not to use the IpH with an IC60, because of the excessive current draw of the 60. Guess what Pentair, it happens with an IC40, too! They should have recalled every last one of these!
== END OF RANT ==
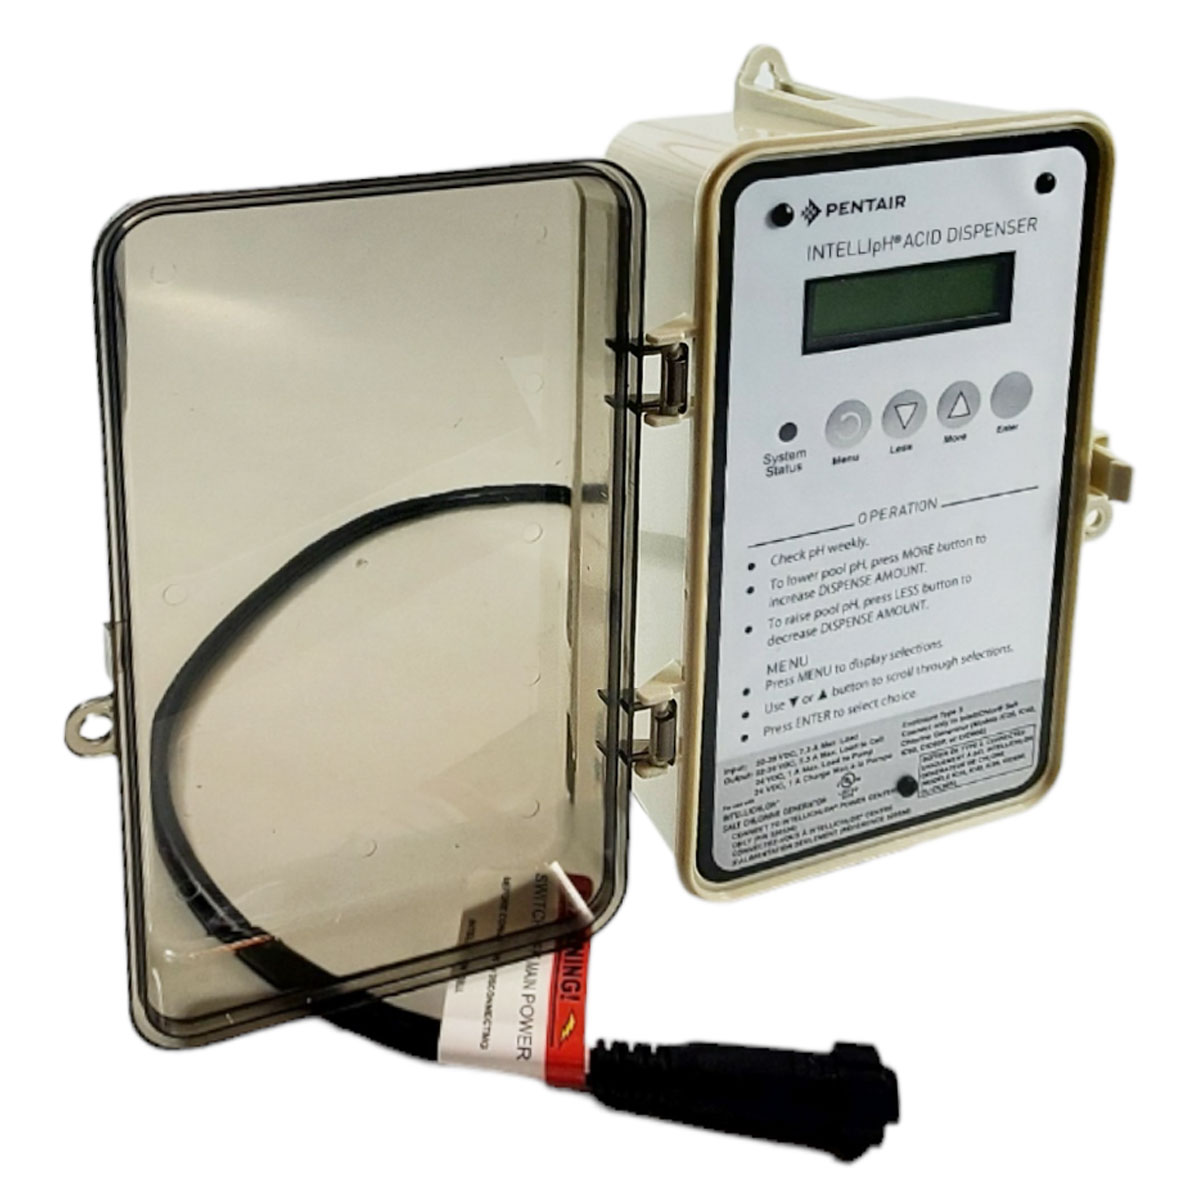
Others here have pursued how to replace that connector. But I figured why do that? Just so it can happen again? My plan was to remove it and solder the wires to the board.
So I sliced off the connector with my Dremel. I managed to do that without slicing through the board, too. Man, those Dremels can MOVE. I almost sliced through that white component next to the connector, but it survived! I left the eight pins soldered to the board.
I tried to solder the wires to the pins, but that was a no go. The wires are fat, and stranded, and the pins are neither. I got a few soldered, but then they started popping off. Solder was bridging between the pins. The pins started melting out of the board. It was a real mess, and very frustrating.
So I abandoned that idea. On to plan B. I desoldered the pins and cleared out their respective holes in the board. I re-stripped the wires: I bared about 3/8", then I cut most of the strands at about 1/4". I left about 5 or 6 strands poking out about 1/8". These I used to thread through the holes in the board, which were too small to accommodate all of the strands. I didn't expect those few strands to carry the current, rather just to hold the wire in place while soldering. The solder flowed down all the strands, through the board and made a good connection.
View attachment 394979
I abused the board so much, doing this twice, that I fully expected it to be fried. I soldered and desoldered and re-soldered and bridged holes and cleaned and scraped. Normally I'm quite skilled at this kind of thing, but the wires are so fat and the holes so close together... ugh. But I held my breath and powered it up and son-of-a-gun it worked. And still is working. So I pulled it off.
This repair is not for the faint of heart, for sure. But it's possible, and I still contend that soldering the wires to the board is better than replacing that connector, even if you could find one somewhere. That said, I still put a pox on you Pentair!!
Last edited by a moderator:
") Will this solution (of bypassing the white connector) also work for an IC60? - in other words, can the Intelliph board handle the IC60 power draw if you use the soldering bypass you have above? (I hope I'm explaining that correctly - I currently have an intelliph (with a very obviously fried connector) and an IC60(out of warranty)) so I was curious if the soldering bypass that works for the IC40 would also work for the IC60 or if the power draw on the IC60 is too much for the intelliph board itself?
Will this solution (of bypassing the white connector) also work for an IC60? - in other words, can the Intelliph board handle the IC60 power draw if you use the soldering bypass you have above? (I hope I'm explaining that correctly - I currently have an intelliph (with a very obviously fried connector) and an IC60(out of warranty)) so I was curious if the soldering bypass that works for the IC40 would also work for the IC60 or if the power draw on the IC60 is too much for the intelliph board itself?