
Hartford CT Demo - Updated: current status of build and some photos added via comments
- Thread starter Wntrequinx
- Start date
You are using an out of date browser. It may not display this or other websites correctly.
You should upgrade or use an alternative browser.
You should upgrade or use an alternative browser.
Put the level along the post (like the post sits up/down) and go slow until its plumb. The top either lines up or it doesn't when even close.I was having trouble measuring the level without the top rails on...
If it doesn't, pop the leg out and compare it to another to make sure they are the same.
If they are the same, is there a bracket needed to attach the top piece to the post? It could be either backwards or missing.
If not, check for level with the ground. At the bases between a ok one and a short one next to it.
My plans are to level the posts on Sunday (rain with lightning on Sat...), so we'll see how that goes...Put the level along the post (like the post sits up/down) and go slow until its plumb. The top either lines up or it doesn't when even close.
If it doesn't, pop the leg out and compare it to another to make sure they are the same.
If they are the same, is there a bracket needed to attach the top piece to the post? It could be either backwards or missing.
If not, check for level with the ground. At the bases between a ok one and a short one next to it.
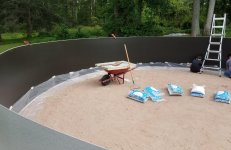
My big fear is that there is dirt under the wall on the track on that side, but I'm hoping its just the top not being a circle because the water level is super low...
it also seems like the
Once we've put on a few i should be able to tell if it will force the circle shape we need for my theory that it's all ok, just leaning weird. If not, I'll be either starting over or messaging here on Sunday... *crosses fingers*
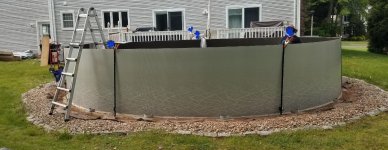
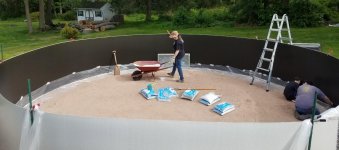
More pictures, some from when we were prepping the cove on the 21st and some from yesterday, and the last two are today...
Attachments
-
 20220530_182937.jpg282.6 KB · Views: 14
 -
 20220530_183654.jpg553.4 KB · Views: 12
 -
 20220530_183636.jpg648 KB · Views: 12
 -
 20220530_183406.jpg575.9 KB · Views: 12
 -
 20220530_183311.jpg289.5 KB · Views: 13
 -
 20220530_183328.jpg382.8 KB · Views: 14
 -
 20220530_183148.jpg187.3 KB · Views: 15
 -
 20220530_183240.jpg178.5 KB · Views: 14

Leaky skimmer Question...
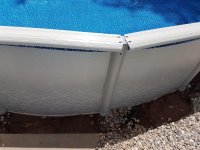
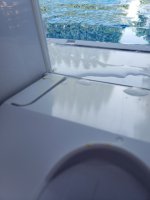
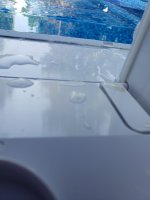
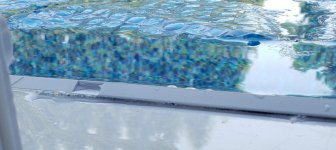
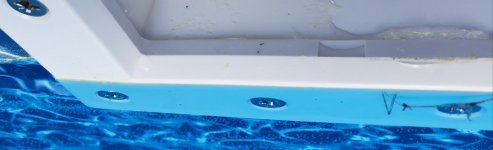
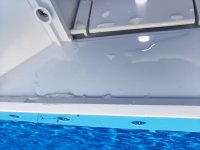
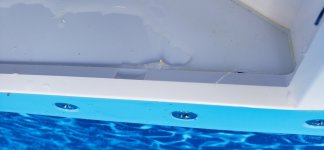
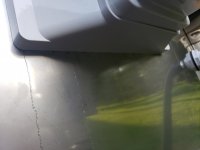
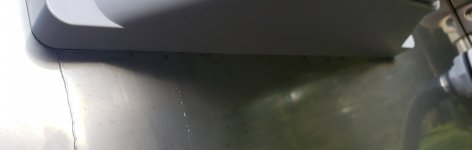
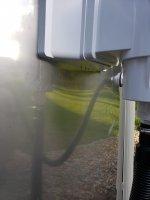
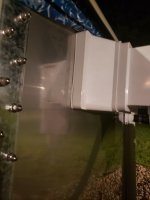
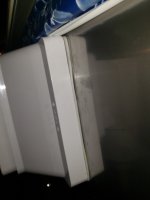
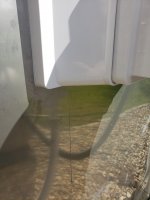
Here are some pictures of the skimmer and how it's leaking around the edges... it seems to be tightened down as much as I can do... is this something we could seal from inside the skimmer?
I think I maybe should have cut the skimmer hole in the foam before we installed the liner and that might be the source of our problems...
Attachments
-
 20220530_184530.jpg363.8 KB · Views: 20
 -
 20220530_184626.jpg347.6 KB · Views: 19
 -
 20220530_185125.jpg108.8 KB · Views: 18
 -
 20220530_185028.jpg294.5 KB · Views: 17
 -
 20220530_185213.jpg112.3 KB · Views: 17
 -
 20220530_185238.jpg274.4 KB · Views: 15
 -
 20220530_185304.jpg169 KB · Views: 13
 -
 20220530_184935.jpg301.6 KB · Views: 11
 -
 20220530_184921.jpg75.4 KB · Views: 14
 -
 20220530_184435.jpg351.5 KB · Views: 17
The skimmer should have come with a gasket. If it did where did you place it? Between liner and pool wall? Between skimmer and liner?
@zea3 is on the right track..........going to support and help if needed.
I put it between the liner and faceplate- does it go on the other side?The skimmer should have come with a gasket. If it did where did you place it? Between liner and pool wall? Between skimmer and liner?
Edit... looked it up... oops. I think I know how to fix it now! Thank you!!
Ok, so I pulled it off, I put the gasket on both sides of the opening, and I screwed it in as best we could, but it was still leaking.... it's dark but I'll try some photos...The skimmer should have come with a gasket. If it did where did you place it? Between liner and pool wall? Between skimmer and liner?
We can't get it off and on again with this set of screws, because they just want to strip, and we've already got one that we can't tighten and I hope we can get off... husband is headed to store for new stainless screws for it, so we can try again tomorrow.
2 things I now know i did wrong: 1) there was a longish piece of liner that ended up folding over the wall cutout in the center under the gasket and 2) I did not install the screws from the center outward.
I'm still not sure why the gasket is pulled away from the skimmer so much given how tight it seems to be...
I foolishly didn't look at the inside of the skimmer to make sure I was actually screwing into all the correct holes and not making my own, so now I'm worried I need to order a new skimmer because I've messed up the inside of this one.
Thanks!
Attachments
Do you have any advice? Other than use the right size screwdriver and the gasket goes on both sides?I hated the skimmer install the most on these builds!!!
Did you have any issues with it not screwing down tight? That seems to be the case here, and tomorrow when it's not raining I get to take the skimmer off and see if one of the screw holes is wonky (did I miss the hole type thing... that's my guess/fear)
Ok so that was actually all I needed! And I went and got a 1/4" socket to use the #3 drill bit with, to give my noodle-arms (weak) some leverage.Do you have any advice? Other than use the right size screwdriver and the gasket goes on both sides?
Because I hadn't screwed it down tight enough. They are self-tapping screws, and the first time I put it on, it didn't tighten down and leaked because the gasket was only on one side of the wall.Ok, so I pulled it off, I put the gasket on both sides of the opening, and I screwed it in as best we could, but it was still leaking.... it's dark but I'll try some photos...
The second time, we didn't use the correct screwdriver size (because I wasn't about to use the cordless on it from outside the pool when the water was higher... using it while I was inside the pool was bad enough...)
My theory is that when we put it back on, the screws went in ok by hand until they reached the point we'd stopped at the first time. They still had to go in farther to seal, but between having to tap the hole for the first time after that point, and needing to compress the gasket, they were too hard to turn from outside the pool with the wrong screwdriver.
Nope neither of these mattered... it was in fine, and my method of doing corners then each one a little bit one side then the other seemed to be fine.2 things I now know i did wrong: 1) there was a longish piece of liner that ended up folding over the wall cutout in the center under the gasket and 2) I did not install the screws from the center outward.
It wasn't tight, we'd just reached the point we had to start tapping the holes again and that was when the gasket started resisting.I'm still not sure why the gasket is pulled away from the skimmer so much given how tight it seems to be...
It was fine. I talked it through with someone and realized I couldn't tap new holes in the support fins or other wrong parts inside the housing for 18 screws when they were flat.I foolishly didn't look at the inside of the skimmer to make sure I was actually screwing into all the correct holes and not making my own, so now I'm worried I need to order a new skimmer because I've messed up the inside of this one.
After typing this up, I went and checked it to get a "not leaking" picture and found a tiny slow leak.
I gave up trying to tighten it more (we got it down to an even slower leak, but tightening it would make it slow more, but then speed up again when a different one was tightened), and bought pool putty. Had to get it from Leslie's because the hardware stores had nothing in stock, sadly. The resin part was partially hardened, so that was fun, but I got it mixed and sealed between the faceplate and the back of the skimmer. That reduced it to one super super slow drip in the back.... so I also sealed the whole bottom of the skimmer. Not sure I would have gone the pool putty route if I didn't have the stainless panel, honestly.
It's not leaking now! I'll add a final picture to this post after work tonight!
Attachments
What an adventure! Well done on getting the right tools and learning to put them on the right way!!!
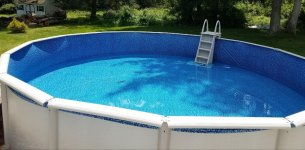
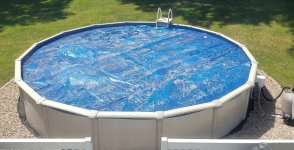
Finally up and running!
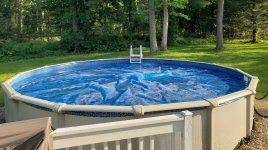
So the pool is up, level, and filled, the liner has like 50 wrinkles in it (but I plan to vacuum and brush diligently), I had to pool putty the skimmer to seal it, and there is a tiny rock (just bigger than a marble) under the floor (so glad for the under-liner floor mat). I haven't done the bonding yet, though.
I'd rate the quality of the overall installation 3 out of 10, with the lumpy, uneven floor with a rock under it taking off three points, and the wrinkly liner taking off another two, and the final two go to the lack of bonding on the pool.
All in all, a 3/10 star pool is far better than no pool! And we can bump it up to a 5 once we get it bonded...
I learned a lot, like, I'll never do that again for myself, I'll pay someone else or not replace the pool. Husband and I were ready to be done with this before the walls went up... if we could have gotten someone to do it, we would have.
Thanks everyone for your support and helpful comments!
I'll add more pictures next time I have the solar cover off!
Attachments
You and @zea3 were super helpful in pointing me to look into the gasket! Can't believe I didn't look into it myself because I was just so eager to get it done, and you ignore the "butterfly" aspect of the other gasket when you assemble the wide mouth (I had assumed they were both just poorly glued together).What an adventure! Well done on getting the right tools and learning to put them on the right way!!!
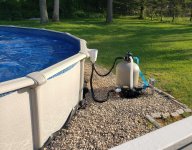
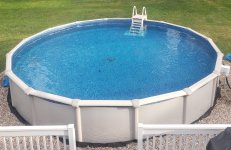
Well, let the chlorine get away from me (maybe only had it properly chlorinated until Tues...) but it still is looking nice, even if it is starting to get a hint of turquoise.
Had a bunch of rain one night and I had to backwash to drain it a bit tonight so the skimmer would work. Was weird because I never had to drain the old pool after so little rain (which just goes to show it was a pretty good leak(s) in the old liner)
Had a bunch of rain one night and I had to backwash to drain it a bit tonight so the skimmer would work. Was weird because I never had to drain the old pool after so little rain (which just goes to show it was a pretty good leak(s) in the old liner)
Attachments
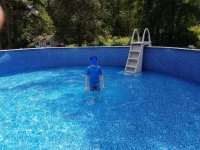
Winter! That looks AWSOME!!!! NICE!!!
Now lets teach ya about a SLAM SLAM Process Do this until you get back the sparkle. If you want to swim you can so long as the FC is just below SLAM level for your CYA.
Kim
Now lets teach ya about a SLAM SLAM Process Do this until you get back the sparkle. If you want to swim you can so long as the FC is just below SLAM level for your CYA.
Kim
Thread Status
Hello , This thread has been inactive for over 60 days. New postings here are unlikely to be seen or responded to by other members. For better visibility, consider Starting A New Thread.