I have a Triton PS Plus doing the same thing. It would run about 3 minutes and then stop and shut off. I've pulled it apart a couple of times to try to trouble shoot some mechanical failures. I did not see any obvious mechanical issues, i.e. nothing looked 'broken'. I went through some reassembly and tried to trouble shoot using the bluetooth manual mode. I was able to get the robot to move across the floor but noticed that the water pump was not functioning correctly in that process. This was especially apparent when I tried to make a turn in manual mode. The blower is used to jet water sideways to turn the robot and it was not turning.
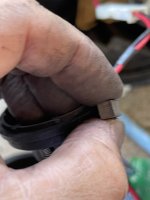
I pulled the robot apart again and started to inspect the fan motor to see what it felt like when trying to turn manually. I could feel a slight binding about every 1/3 of a rotation that did not stop the rotation but was not 'smooth' like I would expect. Given that I was at the point of throwing the whole thing in the trash, I figured I would open up the motor and see if there were burns on the rotor assembly or some other mechanical indication of a failure. My motor had two screws holding the assembly together. Power went into the motor from each side of the housing, one red and one black. Both wires had spring loaded brushes for the power to the rotor assembly. I realized in looking at them that one side had the wire wrapped over the top of the housing where the other was around the side. Both springs appeared to have some tension on them to push the brush against the rotor assembly.
I unscrewed both of the long screws holding the rear cap of the motor to the front cap. It was not necessary to remove the motor from the complete housing. When I removed the rear cap, the stator was easily removed from the rotor leaving it in place attached to the fan and plastic housing. I immediately noticed a large amount of what looked like coffee grounds in the cap and around the assembly. I believe this is the graphite worn off of the brushes combined with the small amounts of grease within the motor. I blow most of that off and examined the rotor where it makes contact with the brushes ( I know it has a technical term but I can't remember it right now). The contact point showed a fair amount of wear from about 3 years of use. There was an obvious groove around the circumfrence from contact with the brushes. However, the wear appeared to be inconsistent with a part of it shiny and another black. I used some 600 grit emery cloth to shine that up and knock off the debris. I also blew out the graphite debris ( it sticks to *everything* ) in the housing, cap, and on the rotor.
I also looked at the brushes. One brush was definitely worn more. I now believe that the brush with the wire wrapped around the top of the housing was not able to move forward under the spring compression due to the tension from the wire holding it back. It was just close enough to work sometimes but not close enough to make positive contact, hence the difference in wear on the two brushes (the brushes are not actually brushes but two rectangular cubes of graphite to transmit power to the motor from the wiring). I rerouted the wire to ensure that it would allow the brush to move against the rotor and reassembled everything. To reassemble I had to place a tension washer on the top of the bearing and remove the two spring loaded brushes from the cap. This allows the cap to go back onto the stator. Once the stator is in place then you can put the cap on and re-insert the two screws holding the cap and stator to the other side that is mounted to the assembly. Once those are tight you can insert the brushes back in their slots and put tension back on them using the springs.
I reassembled the entire unit and ran it to see if it would function properly. It did so I put it into manual mode and used bluetooth to test everything while it was still out of the robot. It all worked properly. I put it back into the robot and ran a test of it in the pool. It functions like a champ now. Hopefully that will continue to be the case for the rest of the year. It still shows me random errors on the bluetooth display but does not stop and does not say that it is out of water like it would occasionally do before.