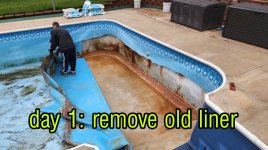
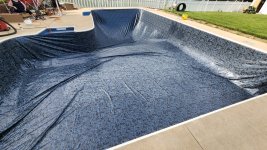
OK, so since we couldn't find ANYONE to install our replacement liner for us, we decided to jump in & do it ourselves. We knew it wasn't going to be a Cakewalk, but after some deeper Googling & reading, I'm second guessing everything.
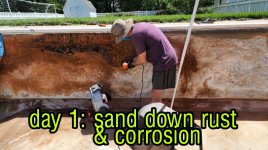
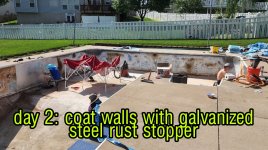
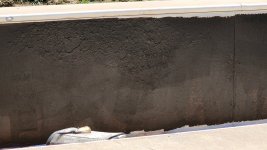
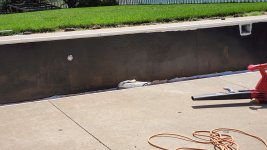
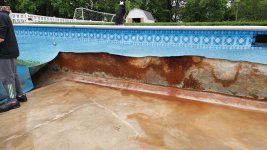
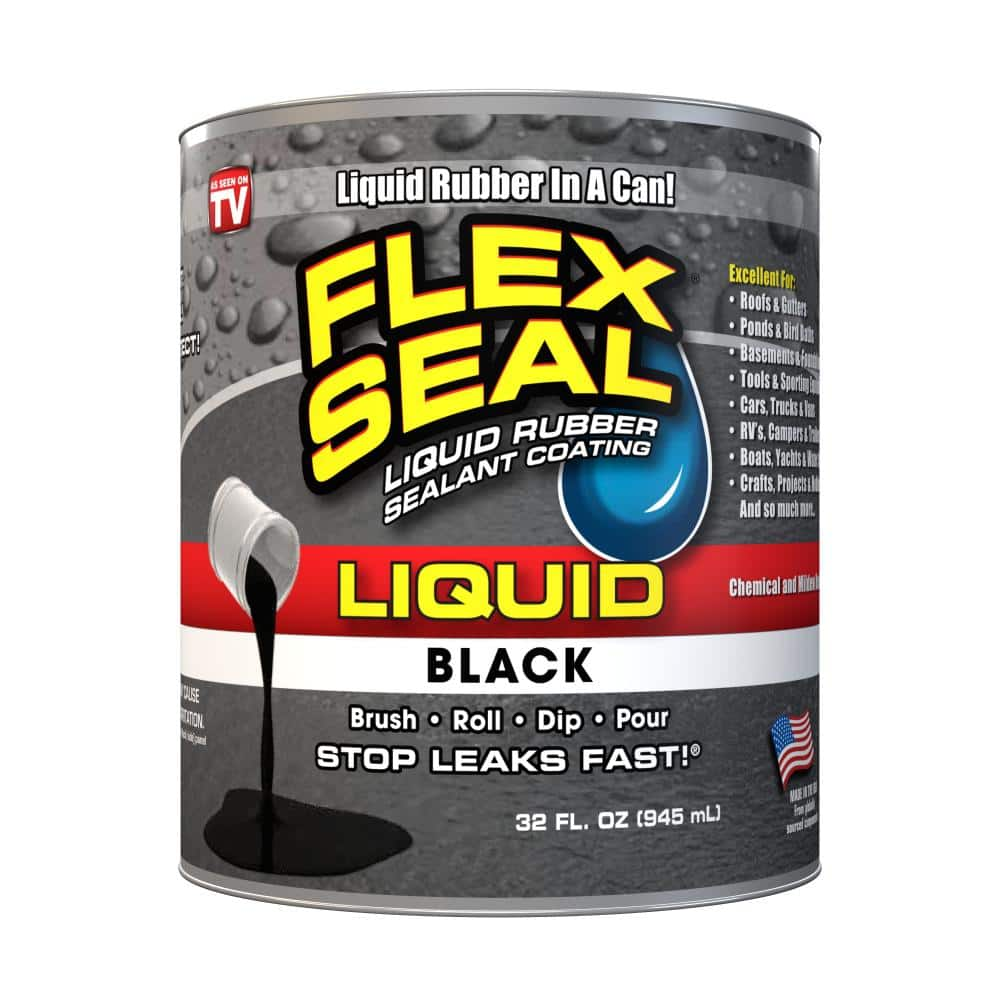
Steel walls are rusty.. I pretty much expected that.. and @Nashvillejoe has great documentation of repairing his, so I think we can manage that. The one question I have about that is the Liquid Rubber - which type should we use? There are several.
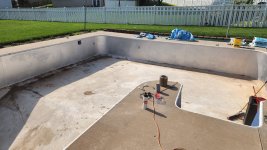
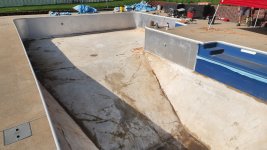
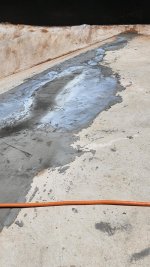
The poolcrete bottom appeared to be in pretty good condition... there were lots of "hills & valleys" - how can we level those? Should we even bother?
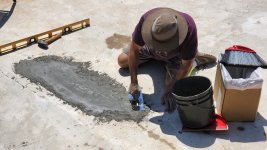
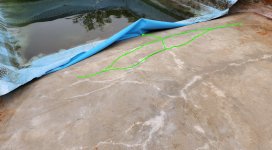
Then there's the crack(s). When we pulled the liner back to where the dropoff to the deep end begins, we discovered an ugly, deep, rough edged crack. We'd never ever felt a crack like that before... I'm thinking it happened just this winter. Unless you guys think it could have been there & we just never noticed/saw it. We have a PoolCrete floor, but can't find vermiculite anywhere. I know we'll have to use something different, but I'm a bit concerned about it not bonding well to the pool Crete. Is there a specific recommended product we can purchase (at a pool store or Home Depot/Lowes/Menards/etc), or an ideal mix of ingredients that seems to work best?
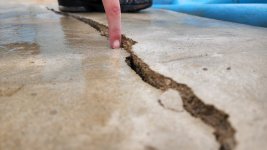
Since the deep end side of the crack is approx 3/4" - 1.0" higher than the shallow end side of the crack, should we try sanding down the high side? Or just fill in the crack & smooth out the slope really well?
There's also a thinner crack that runs perpendicular to the big deep crack. It starts near the center of the crack & heads down into the deep end. We have not taken the deep end Vinyl out yet, so we have no idea what the condition of the hopper & walls are... I'm nervous.
We're hoping all of you TFP experts (& skilled rookies!!) will have some sound advice for us... **fingers crossed**
Thank you!!!
Cathy
Steel walls are rusty.. I pretty much expected that.. and @Nashvillejoe has great documentation of repairing his, so I think we can manage that. The one question I have about that is the Liquid Rubber - which type should we use? There are several.
The poolcrete bottom appeared to be in pretty good condition... there were lots of "hills & valleys" - how can we level those? Should we even bother?
Then there's the crack(s). When we pulled the liner back to where the dropoff to the deep end begins, we discovered an ugly, deep, rough edged crack. We'd never ever felt a crack like that before... I'm thinking it happened just this winter. Unless you guys think it could have been there & we just never noticed/saw it. We have a PoolCrete floor, but can't find vermiculite anywhere. I know we'll have to use something different, but I'm a bit concerned about it not bonding well to the pool Crete. Is there a specific recommended product we can purchase (at a pool store or Home Depot/Lowes/Menards/etc), or an ideal mix of ingredients that seems to work best?
Since the deep end side of the crack is approx 3/4" - 1.0" higher than the shallow end side of the crack, should we try sanding down the high side? Or just fill in the crack & smooth out the slope really well?
There's also a thinner crack that runs perpendicular to the big deep crack. It starts near the center of the crack & heads down into the deep end. We have not taken the deep end Vinyl out yet, so we have no idea what the condition of the hopper & walls are... I'm nervous.
We're hoping all of you TFP experts (& skilled rookies!!) will have some sound advice for us... **fingers crossed**
Thank you!!!
Cathy


 you on!!! Thanks to