Central Florida pool: under construction!

matt1097

Member
Apr 16, 2023
5
Florida's Space Coast
The wife and I have started gathering quotes/designs for a pool/spa.
We have reached out to 4 PBs, received quotes back thus far from 3 of them and are really gravitating to 1 in particular thus far.

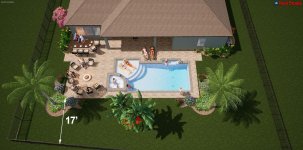
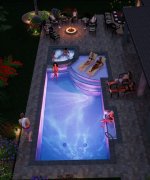
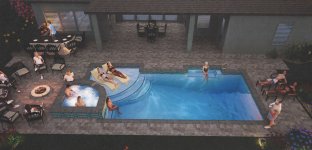
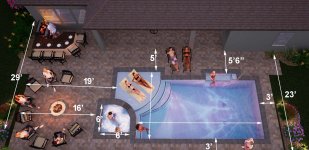
The attached design, is our 2nd revision with this PB. We actually spent some time in a friends pool this past weekend and made some changes based on that.

I have already been scouring other pool construction threads, taking notes, and bookmarking things for later. Looking for any general feedback/opinions/thoughts.

Pool details

Pool Size: 15' x 30' (~390sqft)
  • The swimming area is more like 26'x13'
Currently at 3' to 6' depth.
  • Will likely be changing shallow end to 3.5 or 4'
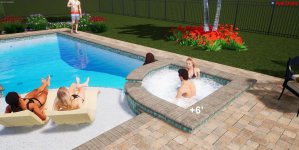
Spa size ~6x6' w/ 6 hydro-therapy jets (venturi jets, no blower)
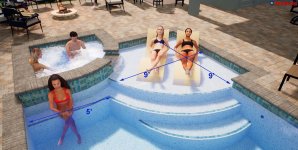
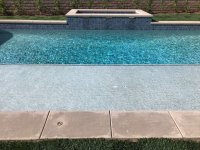
Sun shelf ~9x9', ~5.5" water depth (1st step)

Deck Size: 29' x 52'
Deck/pool fully screened in
  • 2 doors
  • with 1, 30ft wide 'picture window' panel

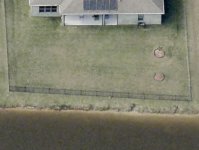
Backyard faces nearly due east. Large lake lot
No gas available, house has electric solar panels

Pentair equipment:
  • Intellicenter (i5?)
  • Intelliflo3 pump
  • Intellichlor SWG
  • 200sqft pentair cartridge filter
  • 120KBTU Pentair heat pump

2-3" Sch40 piping
I see on their permit packages for other pools: 3" branch, 2.5" suction, 2" return​
3 returns
1 skimmer
"separate valve control for drains and skimmer"
4500PSI shotcrete shell w/ 3/8 rebar
2 Globrite LEDs in pool
1 Globrite in Spa
Florida Stucco Gem Finish
Upgradable to the pearl and petite lines
6" x 6" waterline tile, cantilever edge (coping?), 2" cap tile on steps

Deck is pavers
we've asked for the upgrade price for travertine
Spa raised 6"
Umbrella sleeve in sun shelf
fire pit & outdoor kitchen not part of project scope, just flair on the design
although there might be a nice kamado smoker/grill in my future


Questions
  1. General design feedback.
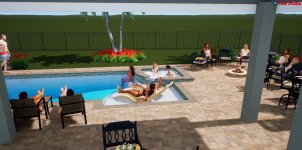
  2. Considering sliding the whole pool 4-5' towards the "fire pit" area to make more of the pool viewable from inside the house
    • MBR is the triple windows
    • Sofa in LR is almost directly behind the 2 sun bathers on the deck by the column. Faces towards the triple window. So natural sight line is towards that large open expanse of deck currently. The under the porch photo is close to that view but probably too far right (vs the couch)
  3. Thoughts on raised spa height?
    • Leaning towards changing it to 12" to make it a more natural to sit on the coping for someone not in the spa
  4. Really torn on 1st step vs 2nd step sun shelf
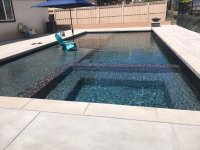
1.jpg2.jpg4.jpg5.jpg7.jpg8.jpgaerial.jpg
 
Hello there neighbor! I would love to hear what pool builders you are considering. We are also in Central Florida and also in the bid soliciting stage.
We are in south Brevard, and reached out to some mid-size established builders in the south/central Brevard area plus one small one that is a neighbor. The largest ones all seemed to have massive months long backlogs to even start.
If you are in the same general area PM me and I can give more specifics.

Some real horror stories on certain pool builders in central fla...TD Pool very reputable.
One of the recent ones with an arrested owner was well known in my neighborhood.
 
Yes move the pool and spa toward the fire place for two reasons, one is so you will have more than 3’ of deck to walk on at the deep end of the pool, second you want the pool and especially the spa spillway more visible from inside the house.
My experience is when customers are wanting to use the coping for sitting they typically go with a + 18” RBB.
The two main differences between a sun shelf on the first step or second step is depth of water for your needs.
First step water depth is typically 8” that can be adjusted up or down 3-4 inches with the auto fill system, that works best for lounges to keep the water about halfway on your lower body.
Second step is typically for chairs and the water depth of around 20” with the same adjustments in depth up or down.
6’ X 6’ spa size is considered small in todays standards.
Consider a light on the Sun shelf, auto-fill, overflow pipe and trim tiles on steps.
 
coping for sitting they typically go with a + 18” RBB
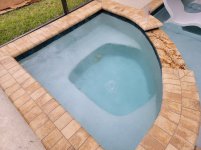
18" is where i started in my head as well, a nice seating height. Our friend's pool is raised 12" and that wasn't bad. I guess in my head it is a trade off of sightlines behind the spa, overflow height/sound, seating comfort. 18" is probably still the way to go, and gives us more color 'pop' from whatever tile we go with.
sun shelf on the first step or second step is depth of water for your needs
Our PB is stating ~5.5" water depth for a first step and ~15" for second step. This is the area i am probably most torn.

Arguments for 1st step as I see it:
  • Any plastic chair can be put in there and not worry about floating away mostly.
  • The ledge loungers chaises seem perfectly happy at that depth range without need for riser. Throw a riser in (or chair vs chaise), and your butt can stay dry
  • Sun will keep the water warmer
  • Can still go sit on any other ledge in the pool if you are just wanting legs in the water
  • Better for kids, although that is not a primary concern for us currently.
With a 2nd step:
  • Would need to probably use a ledge lounger or similar purpose built chair to not float away?
  • More useful amount of water to lounge in or even just stand in
Maybe I've just convinced myself 1st step is good enough.
6’ X 6’ spa size is considered small in todays standard
I would say most of the time it will just be 2-4 in the spa.
The first design had a fully square 6x6 spa with seating on 3 sides. We changed it to the curved for better space utilization of the pool along with making the sunshelf larger. The plan is to do the benches similar to this:
20230618_174700.jpg
This way we can maximize seating space.
Going to a 7'x6' would give us maybe room for one more?

Consider a light on the Sun shelf, auto-fill, overflow pipe and trim tiles on steps
Would a light fit for a first step shelf? Looks like Globrites/Microbrites need to be at least 4" under water.

PB is currently quoting All steps to have a cap tile on them, with the longer section of tile on the front of the steps.
I have taken a note to ask about how overflow will work the next time we chat with them.
 
With the layout of your pool and house the spa spillway will become a visual point from inside the house and the +18” helps bring that out.
I provided a picture of a few first step pools and how the lights are situated on the wall.
The spa size and seating is a personal preference, just keep in mind what your needs will be so the number of jets and their location and height can be maximized.
If you have the double brick coping as in your photo think about having the radius cut on both sides of the bricks to keep the grout lines symmetrical, it may not matter to you but shortcuts like that catch my attention.IMG_4172.jpgIMG_4173.jpgIMG_4175.jpg
 
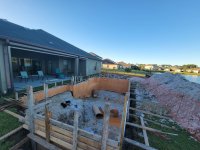
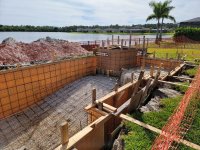
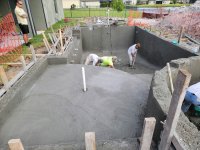
A long over due update... and conversion into a build thread!

We ended up making a few small changes:
  • shifted pool southward to allow more room at deepend
  • Raised spa to 18"
  • Kept sunshelf at first step
  • Adjusted screen enclosure to add a second "panoramic window" from spa to south corner

pool-render.jpg


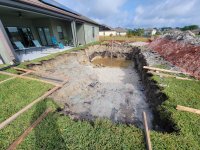
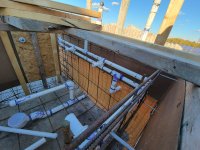
And construction has since started! We are currently 3 weeks since dig day and 1 week since concrete day!
Also had a bonus reroof and solar panel take down/reinstall all at the same time

20231013_102128.jpg
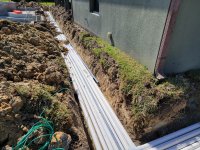
20231017_180834.jpg20231022_110756.jpg20231026_103843.jpg20231026_103928.jpg20231102_115048.jpg20231102_122001.jpg20231102_130908.jpg
 
  • Love
Reactions: newdude
Amongst all that excitement and progress, we have also had our first major issue, and I would like so advise as to how yall would proceed.

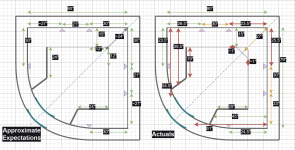
spa-measurements.png
green = as expected, red = major problem, orange = by itself not a major concern, but contributing. The above drawing is mine and not from the PB.

20231026_190104.jpg
20231020_171954.jpg
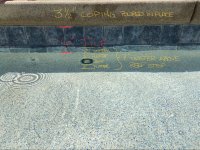
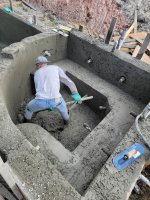
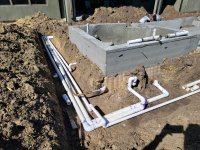
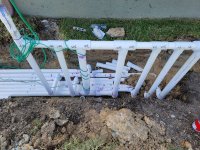
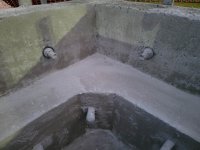
Several things went wrong in the spa.
Jets locations were tweaked in the field during plumbing and i did not get a chance to verify measurements before concrete crew came in. There was also some poor centering by the concrete crew.

The builder has been excellent though. We met with them today, discussed the concerns, and they seem willing to make corrections.
The spa was one of the areas we went back and forth a lot during design to get the layout just right.

What has already been agreed to be fixed:
  • Spa bench is being lengthened to match
  • The spillover is being adjusted to be in the proper middle.
What likely wont get fixed:
  • The uncentered pipe in the bench for the spa light

The big debate (and the thing i noticed first that evening):
  • the two jets in the photo above.
They should have been ~8-12" away from the corner of the bench.
They will do it if we request, but are advising the risks are not worth it.

If they were to do it, they mentioned something about using some flexible pipe as part of the fix. Sounds like it would be a similar process they would use if a jet had been damaged during construction, so it sounds like they have done these before.

I would love to hear yalls opinion! Are the risks worth it?
The number of times we will have more than 4 people in the spa at the same time is not all that high. Most of the time it will be just the wife and I.
 
Getting ready to start my build shortly as well. Try sitting in the spa and see if the jet arrangement will work for you. I would not be chipping concrete to do a flex pipe repair if I didn't have to. I'm surprised they didn't loop the spa jets .....that way you get balanced pressure to each jet. Make sure you do a hydraulic calculation for your jets so they are not "underfed" in GPM's. Here's pretty good link:
 

Enjoying this content?

Support TFP with a donation.

Give Support
Thread Status
Hello , This thread has been inactive for over 60 days. New postings here are unlikely to be seen or responded to by other members. For better visibility, consider Starting A New Thread.