
Building my own pool in North Jersey
- Thread starter ksungela
- Start date
You are using an out of date browser. It may not display this or other websites correctly.
You should upgrade or use an alternative browser.
You should upgrade or use an alternative browser.
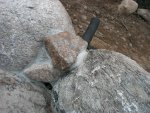

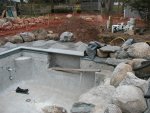
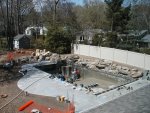
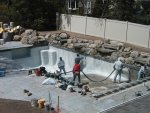
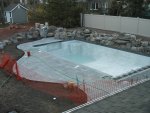
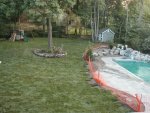
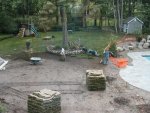
I'm ready for plastering, but my landscaper suggested installing the patio first due to all the stone cutting dust, so patio first it is. Had 6 pallets of bluestone delivered, but one was a bunch of junk, so I sent it back. Kinda like buying lumber where a few pieces are unusable, only the stone is more expensive, so I wasn't going to eat it.
Patio is dry laid natural clef ~1 1/2" bluestone.
Patio is dry laid natural clef ~1 1/2" bluestone.
Attachments

melissab
0
That bluestone decking is going to look fabulous.
I sure hate to be the person who has to brush down that long wall.
I sure hate to be the person who has to brush down that long wall.

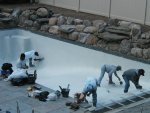
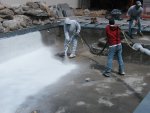
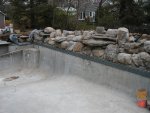
Pretty cool. They just spray it on like gunite, then trowel it smooth. Raymond Brothers Plastering, the best in the area especially for Diamond Brite.
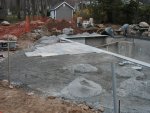
Paid $5760 cash, 20x40 pool, did not pay the extra $800 to have the aggregate exposed which entailed sponging down the surface. They said over a few years the aggregate would become more exposed and thus more color, but the surface will also become a little rougher. I would have paid the extra $800 to have it sponged if it meant I wouldn't have to brush the walls for 2 weeks. I'll still have to brush, so opted to not do it. He said it should last a little longer too, by not having it sponged.
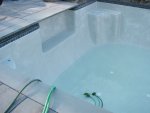
I'm filling at a rate of about 9 gallons per minute according to my water meter, so about 28500 gallons should take 2.2 days. We'll see how close my calculations are.
They also installed all drain and outlet covers.
Final Gas piping inspection tomorrow. Pressure test is steady at 5 psi, so I'm good.
Auto cover going in on Thursday. First I have to get the @#%!* coping brackets installed. My coping contractor was supposed to do it, but he backed out because he was too "busy". I drilled the top holes for the brackets. Making the actual holes it easy, figuring out where to put them is the hard part. I'm seeing more flex in the brackets than I anticipated when I step on them, so feeling a little uneasy about them working out.
Bonding and final electrical inspection on Friday. The inspector doesn't miss anything, especially with me, so I don't anticipate passing the first time around.
Paid $5760 cash, 20x40 pool, did not pay the extra $800 to have the aggregate exposed which entailed sponging down the surface. They said over a few years the aggregate would become more exposed and thus more color, but the surface will also become a little rougher. I would have paid the extra $800 to have it sponged if it meant I wouldn't have to brush the walls for 2 weeks. I'll still have to brush, so opted to not do it. He said it should last a little longer too, by not having it sponged.
I'm filling at a rate of about 9 gallons per minute according to my water meter, so about 28500 gallons should take 2.2 days. We'll see how close my calculations are.
They also installed all drain and outlet covers.
Final Gas piping inspection tomorrow. Pressure test is steady at 5 psi, so I'm good.
Auto cover going in on Thursday. First I have to get the @#%!* coping brackets installed. My coping contractor was supposed to do it, but he backed out because he was too "busy". I drilled the top holes for the brackets. Making the actual holes it easy, figuring out where to put them is the hard part. I'm seeing more flex in the brackets than I anticipated when I step on them, so feeling a little uneasy about them working out.
Bonding and final electrical inspection on Friday. The inspector doesn't miss anything, especially with me, so I don't anticipate passing the first time around.
Attachments
- May 4, 2011
- 634

Awesome, that's gonna look incredible when all the water is in and the lawn is finished.
Great job.
Great job.
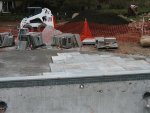
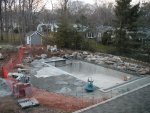
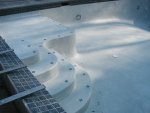
Auto cover installed. I used a CoverPools cover. Installed cost of $7700. Works off a keyed switch and has a water feature lockout so the waterfalls can't be turned when the pool is covered. 316SS brackets also installed to support (hopefully) the coping covering the cover box. 25" overhang using 30" wide bluestone which gets installed tomorrow. This whole coping cantilevered over the coverbox thing has been the biggest PITA of this project. Moment of truth is tomorrow. :?:
Attachments
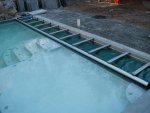
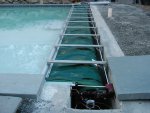
Coping over the cover box installed. Stainless steel shims were used to get the stones to level up. No too much bounce so we'll see how it holds up over time.
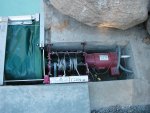
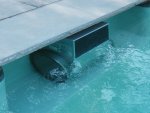
Fastlane current generator installed. It puts out a strong current for swimming.
Fastlane current generator installed. It puts out a strong current for swimming.
Attachments
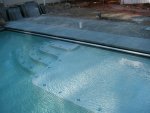
With cover rolled up to shallow end i guess you are able to walk on pit cover? How much weight do they say you can have on pit cover?
harleysilo said:With cover rolled up to shallow end i guess you are able to walk on pit cover? How much weight do they say you can have on pit cover?
I can walk on the bluestone covering the cover whether its rolled up or not. I designed the brackets based on other designs the cover company has used, but I'm hanging over 25" which is a lot. 30" wide bluestone is only 5" resting on the pool beam. The cover was my responsibility, so no one said it would hold anything, but the more weight the more deflection. I think its structurally sound, but I wouldn't jump up and down on it. Eventually, a deflection won't come all the way back to level.
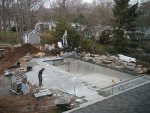
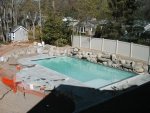
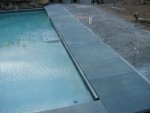
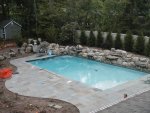
I thought I'd be done by now, but thanks to my landscaper....I'm not. Finally covered up all the mud and now have an insta-lawn thanks to sod. The bigger stuff has been planted around the pool, still more to plant. Fence is behind schedule thanks to all the rain, but should be installed in the next few days.
Attachments
- Jul 16, 2012
- 7,282
- Pool Size
- 27000
- Surface
- Plaster
- Chlorine
- Salt Water Generator
- SWG Type
- Hayward Aqua Rite (T-15)
Looking very nice!
Do you get much water escaping the pool over the dam wall now that the cover is installed? My cover is not in yet and a lot of water rolls up over and splashes into the cover pit. I expect the aluminum bar will rest on or close to top of the wall and stop much of it. Our bluestone coping over the cover will not go out as far as yours. At least 1/2 of the dam wall top will be exposed but it's on the deep end not the main entry side.
Do you get much water escaping the pool over the dam wall now that the cover is installed? My cover is not in yet and a lot of water rolls up over and splashes into the cover pit. I expect the aluminum bar will rest on or close to top of the wall and stop much of it. Our bluestone coping over the cover will not go out as far as yours. At least 1/2 of the dam wall top will be exposed but it's on the deep end not the main entry side.
Thread Status
Hello , This thread has been inactive for over 60 days. New postings here are unlikely to be seen or responded to by other members. For better visibility, consider Starting A New Thread.