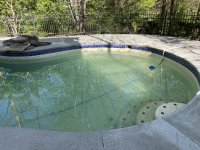
bperry’s pool renovation

I just found this thread and what a JEWEL of DIY work it is! Well done! You know how to clear that pool right up so not worries there. Just keep the filter running 24/7 so it can do it's job! Make sure to back wash often to help clean the glass media in the filter. You might even have to do a deep clean in the end.
Yes, once I turn the equipment back on, I think it’ll clear up pretty quick.
 
Went to open the pool yesterday and discovered the filter leaking from one of the bulkhead fittings.
179BAC44-C157-48F1-A9E6-7BB0FA3902E8.jpeg

Water is spraying out where the red arrow is pointing. This is a pentair TR-100 filter made in 2020. Looks like I need to remove my $600 fancy glass sand to get to the back side of that fitting. Anyone have any guesses before hand on what failed? There’s an oring back there I’m hoping is the problem but not sure why it failed after only 2 years.
 
  • Wow
Reactions: newdude
Was able to finally get a wrench to remove the fitting and it looks like it wasn’t a gasket. The whole fitting just broke. Of course I only ordered new gaskets. 🤣
One question, it looks like I need to remove all the sand to be able to twist the pvc line that feeds the laterals. Any way to do it without removing the sand? Im pretty sure I know the answer, was just hoping someone was smarter than me.
B285E303-D2F3-4705-8D9D-4A3C6C9CEDF1.jpeg
 
Yeah.............a scopping you will a go..................you can use a shop vac to help empty the tank. I keep a tarp by where I am working to dump the sand out of the shop vac onto. IF you have a big enough wheelbarrow you can use it to put the sand into with the added bonus of being able to clean it very well.
 
Wouldn’t you know it…I replaced the lower filter fitting and it’s all sealed now but the top decided it was time to break as well. Can’t seem to catch a break
49682614-0E19-4738-859A-BEF30AD42392.jpeg

And I’ve started the pool drain process to fix the crack along the walls and shallow ends. I’ve got 20 ft of torque lock staples, some masonry tools, and a bit of foolish bravery.
image.jpg
image.jpg

And oddly enough I’ve had a few people from YouTube ask about the tool I built to lift the concrete decking and so I’ve been doing a little weekend side gig making those for people. Spring time must bring out all the DIY’ers.
 
Last edited:
REALLY?? Just after you fixed the other one............kind of stands to reason though..........hope that is the last of it with the filter.

Good luck with the pool fixing! Do you have some cold ones in the fridge for the end of each day?
 
REALLY?? Just after you fixed the other one............kind of stands to reason though..........hope that is the last of it with the filter.

Good luck with the pool fixing! Do you have some cold ones in the fridge for the end of each day?
Cold water is all I got for end of the day…Doctors orders… but my son and I snuck away for some Gyro’s at our favorite restaurant today so that was fun.
 
And oddly enough I’ve had a few people from YouTube ask about the tool I built to lift the concrete decking and so I’ve been doing a little weekend side gig making those for people. Spring time must bring out all the DIY’ers.

Man, that is awesome. I hate the idea of mudjacking around a pool because (at least in my childlike imagination) when you pump mud with enough force to lift a concrete slab, isn't there the potential to displace/shift ground and break plumbing?

Your system combined with a pipe and a suitable pump to push the mud mix all under the deck seems like it would be both safe and effective.

We did a pool for a hospital where they had ground penetrating radar come out and showed they had significant voids under their shell. We cored holes in the pool floor and used our plaster pump to fill all the voids. Same kind of idea just pumping horizontally.
I hadn’t thought about that aspect and it would be a concern. I could see it being even easier to just drill holes and fill the voids without pressurizing the grout, (similar to what you did). I was able to do quite a bit of filling just by pouring the grout between the expansion joints of the slabs. Still don’t have any movement on my decking so far.
 
  • Like
Reactions: MAPR-Austin

Enjoying this content?

Support TFP with a donation.

Give Support
Pool is about done draining and I’ve been power washing any obvious loose plaster away.
334EB4A6-C586-4ED4-8154-372A04B3EBE0.jpeg

And I’m finding lots of spots like this that look like gunite showing through, but when I pick at it with a steel tool, the center of these little holes is mushy and green so I’m thinking it’s black algae that has embedded itself in some of these soft plaster spots.
D66479F6-413A-4227-9A59-308A021CBC5E.jpeg
And there are definitely structural cracks. When I spray water into the crack, dirty water streams out from other spots.
FA4828A4-7D54-48FC-BB37-B04715C1D45F.jpeg
3BA10113-0954-460A-95DD-024BA5DDEF88.jpeg

Still need to determine if I want to just patch what’s here or remove all the plaster and redo it. I’m not sure I can buy plaster as a DIY’re.
 
Just saw you reply to my thread, so I'm checking yours. I love that deck jack, simple and super easy to make. Nice job. (y)

Good luck with the torque locks. Your cracks are definitely worse than mine so I think you're on the right track with them. Another thing I learned when installing mine is to take care when drilling your holes. You want them to to be spaced correctly AND you want them to be parallel. If the holes aren't parallel you end up opening them up to get the staple to lie flat, which can potentially reduce the spacing between the holes. If the holes end up too close you won't be able to torque them sufficiently. I found that I needed about a 1/4 turn to get the proper torque in some cases, so if the cam ends up more than 90 degrees out of perfect starting alignment (i.e. perfect hole placement) you may not be able get them torqued right. I had 2 out of 20 end up with the holes spaced too close together. In the process, I figured out why they them make in two different sizes - so that you can re-drill with either a larger or smaller one if you mess up. I had one large and one small one with the holes too close, so I swapped them and was good to go after a bit more drilling, grinding, and hammering. I also found it better to cover the staples themselves using two separate batches of hydraulic cement. Use the first batch to jamb into all the nooks and then feather it out around the edges with a trowel so you end up with a recessed layer of cement over the staple. Use the second batch to complete filling in the hole. Doing it this way allows you to get a good flush finish without the concrete slumping too much.
 
  • Like
Reactions: Bperry
Got my first 10 staples installed and covered. The hydraulic cement installation was the hardest part. Trying to get it packed in but still 3/8” below the finished surface was tricky. Ended up that a grout sponge allowed me to keep the surface hydrated while it was curing and to fine tune the depth of the cement. The staples are only torqued to 22lbs (I assume it’s ft/lbs) which felt like not very much but I guess the goal is to just keep the crack from opening.
EF5771C4-ECB4-4DD7-B163-34045B8F5131.jpegD0534E55-C673-46A7-A400-F766AE34CAC1.jpeg0DB16B4A-98C2-413F-8AB4-A98BC0DDA84B.jpeg76CE01AC-F3C7-4AEC-BE57-F823DB9A1121.jpeg
 
Last edited:
I am glad I am only along for the ride and not the work!! Well done sir!!
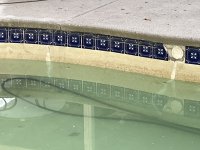
Any ideas for replacing the broken tile and having it look nice (assuming I can’t find an exact replacement for 22 year old tile)? I guess I can look but as just assuming. I could remove every other tile and replace with a new one, making it a pattern.
 
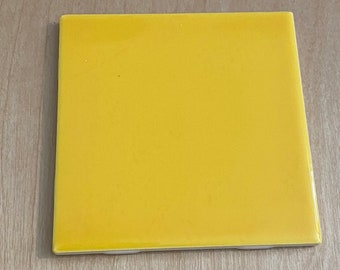
I was thinking about a big contrast for the new tiles. This could be fun. Lets see what you think of these:
OSEANCISANSEB6_-San-Sebastian_6_x_6---Aquatica---Porcelain-Pool-Tile-by-AquaBlu-Mosaics_480x480.jpg
OSEANCIBARCEL6_Barcelona_6_x_6_-_Aquatica_-_Porcelain_Pool_Tile_by_AquaBlu_Mosaics_480x480.jpg
il_340x270.3772475660_dnsw.jpg


Then there are these:
That’s a handy tile browser. Our backyard is pretty solidly green so not sure brown or yellow would work. Greens and blue might be a big but decent contrast. I guess another option is replacing all the tiles or just sticking the broken tiles back on like a mosaic. I have high confidence I can do either of those tile jobs myself.
8EB0540E-611A-4A6F-9882-10E136D9CAF6.jpeg

I’ve also been going back and forth on replastering myself. I’m not confident in the DIY options so far and there’s just so many loose plaster spots to not do anything. The Sider Crete roll on plaster is somewhat tempting but so is paying extra to have someone else do plaster work that I know could do it better than me. This is a hard decision for a DIY’r like myself.
 
If you're going to re-plaster anyway, then you might as well replace the tiles while you're at it. It will be hard to get the old plaster off without knocking off a few more tiles in the process. And you gotta know that replacing every other one would be way more work than replacing them all. Besides, with new tiles and a re-plaster the pool will look brand new. As @kimkats illustrated, the new tile possibilities are endless - you could choose any size or combination of sizes, mosaics, whatever. Go for it!
 
  • Like
Reactions: kimkats and Bperry
If you're going to re-plaster anyway, then you might as well replace the tiles while you're at it. It will be hard to get the old plaster off without knocking off a few more tiles in the process. And you gotta know that replacing every other one would be way more work than replacing them all. Besides, with new tiles and a re-plaster the pool will look brand new. As @kimkats illustrated, the new tile possibilities are endless - you could choose any size or combination of sizes, mosaics, whatever. Go for it!
Ugh, unfortunately that’s good advice. I could even fix up the coping to tile joint that’s bad in a few places much easier if there were no tile. This project just keeps getting farther away from the original, “I’ll just fix and patch this one crack in a weekend”….:laughblue:
 
  • Like
Reactions: newdude

Enjoying this content?

Support TFP with a donation.

Give Support
Thread Status
Hello , This thread has been inactive for over 60 days. New postings here are unlikely to be seen or responded to by other members. For better visibility, consider Starting A New Thread.