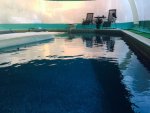
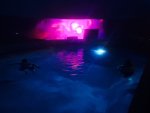
Lol. I'd better be able to get wifi AND Bluetooth in there or I won't be able to play my "physiotherapy" set on spotify 
For Kim: temp report:I have an air temp sensor that I haven't installed yet, but I will tell you that yesterday it was unseasonably warm here for Oct. (mid sixties) outside and it was actually quite HOT inside before i put the solar cover back on. The water was 94, which I'm sure contributed
The air blower cycles on and off according to an automated barometric switch, so without the dome air heater on, it stays quite comfortable. I havent run the dome air heater yet as I had a few connection issues to sort out today and I was beat.
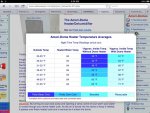
But even when it dropped to below 40 last night, hubby and I had a nice swim here's the chart showing average inside-dome differentials with and without the heater assembly...even without, you net a good 15 degrees or so:

Installation Notes for posterity/those who might consider a dome.
The MFG supplies a very detailed anchor drilling diagram and instructions are very thorough. Mine required drilling 47 anchors and was a custom size. Requires a 1/2-inch bit. I hired a friend who used to install pools do this part because anchor work is old hat to him and with my knee injury, I can't kneel
After you've snapped chalk lines and drilled anchors on all your straight lines and before installing eyebolts, you unpack the dome, which is not unlike unpacking a liner...the directions on the box are critical and it takes a few peeps to float it into position without water logging.
The fastening system is to slip the aircraft cable in the vinyl-covered skirt of the dome into each eyebolt after prying the eyebolt open a bit. Eyebolts are every 3-feet on the straight runs, and vary on corner radius (eg 2 ft, 4 ft.). You cut through the vinyl sleeve at each location to do so.
Because of the cuts, we initially affixed only 4 points then inflated the dome to confirm that our position was centered. That way we could adjust a few problem areas with additional anchors if necessary, which ultimately, we did (we're up against a terrace so our footprint required a couple of 2' radiuses, which can be fussy.) Next, you drill the radius anchors. You then zip tie the cable inside the eyebolt to ensure it can not slip out in a wind condition, etc.
The eyebolts and anchors are readily available in the world, so I see why the mfg uses them, but I'd love it if they were instead turnbuckle or caribinger style clips...though same might not weather as well. The advantage of eyebolts with zip ties is it simplifies annual replacement. There are also plugs to preserve anchor wells from debris etc. for summer when the dome is down/stored.
The kit also ships with a vinyl repair kit and runs of vinyl in your colors and clear.
Overall, the mfg of the dome seems quite decent, with some njce design considerations such as easily replaceable zipper sections and a supplied replacement zipper. It comes with a 3 year warranty. High heat will degrade the vinyl faster, so mfg recommends taking dome down before full summer, and says those in northern climates typically get anywhere from 7-12 years.
The seams on the dome are mfg'd and sealed using radio frequency just like liners.
In my case, there are two spots on two ceiling seams that look a bit uneven to me and former pool guy, with a bit of light leak/translucence. We're a bit concerned these areas might be the first to go, so documented it, but since it appears to be air tight, and considering the install labor spent and late season, are disinclined to return it for evaluation at this point. The simplest fix may be to reinforce those two seam areas when the dome comes down in spring, since shipping the done was a $500 proposition . Pool pal says we should discuss this with mfg.
The blower is unbelievably quiet - pool pal was amazed by this.
I'll report more as we go along
For Kim: temp report:I have an air temp sensor that I haven't installed yet, but I will tell you that yesterday it was unseasonably warm here for Oct. (mid sixties) outside and it was actually quite HOT inside before i put the solar cover back on. The water was 94, which I'm sure contributed
The air blower cycles on and off according to an automated barometric switch, so without the dome air heater on, it stays quite comfortable. I havent run the dome air heater yet as I had a few connection issues to sort out today and I was beat.
But even when it dropped to below 40 last night, hubby and I had a nice swim

Installation Notes for posterity/those who might consider a dome.
The MFG supplies a very detailed anchor drilling diagram and instructions are very thorough. Mine required drilling 47 anchors and was a custom size. Requires a 1/2-inch bit. I hired a friend who used to install pools do this part because anchor work is old hat to him and with my knee injury, I can't kneel
After you've snapped chalk lines and drilled anchors on all your straight lines and before installing eyebolts, you unpack the dome, which is not unlike unpacking a liner...the directions on the box are critical and it takes a few peeps to float it into position without water logging.
The fastening system is to slip the aircraft cable in the vinyl-covered skirt of the dome into each eyebolt after prying the eyebolt open a bit. Eyebolts are every 3-feet on the straight runs, and vary on corner radius (eg 2 ft, 4 ft.). You cut through the vinyl sleeve at each location to do so.
Because of the cuts, we initially affixed only 4 points then inflated the dome to confirm that our position was centered. That way we could adjust a few problem areas with additional anchors if necessary, which ultimately, we did (we're up against a terrace so our footprint required a couple of 2' radiuses, which can be fussy.) Next, you drill the radius anchors. You then zip tie the cable inside the eyebolt to ensure it can not slip out in a wind condition, etc.
The eyebolts and anchors are readily available in the world, so I see why the mfg uses them, but I'd love it if they were instead turnbuckle or caribinger style clips...though same might not weather as well. The advantage of eyebolts with zip ties is it simplifies annual replacement. There are also plugs to preserve anchor wells from debris etc. for summer when the dome is down/stored.
The kit also ships with a vinyl repair kit and runs of vinyl in your colors and clear.
Overall, the mfg of the dome seems quite decent, with some njce design considerations such as easily replaceable zipper sections and a supplied replacement zipper. It comes with a 3 year warranty. High heat will degrade the vinyl faster, so mfg recommends taking dome down before full summer, and says those in northern climates typically get anywhere from 7-12 years.
The seams on the dome are mfg'd and sealed using radio frequency just like liners.
In my case, there are two spots on two ceiling seams that look a bit uneven to me and former pool guy, with a bit of light leak/translucence. We're a bit concerned these areas might be the first to go, so documented it, but since it appears to be air tight, and considering the install labor spent and late season, are disinclined to return it for evaluation at this point. The simplest fix may be to reinforce those two seam areas when the dome comes down in spring, since shipping the done was a $500 proposition
The blower is unbelievably quiet - pool pal was amazed by this.
I'll report more as we go along


