Corona, CA Pool Build

So the homeowner is looking for some sort of personalization in the pool and wanted to do their footprints in the reef step. I wasn't in love with the idea so here is what I came up with:

IMG_20170810_205422269_HDR.jpg

They loved it and want to do it. Now I'm having nothing but regret because it's close to midnight and I have to get this thing done by the morning.

IMG_20170810_212000064_HDR.jpg

Low budget large format printing!

When we plastered Joannie's pool we used a different technique to roughen up the plaster enough to not have to about wash the pool. It worked out well enough on her pool that if I timed things right, I could complete the AquaBright installation in one day.

I got to the house at 6:30, pumped the water out and started masking off the waterline tile.

IMG_20170811_075217648.jpg

First coat of epoxy was applied and immediately followed but the second coat:

IMG_20170811_100751475.jpg

IMG_20170811_100805014_HDR.jpg

First coat of AquaBright:

IMG_20170811_122221505.jpg

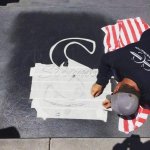
After the second pass of material I laid out the stencil and began the miserable process of cutting this nightmare out:

IMG_20170812_085252_995.jpg

Miserable! 100 degrees with two torches running in the background and sweating like crazy.
 
I can see the sweat soaking your signature ball cap...100F , yeah that's siesta weather, not work weather.

El Guapo is laughing his mustachio off at the gringo doing arts & crafts at the bottom of a hot pool....
 
So the homeowner is looking for some sort of personalization in the pool and wanted to do their footprints in the reef step. I wasn't in love with the idea so here is what I came up with:

View attachment 67988

They loved it and want to do it. Now I'm having nothing but regret because it's close to midnight and I have to get this thing done by the morning.

View attachment 67989

Low budget large format printing!

When we plastered Joannie's pool we used a different technique to roughen up the plaster enough to not have to about wash the pool. It worked out well enough on her pool that if I timed things right, I could complete the AquaBright installation in one day.

I got to the house at 6:30, pumped the water out and started making off the waterline tile.

View attachment 67990

First coat of epoxy was applied and immediately followed but the second coat:

View attachment 67991

View attachment 67992

First coat of AquaBright:

View attachment 67993

After the second pass of material I laid out the stencil and began the miserable process of cutting this nightmare out:

View attachment 67994

Miserable! 100 degrees with two torches running in the background and sweating like crazy.

I could have made that stencil for you with my cutting machine. You're fault for taking the long route - I offered [emoji12]
 

Enjoying this content?

Support TFP with a donation.

Give Support
I shoot the area in the color for the stencil, tape the entire area, cut and remove the sections that don't belong and then shoot over the whole section with the same color as the rest of the pool.

You can see in the picture where I'm cutting out the tape, the section is black. The tape I use is heat resistent and I peel it off once we're done with the pool. When the tape comes of it leaves the underlying black areas showing then it gets hit with some heat to smooth the layers together.
 

Enjoying this content?

Support TFP with a donation.

Give Support
Thread Status
Hello , This thread has been inactive for over 60 days. New postings here are unlikely to be seen or responded to by other members. For better visibility, consider Starting A New Thread.