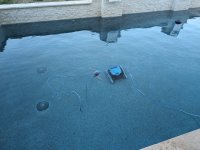
Well I'm back and Maisie the Maytronics Dolphin is back in the pool.
The whole fiasco cost about $260.00 to bring the robot back up to par which included the following parts;
From Poolweb.com
Both front drive wheels
Both rear wheels
4 wheel bushings
2 active brush bushings
1 pair of new treads
From Marinapoolsandpatios.com
2 active brush pinion gears
From discountpoolmart.com
1 drive motor
From Amazon
3 sets of impeller motor brushes (more on this below)
2 sets of impeller motor bearings
Honestly, getting the robot open is very easy and doesn't require much knowledge or skill. I don't have many pics as I was in the heat of getting this done and kinda forgot. I will attach what pics I do have.
1. Take the basket out.
2. Remove the 2 screws holding the cover on over the black motor box.
3. Remove the 2 screws that pinch the grommet in place on the cover.
4. Remove the 2 black motor box screws on either side.
5. Slide the motor box to the right (when the front of the robot is against your stomach) and lift it out. Note there is a slot in the chassis of the robot that a tab on the motor box fits under in the front of the robot.
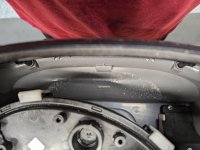
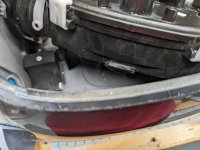
6. Remove the front drive wheel covers (the pry off easily but be gentle they may break).
7. Remove the screw holding the front drive wheel hub caps in place on both sides and remove the wheels and treads. Keep the hub caps.
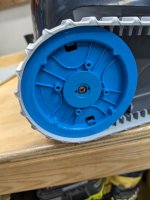
8. Remove the small plastic center caps on the rear wheels.
9. Remove the screws holding the rear wheel hub caps in place. Keep the hub caps. Note the location of the weight inside one of the rear wheels. It needs to go back in the same wheel.
10. Remove the screws holding the active brush pinion gears, the active brush bushings should just fall out with them along with the brush. Note, there are 2 gray plastic end caps on the active brush. They will fall out, find a safe place to put them to reuse later.
11. Gently pry the wheel bushings off of the chassis with a flat head screw driver. Once it gets started you can typically twist and pull them off. Note, there are notches on the bushings the line up with tabs on the chassis, these need to line up on re-installation.
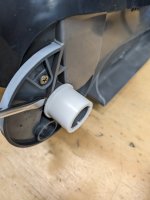
12. Once the bushings are removed the chassis is now fully stripped. Give it a good cleaning and set it aside.
13. The motor box. Remove the impeller volute and what I assume is a debris shield in front of the box.
14. Remove the impeller blade. Be careful, its very sharp.
15. Unfasten the clips holding the top of the motor box on and remove the top and toss the desiccant bag.
16. Disconnect the drive motor and impeller motor from the circuit board.
17. Unfasten the clips holding the drive motor in place and remove it. If the drive motor is malfunctioning, replace it. I wouldn't try to disassemble it. Give it a good inspection, check for corrosion and proper functionality. Again, replace it don't fix it. Or if you do fix it, let us know how it turned out.
18. Remove the clip at the top of the motor box holding the impeller motor in place.
19. Remove the motor from the top of the box .
The tear down is complete (minus rebuilding the impeller motor), and its time to re-assemble. For the most part putting the robot back together is the reverse of disassembly. I will go over some key points that may not be obvious or were not the exact reverse order of disassembly a little further down. I will first address the "rebuild" of the impeller motor.
At this point you need to decide if you want to attempt to replace the bearings and brushes of the impeller motor. Neither are hard to do if you are handy with a soldering iron and there are videos online on how to get it done. If you do decide to open up the motor, mark with permanent ink or paint the location of the wires in relation to the motor can. Getting them incorrect upon reassembly will cause the motor to spin the wrong direction.
1. Mark the location of where the wires exit the motor on the motor can. DO NOT SKIP THIS STEP. Putting the brushes in the wrong orientation will cause the motor to spin backwards. The correct direction of rotation is counter clockwise for this robot.
2. Remove the 2 screws at the bottom of the impeller motor can, gently remove the bottom bearing housing, and slide the armature out. Be careful as there is a wavy thrust washer in the bottom of the bearing bore of the silver bearing housing, don't lose it and make sure it goes back in place when reassembling.
3. To remove the impeller motor top bearing I used a screw driver and a hammer. I put the armature in a vise using soft jaws and gently tapped the bearing off of the shaft.
4. The bottom bearing requires you to find a thin forked object to place in-between the armature and the bearing. I used a wrench for a die grinder collet. Once you have the right tool and the armature secured, use a punch to gently tap the armature out of the bearing.
5. I installed the new top bearing using a 10mm 3/8ths drive deepwell socket and a soft faced hammer. Slide the socket over the shaft of the armature and gently tap the bearing home. This bearing was a 608 2RS.
6. The bottom bearing was able to be pressed on by hand needing no additional tools. This bearing is a 626 2RS.
7. I replaced my brushes, this involved a little bit of soldering. Its not hard, but it does take a little bit of technique and skill. I went through three different types of brushes from amazon until I found a set that worked. In the end, I bought over sized (6mm x 6mm) brushes and sanded them down to the required 6mm Tall by 5mm wide. Be sure that if you replace the brushes, the lead either comes out of the back or the top of the brush (6mm goes up). Leads that come out of the side of the brush will interfere with the spring and bind up the brush.
8. Once the brushes are soldered in place adjust their length by sanding them down to the desired length (just shorter than the brush housing when the armature is seated) using a dremmel 60 grit sanding drum. Take your time on this and make multiple checks of the length during this process to get it right.
9. These three videos go over most of the steps that I listed above for the brush and bearing replacement. Your model may vary a bit but overall the steps are the same. Remember to mark the orientation of the motor power supply wires on the motor can.
10. CLEAN EVERYTHING! I used electric motor cleaner for this and that is all I would recommend. Be sure to remove as much of the carbon and old grease as possible prior to reassembly.
11. Reassembling the motor is the same as taking it apart. I did find it helpful to mark on the brass top cap of the motor the location of the threaded holes to make it easier to line up the bolt holes in the bottom bearing housing.
12. Add some high quality marine grade grease into the seal cavity on the top cap of the impeller motor.
13. Slide the armature into the bottom bearing housing making sure its fully seated and the brushes are making good contact. This is a finicky step and will take some time to get right so be patient. The above videos to a good job of detailing this out.
14. Once the armature is seated, slide the assembly into the motor can. The magnets in the can will draw the armature up into it so be cautious as you go so it doesn't pull the armature out of the brushes.
15. Align the marks you made for the wires on the motor can with the wires.
16. Line up the marks on the brass cap to the bolt holes in the bottom bearing housing.
17. Re-install the screws.
18. Check the rotation of the motor by applying power to it.
Tips for re-assembly,
1. Keep in mind the slot the motor box tab slides into. Set the box in the chassis just to the right of center with robot facing you. Then slid it into place.
2. Make sure the wheel bushings are fully seated with the notches lined u with the tabs on the axles.
3. LUBE ALL ORINGS. I used jacks magic lube. It seems to work well.
4. Replace the desiccant bag.
5. Once the wheels are on putting the tracks on is like putting a chain on a bike. Get the track completely installed on the rear wheel, then partially install it on the front. with the track partially installed on the front, rotate the front wheel in away from the installed section of track.
That is all there really is to it. The robot only goes together one way and is easy to see when something is not quite right. If you are looking to try to prolong the life of your robot, try rebuilding it.


