Green swamp at opening

Great! :goodjob: So when you get ready to start again, be sure to do the following:
1 - Close ALL 3 suction (yellow) valves before the pump.
2 - On the return side, you should be able to just close the 3-way valve immediately after the SWG. Closing that one valve should isolate everything else after it.

If your system was on today, then your filter is full of water. You can let a little drain out of the bottom drain valve if you wish before opening the MPV. Once you open the MPV, any water above the MPV in the filter will try to come up & out, but that should stop fairly quickly so that you can clean & dry the area and prep it for the new silicone and spider gasket.
 
More questions… we are in and decided this time to open the top of the filter to monitor the water level. I reassessed the sand with a measuring tape and we don’t have near enough. Apparently, the manual calls for the sand to be 6 inches from the top of the filter. It’s actually about 15” down! I still don’t think this is the main problem, as this is the same filter we have been using successfully since fall of 2013. BUT we’ve also never started with a swamp, only a couple of small algae blooms before. Husband is gone to get sand. It is taking water forever to trickle out of the bottom of the filter to get the level of water and the filter below the height we are working. I suppose we will close everything up when we are done with the gasket and open the filter back up tomorrow to add water and more sand.
 
manual calls for the sand to be 6 inches from the top of the filter.
Correct, and it's good you are going to add some. Be sure to cover that exposed elbow opening so that no sand gets in there. I still think the MPV has an issue since water was allowed to pass through it when in the closed position. Attending to both the MPV and low sand issue are good things. :goodjob:

When he gets back, you can open the MPV and just any remaining water pour up & out if you want. Then dry, clean, and replace the gasket, Fingers crossed all goes well over there.
 
More questions… we are in and decided this time to open the top of the filter to monitor the water level. I reassessed the sand with a measuring tape and we don’t have near enough. Apparently, the manual calls for the sand to be 6 inches from the top of the filter. It’s actually about 15” down! I still don’t think this is the main problem, as this is the same filter we have been using successfully since fall of 2013. BUT we’ve also never started with a swamp, only a couple of small algae blooms before. Husband is gone to get sand. It is taking water forever to trickle out of the bottom of the filter to get the level of water and the filter below the height we are working. I suppose we will close everything up when we are done with the gasket and open the filter back up tomorrow to add water and more sand.
After you add the sand and replace the gasket, make sure you backwash and rinse the filter before you put it back into filter mode. Otherwise you risk getting tiny sand particles in your pool.
 
  • Like
Reactions: Mdragger88
After you add the sand and replace the gasket, make sure you backwash and rinse the filter before you put it back into filter mode.
Yes, but on this MPV, let that silicone dry first. :goodjob:
 
More questions… we are in and decided this time to open the top of the filter to monitor the water level. I reassessed the sand and I don’t think we have near enough. Apparently, the manual calls for the sand to be 6 inches from the top of the filter. It’s actually about 15” down! I still don’t think this is the main problem, as this is the same filter we have been using successfully since fall of 2013. Husband is gone to get sand. It is taking water forever to trickle out of the bottom of the filter to get the level of water and the filter below the height we are working. I suppose we will close everything up when we are done with the gasket and open the filter back up tomorrow to add water and more sand.
Correct, and it's good you are going to add some. Be sure to cover that exposed elbow opening so that no sand gets in there. I still think the MPV has an issue since water was allowed to pass through it when in the closed position. Attending to both the MPV and low sand issue are good things. :goodjob:

When he gets back, you can open the MPV and just any remaining water pour up & out if you want. Then dry, clean, and replace the gasket, Fingers crossed all goes well over there.
We are actually wet vacuumed it out bc water was in that elbow pipe. Finally got the old gasket out. Removed the bits of residue, and the new gasket is on. The plan is to put everything back together and let it sit until the morning. At that point, we will open the filter back up and add water so that we can add the sand. We don’t want to do that now because water would flow back in today area where the gasket sits. Sound good?
 
Last edited by a moderator:
do you think nine or 10 AM will give it enough time?
We're splitting hairs, but let's hope so. Ha. I know, only a few hours right?

prayer GIF
 
  • Like
Reactions: Mdragger88

Enjoying this content?

Support TFP with a donation.

Give Support
One last thought as you kick back and relax from the pool work, have you added chlorine lately? I wasn't sure how long your system had been sitting or if you elevated the FC level at all beforehand. But if you have any worries about the FC being low, you can always add some liquid and brush it around for a few minutes.
 
I am so grateful for the help here! I will become a supporter if I finally get this cloudiness gone and hopefully have some $ left in my pool budget, lol. I think I will deep clean the sand again first in the morning before adding new. It’s not clumpy or channeled but it still has tiny bits of debris. That was more evident when I drained the water below the top layer of sand.
 
One last thought as you kick back and relax from the pool work, have you added chlorine lately? I wasn't sure how long your system had been sitting or if you elevated the FC level at all beforehand. But if you have any worries about the FC being low, you can always add some liquid and brush it around for a few minutes.
My SECOND refill of test reagent arrived today if that answers your question! I can pour 10 mL almost perfectly my first try after almost 3 weeks of this. 🤣 I tested an hour before we cut the filter off and added enough chlorine to bump it up to 16 and let it mix around which is plenty to get me through the rest of the day and until I get things circulating and I can test again tomorrow.
 
Yeah…skip forward to about 7:25…”these laterals don’t lift out so I’m just going to look from here and they look fine” 🤣🤣 I may replace the sand though. Mine feels super fine and has still a lot of other tiny junk in it despite 45 minutes + of deep cleaning.
 
  • Like
Reactions: Shapshftr
Mine feels super fine and has still a lot of other tiny junk in it despite 45 minutes + of deep cleaning.
Certainly your call based on the feel and texture of the sand. While we at TFP don't believe sand "wears out", your sand was installed and used by previous owners several years ago. No telling what was added over those years. You've never had issues before, but with everything you have done as of late it may be reassuring. Be sure to get #20 silica (0.45 - 0.55 mm) pool sand. Never play sand. Seems like a no-brainer, but you would be surprised. :hammer:

 
This is weird, conflicting info in manuals:
tThis one says on page 3, 4. d. To fill the sand halfway

This one says on page 4, 4. D. To fill it within 6 inches from the top of the filter

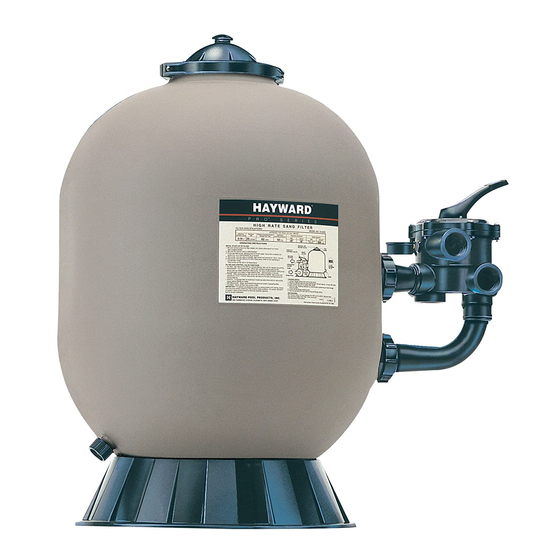
Both supposedly for my model Hayward s244sv
Those are huge differences. Mine is probably slightly over halfway now. The odd thing is that the top of the elbow pipe is more than 6“ from the top. I wouldn’t even be able to fill it within 6“ from the top without covering the top of that pipe, and then I obviously would not be able to uncover it and put the diffuser back on because It would be covered with sand. I guess I will just fill it a little below the top of the elbow pipe which would be maybe 10-11 inches from the top of the filter. Tape measure is resting on the top of the elbow pipe.
 

Attachments

  • 510E8DF7-D0F1-4E0B-A6E4-4F7169A86916.jpeg
    510E8DF7-D0F1-4E0B-A6E4-4F7169A86916.jpeg
    270 KB · Views: 6
There is always an exception to the rule, but I saw a good recommendation recently to fill to the edge where the vertical wall becomes the rounded top.

How would that line up with yours ?


Screenshot_20230416_103534_Chrome.jpg
 
This is weird, conflicting info in manuals:
tThis one says on page 3, 4. d. To fill the sand halfway

This one says on page 4, 4. D. To fill it within 6 inches from the top of the filter

Both supposedly for my model Hayward s244sv
Those are huge differences. Mine is probably slightly over halfway now. The odd thing is that the top of the elbow pipe is more than 6“ from the top. I wouldn’t even be able to fill it within 6“ from the top without covering the top of that pipe, and then I obviously would not be able to uncover it and put the diffuser back on because It would be covered with sand. I guess I will just fill it a little below the top of the elbow pipe which would be maybe 10-11 inches from the top of the filter. Tape measure is resting on the top of the elbow pipe.
Here is a picture of the label of my Hayward filter. Notice the section of filter media where it lists media required and LBS. My filter needs 300 pounds of sand. If our going to replace all the sand anyway, just add what the label says and the MM for the sand type. The manuals for these Haywards always seem to be for a couple of variations of model numbers that might need different amounts of sand. It’s the label on the filter itself you should use.
 

Attachments

  • D44A986E-862D-4BF4-A548-72DD74B873AE.jpeg
    D44A986E-862D-4BF4-A548-72DD74B873AE.jpeg
    638.2 KB · Views: 8
  • Like
Reactions: WhitB08
There is always an exception to the rule, but I saw a good recommendation recently to fill to the edge where the vertical wall becomes the rounded top.

How would that line up with yours ?


View attachment 483171
That looks approximately where I’m planning on filling it- Just below the top of that interior elbow pipe. I guess that’s about 3/4 of the way up which is in between the recommendations that both of the manufacturer manuals recommend, whatever sense that makes…🤔
 

Enjoying this content?

Support TFP with a donation.

Give Support
Thread Status
Hello , This thread has been inactive for over 60 days. New postings here are unlikely to be seen or responded to by other members. For better visibility, consider Starting A New Thread.