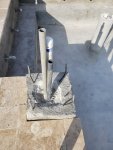
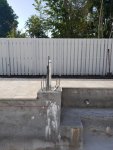
South Florida - New In-ground Large Build

@MyAZPool
We haven't talked ALL DAY!!!!! I am having separation anxiety!!!!!! LOL
:laughblue: Too funny! Yea, just got done finishing up something else and just sat down at the computer. Was wondering what your thoughts/comments were about the info I wrote about in post#298.
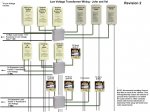
I need to finish up REV2 of the Low Voltage Transformer Wiring Diagram and the Conduit Layout, now that you have provided that additional information.
r.
 
  • Like
Reactions: chemillion
Dual Heater Relay...........Nobody has mentioned that to me. But you seem right that i need it.
Don't you mean Heat Pump and not Master Temp?
I was thinking the Solar Hook up is working in conjunction with the Ultra temp. and then when it cant keep up - it switches to the master temp???


That was your original thinking, right?

RS-485's - dont we need one for the master temp also? And another good catch because no one has mentioned the expansion card to me. I will start researching that.
interesting though....in you post of the com ports, it says "multiple wires can be inserted into a single terminal - does that mean we can piggy back????
The expansion card is the best option though.
Especially with the update to control intellivalves!!! Ughhhh!!!!!!! it never ends!!!!!

Still Studying!
 
John_and_Val
Dual Heater Relay...........Nobody has mentioned that to me. But you seem right that i need it.
Don't you mean Heat Pump and not Master Temp?
I was thinking the Solar Hook up is working in conjunction with the Ultra temp. and then when it cant keep up - it switches to the master temp???
That was your original thinking, right?
My typing fingers got ahead of my brain. Yep, corrected. ;)

RS-485's - dont we need one for the master temp also? And another good catch because no one has mentioned the expansion card to me. I will start researching that.
interesting though....in you post of the com ports, it says "multiple wires can be inserted into a single terminal - does that mean we can piggy back????
Correct. You can have more than one RS-485 connected device connected to the RS-485 terminals. Some even connect several devices together to one pigtail and connect the pigtail to the RS-485 connector(s). I should have stated that and meant to, just forgot. Makes things really confusing and difficult if you ever have to troubleshoot though and not near as clean an install. But like I said, you will need the Serial Com Expansion Board in the near future anyway to get the FULL advantage of the IntelliValves. I will send you REV3 of the Equip Pad Plumbing Diagram. It lists seven IntelliValves for your setup. If that holds into actual setup, and you want FULL control over all seven, then you will need two Serial Com Expansion Boards (since you can only connect six IntelliValves per board.

The expansion card is the best option though.
In my honest opinion, I couldn't agree more. Much cleaner. Especially with that "Above and beyond" Pool and Equipment setup, you got going. :p
I wanted to send you something that I thought would be helpful. Not sure if you got your inbox setup or not. Anyway, let me know on that.
I'm working on some of your diagrams now.
r.
 
John_and_Val
Per our discussion, that information contained in the UltraTemp manual regarding the setup of the two heaters appears to be somewhat "dated" I'm informed, with regards to IntelliCenter automation. (I wish Pentair would revise or update their documentation, doggone it :ROFLMAO:).
Anyway, here is some updated information with regards to the heaters setup.
1. Forget about the Dual Heater Relay Kit (old info with regards to IntelliCenter).​
2. Connect Pin 2 (Green) and 3 (Yellow) on the J8 connector on the UltraTemp to the same pins on one of your RS-485 connectors on a Serial Com Expansion Board.​
3. Connect the Mastertemp to the 2-wire Gas Heater connection on the IntelliCenter mother card (J2).​
4. Turn Heat Pump on.​
5. Press MENU SELECT on Heat Pump Control Panel repeatedly until the Relay Remote screen is displayed.​
6. Once displayed, press the UP or DOWN arrows to toggle to REMOTE ON/OFF​
7. Wait a few seconds and screen will return to main menu.​

Also connect a temperature sensor probe to the 2-wire SOLAR connector (J15) on the Mother Card. The sensor will not be installed anywhere. It can hang behind the Mother Card or inside of the enclosure Low Voltage Raceway (shorten up the cable length). Just don't let it find it's way into the Line Voltage area.:eek:

Okay cool. We got that. On to revised diagrams I guess. :)

Here is the latest revision (REV3) on the Equipment Pad Plumbing based on our exchanges

2019-03-28_18-01-00.jpg


Based on the latest information from your City Inspector, here is REV2 of the Low Voltage Transformer Wiring Diagram
2019-03-28_18-17-09.jpg


Again, based on the latest information from your City Inspector, here is REV2 of the Conduit Enclosure Layout Diagram.
2019-03-28_18-21-22.jpg


I'm thinking this additional information should get you a bit further down the road. Let me know what I can do to help with "what's next". ;)
r.
 
Last edited:
@MyAZPool
In regards to the NEMA 3r boxes - they are metal.....so not only should a put a ground bus bar in them to lessen the wires in conduit......

I need to have the equipontential bonding wire run to them also, right?
I agree, if they are metal, then they should be bonded. That is why for mine, I used the thick plastic ones. One less "bullet-to-dodge" :)
r.
 
  • Like
Reactions: chemillion
:laughblue:Oh my gosh Kim. Stop lol. It's no big deal at all. Besides, we still got to get all of the conduit, wiring specs, etc, past a licensed electrician and the city inspector. Once "electrons" are flowing through all of this wiring and everything works, then John can have a :cheers: for you and all the rest that have assisted him, using that unreal beer dispenser of his.
Thanks Kim!!!!!
r.
 
  • Like
Reactions: chemillion

Enjoying this content?

Support TFP with a donation.

Give Support
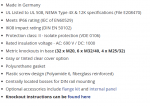
@MyAZPool - What do you think about 3 of these?
They measure 14" x 10" x 4"
John_and_Val
Yea, wow. Those look pretty nice. Good specs and nice optional accessories.
Made in Germany usually = Quality.
I don't think the inspector will have a problem with those.
Should be large enough for all of the wiring that you need to get in there?
I like em!
r.
 
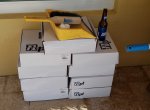
Stripped the forms of the equipment pad today.....and decided I would like to put the leftover travertine i have on it. I think that will give it a custom look.

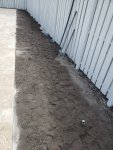
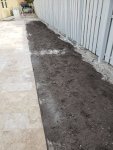
Also had 10 yards of topsoil delivered for the landscape beds. I wanted to start getting a base down so my sand for the travertine doesn't start washing away. So I got some wheelbarrowing to do on Sunday!

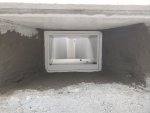
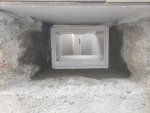
Chipped out all the "going to bleed" exposed rebar at the skimmers. Lesson learned to all owner/builder - the "throats" of skimmers are cut in by the gunite guys at a 45 degree angle - therefore plan accordingly with your steel. Otherwise you have to do what I did and chip out a bunch of concrete, cut the steel, paint it, and then hydraulic cement it. While i was at it, i hydraulic cemented all around the skimmers to hopefully prevent any leaks in this area.

Monday, my guy is coming to pick up all the travertine on the bond beam and mud them in. Also - he will prep for waterline tile and step markers...............View attachment 96008View attachment 96008View attachment 96008View attachment 96009View attachment 96010View attachment 96011View attachment 96012View attachment 96013
 
  • Like
Reactions: chemillion
Live and learn for sure.............as well as hope you never have to do this again!!!

You know it will be interesting to see what the inspector has to say about the plans for the electric. I hope you pick his brain to see what he is thinking as he looks at it.

Kim:kim:
 
  • Like
Reactions: MyAZPool
You know it will be interesting to see what the inspector has to say about the plans for the electric. I hope you pick his brain to see what he is thinking as he looks at it.
Kim:kim:
:cool: He'll say - "Who was the maniac who came up this plan? Lock that guy up and throw away the key". Remember I'm "anonymous" :laughblue:
r.
 
Well....long day today.
Moved that big pile of dirt by wheelbarrow - 10 yards worth. But at least now when it rains, the water won't eat at my border...........I hope. I know I need to get trees in and rock to finish it off and prevent wash out.
Tomorrow my guy will pick up all the pieces laying on the bond beam and set them in mud - then the next couple of days are waterline tile, step markers.

@MyAZPool - heater and transformers should be in April 4th
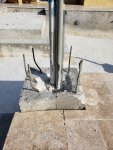
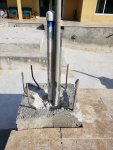
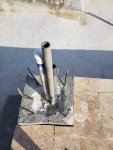
@bdavis466 can you give some input on the following about fire/water bowls, please:
While he is doing that I need to form up the fire/water bowl pedestals at about 2" thick walls so we have a void in the middle to put key valve and piping. Then he can face the pedestal with tile. Taking a gamble on this as I do not have the bowls yet and information from company is not reliable. I have a 1.5" water pipe, 1" conduit for electric, and 1" conduit for a sleeve for a 1/2" propane line (which will come from a 2psi regulator in the landscape bed.. All that and a key valve need to fit in my void of the pedestals. I am going to have about a 12 x 12" void before the "cap" and then the 13" High fire bowl. Total Height - finished product is about 33" from water line. Do you think that is good? Do you think there is enough room inside to fit everything? Cosmetically, height of bowls good? Noise? I attached a pics of what i got now.
These are the things that I did not plan for!!!!! Because they looked so good on paper, now i have to make it a reality.
I hope you can provide some input!
 

Attachments

  • 20190331_164041.jpg
    20190331_164041.jpg
    804.8 KB · Views: 38
  • 20190331_164058.jpg
    20190331_164058.jpg
    824.4 KB · Views: 42
  • 20190331_173718.jpg
    20190331_173718.jpg
    827.1 KB · Views: 42
  • 20190331_173721.jpg
    20190331_173721.jpg
    787.9 KB · Views: 42
  • 20190331_173725.jpg
    20190331_173725.jpg
    779.3 KB · Views: 42
  • 20190331_173732.jpg
    20190331_173732.jpg
    721.1 KB · Views: 42
  • 20190331_173749.jpg
    20190331_173749.jpg
    687.6 KB · Views: 40
  • Like
Reactions: chemillion

Enjoying this content?

Support TFP with a donation.

Give Support
Thread Status
Hello , This thread has been inactive for over 60 days. New postings here are unlikely to be seen or responded to by other members. For better visibility, consider Starting A New Thread.