
New Build in Surprise, AZ!!
- Thread starter dice7074
- Start date
You are using an out of date browser. It may not display this or other websites correctly.
You should upgrade or use an alternative browser.
You should upgrade or use an alternative browser.

Welcome to TFP!!  I think pools are required in Arizona, right?!! You're going to love it!
Are you planning to manage your water yourself? If you haven't owned a pool before, you've come to the right place!! There is no prettier, cleaner water than pool water maintained the TFP way! And everyone helps you learn.
Now, more pictures please!!!
Suz
I think pools are required in Arizona, right?!! You're going to love it! Are you planning to manage your water yourself? If you haven't owned a pool before, you've come to the right place!! There is no prettier, cleaner water than pool water maintained the TFP way! And everyone helps you learn.
Now, more pictures please!!!
Suz
Hi Suz and thanks for the warm welcome!! We bought and sold a fixer-upper with a pool in California, and we just had a "pool guy" come out and maintain it for us. After looking at these beautiful pictures, I'm definitely thinking about it. I think with TFP, I can do a better job of making our pool look pretty!!
I'm trying to get more pictures up, but I guess I met my quota...
I'm trying to get more pictures up, but I guess I met my quota...
PICTURES PLEASE! :angel:
Use photobucket using the IMG tag and you can have the pics right in your post.
Kim
Use photobucket using the IMG tag and you can have the pics right in your post.
Kim


I LOVE your tile! It's perfect with your decking! I can't wait to see it with your water color.
At least owning a pool puts you ahead of me when I started! It was still easy after a few weeks unfer my belt, but I bet you'll get the hang of it even faster. I was just trying to learn the parts of a pool and identifying the equipment! (skimmer? Is that a short skirt or a good skipping stone?)
Thanks for the pictures! You can't post too many - all angles, close ups, distance shots, birds eye views!
So what's next? Is your equipment pad finished? Do you have any questions about the next part of your build?
Now is a great time to begin Pool School at the top of this page. Let us know if you have any questions!
I LOVE 1x2 tiles! Those will go great with your plaster!
I have some links for you. They are a set I put together for new pool owners.It is a lot of info so take it slow. It will all start to make sense when you start using it!
Print these out:
Pool School - Basic Pool Care Schedule
Pool School - Recommended Levels
Bookmark these:
Pool School - Recommended Pool Chemicals
http://www.troublefreepool.com/calc.html
Pool School - ABCs of Pool Water Chemistry
Make sure to ask any and all questions you might have no matter how small! We have all been where you are at one point.
This is also when I ask what test kit will your PB will be giving you. Let us know so we can fill in any holes.
Kim
Thanks Suz & KK!! Phewhh... So much information!! I just glossed over Pool School chemistry and that's good stuff to know... I'm definitely going to give maintaining it myself a try! 
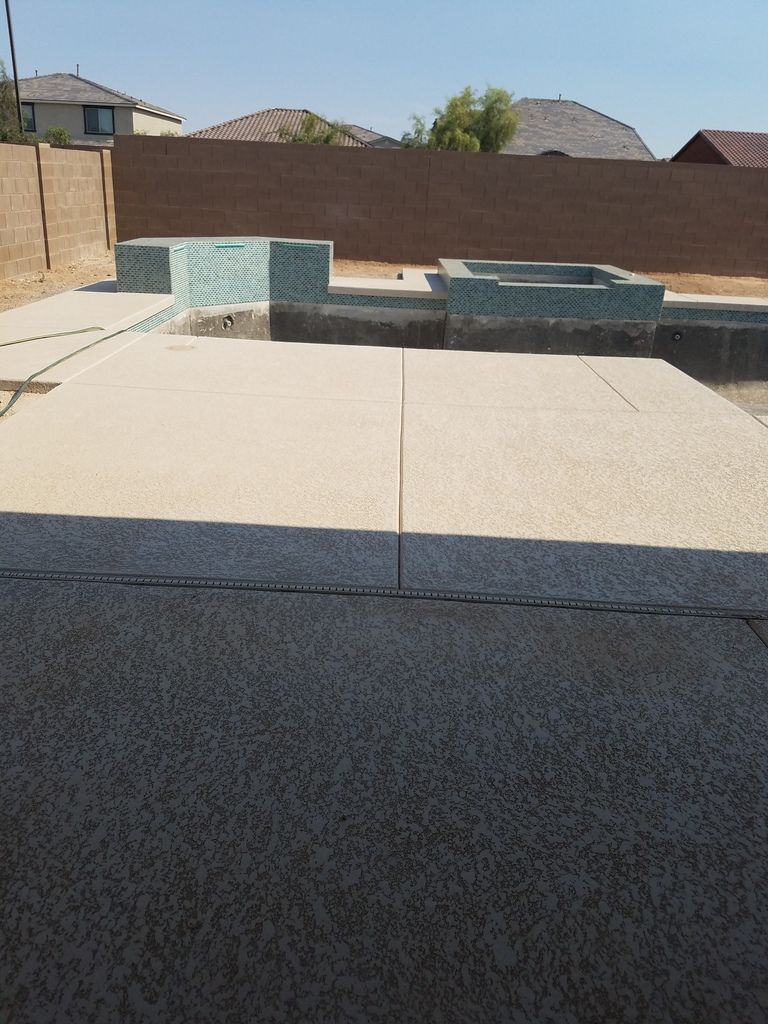
PB built the wall around the equipment last week. I'm scratching my head because I thought the concrete underneath all the pumps was supposed to be more substantial than it is... Right now, the pad is completely covered in dirt, so you'd never even know there's concrete there. Any suggestions for landscaping around this (and my yard!! ) would be greatly appreciated!
So, I do have questions regarding the tile application around my pool and water feature wall. It just seems like the subs could have done a better job applying some of them... but I don't know if I'm just being picky.
I'll post pictures in a bit, but it'll pic heavy. :silent:
PB built the wall around the equipment last week. I'm scratching my head because I thought the concrete underneath all the pumps was supposed to be more substantial than it is... Right now, the pad is completely covered in dirt, so you'd never even know there's concrete there. Any suggestions for landscaping around this (and my yard!!
) would be greatly appreciated!So, I do have questions regarding the tile application around my pool and water feature wall. It just seems like the subs could have done a better job applying some of them... but I don't know if I'm just being picky.
I'll post pictures in a bit, but it'll pic heavy. :silent:
Suz! They said we could spend more of their money on landscaping!! SWEET!
Share you pics so we can get started! I will call in the others as well!
Sooooo..........where are the pics??? hummmmmmmmmm LOL
Yeah that is a LOT of info. Giving it to you know will give you time to take a bite at a time and see what is what. Plus we are right here to help you out every step of the way. Once you start doing it you will LOVE it!
Kim
elwood58
LifeTime Supporter
Welcome. Great pool design. We are in Sun City West, and started up our third Pool on 6/7/17. Send me a PM if you need help after startup.
- Jun 7, 2017
- 9,284
- Pool Size
- 29000
- Surface
- Plaster
- Chlorine
- Salt Water Generator
- SWG Type
- Jandy Aquapure 1400
Thank you everyone!!
elwood58 it's nice to know you're so close!! Congrats on your pool. It's beautiful and just in time for this 120 degree weather we're having!!
elwood58 it's nice to know you're so close!! Congrats on your pool. It's beautiful and just in time for this 120 degree weather we're having!!
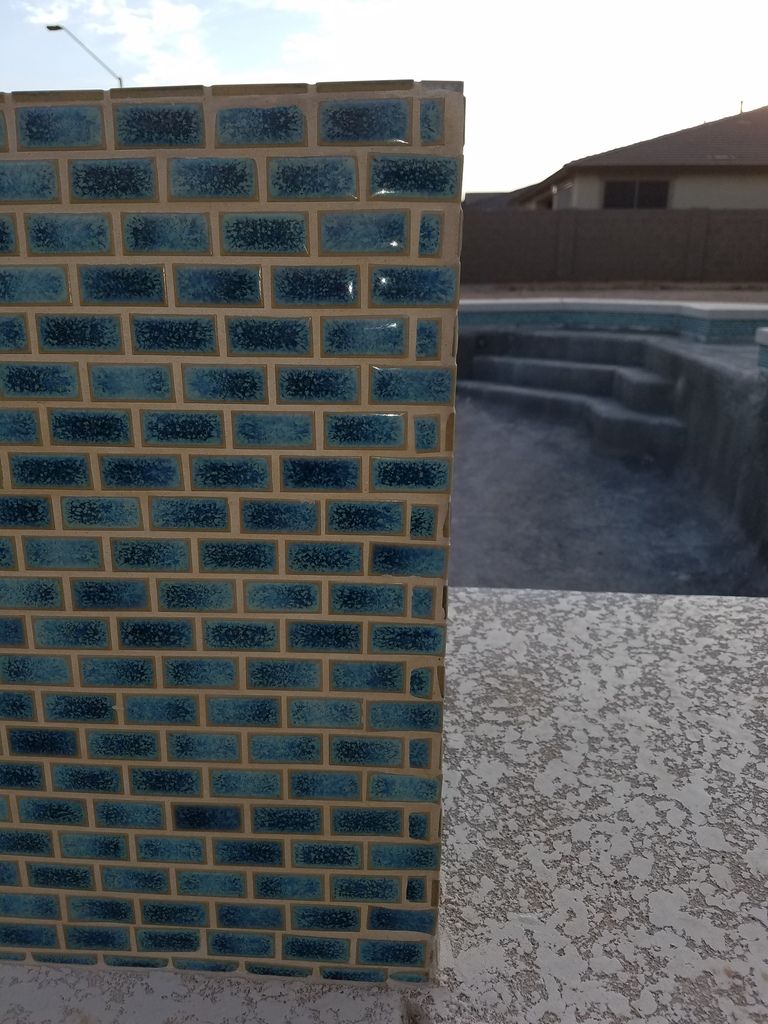
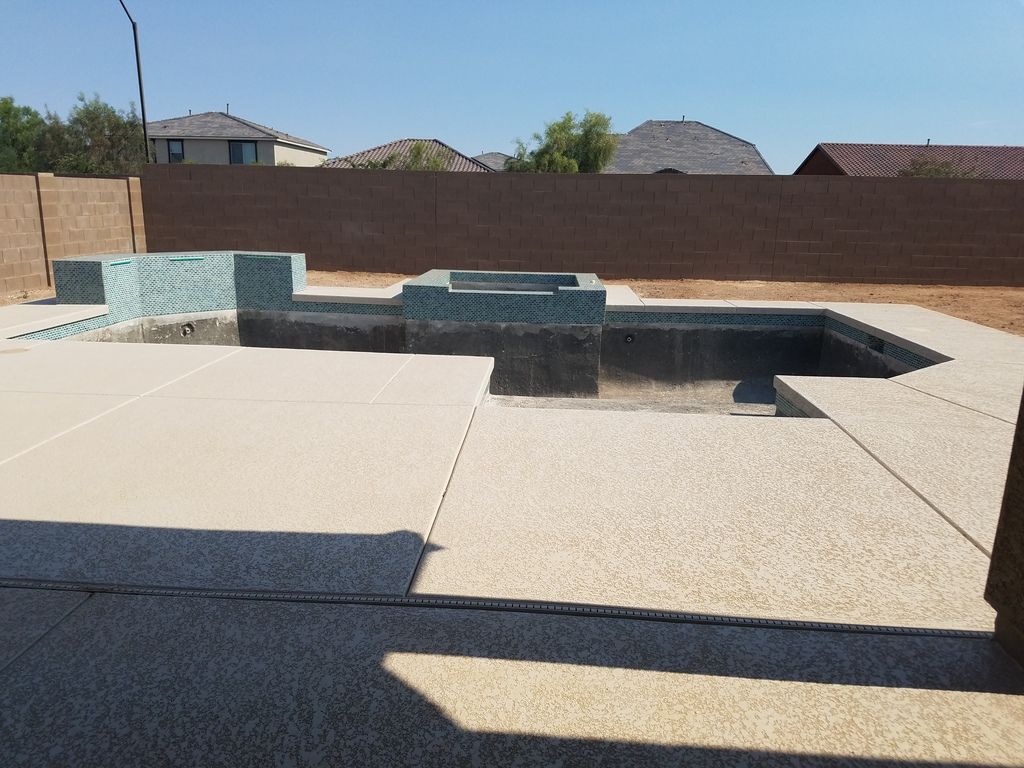
This is pic heavy, but here are the pictures of the tile work I was talking about...
I can live with this...
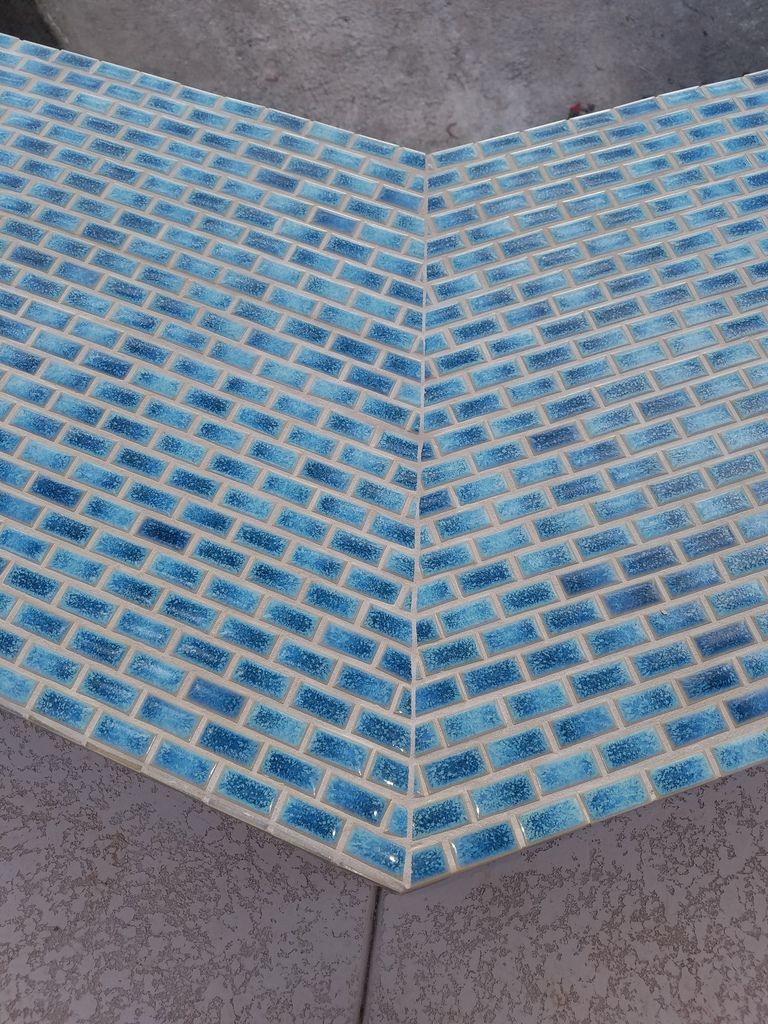
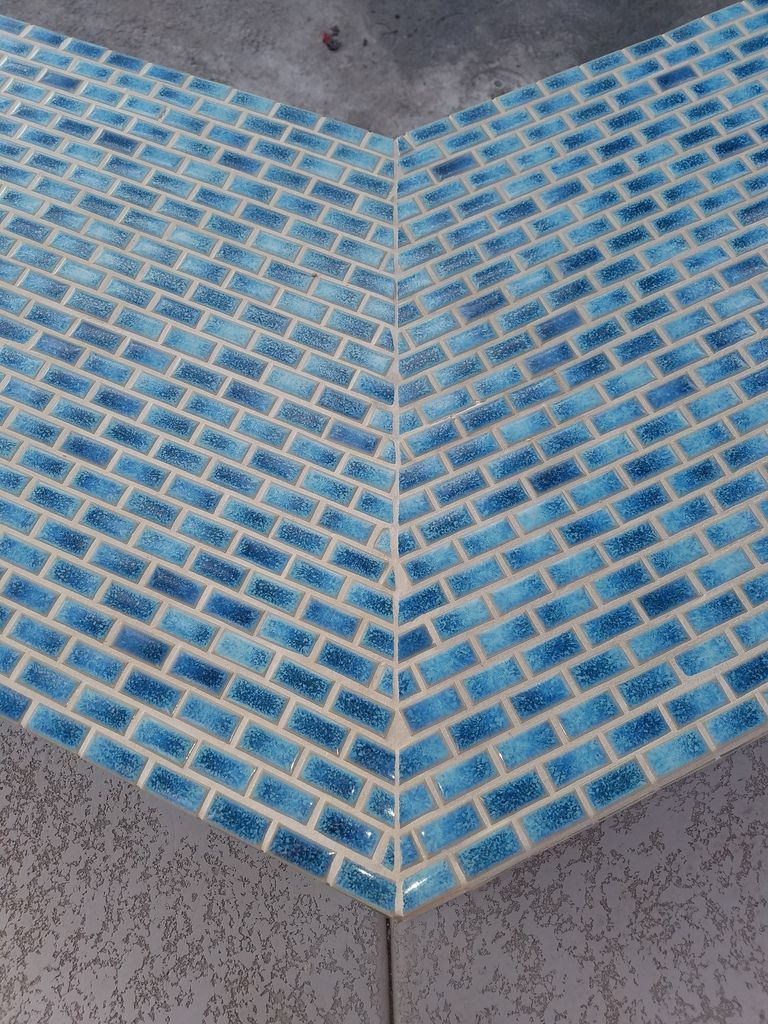
But some of the attention to detail tapered off on most of the other angles and corners where they had to cut and singly apply the tiles...
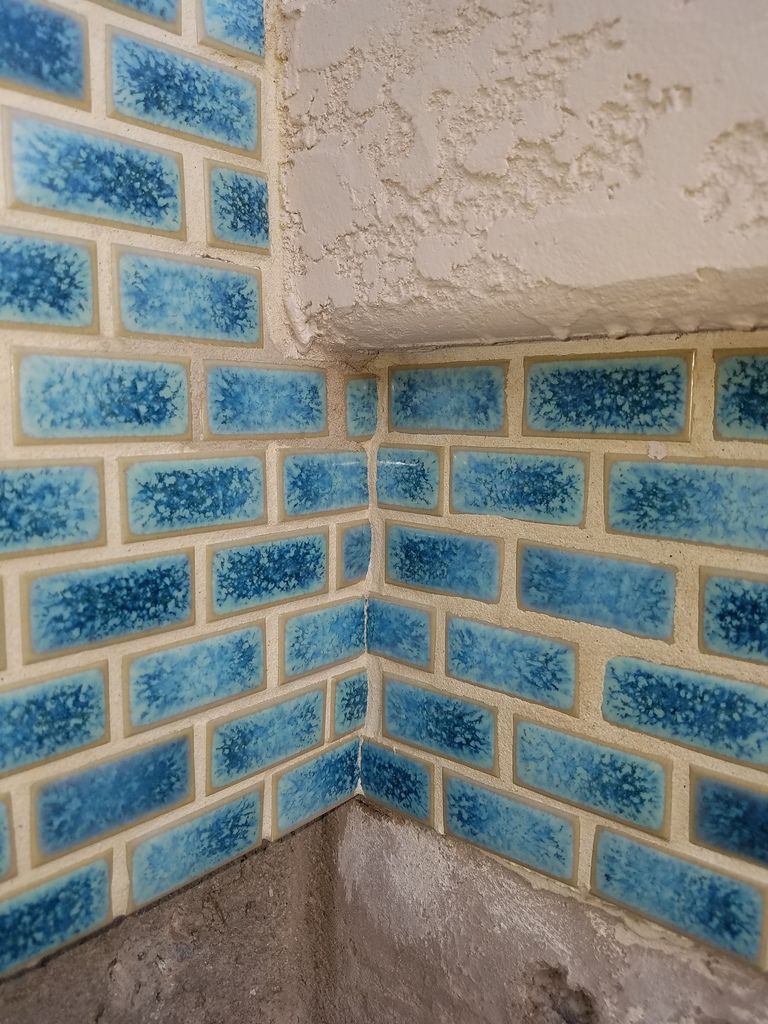

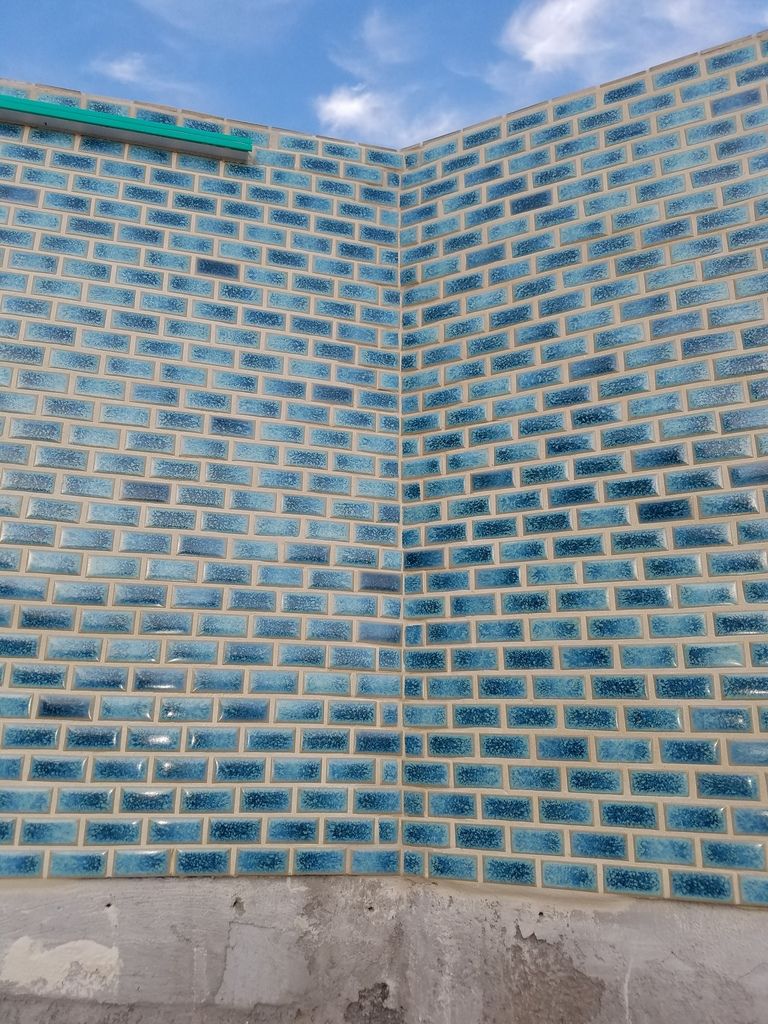
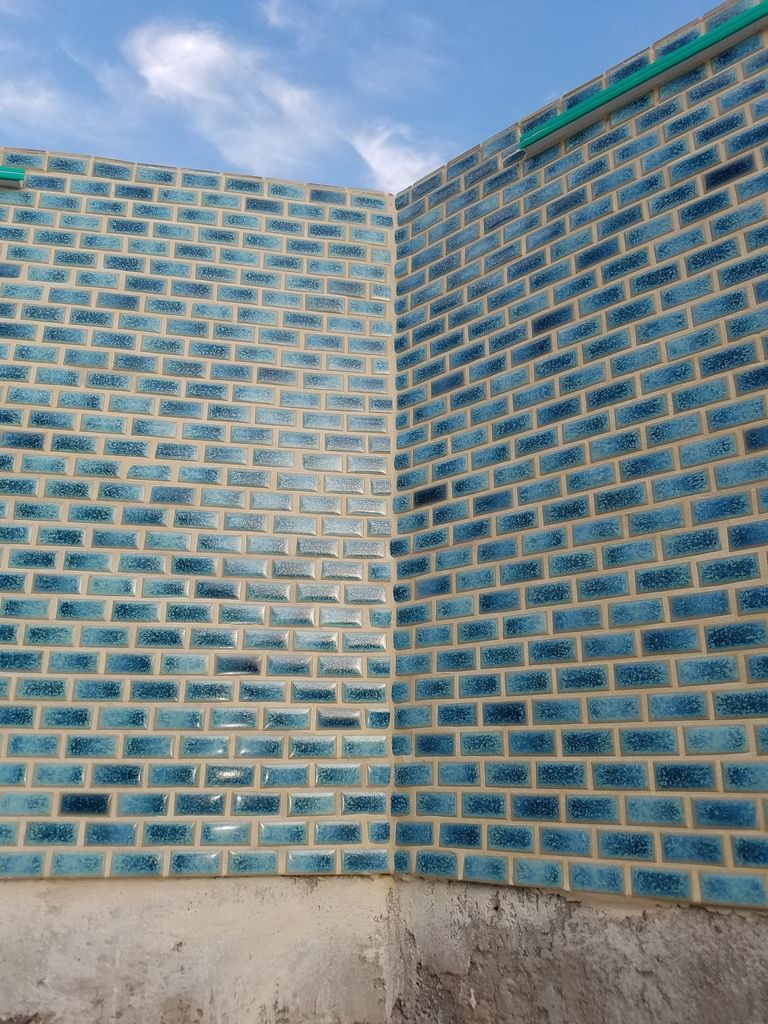
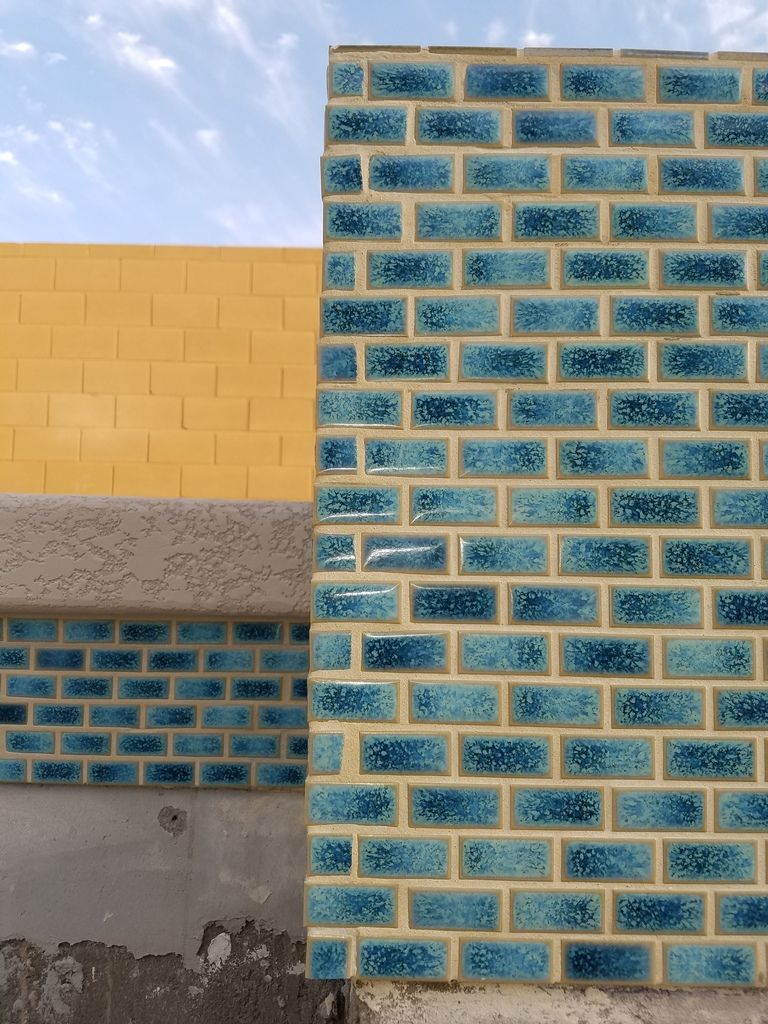
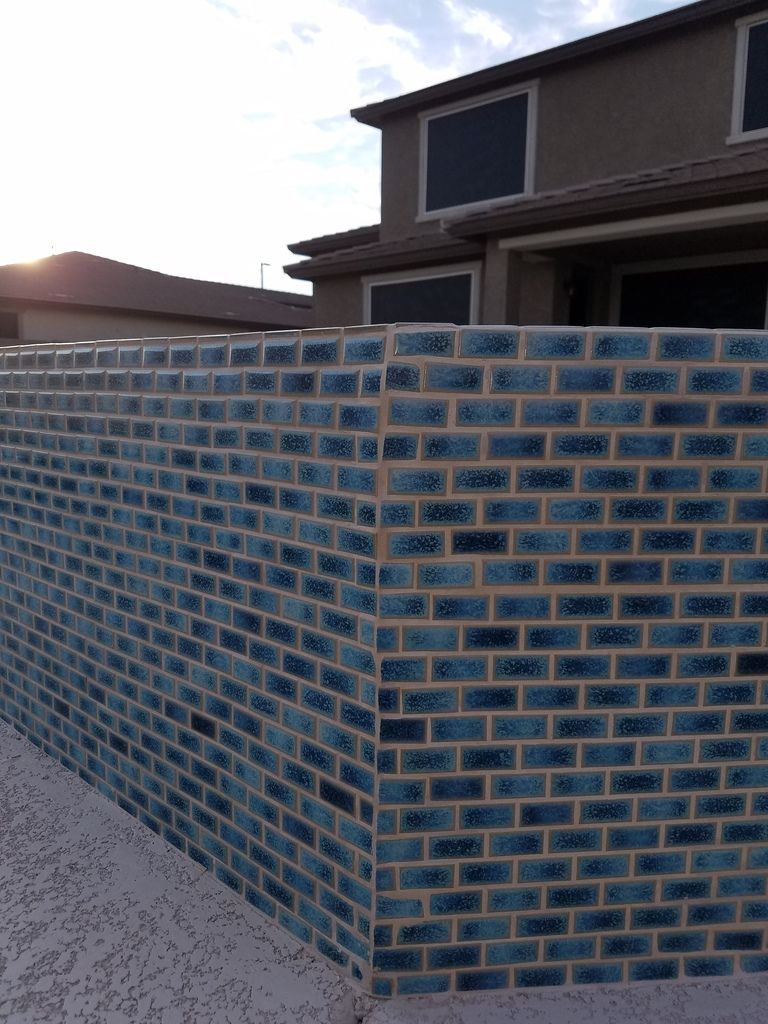
In this last one, underneath the top two center tiles was a gaping hole in the shotcrete... like they busted it while doing the surrounding tilework... because the hole wasn't there when the shotcrete went in. I wasn't home when they tiled over it, but I thought they would be wise enough to at least fill it, but you can tell they just used a thick set of mortar, that unfortunately didn't do the job.
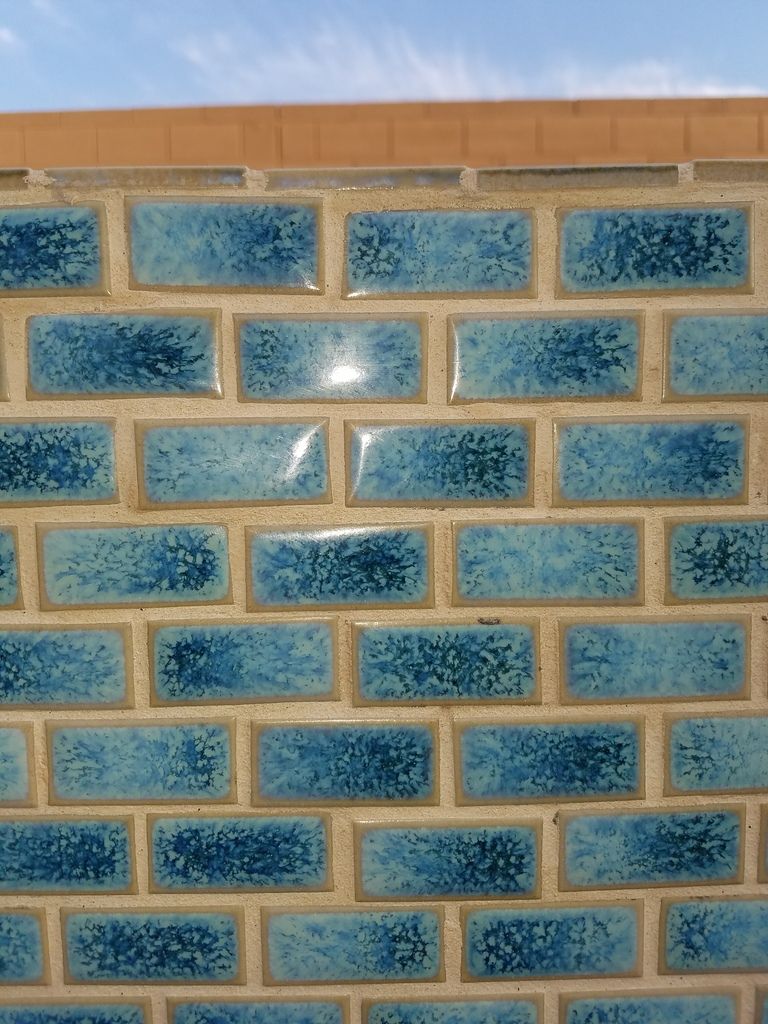
So am I being picky? Or is some of this work subpar?
I can live with this...

But some of the attention to detail tapered off on most of the other angles and corners where they had to cut and singly apply the tiles...


In this last one, underneath the top two center tiles was a gaping hole in the shotcrete... like they busted it while doing the surrounding tilework... because the hole wasn't there when the shotcrete went in. I wasn't home when they tiled over it, but I thought they would be wise enough to at least fill it, but you can tell they just used a thick set of mortar, that unfortunately didn't do the job.

So am I being picky? Or is some of this work subpar?
It's so hard for me to comment about it being subpar, because when I look at the whole picture, it just looks stunning to me, and it's not even glass tile (I don't think....)! If I'm required to look very closely at the close ups and required to be picky, then I do see some things. On some pictures (# them next time), it looks like some sections were done by different guys with different styles. For instance in one inner corner seam, the tiles are trimmed along a line (somewhat) on each side of the midline of the seam. On another inner corner seam, the tiles on every other row cross the midline to the left, and then to the right on the alternate rows. Wish I could draw on the pictures, but I don't think I can. Neither looks bad to me, just different ways of handling an inner corner seam.
Picture #1 top - looks beautiful to me (but I don't install tile) A+
#2 - looks very good to me A
#3 - looks like two rows (4 tiles) should have been trimmed a hair; if it's waterline tile, it won't show. B+
#4 - grout work looks a little dirty and different widths in the seam; if it's waterline and inside corner, shouldn't show B
#5 - awwwww, I have a little tile just like that, and it's my favorite! (Kim, do you remember it?) Gotta love the lonely little crooked tile. When the Amish made quilts, they purposely made a flaw in it, because they believe only God can create something perfect. (something like that). Maybe your tile guy is Amish...... Anyway, it always helps be get over boo-boos. (no grade here, don't want to hurt the little fella's feelings)
#6 - (by one sheer showing) Well, not the straghtest of midlines, but at a glance, it all blends. (shhhhh, be sure you don't point it out to friends) B
#7 - (between 2 sheers showing) See my explanation in paragraph above A-
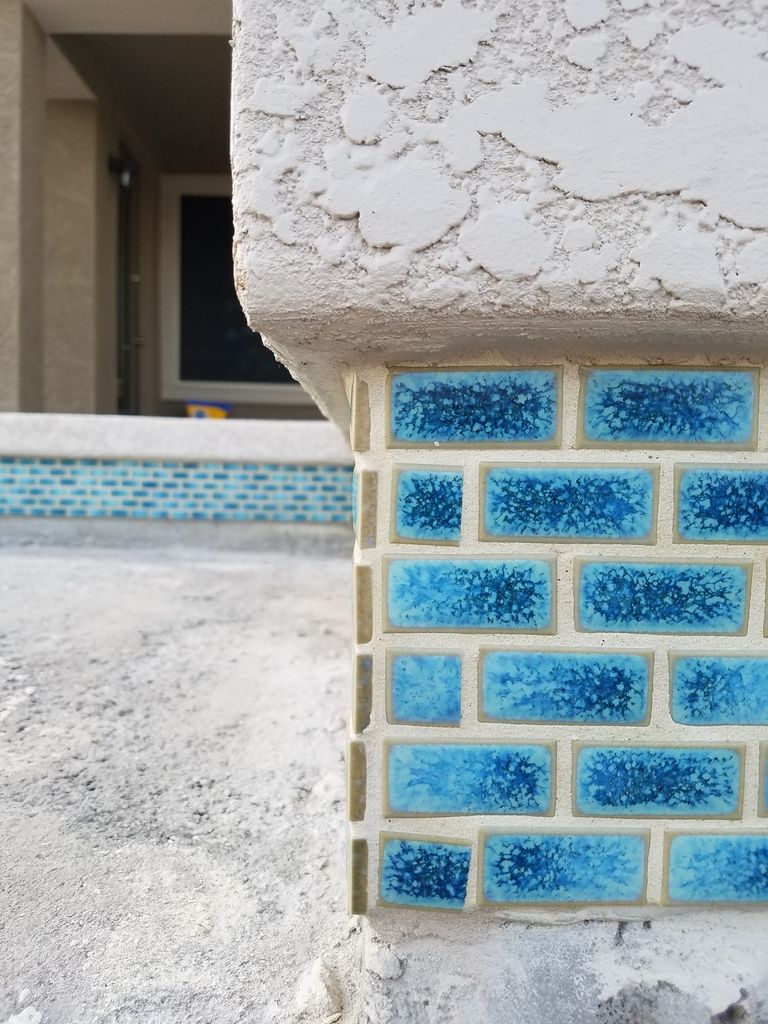
#8 - outside edge; If I had to pick, the top 3 grout lines are a little wide. Other than than..... I've had to line up a vertically patterned wallpaper on an edge that didn't nearly as good. B
#9 -Not sure here unless the left edge isn't as straight along the upper third or so. I'm not sure I would have noticed if I weren't trying or it weren't highlighted by the golden wall behind it. A-
#10 - 4 vertical grout lines on the outside edge going top - down are too wide. Is this in a focal spot where it is easily seen? Looking at the individual tiles, I'm not sure a fix would look better. Is that top part of the seam leaning to the right a bit in the picture? I'm not sure if it's an optical illusion. B-
#11 - I'd want to try to check if the hole was filled in or not. Maybe someone here can tell you how to tell. I know sometimes tapping and listening for a hollow place is one way, but you don't want to damage the tiles.
Are you too picky?? I don't think anyone can say. We all have different tolerances in our expectations. So many variables..... sight (like in near-sighted, etc), past experience (did you lay tile for work), where is the flaw located (obvious, not), how does it look when not scrutinizing, do flaws drive you crazy (hey, we all have our 'thing', don't we?)
Decide what you can live with and what you can't. (oh, never was I trying to make light of anything - it's just I'm not comfortable giving negative criticism - that's one of MY many things, Lol!!)
Picture #1 top - looks beautiful to me (but I don't install tile) A+
#2 - looks very good to me A
#3 - looks like two rows (4 tiles) should have been trimmed a hair; if it's waterline tile, it won't show. B+
#4 - grout work looks a little dirty and different widths in the seam; if it's waterline and inside corner, shouldn't show B
#5 - awwwww, I have a little tile just like that, and it's my favorite! (Kim, do you remember it?) Gotta love the lonely little crooked tile. When the Amish made quilts, they purposely made a flaw in it, because they believe only God can create something perfect. (something like that). Maybe your tile guy is Amish...... Anyway, it always helps be get over boo-boos. (no grade here, don't want to hurt the little fella's feelings)
#6 - (by one sheer showing) Well, not the straghtest of midlines, but at a glance, it all blends. (shhhhh, be sure you don't point it out to friends) B
#7 - (between 2 sheers showing) See my explanation in paragraph above A-
#8 - outside edge; If I had to pick, the top 3 grout lines are a little wide. Other than than..... I've had to line up a vertically patterned wallpaper on an edge that didn't nearly as good. B
#9 -Not sure here unless the left edge isn't as straight along the upper third or so. I'm not sure I would have noticed if I weren't trying or it weren't highlighted by the golden wall behind it. A-
#10 - 4 vertical grout lines on the outside edge going top - down are too wide. Is this in a focal spot where it is easily seen? Looking at the individual tiles, I'm not sure a fix would look better. Is that top part of the seam leaning to the right a bit in the picture? I'm not sure if it's an optical illusion. B-
#11 - I'd want to try to check if the hole was filled in or not. Maybe someone here can tell you how to tell. I know sometimes tapping and listening for a hollow place is one way, but you don't want to damage the tiles.
Are you too picky?? I don't think anyone can say. We all have different tolerances in our expectations. So many variables..... sight (like in near-sighted, etc), past experience (did you lay tile for work), where is the flaw located (obvious, not), how does it look when not scrutinizing, do flaws drive you crazy (hey, we all have our 'thing', don't we?)
Decide what you can live with and what you can't. (oh, never was I trying to make light of anything - it's just I'm not comfortable giving negative criticism - that's one of MY many things, Lol!!)
Thanks Suz... the tiles are porcelain, not glass... but they were so new to Noble Tile (they had just come in the week we went in to look at our options), that our PB couldn't get a good contractor discount on them... not that they were too expensive, but some of the other options we had in mind went from $7/sq. ft. to $3/sq. ft. These tiles only came down from $8 to $7.80. PB specified them as upgraded because they're 1x2 in. tiles rather than the standard 3 or 6 in.
Yeah... I just got off the phone with my husband (he works in Alaska and only comes home once every 2-3 months for 7-10 days) and he said we're definitely going to make them reapply at least some of them... He stressed that we paid for upgraded tiles and PB tacked on to the price of the tilework because of it, so we should get what we paid for... Any tiles that they don't replace, I'll just make my husband does it himself!! :bball: :slidehalo:
Yeah... I just got off the phone with my husband (he works in Alaska and only comes home once every 2-3 months for 7-10 days) and he said we're definitely going to make them reapply at least some of them... He stressed that we paid for upgraded tiles and PB tacked on to the price of the tilework because of it, so we should get what we paid for... Any tiles that they don't replace, I'll just make my husband does it himself!! :bball: :slidehalo:
So as KK asked... Seek and you shall find!!
My backyard!!
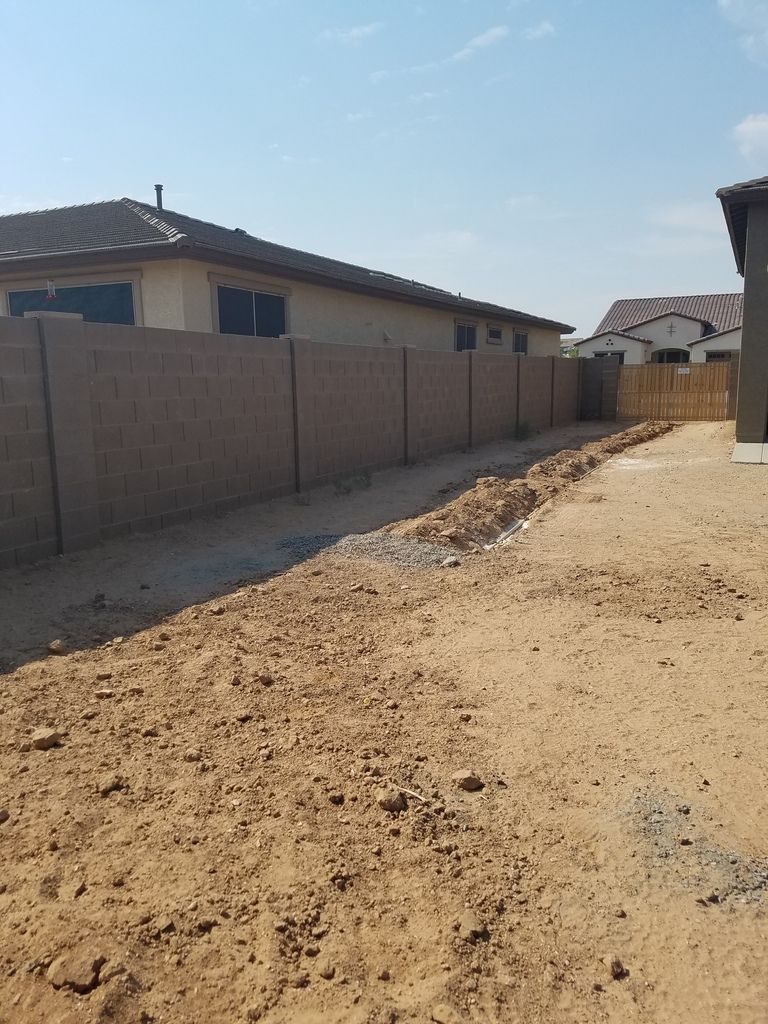
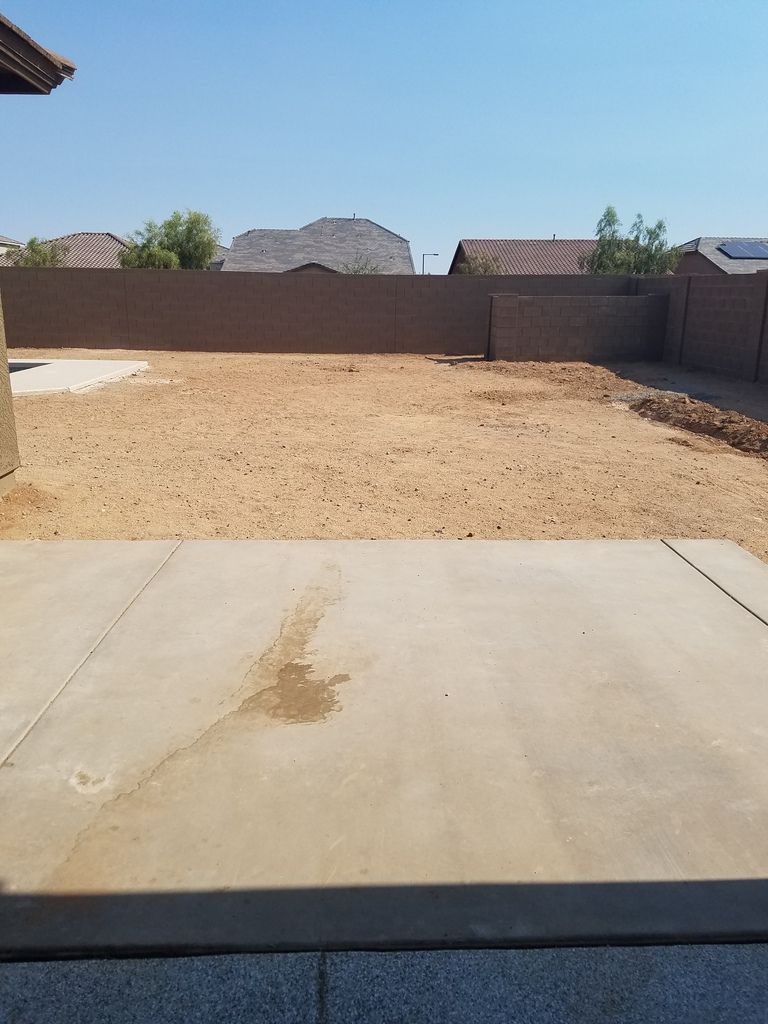
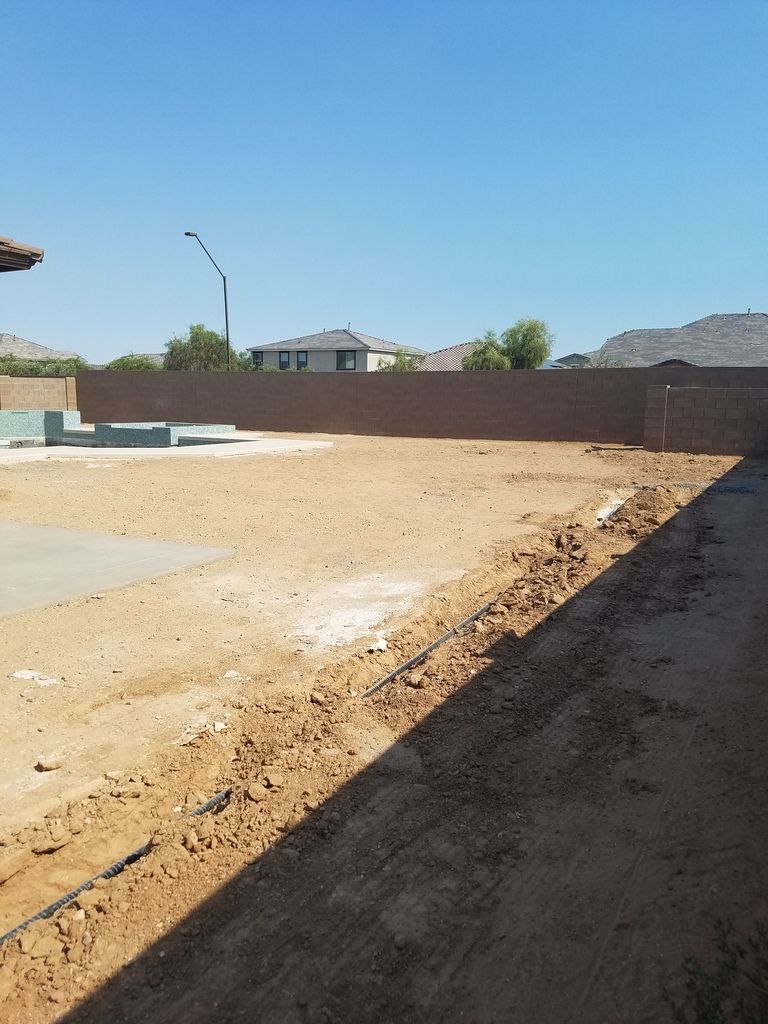
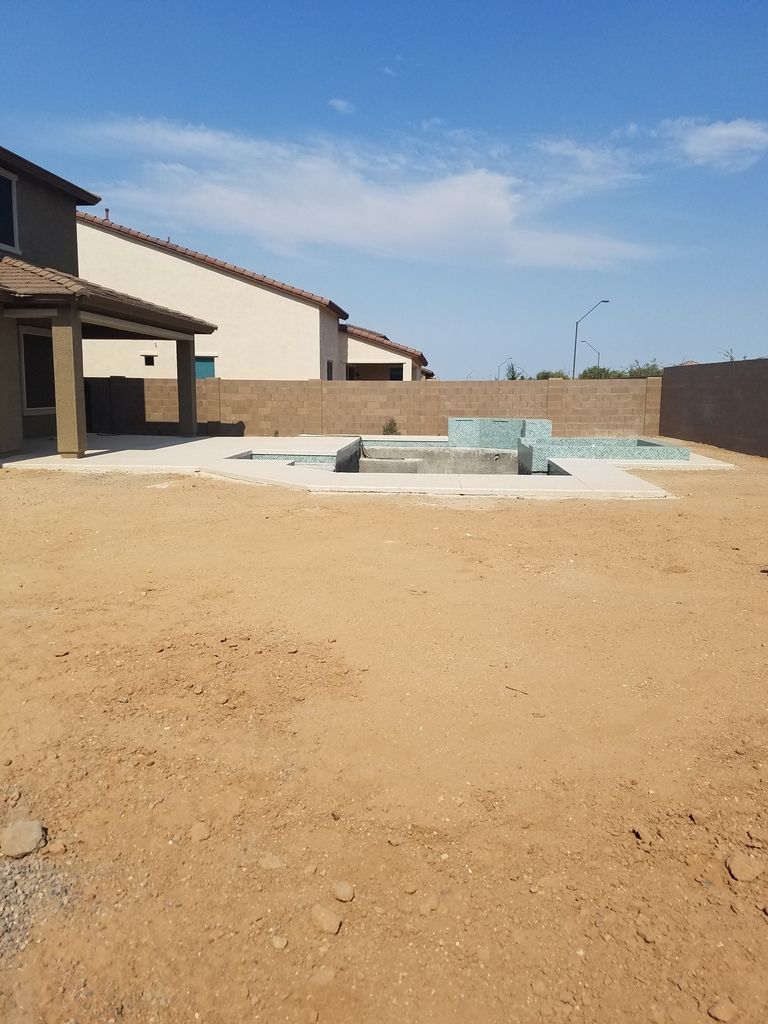
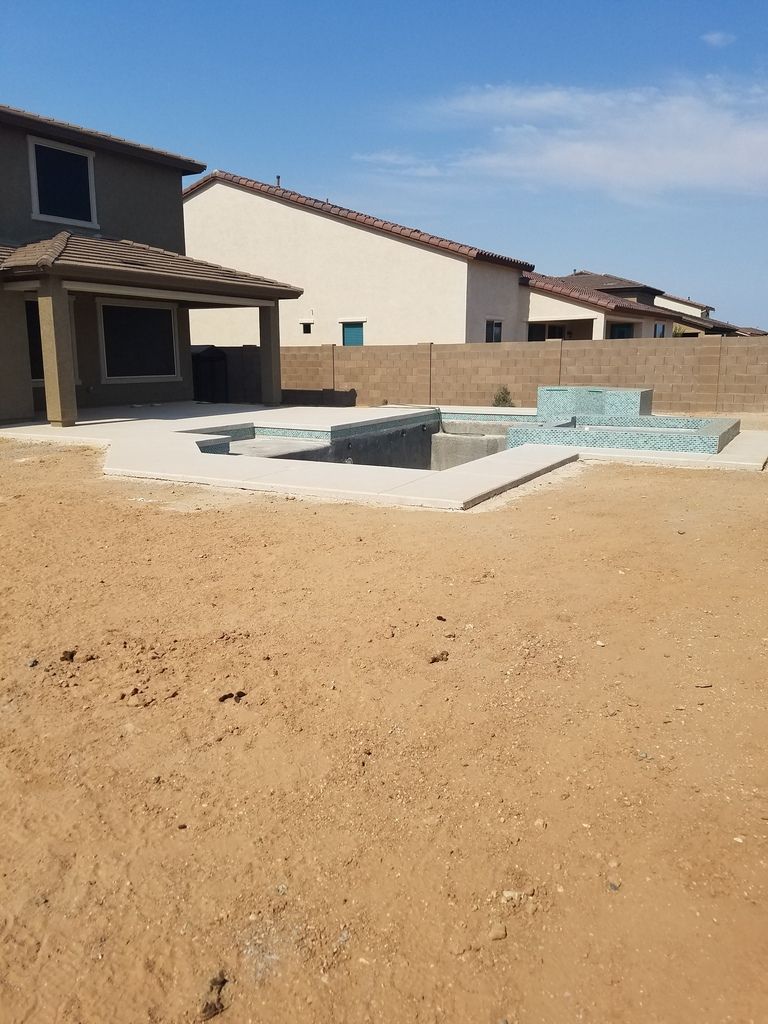
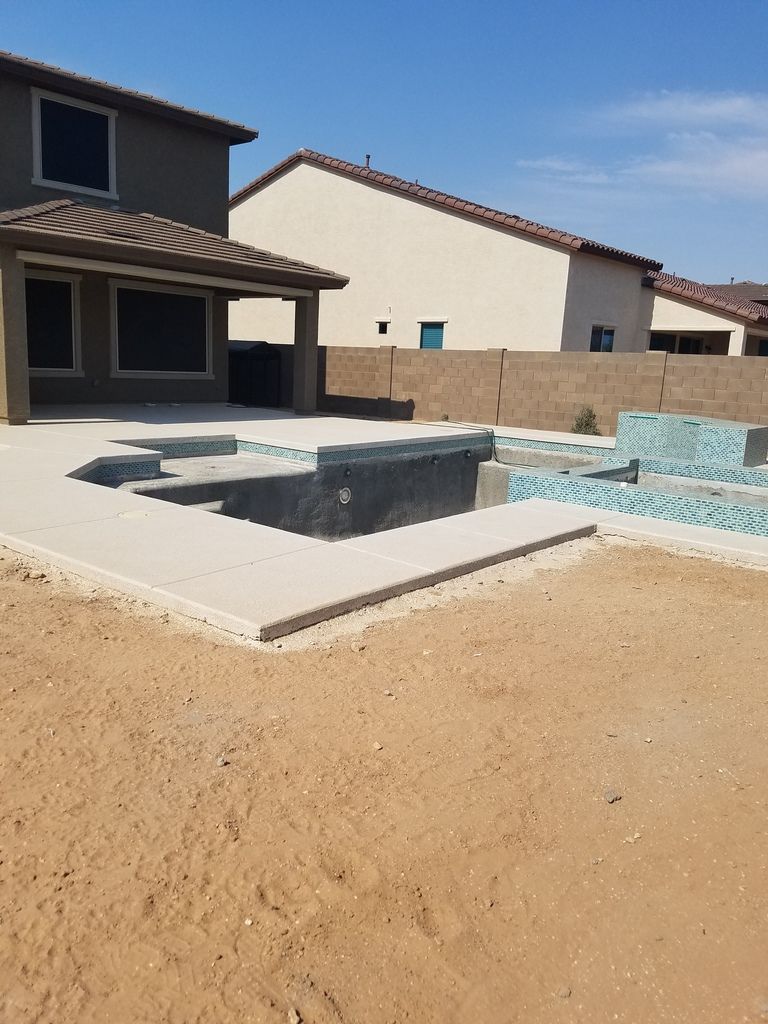
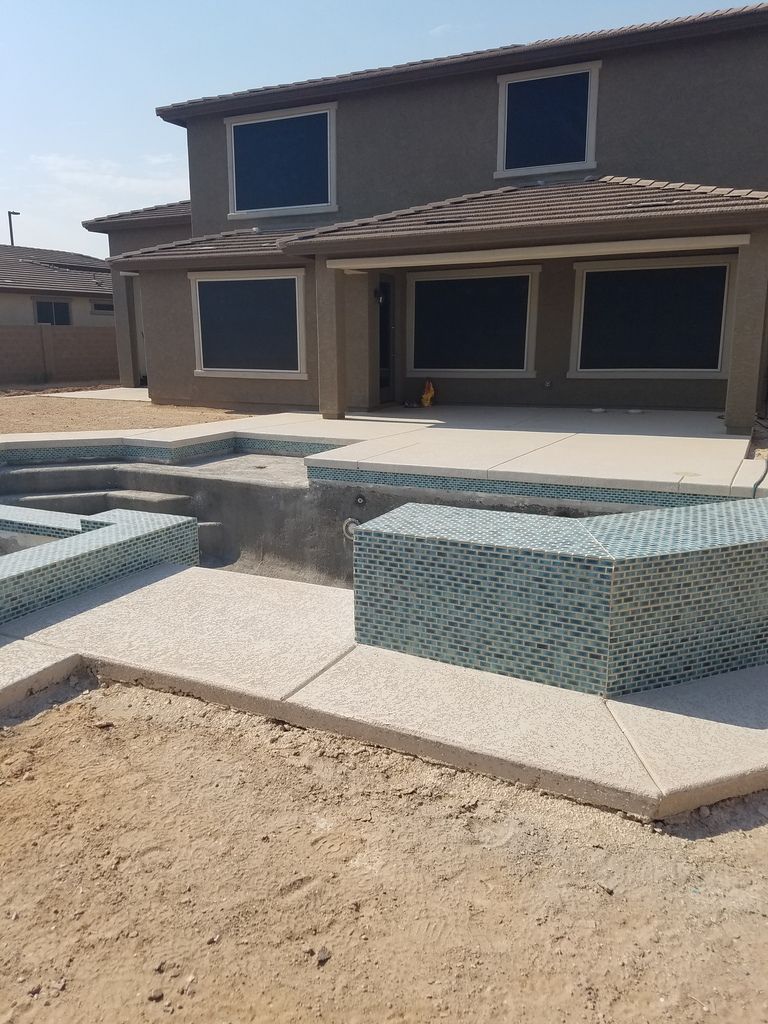
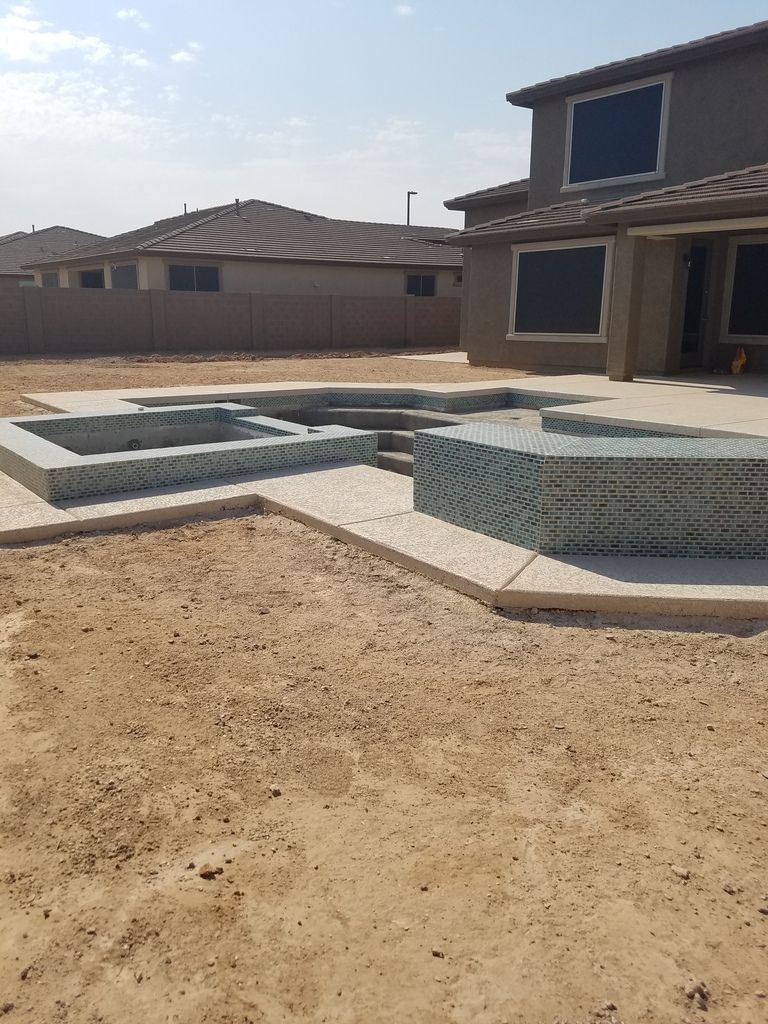
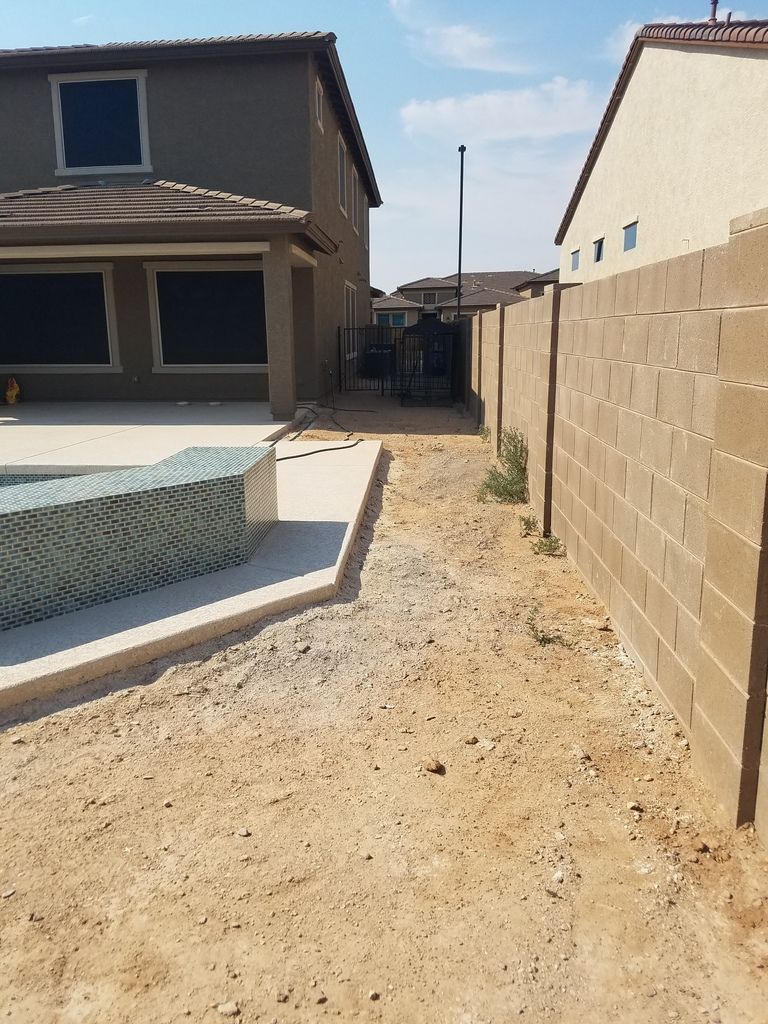
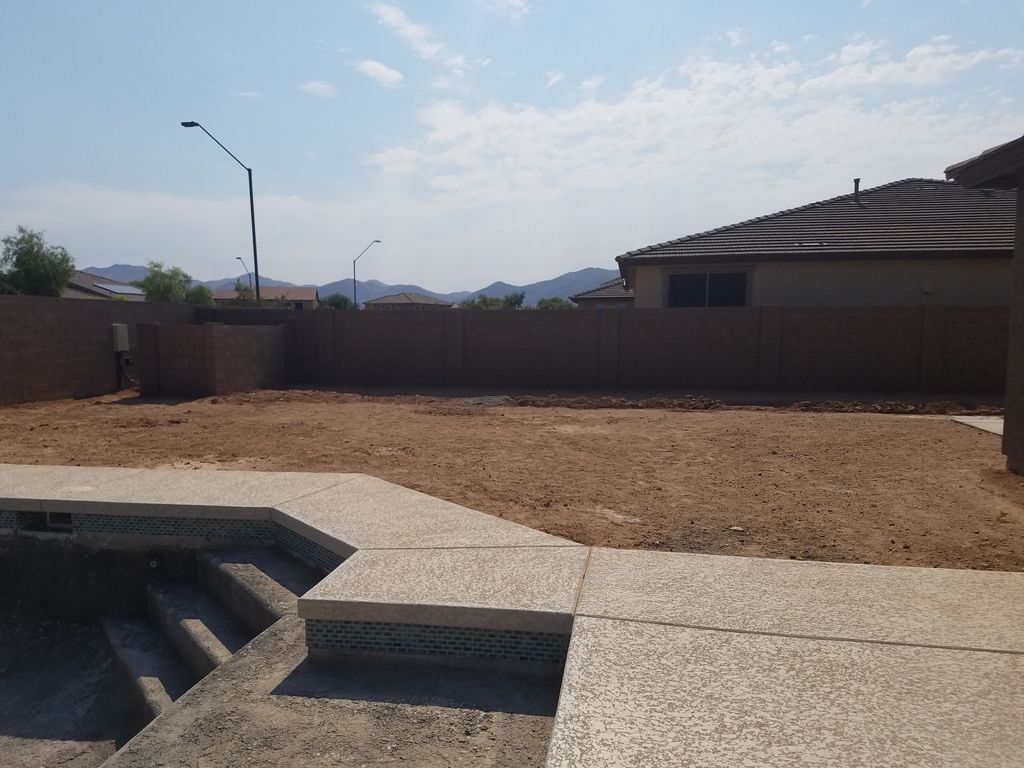
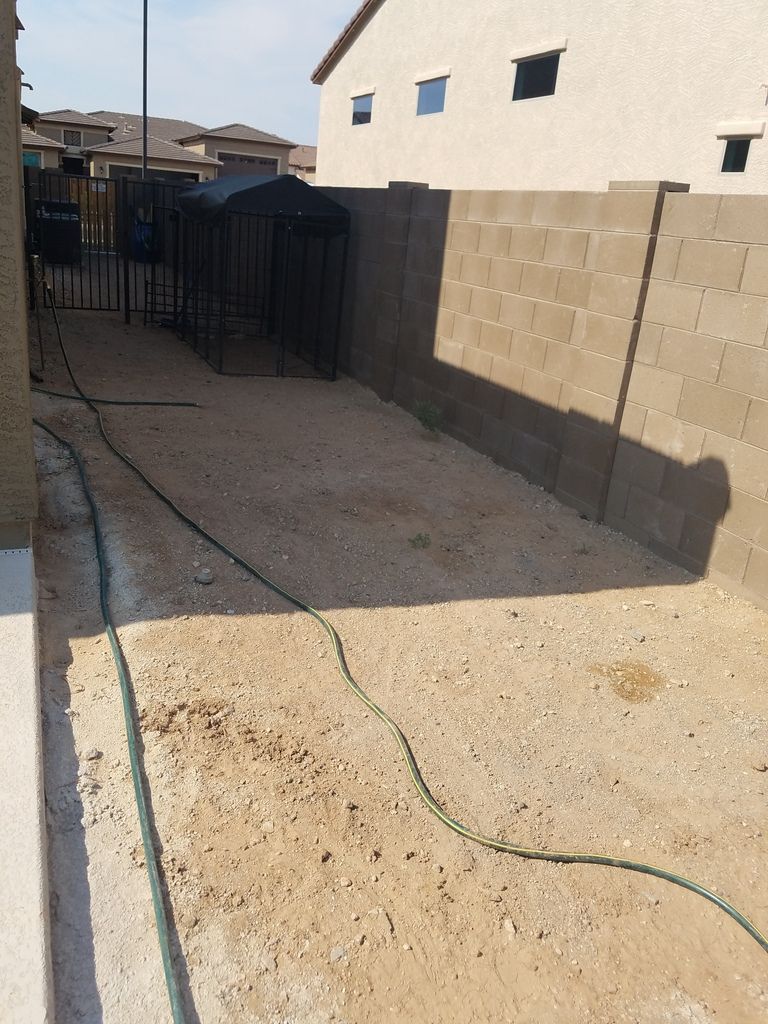
I tried to get as many angles as I could... maybe tomorrow I'll break out a tall ladder and try and get a higher vantage point!! We want a really modern theme, but I'm kind of at a loss because no one in the area seems to be going that route and I'm not sure if any of the landscaping companies out here have that kind of expertise.
My backyard!!


I tried to get as many angles as I could... maybe tomorrow I'll break out a tall ladder and try and get a higher vantage point!! We want a really modern theme, but I'm kind of at a loss because no one in the area seems to be going that route and I'm not sure if any of the landscaping companies out here have that kind of expertise.
Suz! That was a neat way to do each area. Yes I do remember "my" little tile......so cute and off center!
dice, do you have any pictures you have found to show that style you are looking for? That will help us help you pick plants and decorations!
Kim
dice, do you have any pictures you have found to show that style you are looking for? That will help us help you pick plants and decorations!
Kim
Hi KK!!
This is a pic of the inspiration that has now become my pool...

This is the overall look we're going for...
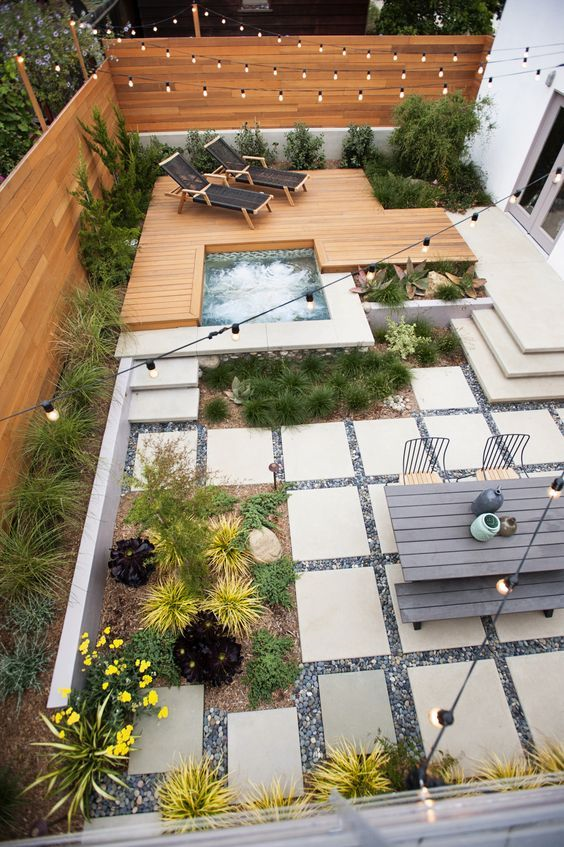
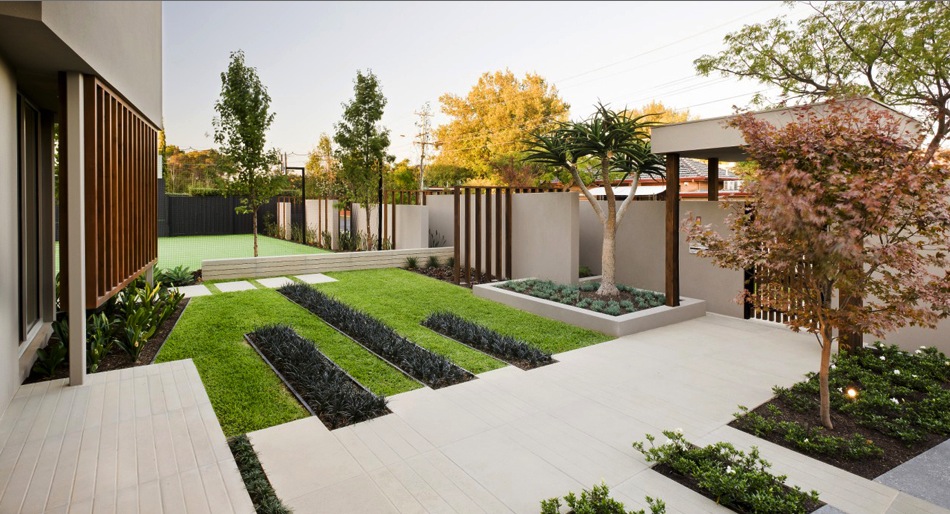


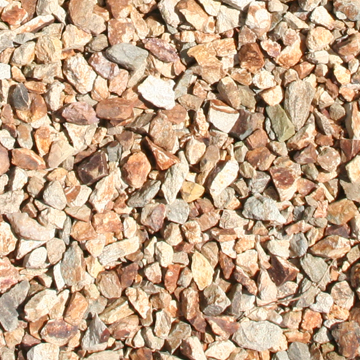
Some of the elements we would like to incorporate are manila palms, banana palms, and ipe wood against the back wall for plants/shrubs. We're hoping to use the palomino gold rock that's paid for in our contract for our frontyard landscaping, and put them in our backyard instead, to help with some of our expenses (since it's free!!). My husband said he can do all of the concrete pads, I just have to figure out where and how I want them designed... I have to figure out where and how I want EVERYTHING designed... It's overwhelming.
This is a pic of the inspiration that has now become my pool...

This is the overall look we're going for...


Some of the elements we would like to incorporate are manila palms, banana palms, and ipe wood against the back wall for plants/shrubs. We're hoping to use the palomino gold rock that's paid for in our contract for our frontyard landscaping, and put them in our backyard instead, to help with some of our expenses (since it's free!!). My husband said he can do all of the concrete pads, I just have to figure out where and how I want them designed... I have to figure out where and how I want EVERYTHING designed... It's overwhelming.
You are well on your way to having your dream retreat! I love your inspiration photos! I know it can be overwhelming, but what a great 'problem' to have, right?!! This is exciting and fun to watch it all come together!!
Hi Dice, Congratulations on getting this far! I love your tile and the shape of your pool. Your inspiration photo, is also one of mine. I think the key to getting a modern look to your pool, and overall backyard is keeping everything very geometrical and forgoing any curves. While I appreciate both, I am more partial to the modern look. I look forward to the completion of your build.
Thread Status
Hello , This thread has been inactive for over 60 days. New postings here are unlikely to be seen or responded to by other members. For better visibility, consider Starting A New Thread.
Similar threads
- Replies
- 79
- Views
- 2K
- Replies
- 28
- Views
- 1K