
BBQ Build
The build happened a few years ago. I have a detailed thread on another forum but will transfer the relevant information here as that forum seemed to have gone silent.
Brief description:
15'x15' covered patio with a 15'x20' concrete slab.
11'-6" Straight Island (on the 5' uncovered portion of the concrete)
One end of the island is against my house
Frame from BBQ Coach 20 gauge galv, screwed together with zinc coating on all screws and cuts
Trex base
1/4 Durock Cement board on all sides
1/2 Hardie on top
Granite Tile on countertop, laid with thin set, smallest grout lines possible, grouted with silicone
Thin Austin Creme limestone veneer all sides
All appliances are LP and island will be vented
Blaze 32" Gas grill
Blaze Double Side Burner
Primo Oval XL (still under consideration)
Various BBQ Guys stainless steel doors
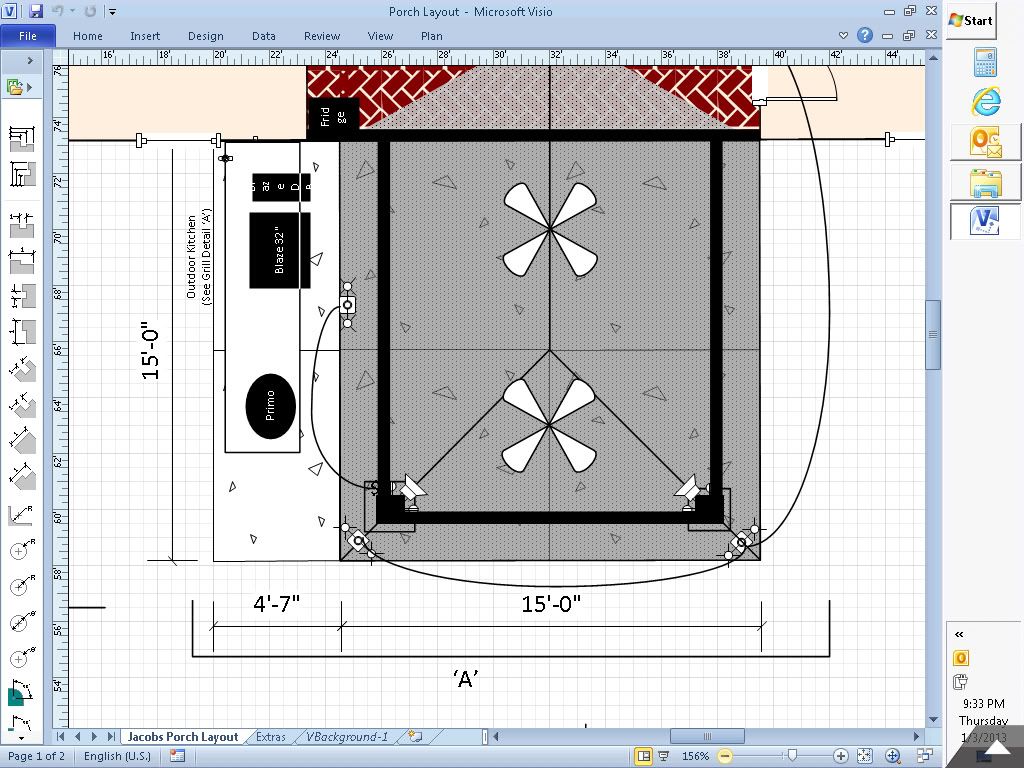
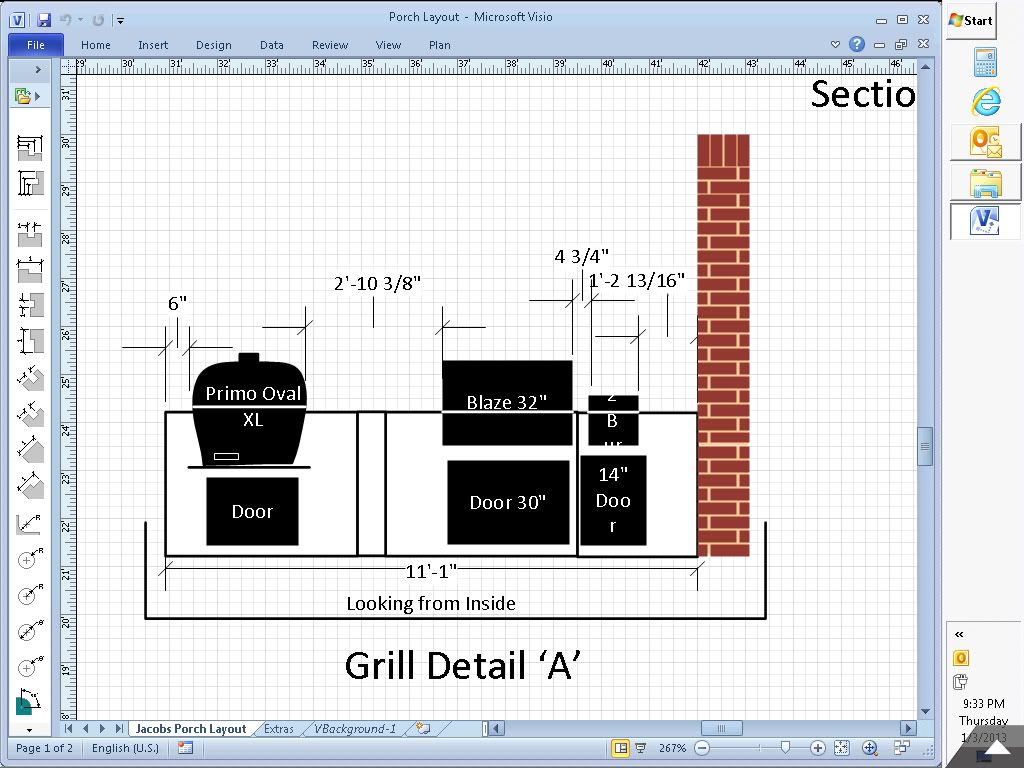
Here are some design drawings done in Visio
Overall Plan:
Kitchen Detail Elevation:
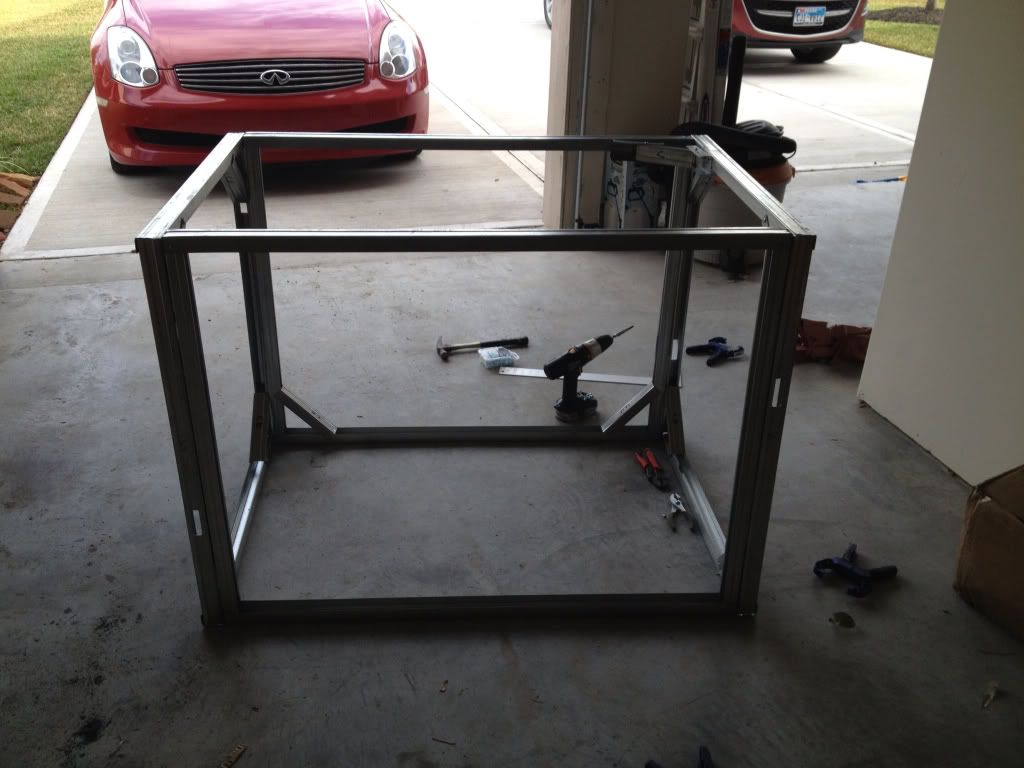
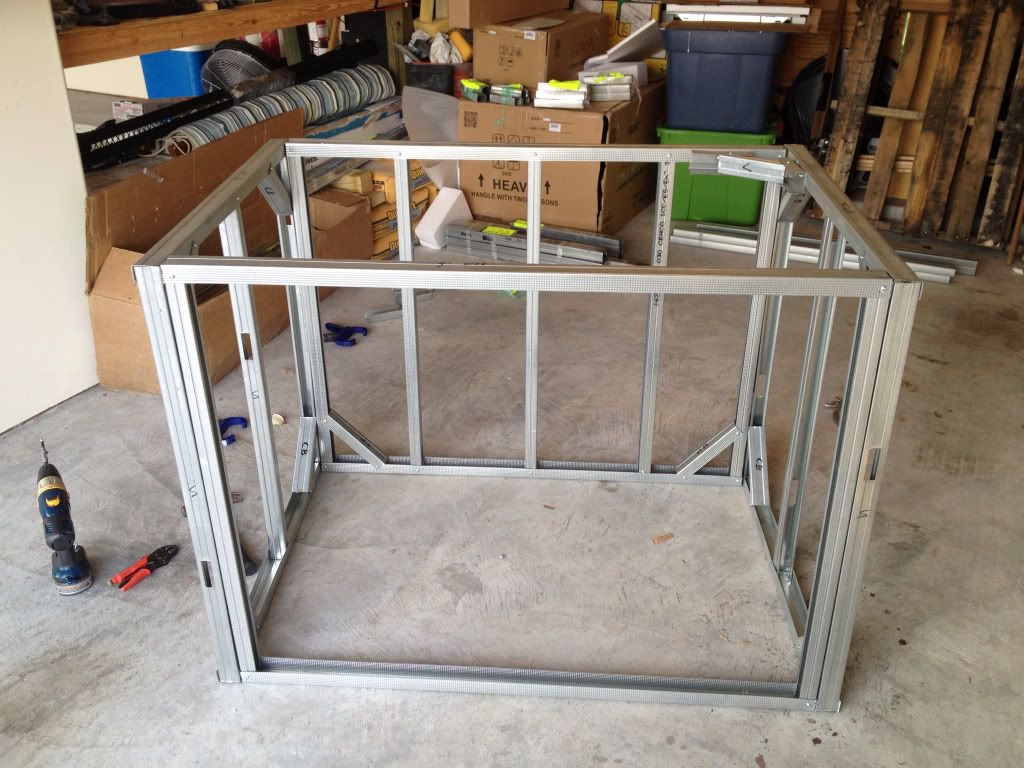
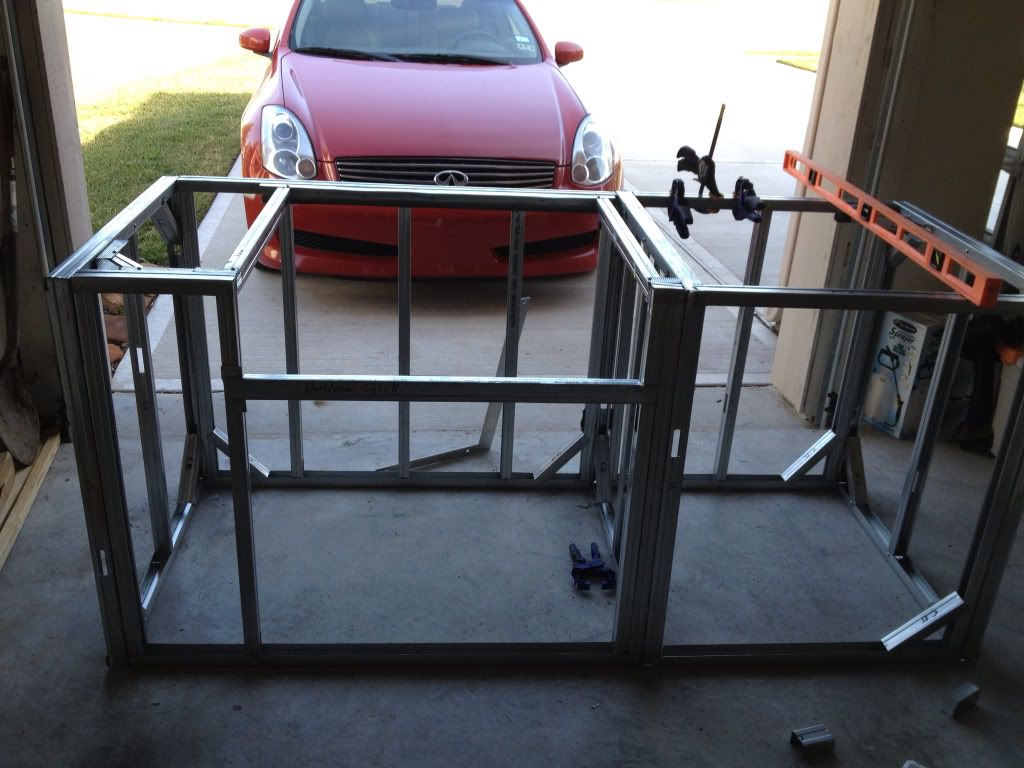
I framed it in my garage and then carried it out back for installation on the concret pad. Various photos at steel frame construction stages:
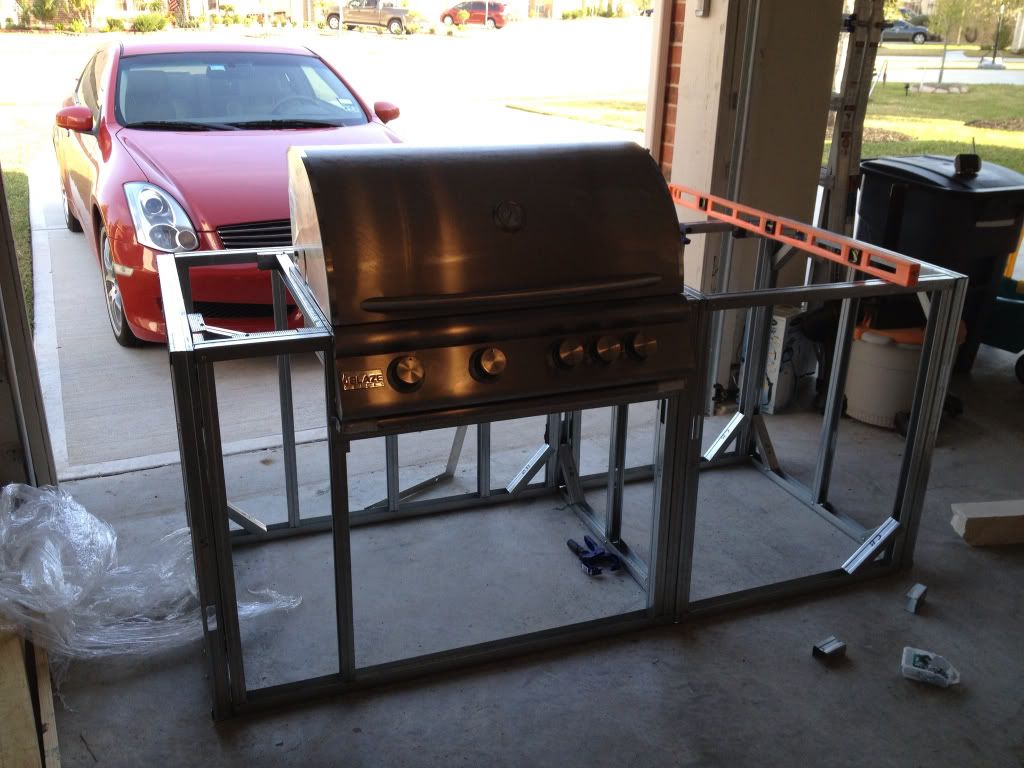
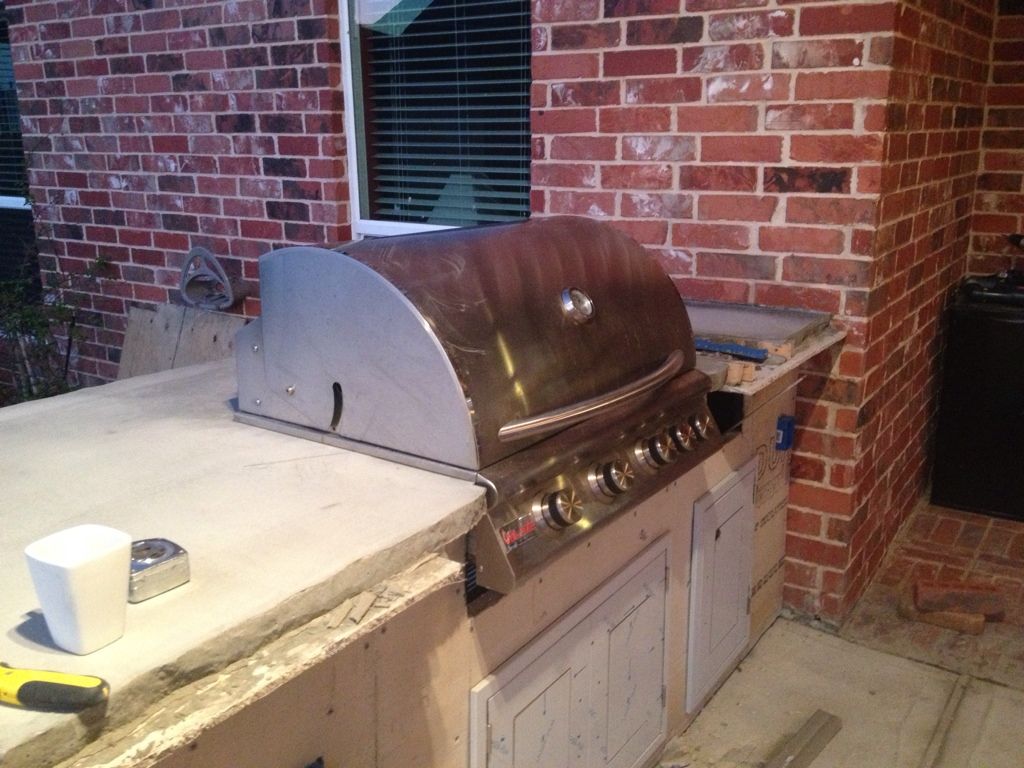
Test fit grill:
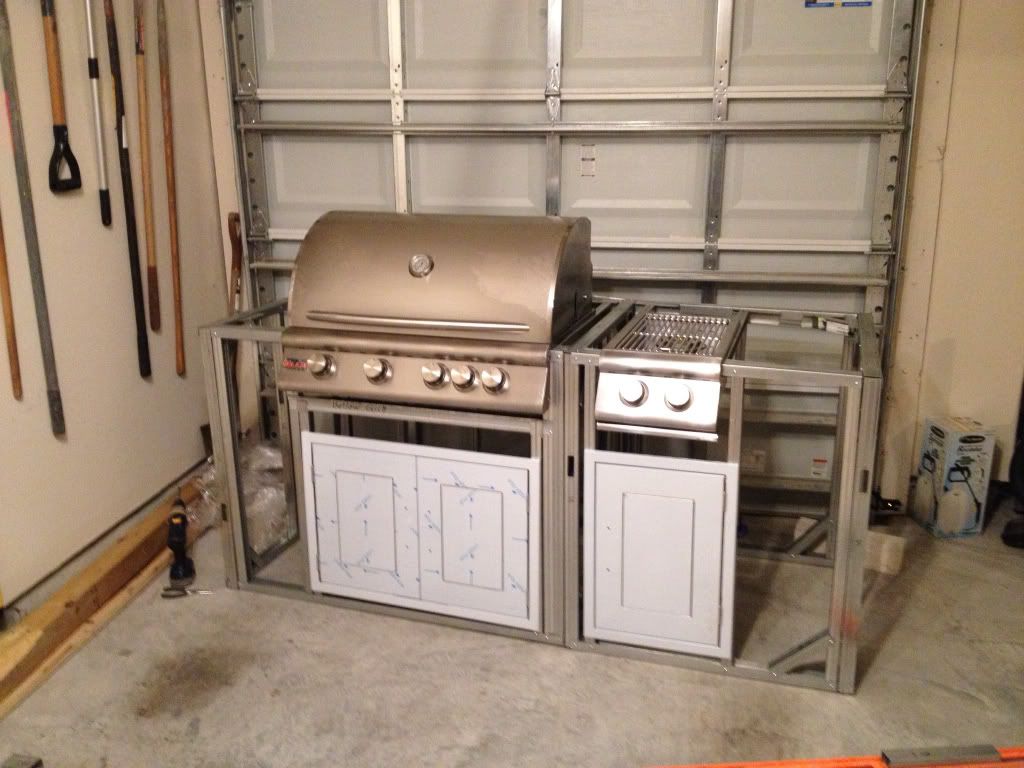
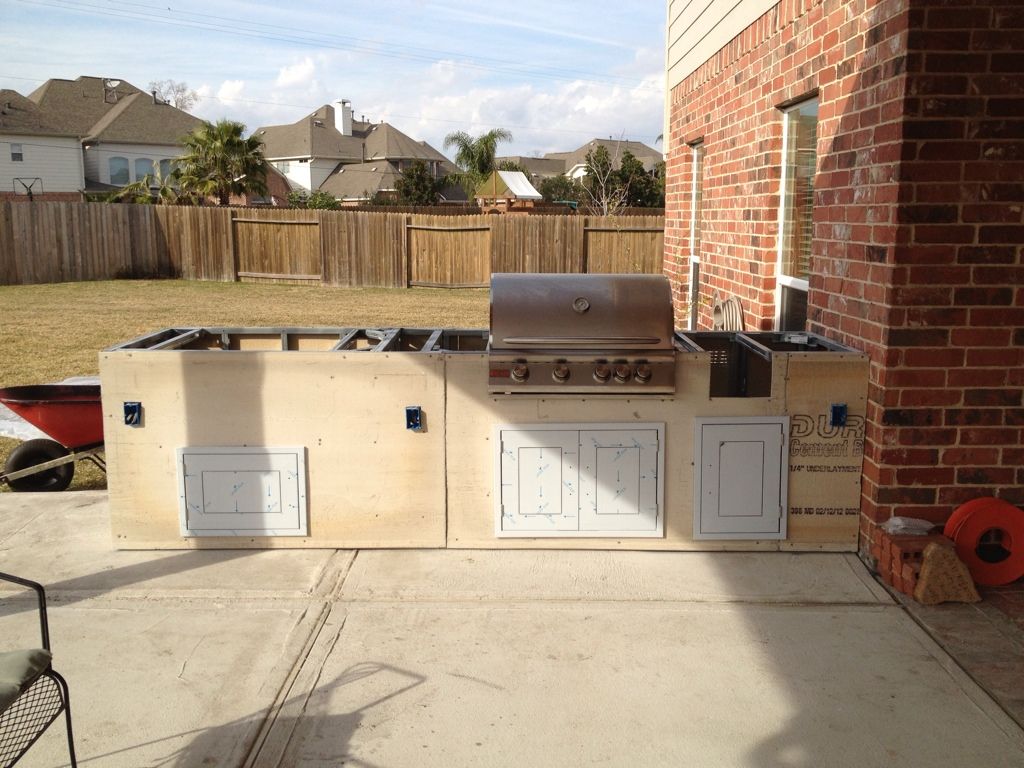
Test fit doors, grill, and side burner. Doors not at proper elevation due to not knowing what counter top material I am going to use and how much height to compensate for:
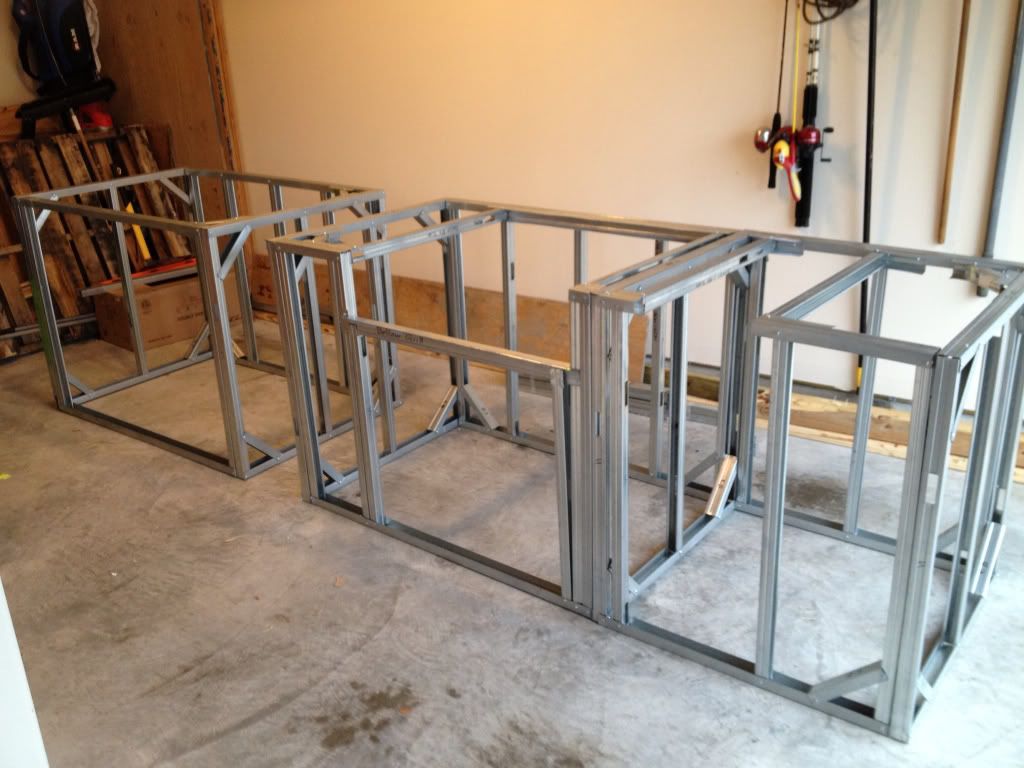
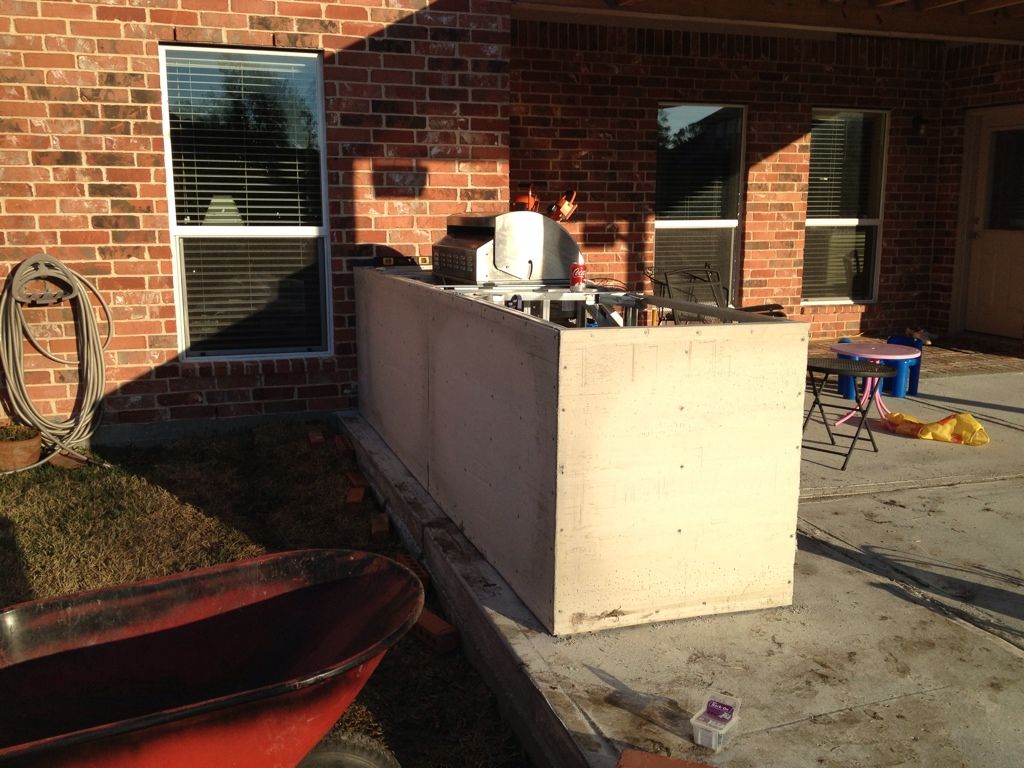
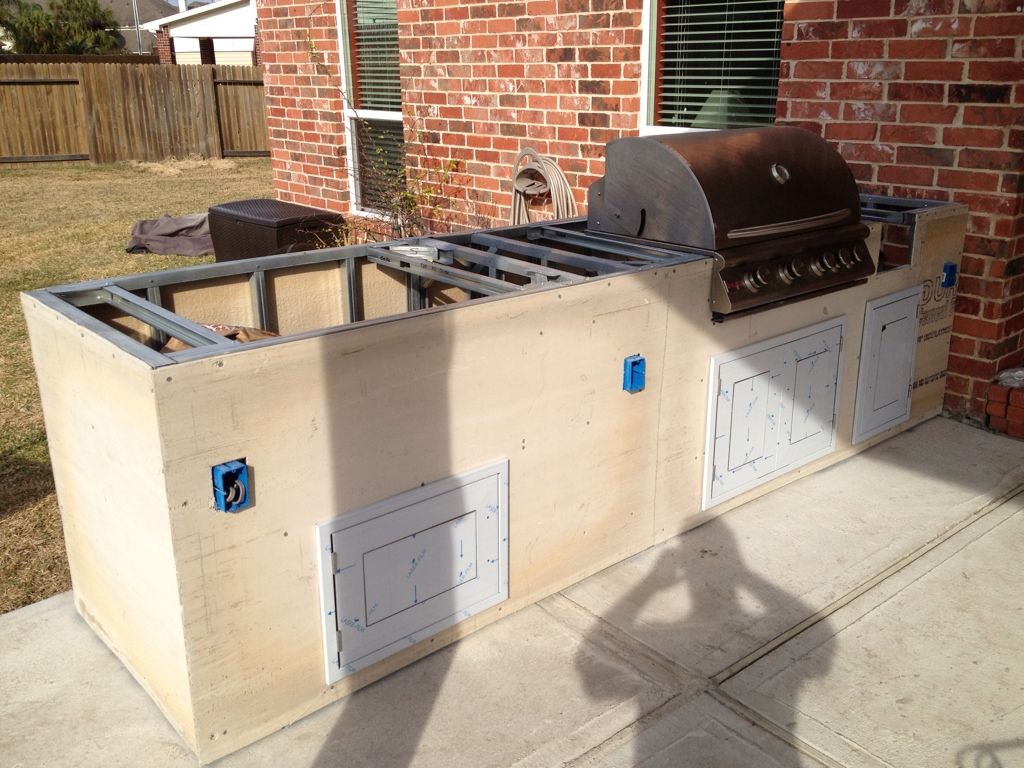
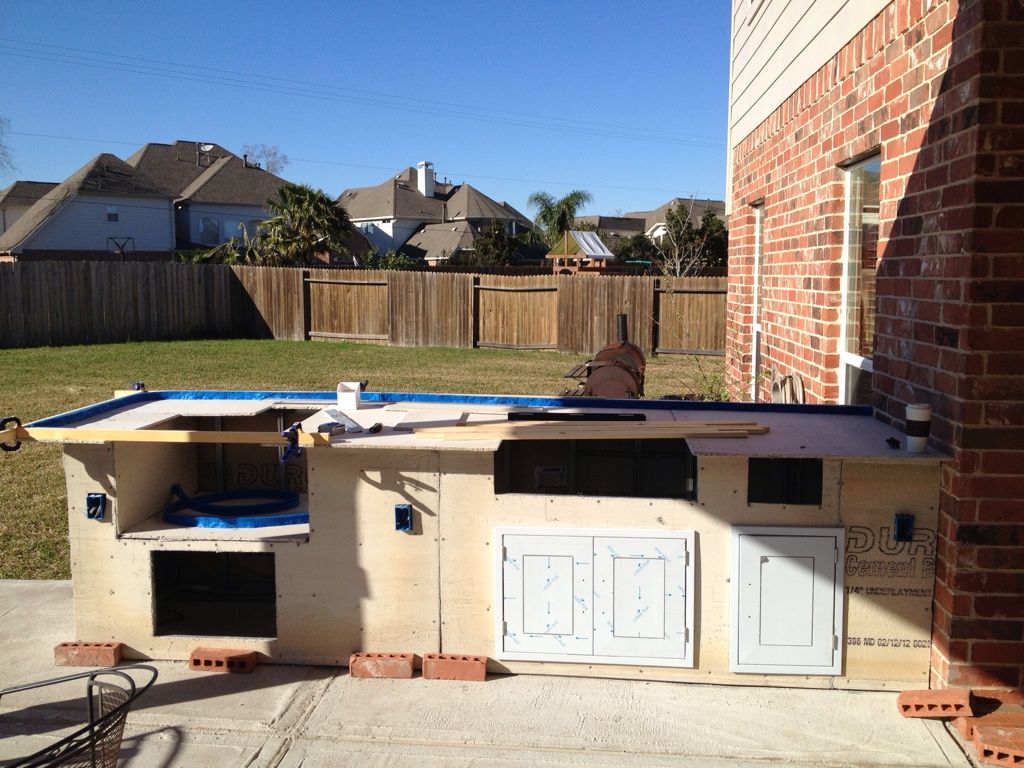
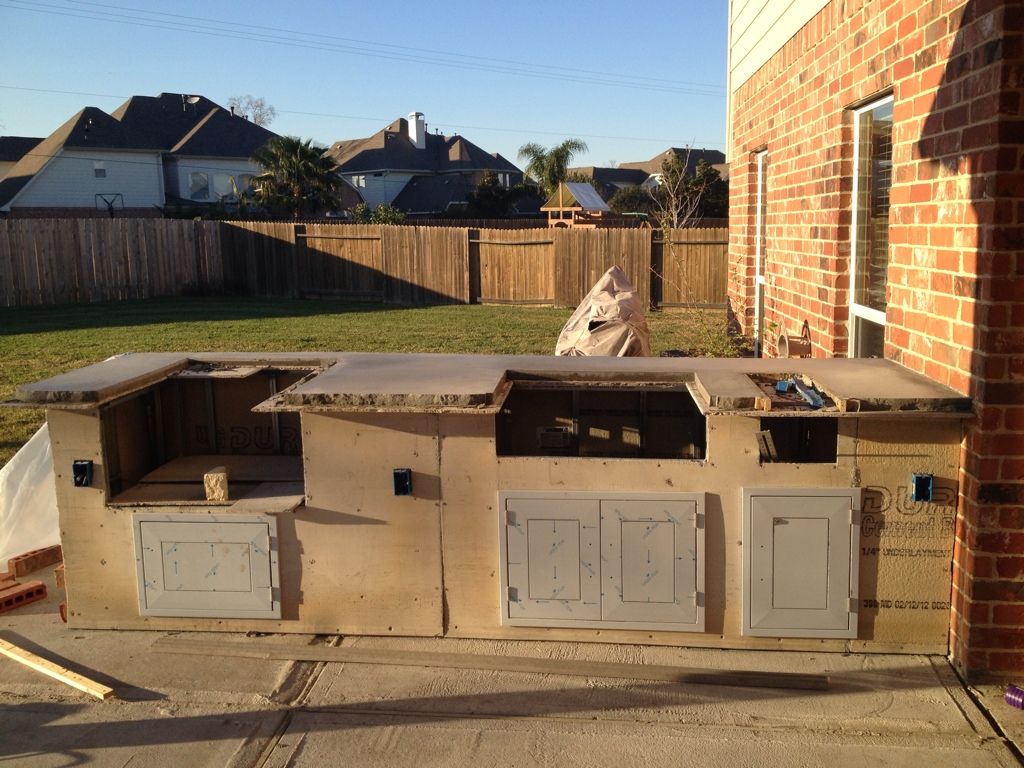
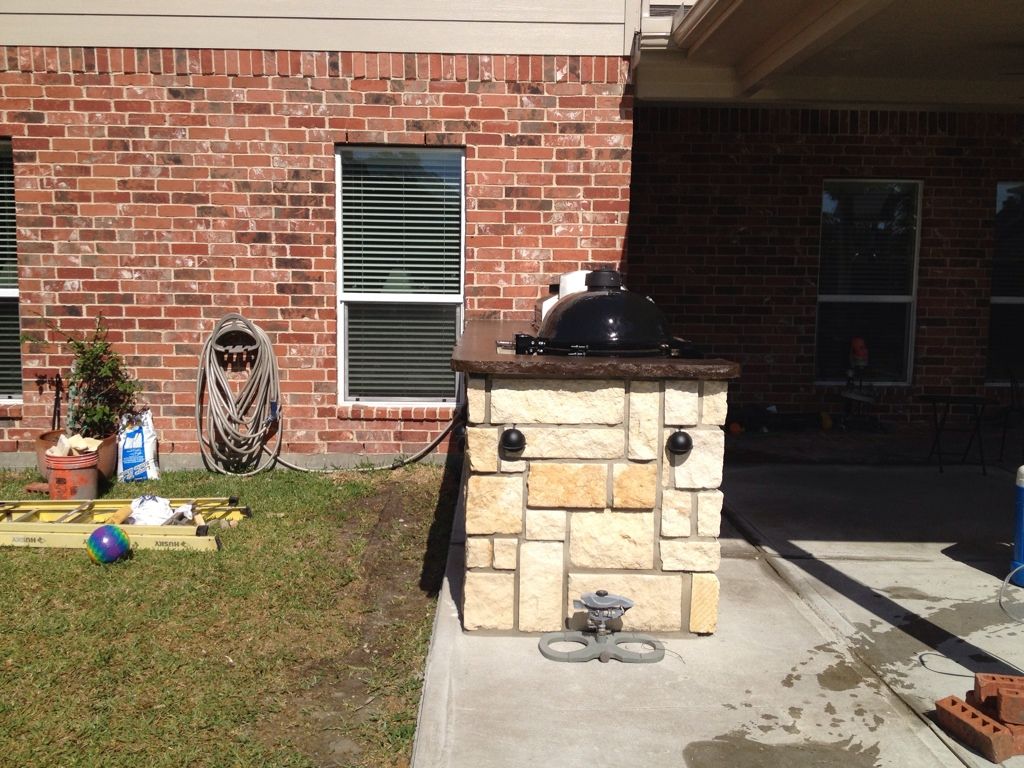
All modules built. The Primo cutout isn't yet installed as it hasn't arrive to get proper dimensions yet.
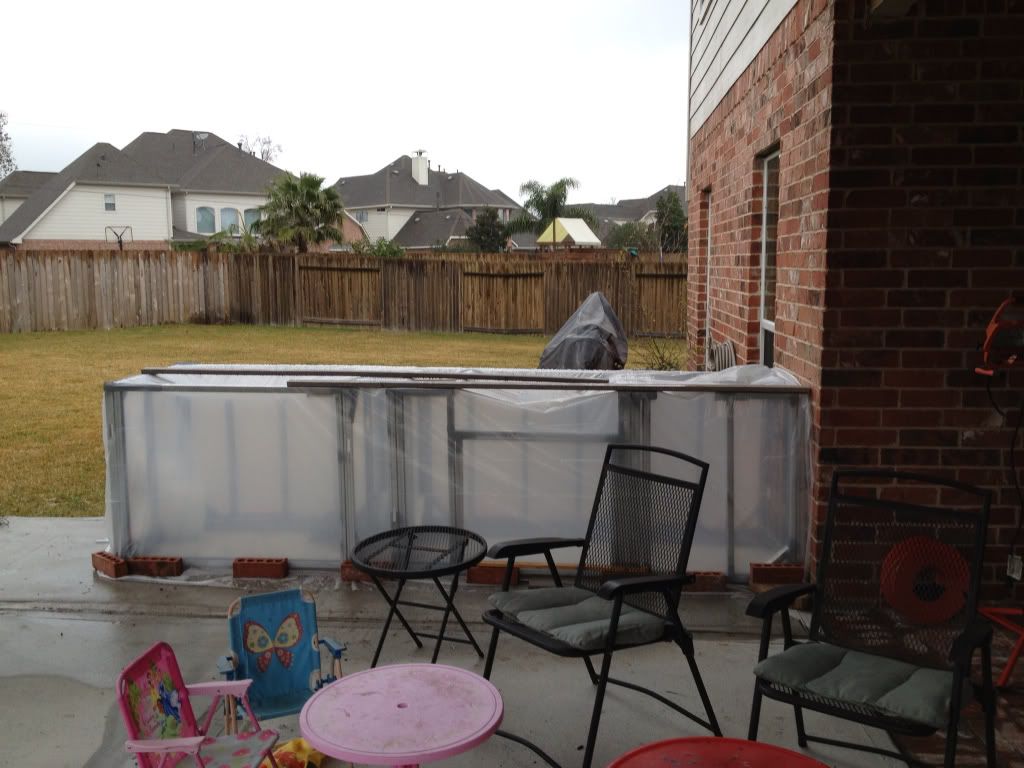
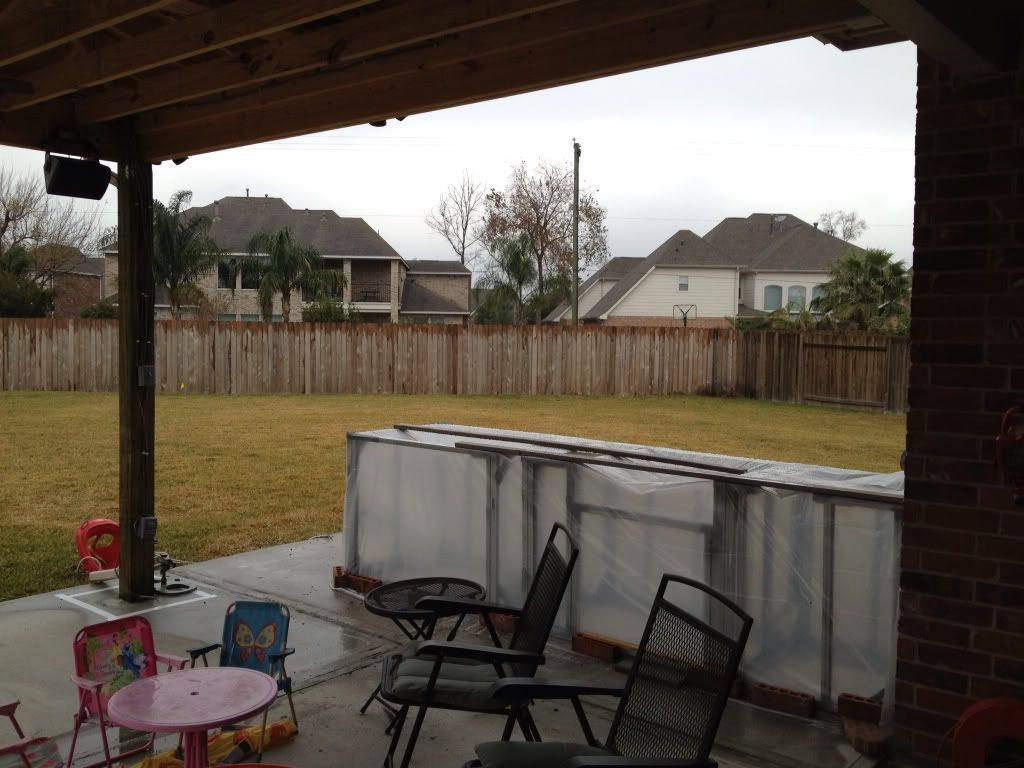
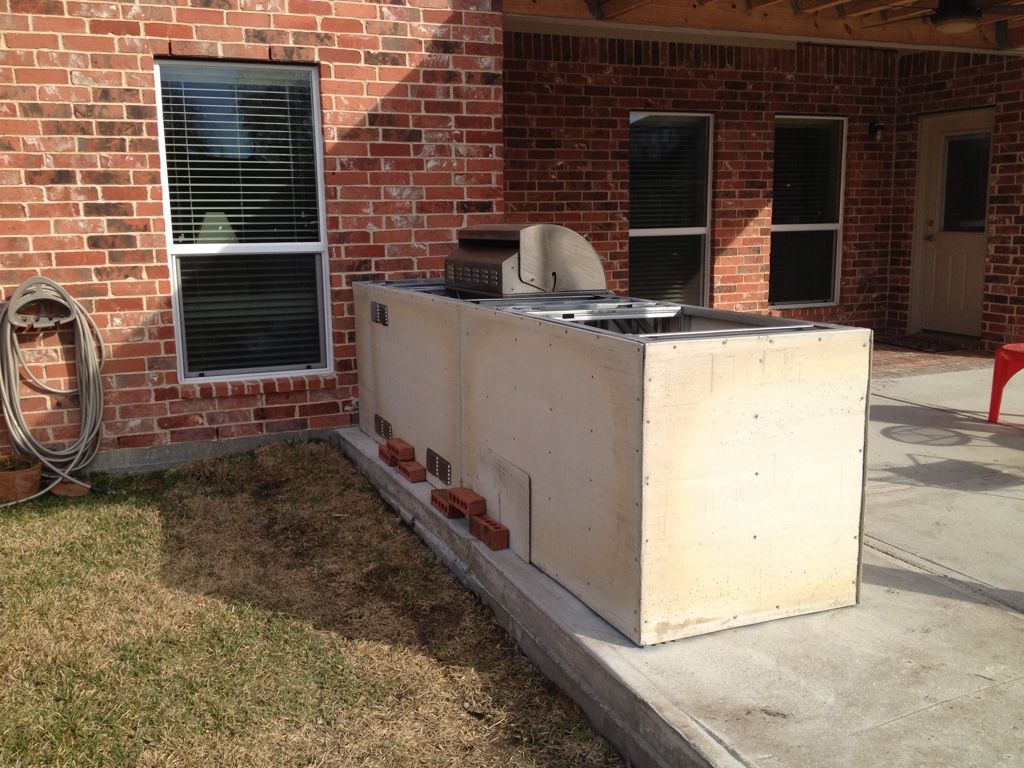
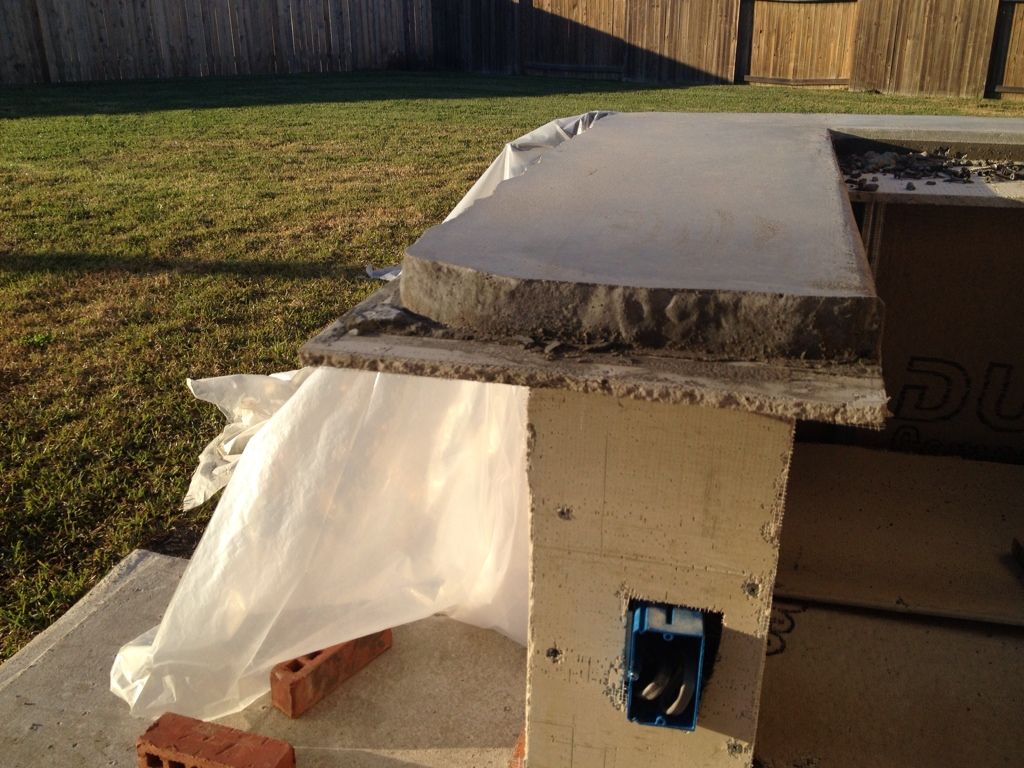
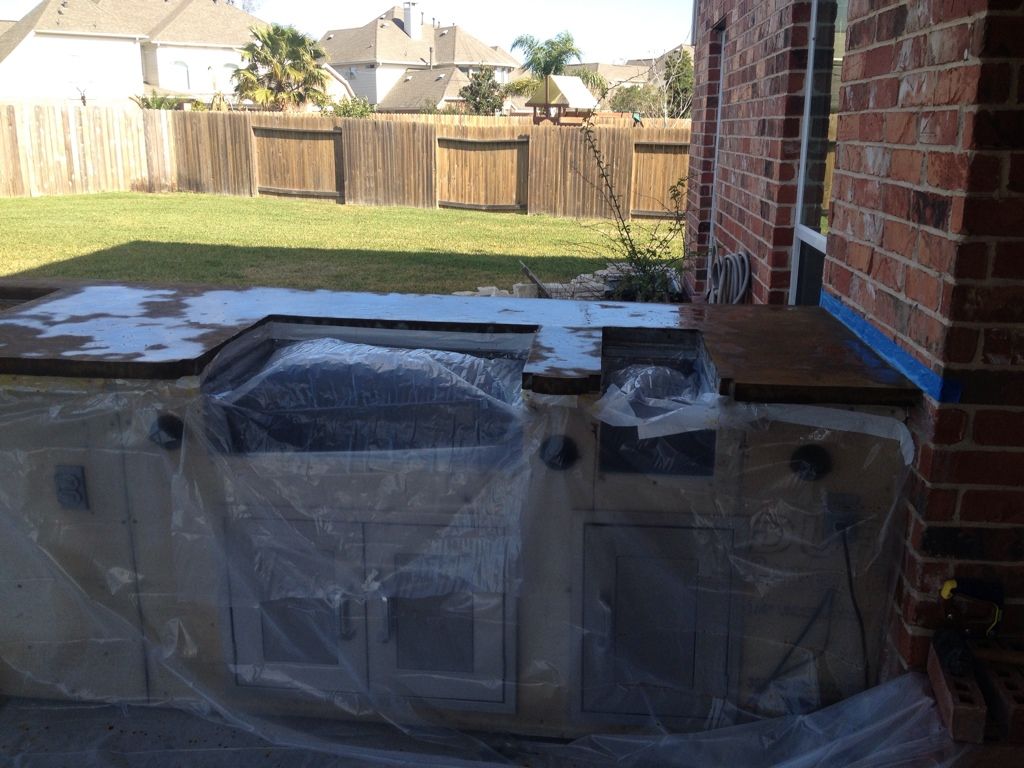
I have moved it around back (sorry no picks. It is freezing and wet in Houston) and covered it with 3.5 mil plastic due to the rain.
Here are pictures in place:
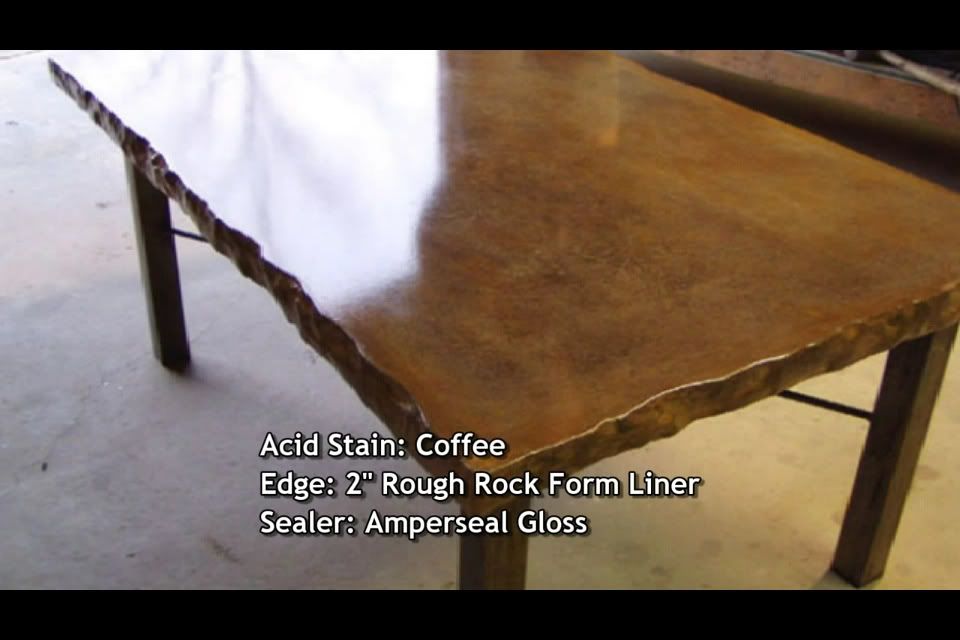
And what I am thinking ant for the concrete countertops.
Progress for the day:

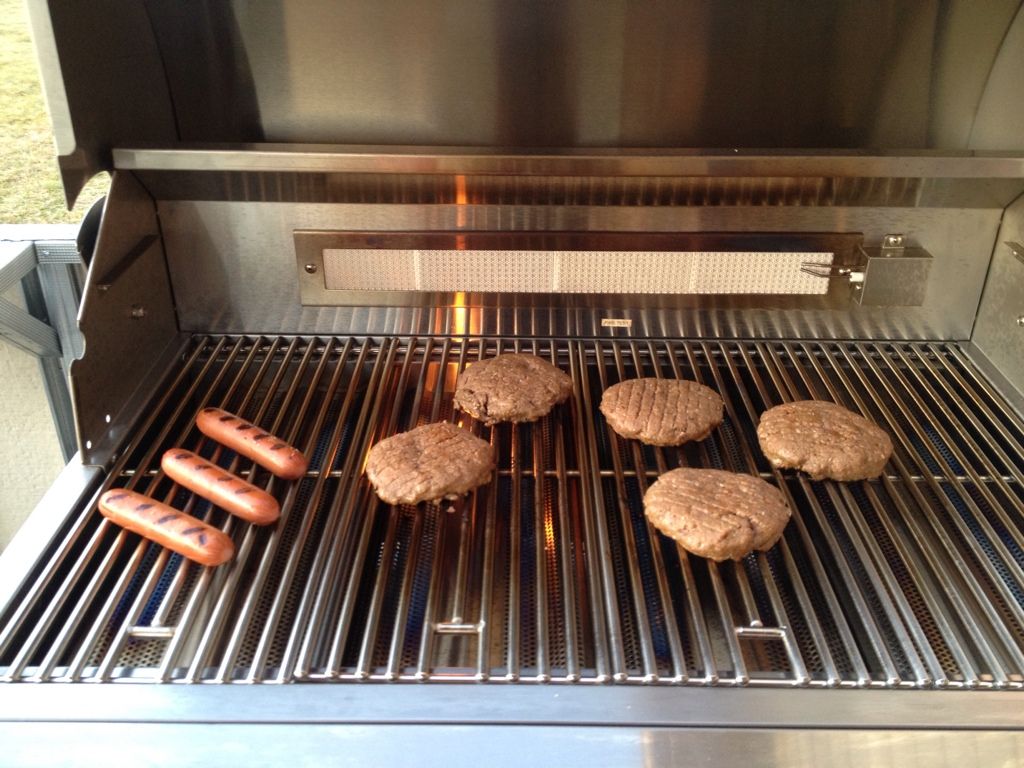
and a little test run:
1/21/2013
Got some progress done today. Finished the cutouts for the doors, side burner, vents, and primo. Finished the Cement board all around as well. Haven't decided how I am going to finish the primo. I am leaning towards open front because of easy access. Need to order rock to get the counter overhang right then install the top 1/2" hardi for the concrete counters.
1/28/2013
Ok guys... First real issue I haven't been able to think through. I am trying to do cast in place concrete counters and am tying to figure out how to frame them.
On top of the studs is 1/2" hardi, not an issue. The problem is attaching the edge boards. The walls will be rocked with 1.5" limestone using probably 1/2" of thinset, then I need a little overhang maybe 1", then I am using silicone edge moulding that is 1.25" thick. So the total overhang is 4.25". After the councrete is set I will cut the hardi overhang off and rock right up to the concrete.
Here is a detail:
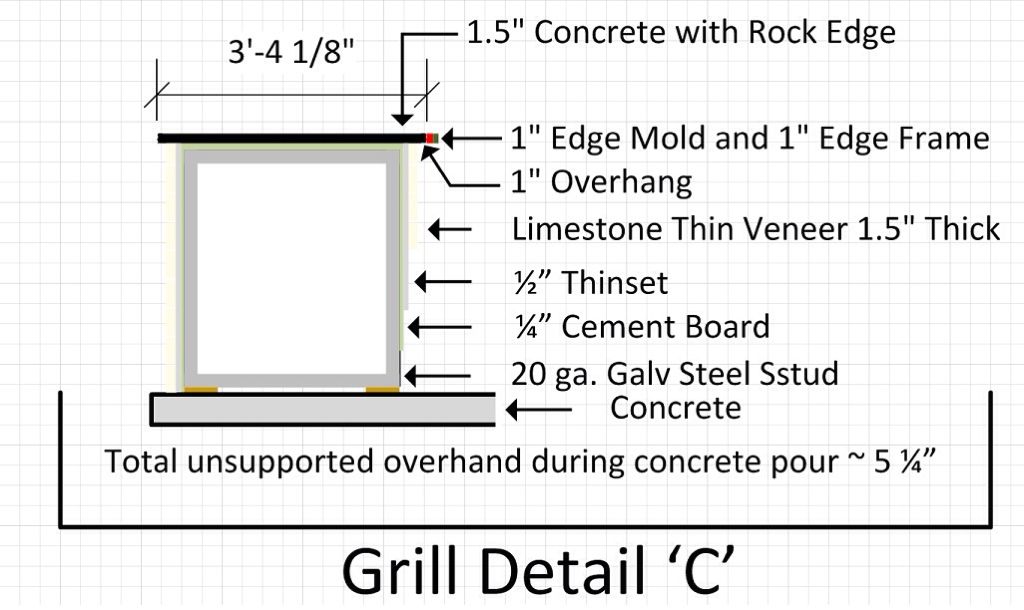
This creates two issues:
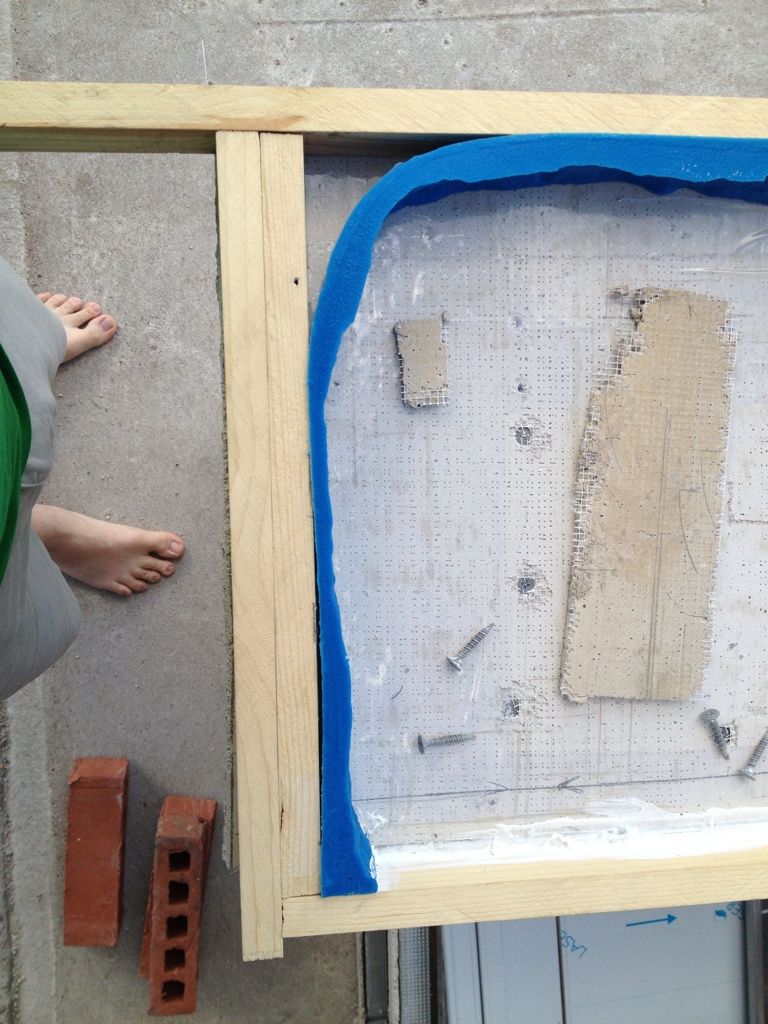
1) How to support the overhang? I believe I could construct a frame with wood studs under the hardi that is temporary.
2) How do I frame the edge pieces on to the 1/2" hardi? I did a couple test screws and the hardi splits every time. Do I frame into the under support for the overhang?
I was trying not to make it too complicated, but this is the best I could come up with. Since I can't make the counter substrate out of 1" plywood (which is **** near self supporting with a 4" overhang) which I could screw right into, I am in a little pickle.
- - - Updated - - -
2/03/2013
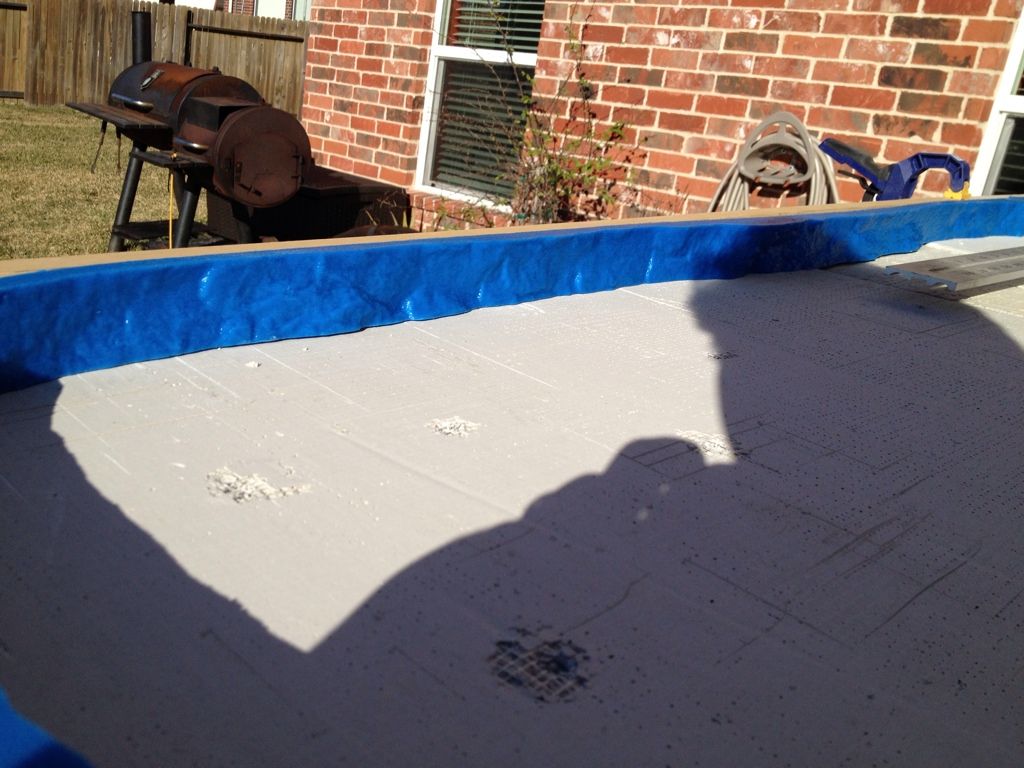
Molds and stain for concrete came in. Framed the countertop with cutouts for Primo, Grill and side burner.
Rounded outside corners.
Rough Rock detail
I bought the edge mold from Expressions LTD along with the acid stain. They have quite a few videos on YouTube.
As for leveling I shimmed under the 1/2" Hardi. Figured that was the easiest. All I was looking for is a level of the edge molds. The area inside the mold can have highs and lows and it doesn't matter.
I shimmed it so there is a slight pitch to the back as the island isn't under cover.
I pulled the edge off a couple of days ago to help it dry. Not too bad. A few pinholes all around that I might hit with a slurry this weekend. I used a reciprocating saw, without the blade, on all the edges over and over to work out a lot of the bubbles. Due to the nature of the silicone edge I used, rough rock, some bubbles were still traped but not many.
I also started to cut the 1/2" hardi from the overhang. Lining the overhang top with wide box tape worked perfectly! The hardi isn't attached to the concrete at all. It is a little messy getting the hardi off though. I was able to get the grill in place last night. I created small cut outs of the concrete (put extra wood in there) so that the grill slide into the edge a little. I think it looks good.
This was the first time I tried to make concrete smooth. It was difficult and it did not come out perfect. I have a few spots that are great but it is definetly not garage floor smooth. I didn't order the diamond pads when I got the stain and edge so I started to sand with 220 grit regular sand paper last night. Just so you know a 4x4 square of 220 sand paper from Home Depot is good for about 2 square inches before it gets burned up. Unfortunately HD doesn't carry diamond paper so I will have to order it.
Anyway... Here are some progress photos.
Edge detail with Thin Limestone piece
Rounded outside corners. The inner edge here is smooth because it is where the Primo will sit. I thought rock face might look funny.
Front cutout is Primo, middle is grill, far is side burner
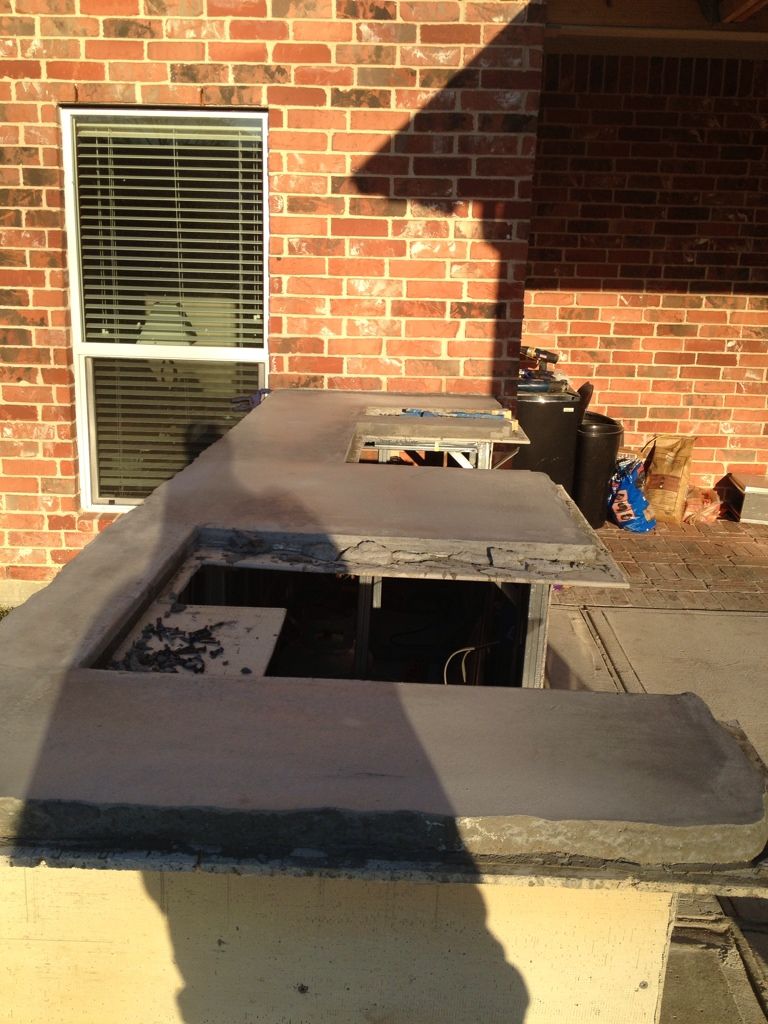
Grill set in place. It slide nicely into the form.
The space below the grill is a little large. I will need to modify the hardi before I do rock face.

4/11/2013
Actually I have made some progress. The sanding pads did in fact come in. 200 400 and 800 grit dry 5" diamond pads. I started with the 200grit and used maybe half a pad. Then hit it with 400. I read that sometimes at 800 the acid doesn't etch as well so I never used them.
After sanding to where the aggregate started to show I stopped. Not the look I was going for. No pics of the sanding sorry. I will say it wasn't that hard. I waited maybe 10 days after pour and it sanded really easy.
I then started the rock while I was waiting for the remaining 18 days (28 total) recommended curring days prior to stain.
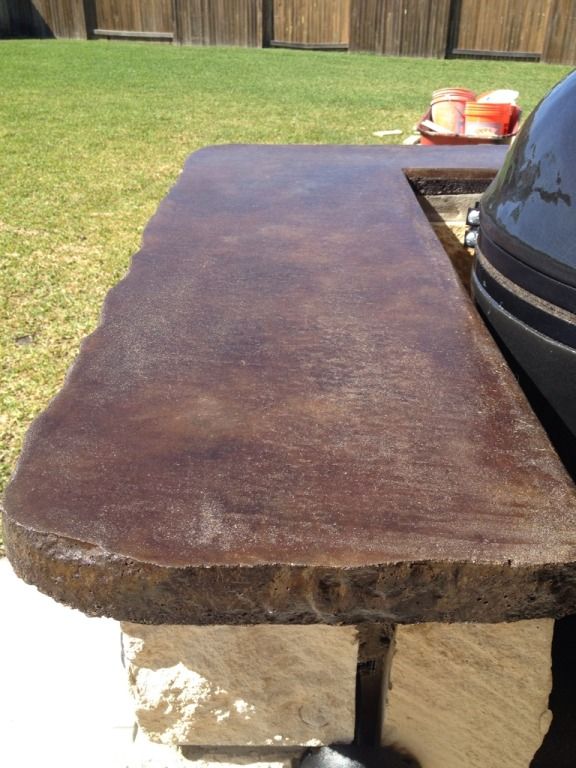
I draped 3.5mil plastic around the island and did the acid stain. It was really easy as well.
Here is the stain prior to ammonia / water neutralization and wash.
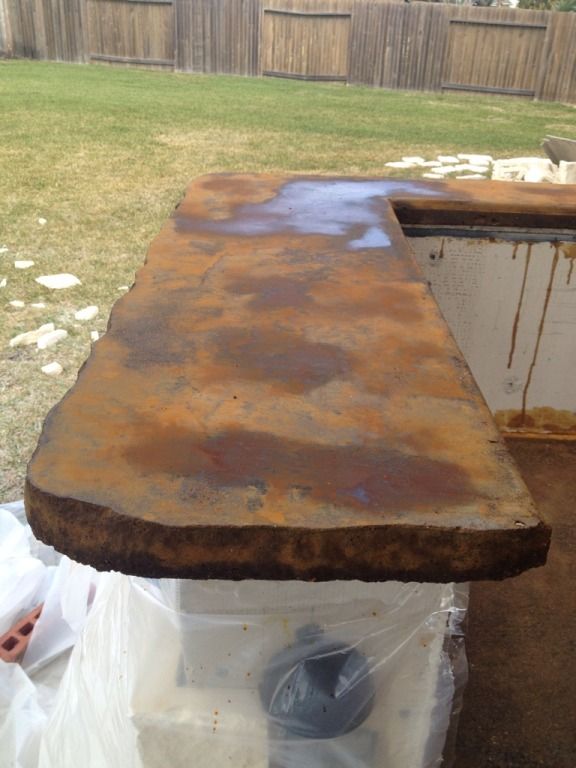
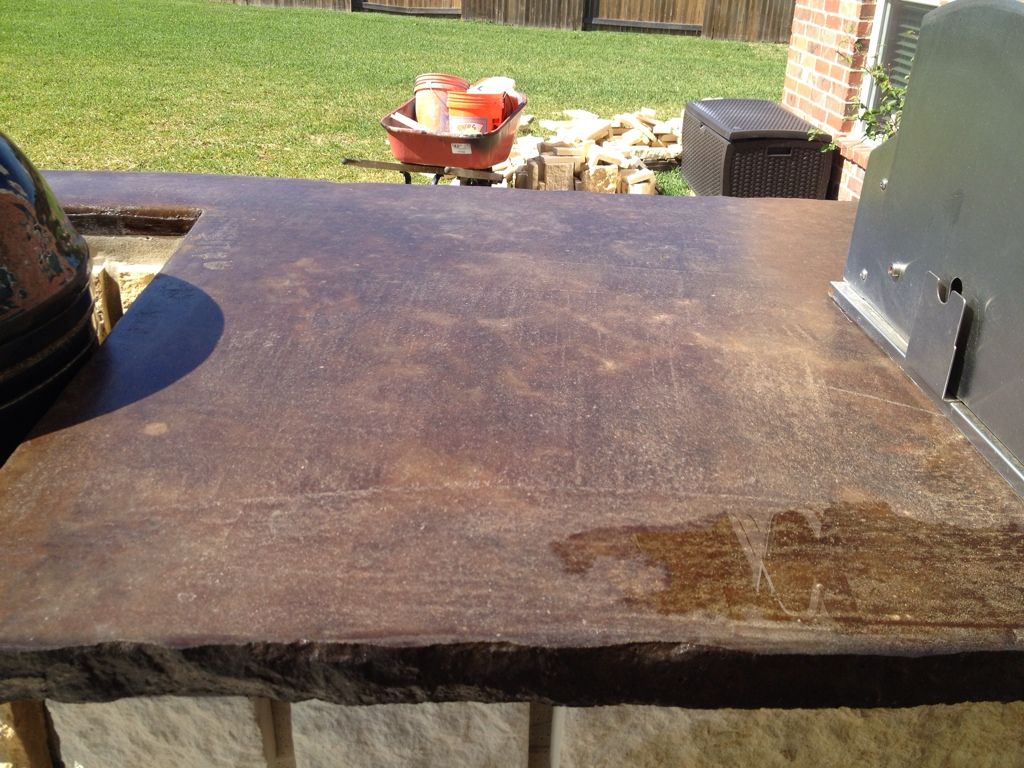
I waited roughly 48 hours before sealing with a matte sealer. Also very easy. It was applied with a short nap roller in no time.
Here is the same spot with sealer as before.
And on other area.
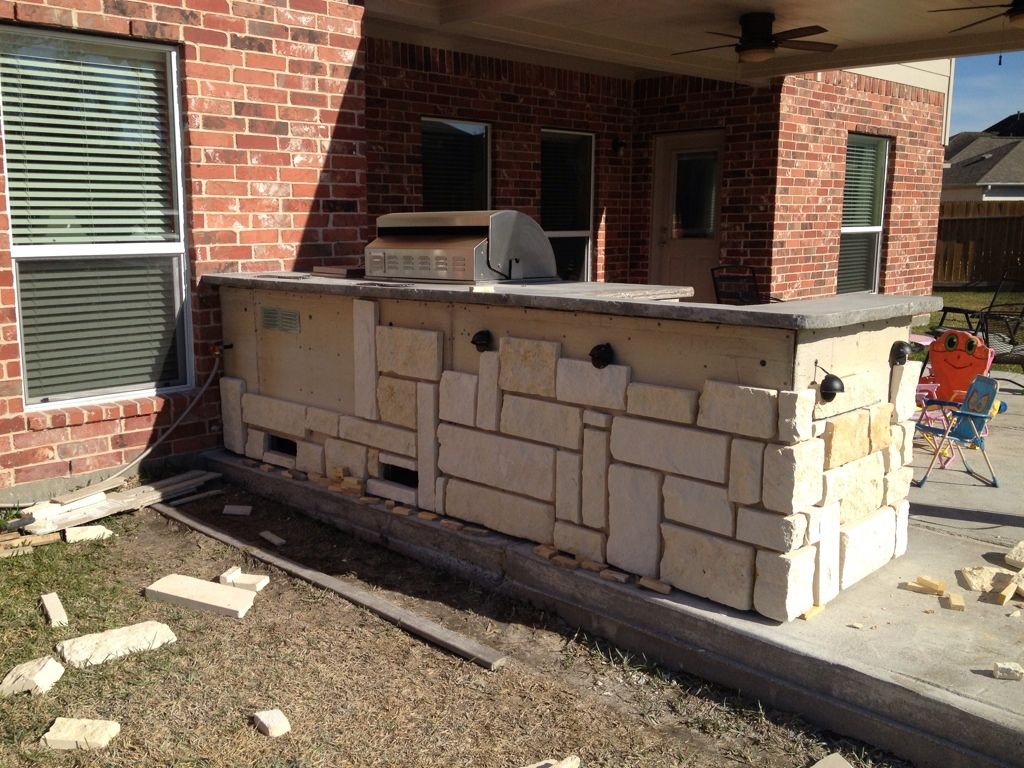
I then adhered the remainder of the rock in place with construction adhesive. Little harder than tile but same concept. Cutting the rocks was the hard part because I was using a tile saw that couldn't cut the depth of the rock in one pass.
Here are a few pictures of the rock up.
I am now working on the mortar in between the rock little by little. Here is the end with finished mortar.
Then mount the lights in place and I am done!
5/16/2013
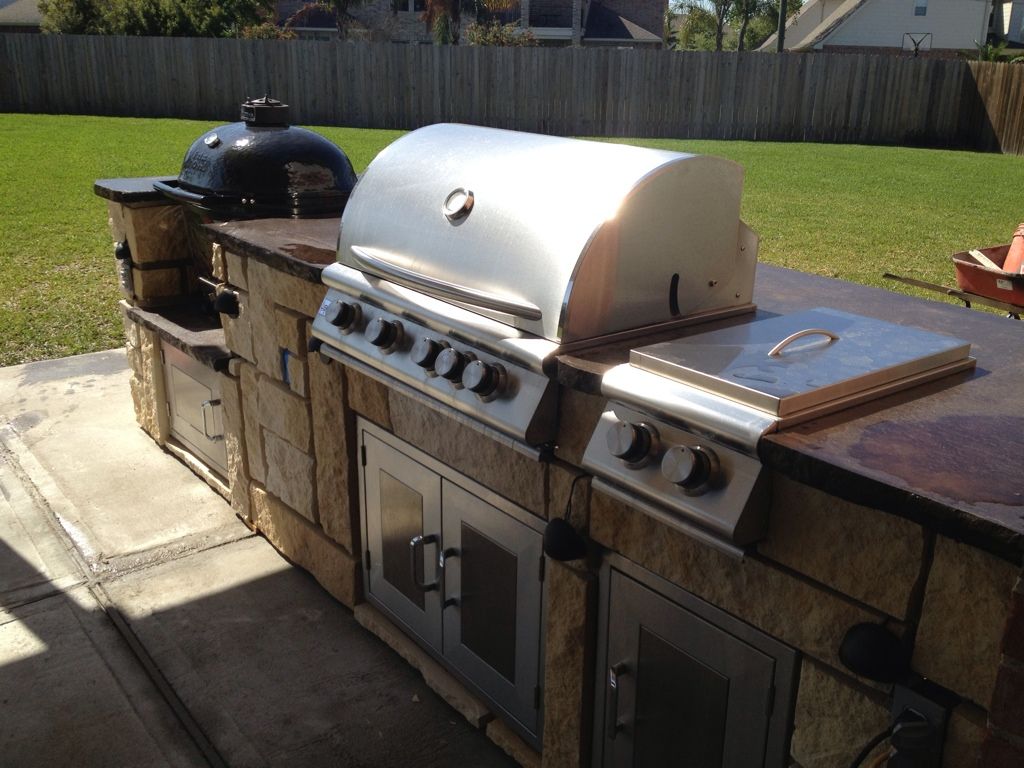
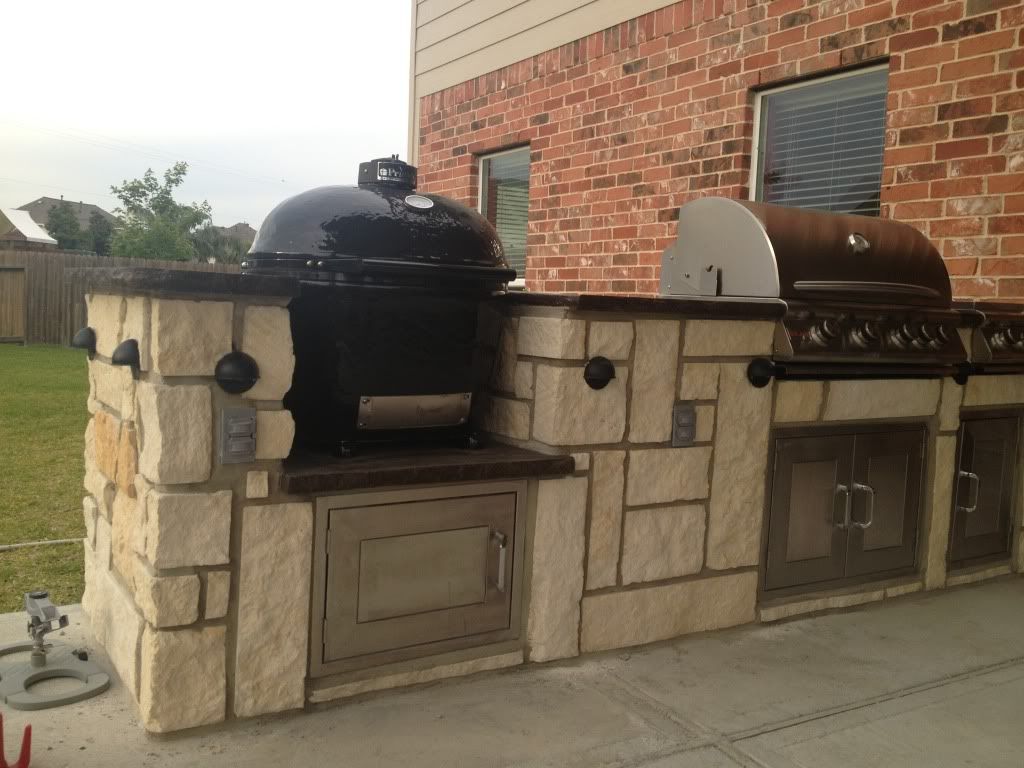
So I finally finished it. Rock, Mortar, counter, plugs, lights, etc..... 100% by me.
Front
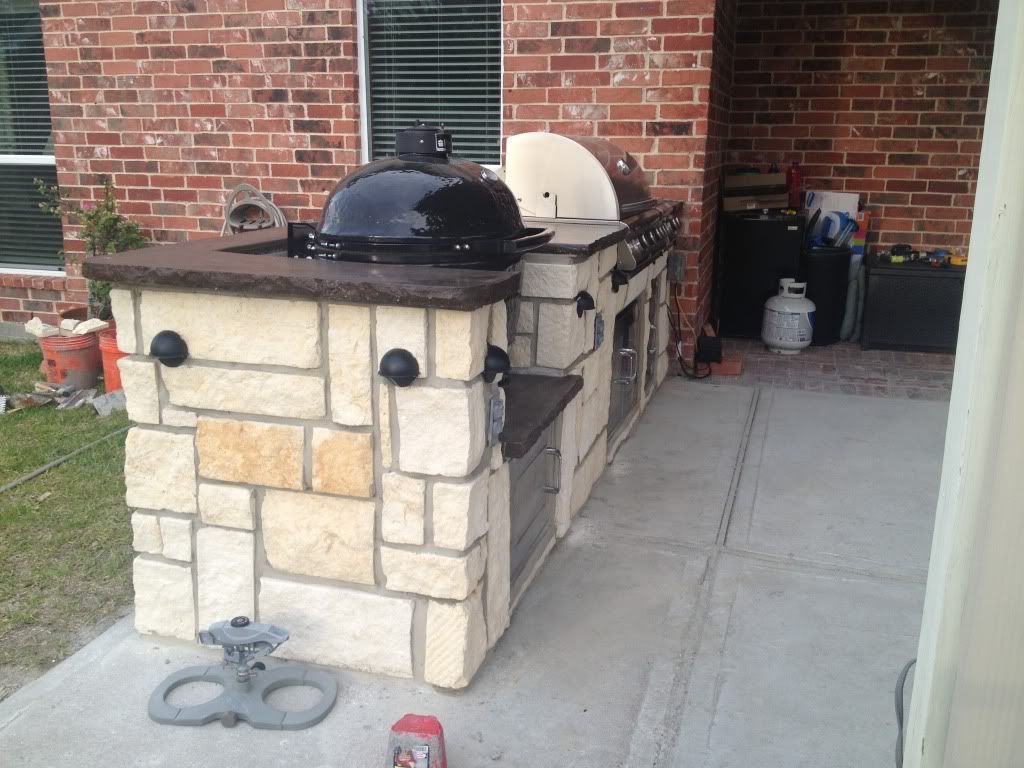
End
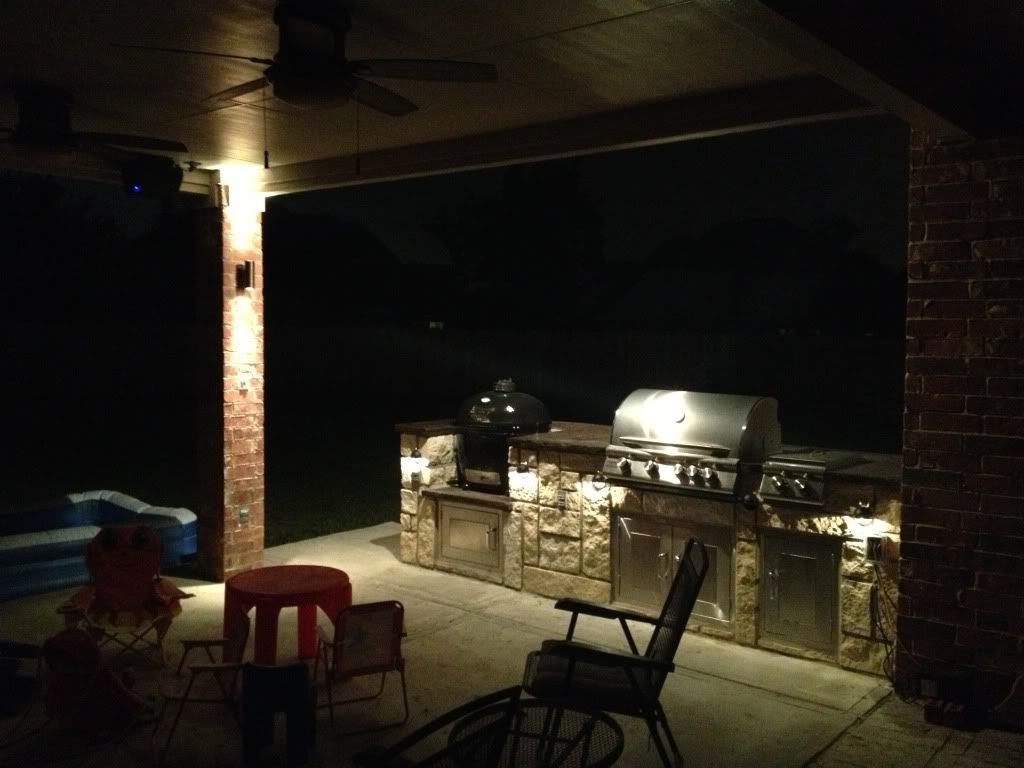
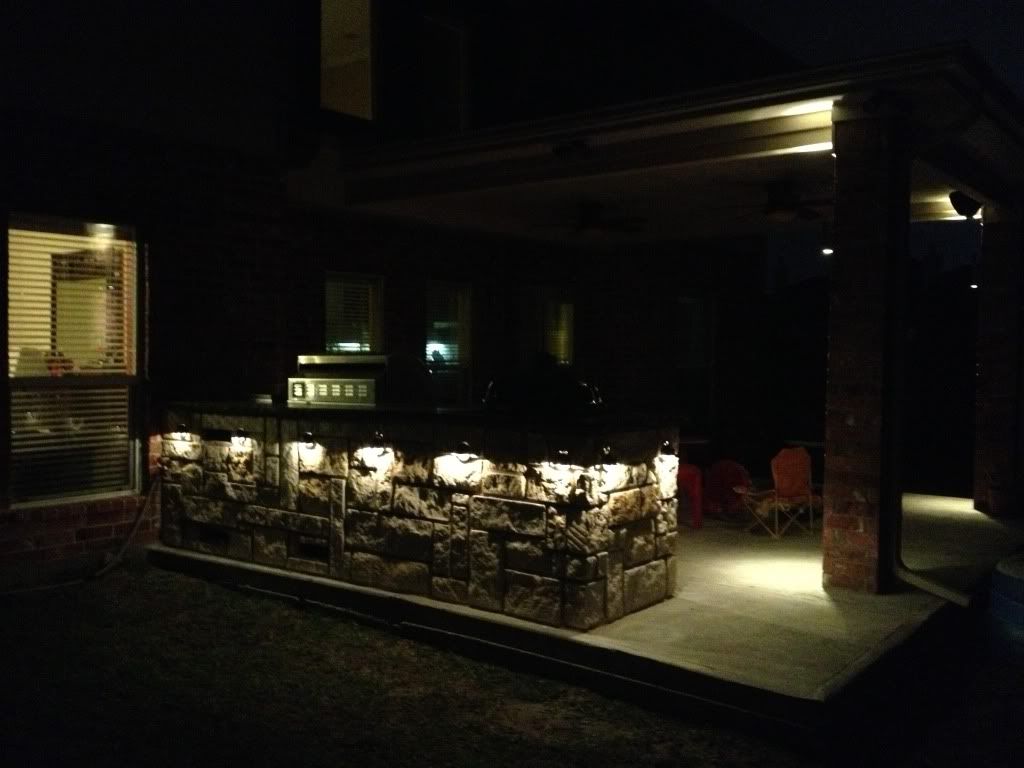
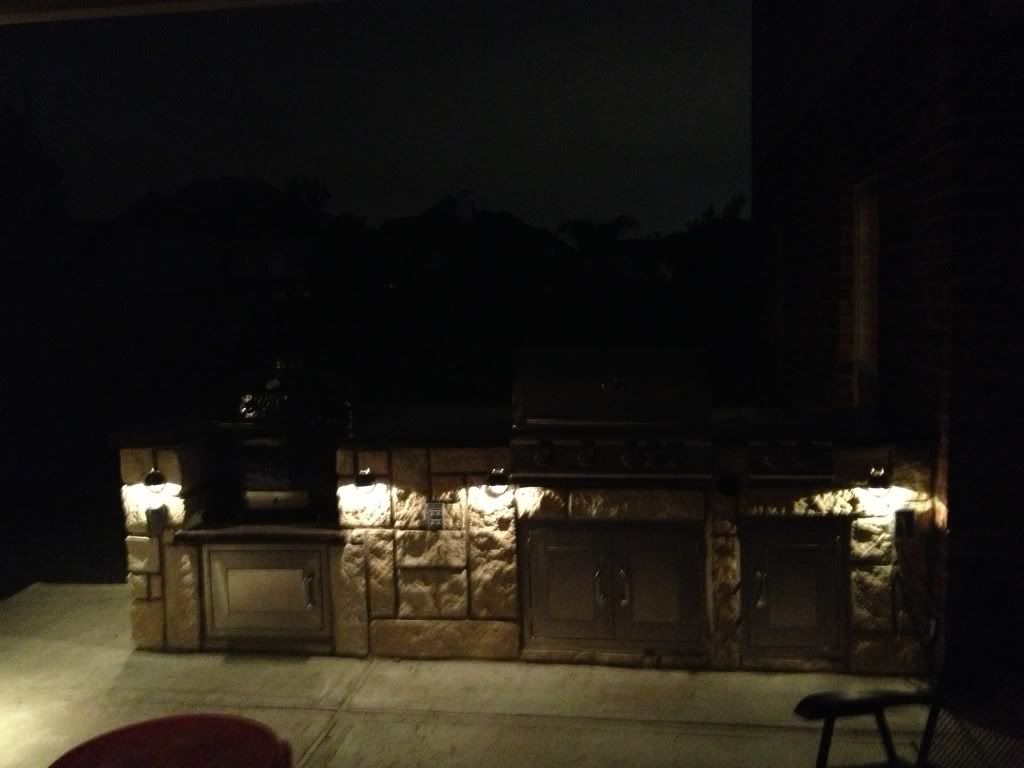
Front at night with grill light on
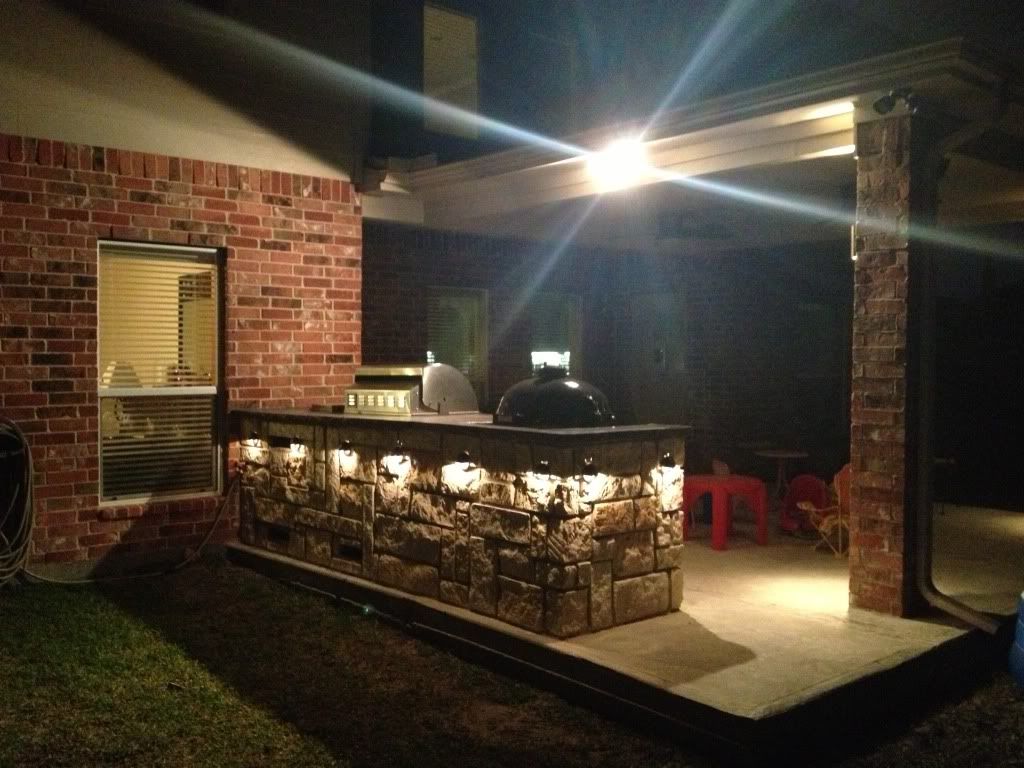
Back at night with grill light on
Grill light off
Front grill light off
All in all it turned out just how I imagined it when I started planning in December. Took long but seeing as how my third kid was born in February I think the delay is quite justifiable.
I hope people get to learn from what I did and benefit.
END SUMMARY
When we built our house a year ago I asked the builder what an outdoor kitchen would cost. What they would have provided is much less than what I built. Their estimate price was $15,000!!! I did all the labor my self, it took working a few days a month from December to May (1 month for the countertop to cure prior to sanding and staining), and I waited on materials a lot as I didn't order anything till I knew exactly what I wanted.
So here is the final cost breakdown:
Gas Grill, Side Burner, and Doors - $2,100
Primo - $1,361
Rock - $1,077
Steel Frame - $439
Concrete Countertop Edge, Stain, and Pads - $483
Cement Backer Board and Screws - $200
Low Voltage Lighting and Transformer - $193
Concrete Adhesive - $148
Electrical Supplies - $118
Trex Footing and Anchors - $98
Countertop support, frame, and tools - $97
Mortar - $40
Total Cost $6,355
REVIEW AFTER 8 MONTHS
So it's been 8 months and I have smoked/grilled hundreds of pounds of meat for days and days. Figured I would add a few comments since I have been using it.
I really like the Blaze Grill and Primo smoker!! Only melted the primo gasket once when it hit 950*!!
Couple of things I modified:
Drilled holes in the drip pans to add a drain via 1/2" poly Tubing to one of the lower vents
Purchased the IR burner for the Blaze
Things I would do different:
I would add pull out drawers or shelves to at least one of the doors
Place the low voltage transformer on the inside
Add a layer of waterproofing on the hardibacker
Things that kinda don't work:
The side burner doesn't work as well as the stove inside. I guess with the wind it doesn't get hot enough.
Things I love:
Having all the low voltage lights
Multiple outlets
A huge space between the grills for prep
Ah one more tip.
I used an 18V recipricating saw with the blade removed as underneath the hardi to help force air bubbles out. Since I have the silicone mold (really suggest you do this it looks awesome) I went down the edges as well.
This also helps work the aggregate down and 'cream' up so that when you sand it you don't expose rock (unless you want that look).
I think I only sanded with 400 and 600. I used less than 1/3 pad each. Got them from the same place I got the edge and stain from.
If you have an overhang more than 6-8" I would think about putting 1x2 under it to help support. My did start bowing with the weight of the concrete in on corner.
And don't start smoothing too soon. Get the nicest tools you can for smoothing the concrete to get the perfect finish. I probably waited almost an hour till I smoothed mine.
The good thing is, if you don't like it your only out the cost of the concrete and you can start over.
Good luck!!
The build happened a few years ago. I have a detailed thread on another forum but will transfer the relevant information here as that forum seemed to have gone silent.
Brief description:
15'x15' covered patio with a 15'x20' concrete slab.
11'-6" Straight Island (on the 5' uncovered portion of the concrete)
One end of the island is against my house
Frame from BBQ Coach 20 gauge galv, screwed together with zinc coating on all screws and cuts
Trex base
1/4 Durock Cement board on all sides
1/2 Hardie on top
Granite Tile on countertop, laid with thin set, smallest grout lines possible, grouted with silicone
Thin Austin Creme limestone veneer all sides
All appliances are LP and island will be vented
Blaze 32" Gas grill
Blaze Double Side Burner
Primo Oval XL (still under consideration)
Various BBQ Guys stainless steel doors
Here are some design drawings done in Visio
Overall Plan:
Kitchen Detail Elevation:
I framed it in my garage and then carried it out back for installation on the concret pad. Various photos at steel frame construction stages:
Test fit grill:
Test fit doors, grill, and side burner. Doors not at proper elevation due to not knowing what counter top material I am going to use and how much height to compensate for:
All modules built. The Primo cutout isn't yet installed as it hasn't arrive to get proper dimensions yet.
I have moved it around back (sorry no picks. It is freezing and wet in Houston) and covered it with 3.5 mil plastic due to the rain.
Here are pictures in place:
And what I am thinking ant for the concrete countertops.
Progress for the day:
and a little test run:
1/21/2013
Got some progress done today. Finished the cutouts for the doors, side burner, vents, and primo. Finished the Cement board all around as well. Haven't decided how I am going to finish the primo. I am leaning towards open front because of easy access. Need to order rock to get the counter overhang right then install the top 1/2" hardi for the concrete counters.
1/28/2013
Ok guys... First real issue I haven't been able to think through. I am trying to do cast in place concrete counters and am tying to figure out how to frame them.
On top of the studs is 1/2" hardi, not an issue. The problem is attaching the edge boards. The walls will be rocked with 1.5" limestone using probably 1/2" of thinset, then I need a little overhang maybe 1", then I am using silicone edge moulding that is 1.25" thick. So the total overhang is 4.25". After the councrete is set I will cut the hardi overhang off and rock right up to the concrete.
Here is a detail:
This creates two issues:
1) How to support the overhang? I believe I could construct a frame with wood studs under the hardi that is temporary.
2) How do I frame the edge pieces on to the 1/2" hardi? I did a couple test screws and the hardi splits every time. Do I frame into the under support for the overhang?
I was trying not to make it too complicated, but this is the best I could come up with. Since I can't make the counter substrate out of 1" plywood (which is **** near self supporting with a 4" overhang) which I could screw right into, I am in a little pickle.
- - - Updated - - -
2/03/2013
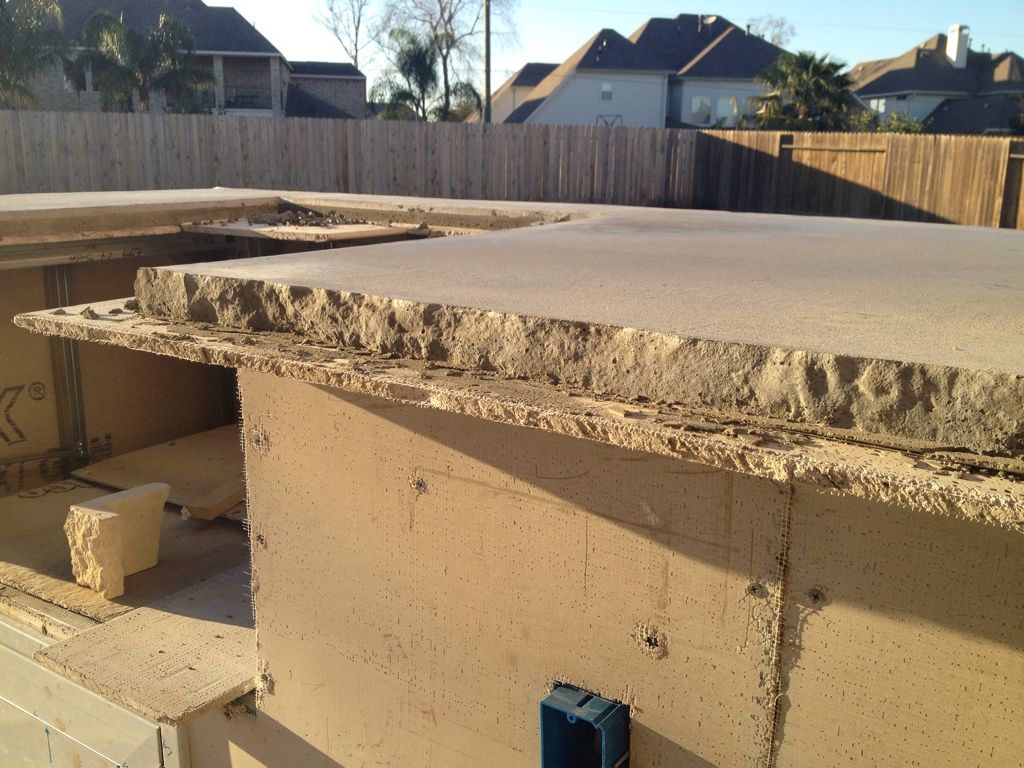
Molds and stain for concrete came in. Framed the countertop with cutouts for Primo, Grill and side burner.
Rounded outside corners.
Rough Rock detail
I bought the edge mold from Expressions LTD along with the acid stain. They have quite a few videos on YouTube.
As for leveling I shimmed under the 1/2" Hardi. Figured that was the easiest. All I was looking for is a level of the edge molds. The area inside the mold can have highs and lows and it doesn't matter.
I shimmed it so there is a slight pitch to the back as the island isn't under cover.
I pulled the edge off a couple of days ago to help it dry. Not too bad. A few pinholes all around that I might hit with a slurry this weekend. I used a reciprocating saw, without the blade, on all the edges over and over to work out a lot of the bubbles. Due to the nature of the silicone edge I used, rough rock, some bubbles were still traped but not many.
I also started to cut the 1/2" hardi from the overhang. Lining the overhang top with wide box tape worked perfectly! The hardi isn't attached to the concrete at all. It is a little messy getting the hardi off though. I was able to get the grill in place last night. I created small cut outs of the concrete (put extra wood in there) so that the grill slide into the edge a little. I think it looks good.
This was the first time I tried to make concrete smooth. It was difficult and it did not come out perfect. I have a few spots that are great but it is definetly not garage floor smooth. I didn't order the diamond pads when I got the stain and edge so I started to sand with 220 grit regular sand paper last night. Just so you know a 4x4 square of 220 sand paper from Home Depot is good for about 2 square inches before it gets burned up. Unfortunately HD doesn't carry diamond paper so I will have to order it.
Anyway... Here are some progress photos.
Edge detail with Thin Limestone piece
Rounded outside corners. The inner edge here is smooth because it is where the Primo will sit. I thought rock face might look funny.
Front cutout is Primo, middle is grill, far is side burner
Grill set in place. It slide nicely into the form.
The space below the grill is a little large. I will need to modify the hardi before I do rock face.
4/11/2013
Actually I have made some progress. The sanding pads did in fact come in. 200 400 and 800 grit dry 5" diamond pads. I started with the 200grit and used maybe half a pad. Then hit it with 400. I read that sometimes at 800 the acid doesn't etch as well so I never used them.
After sanding to where the aggregate started to show I stopped. Not the look I was going for. No pics of the sanding sorry. I will say it wasn't that hard. I waited maybe 10 days after pour and it sanded really easy.
I then started the rock while I was waiting for the remaining 18 days (28 total) recommended curring days prior to stain.
I draped 3.5mil plastic around the island and did the acid stain. It was really easy as well.
Here is the stain prior to ammonia / water neutralization and wash.
I waited roughly 48 hours before sealing with a matte sealer. Also very easy. It was applied with a short nap roller in no time.
Here is the same spot with sealer as before.
And on other area.
I then adhered the remainder of the rock in place with construction adhesive. Little harder than tile but same concept. Cutting the rocks was the hard part because I was using a tile saw that couldn't cut the depth of the rock in one pass.
Here are a few pictures of the rock up.
I am now working on the mortar in between the rock little by little. Here is the end with finished mortar.
Then mount the lights in place and I am done!
5/16/2013
So I finally finished it. Rock, Mortar, counter, plugs, lights, etc..... 100% by me.
Front
End
Front at night with grill light on
Back at night with grill light on
Grill light off
Front grill light off
All in all it turned out just how I imagined it when I started planning in December. Took long but seeing as how my third kid was born in February I think the delay is quite justifiable.
I hope people get to learn from what I did and benefit.
END SUMMARY
When we built our house a year ago I asked the builder what an outdoor kitchen would cost. What they would have provided is much less than what I built. Their estimate price was $15,000!!! I did all the labor my self, it took working a few days a month from December to May (1 month for the countertop to cure prior to sanding and staining), and I waited on materials a lot as I didn't order anything till I knew exactly what I wanted.
So here is the final cost breakdown:
Gas Grill, Side Burner, and Doors - $2,100
Primo - $1,361
Rock - $1,077
Steel Frame - $439
Concrete Countertop Edge, Stain, and Pads - $483
Cement Backer Board and Screws - $200
Low Voltage Lighting and Transformer - $193
Concrete Adhesive - $148
Electrical Supplies - $118
Trex Footing and Anchors - $98
Countertop support, frame, and tools - $97
Mortar - $40
Total Cost $6,355
REVIEW AFTER 8 MONTHS
So it's been 8 months and I have smoked/grilled hundreds of pounds of meat for days and days. Figured I would add a few comments since I have been using it.
I really like the Blaze Grill and Primo smoker!! Only melted the primo gasket once when it hit 950*!!
Couple of things I modified:
Drilled holes in the drip pans to add a drain via 1/2" poly Tubing to one of the lower vents
Purchased the IR burner for the Blaze
Things I would do different:
I would add pull out drawers or shelves to at least one of the doors
Place the low voltage transformer on the inside
Add a layer of waterproofing on the hardibacker
Things that kinda don't work:
The side burner doesn't work as well as the stove inside. I guess with the wind it doesn't get hot enough.
Things I love:
Having all the low voltage lights
Multiple outlets
A huge space between the grills for prep
Ah one more tip.
I used an 18V recipricating saw with the blade removed as underneath the hardi to help force air bubbles out. Since I have the silicone mold (really suggest you do this it looks awesome) I went down the edges as well.
This also helps work the aggregate down and 'cream' up so that when you sand it you don't expose rock (unless you want that look).
I think I only sanded with 400 and 600. I used less than 1/3 pad each. Got them from the same place I got the edge and stain from.
If you have an overhang more than 6-8" I would think about putting 1x2 under it to help support. My did start bowing with the weight of the concrete in on corner.
And don't start smoothing too soon. Get the nicest tools you can for smoothing the concrete to get the perfect finish. I probably waited almost an hour till I smoothed mine.
The good thing is, if you don't like it your only out the cost of the concrete and you can start over.
Good luck!!
 And surprisingly does not burn the food.