Low voltage light and outlet combo or setup?

Hoots711

0
Silver Supporter
May 21, 2018
61
Souderton
Does anyone have any suggestions for a low voltage light/outlet combo?

Most of what I find when searching is for hanging lights.

Im looking for something installed in the ground, specifically in the expansion joint (4-6" of stone) between stamped concrete decking and a retaining wall.

Probably looking for 2x to put on each side of retaining wall steps for the light and then providing outlets to the pool deck.

Electrician has dug the trenches, just not sure what I want to put in at this point.

Any ideas?

Thanks

(Hope this is the right forum for this question?)
 
Maybe you should just have the electrician install a couple of 110 v standard outdoor outlets and then you can come back later and install your transformer and low-voltage lights when they pool is completed.

I'm going to ask my PB to have an extra outlet installed at the pool equipment so I can put a transformer at that location then I'll run low-voltage wiring around the perimeter of my fence and install lights after the pool is completed.

Not a bad idea.

Im hearing from the electrician that we dont have much capacity left from the pad. Im having a wired shed delivered and then he agreed that 3 outlets (one by shed, 2 by steps) with small lights would be ok. But that is about it
 
I would suggest you not think in terms of something "combo." Have the electrician put the outlets where you want/need them, not necessarily where you want light fixtures. Then have him either hardwire a low voltage transformer (for lights), where the best spot for that is, or have him install another outlet at that location, and plug in the transformer. Consider aesthetics when determining where the transformer is going to go (so that you don't have to see it if you don't have to).

VOLT is an excellent brand (it's what I used throughout). Yes, you definitely want LED. Regarding the Costco kit, call VOLT directly and ask them about the spec's and the type of light. They'd know before Costco would. And visit the VOLT website to shop around. You might find a kit more in line with what you need.

Couple of "warnings." VOLT recommends a transformer larger than your need. I forget the exact number. They don't want you to plug in 150 watts of lighting into one of their 150 watt transformers. It's something like 75%, so for a 150 watt transformer you should only use 120 watts of lighting, or so (again, VOLT tech support can give you the correct numbers).

Which relates to "warning" #2: for me, landscape lighting is addictive. I bought a large VOLT kit direct from them. I've since added more. I've maxed out my transformer, and still want more, so now I'm looking at replacing the existing transformer with a larger one, or adding a second transformer.

Point of both "warnings:" overbuild! If you know for sure you only need X number of lights, then plan accordingly. But if you are like me, you'll want to add more lights (once you see how cool landscape lighting is) so buy the next size up transformer, or even bigger...

The cool thing about VOLT low-voltage lighting (or similar setups), is that the wire running between fixtures can lay on the dirt, and you can add new lights and runs of wires at will, with simple splicing. No conduit needed (the wire basically lays on the ground, or just under a layer of mulch). So you can add lights easily, move them around, add a whole new run of lights later, across the yard, etc. Very versatile and expandable. (Versus just a couple of "combo" lights hardwired to 120V conduit.)


The Volt Package from Costco is indeed LED, and you cant beat the price, pricing is only good until the 28th. It also comes with 2 spare LED bulbs, like i said you can't beat this price for everything you get in this kit. You can go on their website and build your own kit and see how much this would cost you buying direct.

The pathway lights are 4 Watts and the Spot Lights range from 2-7 Watts, so with the 120 Watts you have of power, there is plenty of lighting you can add to this system. The 9 lights included only consume up to 54 of the 120 available.

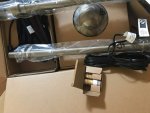
Optimized-Volt Lights.jpg
 
I bought his exact kit from Costco earlier this month and took about 2 hours to setup and it’s awesome quality. Most of that time was taken up by me digging a small trench for the outlet to the bed area to lay the wires. It’s definitely LED and the results look like professionals installed it for $2k plus.
 
Can anyone walk me through a setup for dummies on something like this kit? (im dangerous enough to do minor household electric but thats about it..)

Could i plug the transformer in to the outlet at my pad? If so, would i then be able to dig tiny trenches along patio or through rock expansion joints to run the wire for the lights?

Another problem is timing, my PB and subs are more of fly by the seat of their pants than scheduled work kind of guys if you know what i mean....

I guess im asking... Does it make sense to ditch the combo (as suggested above), have PB/Electrician put our 2 outlet boxes in and then try to do this myself. Hopefully before we rock the EJs?

Thanks guys


  • Kit includes: one 150 watt power supply, three solid brass area lights with lamps and 25 foot power cord, six solid brass spotlights with lamps and 25 foot power cord, two easy-connect hubs for making connections, 100 feet of 14 gauge supply wire, and all the tools needed for assembly and installation.
also, the 3x area lights and 6x spots say they come with 25' power cords and then 100 foot of 14 gauge. Does that mean the first in the series also needs an outlet and then the 14 gauge is to connect the rest? or????
 

Enjoying this content?

Support TFP with a donation.

Give Support
Can anyone walk me through a setup for dummies on something like this kit? (im dangerous enough to do minor household electric but thats about it..)

Could i plug the transformer in to the outlet at my pad? If so, would i then be able to dig tiny trenches along patio or through rock expansion joints to run the wire for the lights?

Another problem is timing, my PB and subs are more of fly by the seat of their pants than scheduled work kind of guys if you know what i mean....

I guess im asking... Does it make sense to ditch the combo (as suggested above), have PB/Electrician put our 2 outlet boxes in and then try to do this myself. Hopefully before we rock the EJs?

Thanks guys


  • Kit includes: one 150 watt power supply, three solid brass area lights with lamps and 25 foot power cord, six solid brass spotlights with lamps and 25 foot power cord, two easy-connect hubs for making connections, 100 feet of 14 gauge supply wire, and all the tools needed for assembly and installation.
also, the 3x area lights and 6x spots say they come with 25' power cords and then 100 foot of 14 gauge. Does that mean the first in the series also needs an outlet and then the 14 gauge is to connect the rest? or????


Yes! all you would do is plug in the transformer at you pad outlet and then dig to your locations. The transformer has a regular 3 prong plug. The 14 gauge cable supplied is for your runs to the hubs. You just connect all the lights to hubs and your done. The transformer has a light sensor as well as a timer. I haven't set mine up yet because my backyard is a mess as my pool is still under construction. Once they clean up all the rock and begin to work layout the decking i will then run my cabling to each location. If you need additional cable, you can just go to Home depot and buy some more direct burial cable or you can order some from Volt if you want.
 
The weak links in outdoor lighting are the bulbs and the connections. VOLT hardware is all solid brass (if that's the model you're getting), they'll last forever. There's a member here who wrote the LED bulbs don't last all that long, because of the tiny circuits they have on board, but mine are going strong after three years now, so my experience has been great. So that leaves the connections. VOLT supplies some good connectors, that are designed for outdoor use, but having messed with lesser systems for years, I wanted this latest system to be my last. So I took the extra step of soldering all my connections. I then used the VOLT water-resistant connectors in addition to that. I realize soldering is beyond the skills of some, but if you can manage it, I believe it to be worth the effort. The resulting electrical connection will not be subject to physical stress or corrosion, and will never fail, or worse, partially fail causing flickering or reduced brightness.

The length of wire run can also impact voltage to the bulb, reducing brightness. I used a heavier gauge wire (from Lowes) than the included 14G. I believe I used 12G direct burial for the main line, and then soldered on VOLT's 14G that is built-in to their fixtures.

I'm not sure what you're referring to when you talk about trenches. You can bury the wire, but you don't have to. As I mentioned, it can lay on the surface. That makes it susceptible to a gardener that's not paying attention (shovels and trimmers, etc), but allows for easy expansion and adjusting. Up to you which is the more important factor. I wire-tied my wires to my drip irrigation tubing, kind'a an all-or-nothing deal. I figured the drip tubing would be more obvious to someone poking around in the garden, so would theoretically make the wire a bit more sheltered, plus making the wire easier to find for future use. I think the water-resistant connections VOLT offers will stand up to it for the most part, but personally I wouldn't (didn't) bury any splices (and mine were soldered). I just think burying a splice is asking for corrosion trouble, which can be a real bear to troubleshoot. Soldered, covered with water-resistant connectors and kept above the dirt and mud is my idea for a trouble-free setup.

Also, if you have extra wire, I recommend you leave it inline, wrapped up near transformer, main line or fixture, so that you later have the option of moving the fixture(s) around. Don't trim everything to the inch, leave the slack. You might want to reposition the fixture later, or need room for a splice, etc.

All those tips are optional, obviously, the whole setup if virtually plug-n-play as is. I'm just giving you some "advanced" tips if you want a more robust and versatile setup.

Have fun with it. We'll see if you have luck resisting the need to buy more and more landscape lighting!! ;)
 
Thread Status
Hello , This thread has been inactive for over 60 days. New postings here are unlikely to be seen or responded to by other members. For better visibility, consider Starting A New Thread.