Fiberglass 16x40 DIY install (PICS)

JPontius6

Active member
Jul 17, 2019
32
Indiana
I've embarked on the project of a lifetime... self-installing a fiberglass pool for my family (wife and 2 kids under 3 yrs old) here in southern Indiana. I spent countless hours researching different types, shapes, and manufacturers of all kinds of pools and settled on a 16x40 Aspen by Thursday Pools. I found a dealer that would order the shell for me without doing the whole install and made the 50% deposit to get the order going.

I then researched, selected, and purchased all of our equipment - mostly Hayward, plus a Circupool SWG. Then I began electrical work: a 50A subpanel at the back corner of the house, a 2-sided control panel for my equipment pad (subpanel on one side, and equipment controllers on the other), lots of conduit for receptacles, pool lights, switches, autocover, and autocover touchpad. As well as a 50ft gas line for the NG heater.

Right about as I finished up the electrical work, I got the call scheduling the pool delivery (about 2 weeks earlier than expected!)

I decided to get the equipment pad poured and have all the equipment set (and wired) prior to the pool arrival so I could get it hooked up and running quickly.

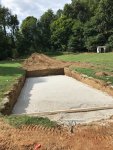
Then, a friend came over on a Saturday to help out with the excavation (pool to be delivered the following wednesday). Excavation went really well and took about 4 hrs:
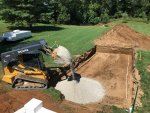
IMG_3582.jpgIMG_3587.jpg

All was well until Tuesday brought a MASSIVE thunderstorm. My yard gets quite a bit of runoff from the neighbors on each side, so my swimming pool excavation quickly became a pond:
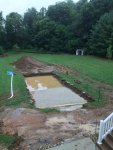
58861221757__FA22E50A-68F0-4826-B6D8-F56FDB263E55.JPG
I left work and rented a trash pump to pump it out and spent the whole afternoon/evening shoveling mud out of the hole and re-screeding the gravel base.

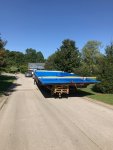
Finally, Wednesday came around and the pool arrived precisely on schedule!
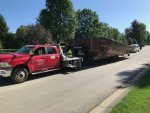
IMG_3617.jpgIMG_3616.jpg
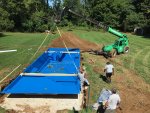
A little rigging and planning, and we had the pool in the air, over the truck, around the house, and in the hole.
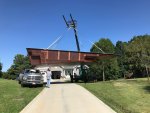
IMG_3623.jpgIMG_3625.jpg
Spent about an hr checking, double checking, and triple checking for level - the whole shell was within 1/2" right off the bat! I took this opportunity to install the bubblers I had planned for the tanning ledge (since I could get under there easily. I just used CMP fiberglass return fittings and plumbed them out to the edge of the pool where I teed them together. Then...time for water and backfill (I used #11 crushed stone on the base, and #8's for the backfill). A couple trucks of water and 3 garden hoses got us to about 15" below the top lip by the end of the day.
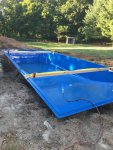
58872528207__D1DD88BC-DEA1-46C2-82D1-F865CC17D444.JPG
IMG_3631.jpg

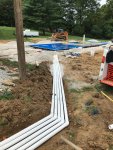
Then I spent about two full days installing 3 returns , 5 lights, and the skimmer, and plumbing them all to one corner of the pool, where they would then extend up to the equipment pad. At the end of day 2 of plumbing/wiring, I gave the lights a try :giggle::
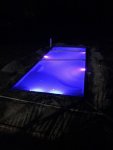
58899536058__03D3870F-8673-418C-8988-4C3D45DD1606.JPG
 
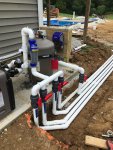
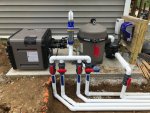
Then, I spent about half a day finished up the rest of the plumbing runs and getting the equipment pad all plumbed and buttoned up:
IMG_3662.jpgIMG_3658.jpgIMG_3660.jpg

Finally, primed the pump, purged the filter and got some water moving!!
IMG_3667.jpg

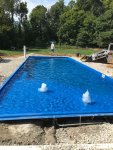
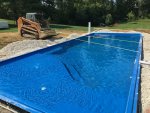
Then, i did my best over the next 24 hrs to monitor all my pipe joints for leaks, and watch for air in the pump. Everything checked out okay, so I continued moving/spreading gravel (160 tons in total). During this time, I straightened the pool walls (using the ratchet strap NOT the skid steer) to prep for the autocover tracks and raised the water level to about 3/4 of the skimmer height.

IMG_3664.jpg

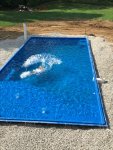
I Finally finished moving all the gravel that was onsite and leveled it out a little bit, which called for a celebratory swim.
IMG_3669.jpg

This is how the pool currently sits. The APC autocover arrived this afternoon, so I need to get the tracks installed in the next few days and finishing up my bonding.
I have my bonding inspection this Friday and my concrete contractor coming next Monday/Tuesday to form up the deck, pour the collar, and then pour the deck.

I'll keep updating with pics as I get into the autocover install and completion of the deck. For the autocover, I'm doing something a little different - an encapsulated track with aluminum bullnose coping (the 365 coping from APC), and then I'll be deck-mounting the reel mechanism and building a nice stone bench around it with limestone caps and a removable back. I also plan to put some lights and a small cascade in the bench (into the deep end).
 
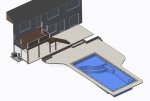
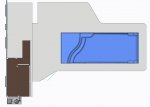
Probably should have started with this, but here's the original layout/plan:
pool_layout1.JPG
pool_deck.JPG

A couple specs:
Pool: Thursday Pools Aspen 16x40 in Maya
Pump: Hayward Tristar 2.7HP
Filter: Hayward C3030
Heater: Hayward H250FDN
SWG: Circupool RJ35+
FlowVis flow meter/check valve - this thing is AWESOME

Lights: S.R. Smith Poollux (3) kelo and (2) treo micro
Skimmer: Thursday Pools Lucky 7
All 2" plumbing: 1 skimmer, 3 returns, 2 bubblers (returns) in the tanning ledge, and I'm stubbing out a return line flush with the deck on one side for a future water slide option.
 
Probably should have started with this, but here's the original layout/plan:
View attachment 117494
View attachment 117493

A couple specs:
Pool: Thursday Pools Aspen 16x40 in Maya
Pump: Hayward Tristar 2.7HP
Filter: Hayward C3030
Heater: Hayward H250FDN
SWG: Circupool RJ35+
FlowVis flow meter/check valve - this thing is AWESOME

Lights: S.R. Smith Poollux (3) kelo and (2) treo micro
Skimmer: Thursday Pools Lucky 7
All 2" plumbing: 1 skimmer, 3 returns, 2 bubblers (returns) in the tanning ledge, and I'm stubbing out a return line flush with the deck on one side for a future water slide option.
Awesome job JPont.
well done.

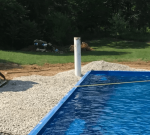
what is this tho?
1567541650618.png
 
That's the pipe that allows you to monitor for ground water under the pool, and pump it out if need be. Very important for fiberglass pools.

I'm curious about the placement of the lights and skimmer... were they already cut out and ready when you rec'd the pool shell or did you decide? Do you have some prevailing winds in your yard to take advantage of the skimmer being up there on that side?

I'm very impressed with your skills! I especially like the equipment pad and your wooden wall. Well done all around!

You're brave and also have skills!

Maddie :flower:
Thanks Maddie! Truth be told, I had about 6 weeks off work following a neck surgery this summer, which afforded me the time to plan every aspect of the build.

And to answer your question about the skimmer, yes, we do have winds that come through our yard in a certain direction (because of a couple rows of trees and the landscape creating a funnel). There weren’t any precut locations - this was just the best arrangement I could figure. The return near the skimmer helps to keep the steps clean and overall, I’m getting great surface movement!
 
  • Like
Reactions: YippeeSkippy
Very impressive... :goodjob:

Getting proper support under the tanning ledge would make me a little nervous. How did you pack the stone under the tanning ledge?
 
Last edited:

Enjoying this content?

Support TFP with a donation.

Give Support
Very impressive... :goodjob:

Getting proper support under the tanning ledge would make me a little nervous. How did you pack the stone under the tanning ledge?
We packed stone under the steps and ledge manually and then brought in a cement truck with flowable fill. The flowable fill does an awesome job of flowing into every little corner and void until it hit the bottom side of the ledge. Tanning ledge feels nice and solid!
 
Here's some info on it. The one BIG trick is not to let it flow under the pool, as it will make the floor bubble up and potentially lift the whole shell. We basically just tamped a bunch of gravel under the bottom step to create a dam that it couldn't flow through. Although it is low stength (relative to concrete), it is essentially just like having concrete under the steps once it sets up. Not to be used for structural purposes, but a great way to fill under steps/ledges. With that said... I would purchase Thursday Pools' backfill eliminator if I had it to do over, even though it was a $2600 add-on.
 
You Sir, are a DIY hero. Massive kudos to you for executing this. Looking forward to seeing the final product!

I have a laundry list of DIY stuff for when our build is complete, including an equipment pad surround, additional landscape lighting, shower station, etc, but I don't believe I'd have the fortitude to take on something of this scale.
 
  • Like
Reactions: JPontius6
Ok, that backfill eliminator is interesting! I've never seen another fiberglass pool manufacturer talk of such support extras.
THanks for the explanations of the flowable fill. My pool was backfilled with stone but of course I don't have a large expanse of sun deck like you have. But it would have been nice as a little something extra under stairs.

Maddie :flower:
 
You Sir, are a DIY hero. Massive kudos to you for executing this. Looking forward to seeing the final product!

I have a laundry list of DIY stuff for when our build is complete, including an equipment pad surround, additional landscape lighting, shower station, etc, but I don't believe I'd have the fortitude to take on something of this scale.

Thanks for the Kudos @PlaysARobin

There have been moments where I feel like I'm in over my head but overall, I'm happy with how it's going, and I can see light at the end of the tunnel. The fun part is the savings - in case anyone is interested in the numbers (i'm an open book), the whole project was quoted at $82k and $86k by two different pool builders. All in, it's looking like I'll complete it for right around $58k myself. I will say, however, that I do understand why they charge what they charge, and I don't think it's unfair - I just have more time than money and like to do things myself when I can. When you consider the knowledge a good pool builder has, the liability that they assume, and the warranty coverage they (hopefully) provide, it is a VERY valuable service that they provide.

But I do think that doing it myself makes the water feel even more refreshing, too ;).
 
I'm a huge advocate for sweat equity, for sure. Having bought our first home as a foreclosure, remodeled every room including 2 bathroom stud-to finish, and a full kitchen stud to finish redesign/rebuild, I can definitely say I understand the feeling of being in over your head. The savings are real. The attention to detail is personal. And the level of ownership over the details is immeasurable.

I convinced myself the work I did in the last house would afford me the opportunity to do 'not as much' work on the new house! Its definitely paid dividends, in both aspects.

Cheers to the warm and fuzzies of sweat equity!
 
We packed stone under the steps and ledge manually and then brought in a cement truck with flowable fill. The flowable fill does an awesome job of flowing into every little corner and void until it hit the bottom side of the ledge. Tanning ledge feels nice and solid!

Even more impressive ... You really did do your homework. Flow fill would have been what I would use.

With that said... I would purchase Thursday Pools' backfill eliminator if I had it to do over, even though it was a $2600 add-on.

Agreed.. I would call that money well spent.You would think that would be the only way they would sell one with a sun shelf to start with. You must have been getting close to $1000 for the flow fill?
 

Enjoying this content?

Support TFP with a donation.

Give Support
Thread Status
Hello , This thread has been inactive for over 60 days. New postings here are unlikely to be seen or responded to by other members. For better visibility, consider Starting A New Thread.