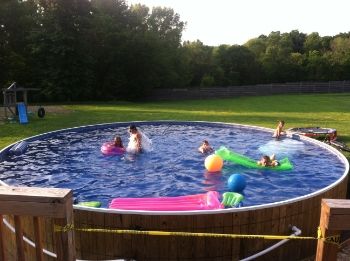
Because I always gravitate toward a challenge, I'm building my own wooden AGP...

It even looks better ! As for the solar cover, they work very well with retaining heat that you would lose over night from evaporation. Even if you get a heater it will still help with the heat loss at night.
I use one all the time. I have no heater and have been able to maintain temps in the 84-90 range for sometime now. To make easier to handle I cut mine in half.
 
Wedding cake steps are wonderful BUT watch them for collecting algae. Some people use turkey baster to squirt bleach into the holes to make sure.

I would also think about taking them out every once in a while to have a look see.

Kim
 
Thanks everyone for advice and nice comments!

The solar cover......I cut it in half this morning when I took it off before work. Water was noticeably warmer today, and it was easier to roll up the two smaller halves.

The steps....they are completely hollow. The entire back section facing the pool wall is open, as well as most of the bottom. There are also holes in the sides to allow some flow, too. I scrubbed and bleached the heck out of them with a solution of hot water, Mr. Clean, and about a half cup of additional bleach, before they went in. I will keep an eye on them as time goes on.
 
Open at the back? PLEASE tell me you know the name of this brand! See when we "lost" the old pool to HIGH cya we sold the wedding cake steps as they were a pain to keep clean.

I would LOVE another set and your set sounds like it work for me!

Kim
 
My steps are made by a company called Innovaplas. Canadian company maybe (?). In any case, each step is completely round, and the entire thing is either injection-molded or blow-molded white plastic (totally hollow). There is a big round cut-out on the bottom side, and the back side has a rectangular opening that is almost as big as the entire backside. I have them sitting about 1-2 inches away from wall. When I get around to installing some bumper material on the backside of the steps, then I'll push them directly up against the wall.

I have a lot of water movement with two returns, even with my pump on Low Speed. I currently have a 50lb sand container sitting on the bottom inside the steps, holding them down. And I'm also filling up some 1 gallon milk jugs with sand/stone to use next to 50lb weight to further keep them in place.

- - - Updated - - -

These are the steps I have :

02.jpg
 
Well, after so much work pulling this pool together, I needed to take a few days off to enjoy it.....

So after a few days this week of....

0d53d18d-9084-4952-bfe7-d2821ff8428a.jpg


and...

202b6280-07c0-4bd6-a9a5-226582289acd.jpg


it was time to get back to work.


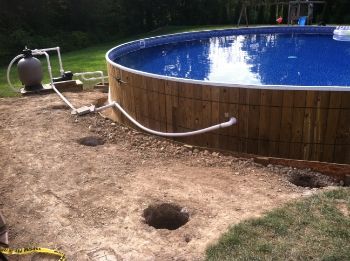
First, I laid out my holes for the deck. Dug six holes by hand....fun times.

cd24ea8d-a5ef-4eda-bfd0-869d02ec7ea4.jpg


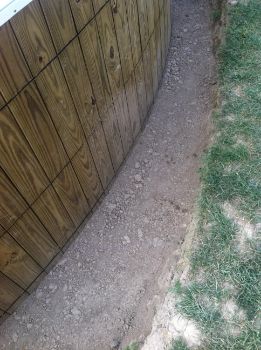
The dirt I had from digging the holes came in handy for lining the bottom of my perimeter drain trench around the pool. This small layer of clay should seal in the sand around my ring of pavers, and it will also form the base for the drain.

3e752b65-d613-400c-a553-48d9b61775de.jpg


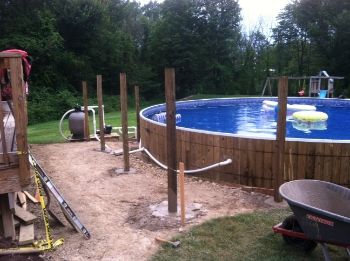
Then, after pouring my 6" footers in the bottoms of the holes and letting that dry overnight, I set my posts and concreted them to grade. I always make a small "mushroom top" of concrete just above grade to discourage groundwater from getting down between the post and concrete surrounding it.

9e04ed89-6900-48c1-8e6f-1a81c52004b4.jpg


So now....I'm setup for a nice weekend of deck building.....more pics to follow!
 

Enjoying this content?

Support TFP with a donation.

Give Support
Thread Status
Hello , This thread has been inactive for over 60 days. New postings here are unlikely to be seen or responded to by other members. For better visibility, consider Starting A New Thread.