Decided to Build First Pool this Spring

Took a few more pics last night. They don't really show the changes in elevation (mostly cause it's all red clay at the moment). The now flat space next to the pool really makes the yard look bigger. I measured that area last night, and giving up some space by the pool deck, and the future fence, i could do a 25'x50' volleyball court if i wanted (official size is 30'x60' i think).

IMG_1956-1.jpg


IMG_1957-1.jpg


IMG_1958-1.jpg


IMG_1959-1.jpg


IMG_1960-1.jpg


Volleyball area possibly
IMG_1951-1.jpg


Before
IMG_0054-1.jpg

IMG_0055-1.jpg

27a776c4-1.jpg

fence1-1.jpg

fence3-1.jpg
 
Somebody swung by yesterday and finished the bonding, forgot to see if they pressurized the lines, guess i'm ready for inspection.

Also painted out where i think we want the pool decking and concrete patio to go, as well as the connecting steps. Concrete foreman comes over today to talk about the pour and finalize where the forms will go.

In case anyone is wondering, these pictures were taken around 5:30 pm. The pool gets full sun from about 9:30- 4:30 currently.

IMG_1963-1.jpg


IMG_1962-1.jpg


IMG_1961-1.jpg


IMG_1966-1.jpg


IMG_1964-1.jpg


IMG_1965-1.jpg


IMG_1967-1.jpg


IMG_1968-1.jpg
 
Coverstar came out over the weekend and installed the auto cover's track and pit cover. The installer was real nice and explained a lot about auto covers too me, pro's con's among the different brands. He was glad the pool was built perfectly square as the tracks don't flex to make up for minor errors. He did have to shim the pit cover support on the pool side of the pit because the pit was formed 1/2" too wide ( i guess that's better than 1/2" too narrow....)

IMG_1970-1.jpg


IMG_1969-1.jpg


They are forming for concrete today, and will pour on Wednesday.
 
So the pool builder has made 1 mistake, he told the head gunite guy 5" radius in the corner and head gunite guy heard something else, so the 4 corners have to be ground down. PB came out the other day and did the top couple inches so as to not hold up the auto cover guy, he said when they do they pool bottom his guys will finish the corners....
IMG_1998-1.jpg


IMG_1999-1.jpg


Concrete forms were put up yesterday. Sure looks different than the pink spray painted lines. Any opinions? Now is the time to change it!

IMG_2010-1.jpg


IMG_2009-1.jpg


IMG_2014-1.jpg


IMG_2013-1.jpg


IMG_2012-1.jpg


The hot tub pad drains towards the pool, there will be a channel drain between the pool decking and hot tube pad. It is supposed to have 1" of fall over 9' so that it's not noticeable in the hottub.

IMG_2008-1.jpg


IMG_2007-1.jpg


The Pink corner needs to be square, the stairs will land along that side, the rounded corner would be hidden and just require the stairs land 1' further into the patio.

IMG_2003-1.jpg


IMG_2002-1.jpg


IMG_2001-1.jpg


Everything (except hot tub pad) drains away from house.
IMG_2004-1.jpg


IMG_2006-1.jpg


Concrete crew will be there tomorrow at 7, pour starts at 9. They said they'll be done by 2ish, including removing all the forms.
 
Well someone came by yesterday and installed the form for the concrete coping. Apparently it is made by Coverpools, and is reusable. It's appears very sturdy.

IMG_2015-1.jpg

IMG_2026-1.jpg

IMG_2021-1.jpg

IMG_2017-1.jpg

IMG_2016-1.jpg

IMG_2019-1.jpg


Concrete guys were here at 7 am, can't wait to get home tonight!
 
Indeed!

IMG_2050-1.jpg


IMG_2047-1.jpg


IMG_2044-1.jpg


IMG_2040-1.jpg


IMG_2041-1.jpg


IMG_2038-1.jpg


IMG_2037-1.jpg


IMG_2033-1.jpg


IMG_2036-1.jpg


IMG_2028-1.jpg


IMG_2029-1.jpg


From inside my living room
IMG_2053-1.jpg

From inside master bedroom bay window
IMG_2054-1.jpg


I think it turned out great and am really pleased. They installed the volleyball sleeves, the gray pipes sticking up are stuck into the stainless sleeves to help them plump them up. They are out of plumb a tad so that when i tighten down on the net the poles will be plumb.

I like the lines and resulting shapes created by the rub lines. Particularly the one nearest the shallow end that is not parallel to the water line, i wouldn't have done it like that but it looks much better that way i think.

The PB said after this everything they need to do to finish will go very quickly, looking forward to that!
 
Got the volley ball post in. They are 1/10th " smaller in OD than the ID of the sleeves in the concrete, plus the manufacture told me once i crank down on tightening the net the top of the 4.5' pole will bend in 1-2". So with that all in mind they concrete guy installed them 1/4 bubble out of plumb. When i stick the real poles in and push the top towards the pool they are perfectly plumb, so we could have gone more than 1/4 bubble off on the sleeves. Except now if i shim the pole, or throw a few wraps of duct tape on them to tighten them up in the sleeve, they should be 1-2" out of plumb at the top which will be corrected with the tightening of the net. I'll break out a 4' level and see later tonight.

Pole pushed to water
IMG_2059-1.jpg


pole just stuck in hole
IMG_2060-1.jpg


Plug for pole hole
IMG_2061-1.jpg


another view, if you laid a level over plug it is flush with surrounding concrete, but the concrete is beveled down right by the plug (so you can grab the plug), hard to see in this pic

IMG_2062-1.jpg


Concrete getting some full sun today
IMG_2065-1.jpg
 

Enjoying this content?

Support TFP with a donation.

Give Support
carlscan26 said:
Looking nice! Who did you get your volley ball setup from?

I got if from http://www.volleyballusa.com/ specifically there complete pool volleyball set http://www.volleyballusa.com/Catalog/Ne ... stems.html

The sleeves are just pieces of stainless steel pipe as are the poles, but they are very thick walled and heavy.

The poles have nice rubber end caps on both ends so you can set the heavy pole on your deck while you remove the sleeve plug. Once i set it up i'll do a report in the Product Reviews section.

I called and talked to them, family business, each of the peoples seemed to know their stuff and know more than i thought you could about volleyball.

IMG_2067-1.jpg


IMG_2066-1.jpg


The thing about stainless is if you had a mind to you can sand/polish it up to a mirror finish like chrome.
 
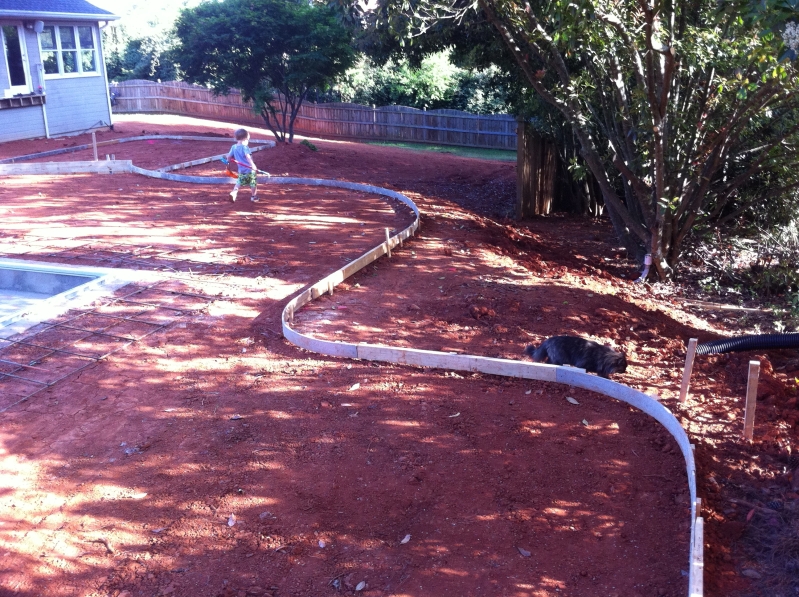
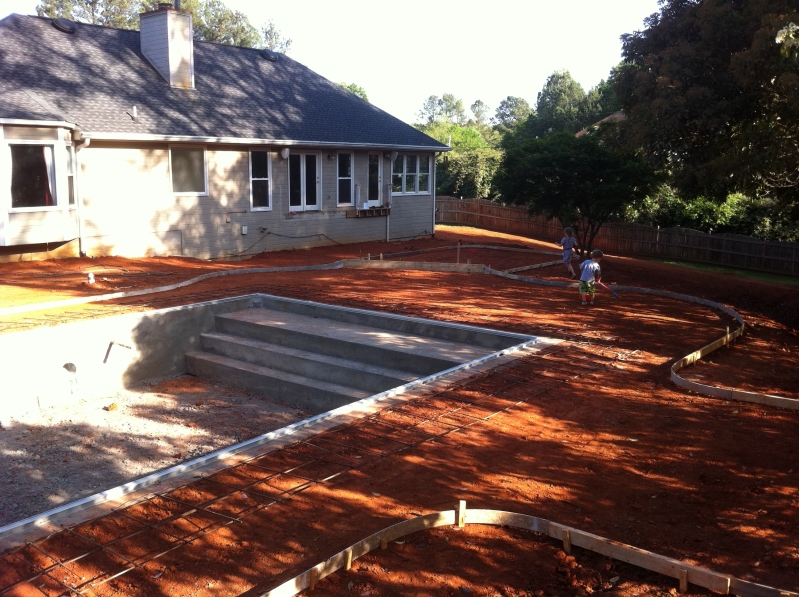
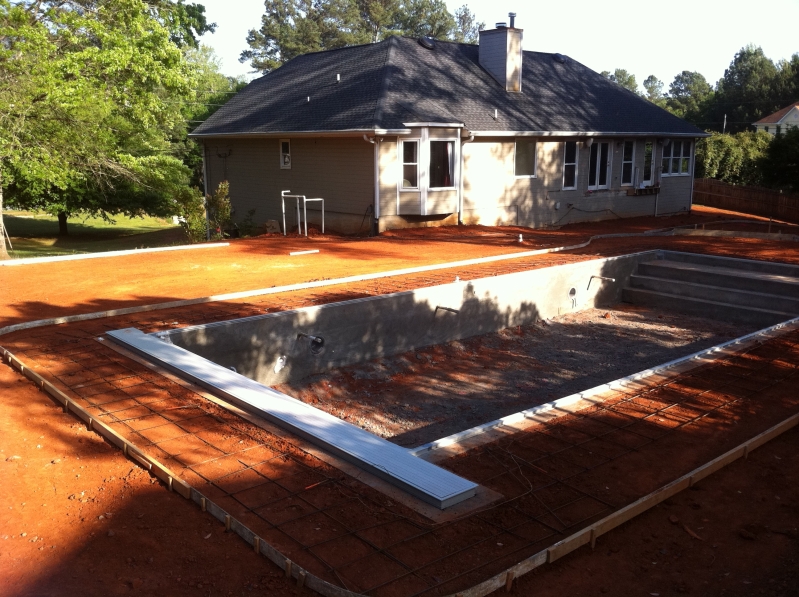
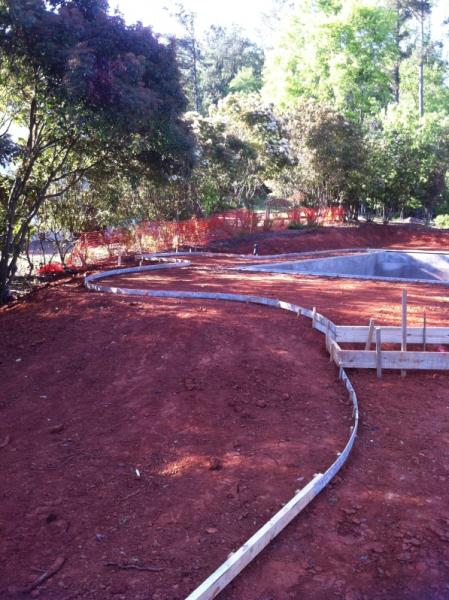
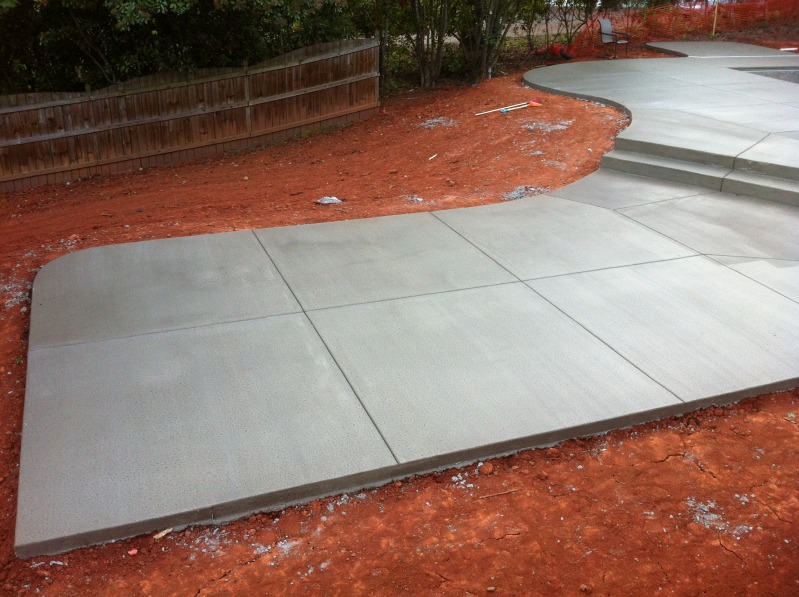
Sorry about the photobucket bandwidth issue, need to move those to my other photobucket account.

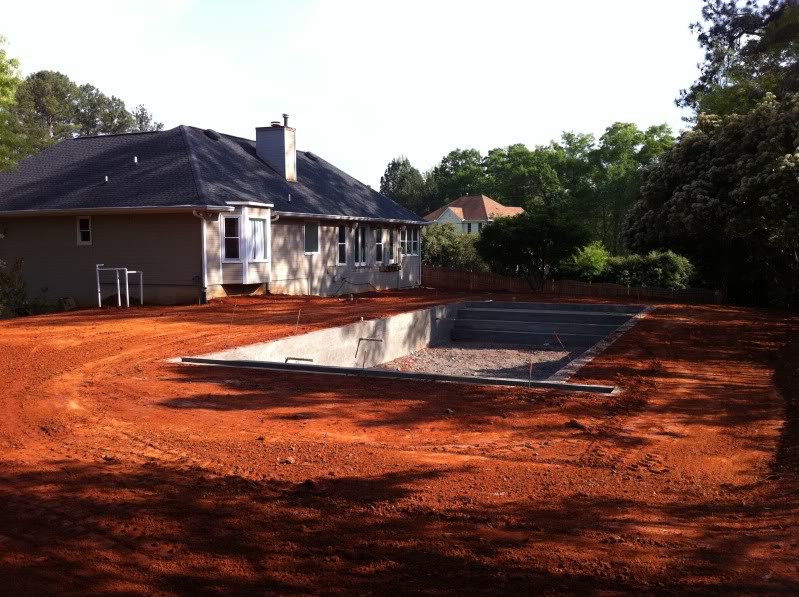
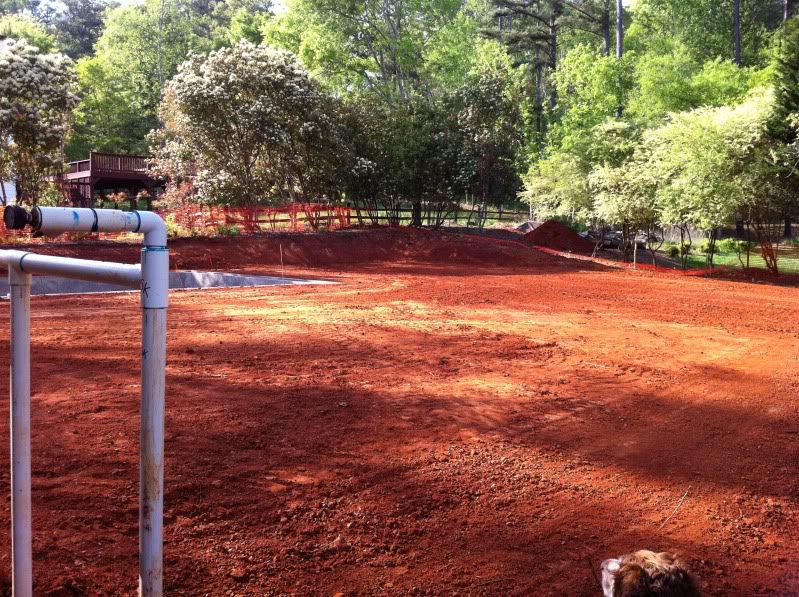
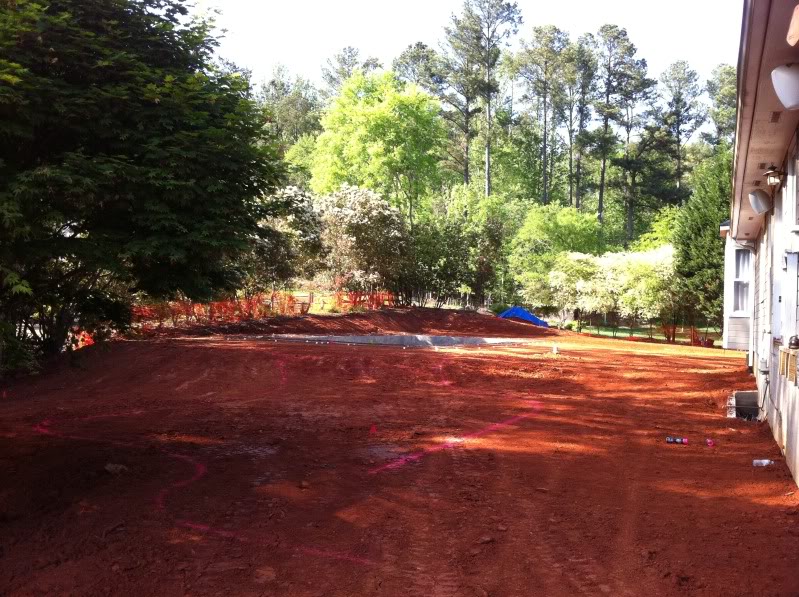
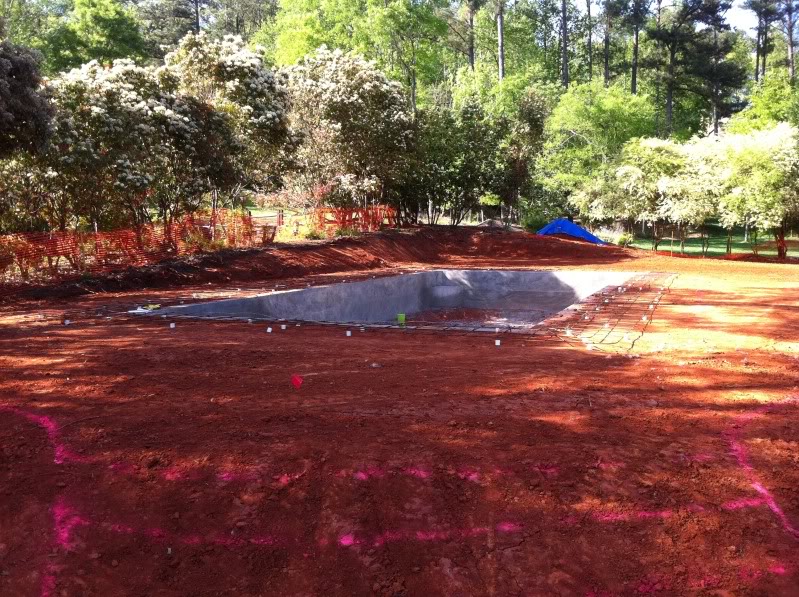
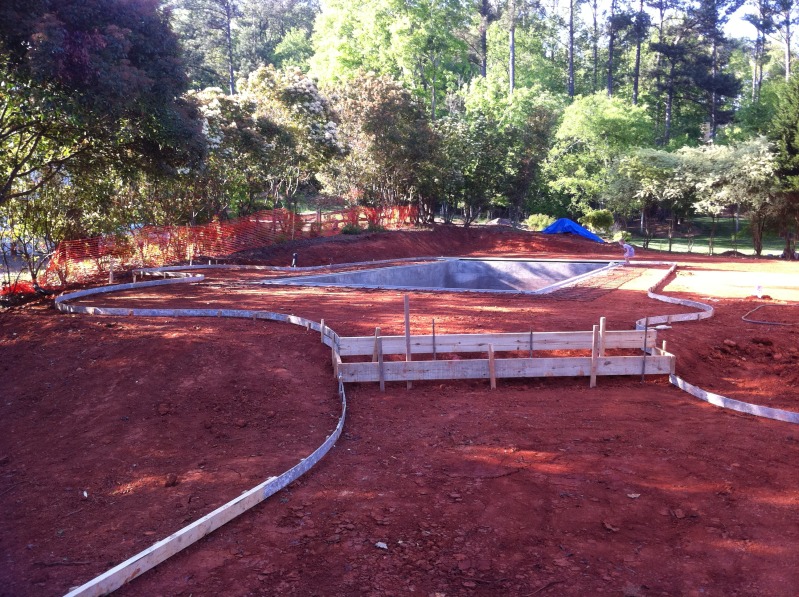
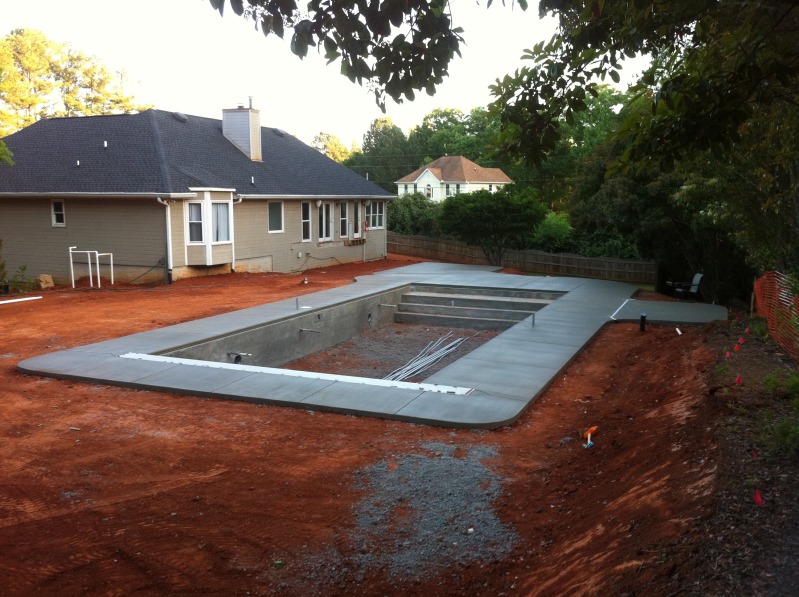
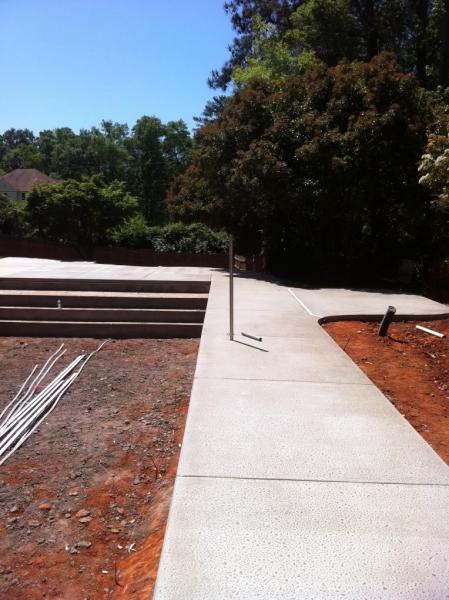
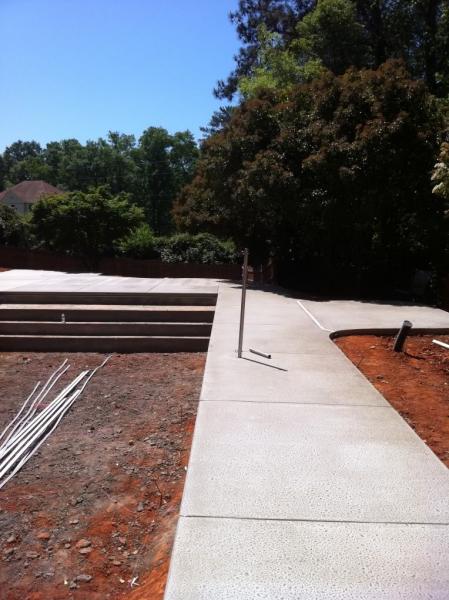
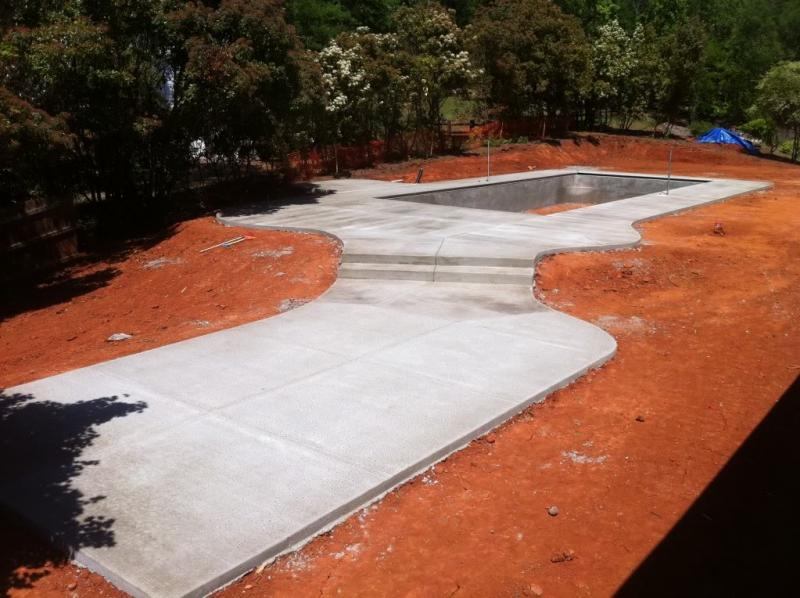
Rain is delaying the finishing of the bottom, liner installation, and equiptment but materials are all on site and they were going to come today, oh well.

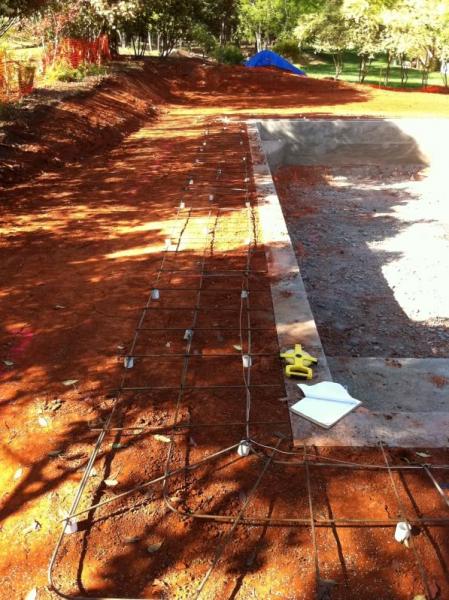
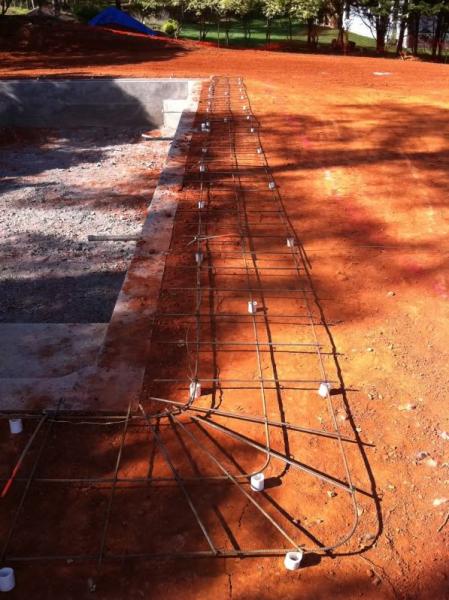
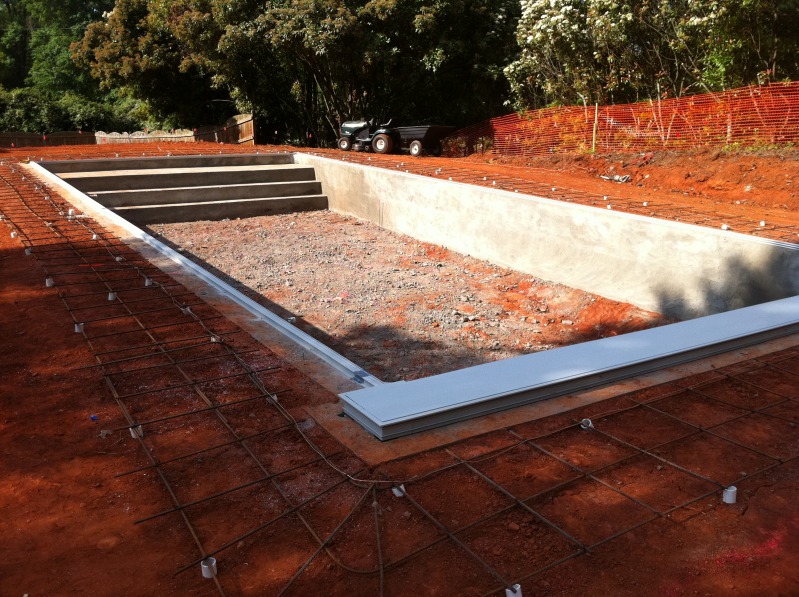
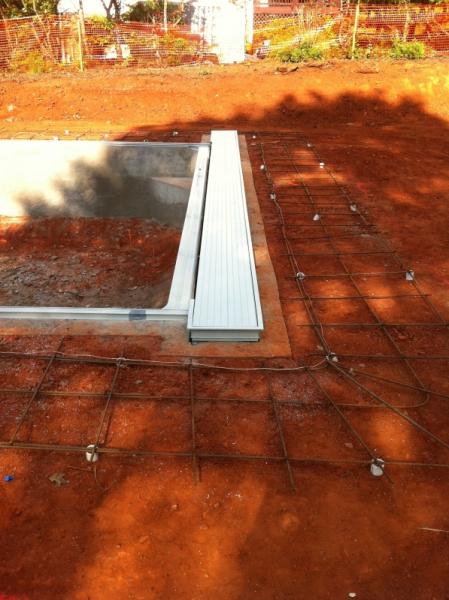
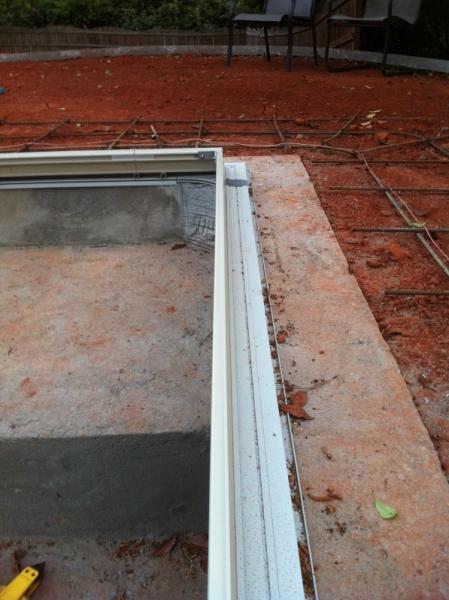
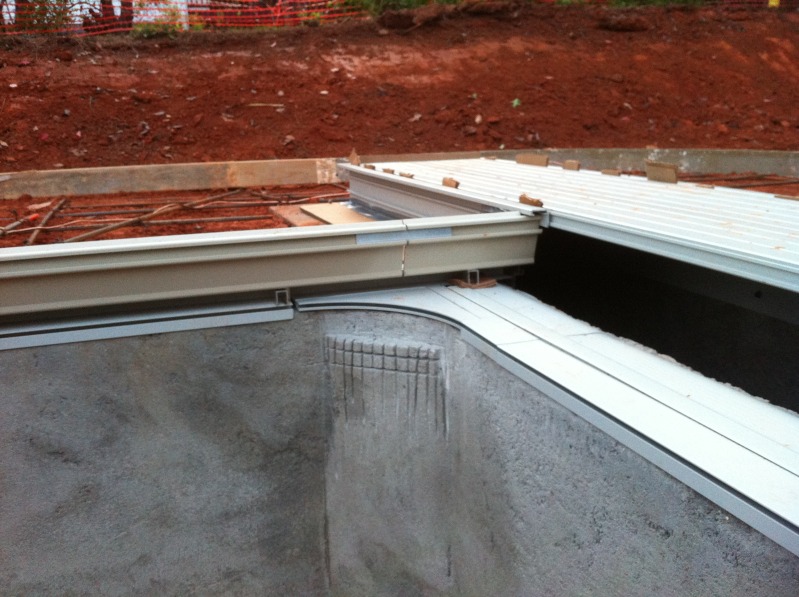
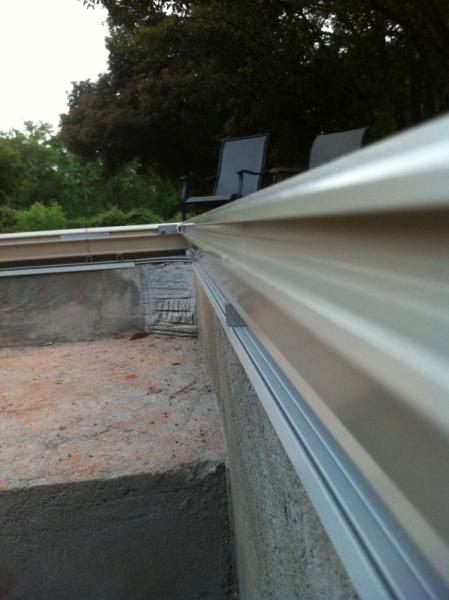
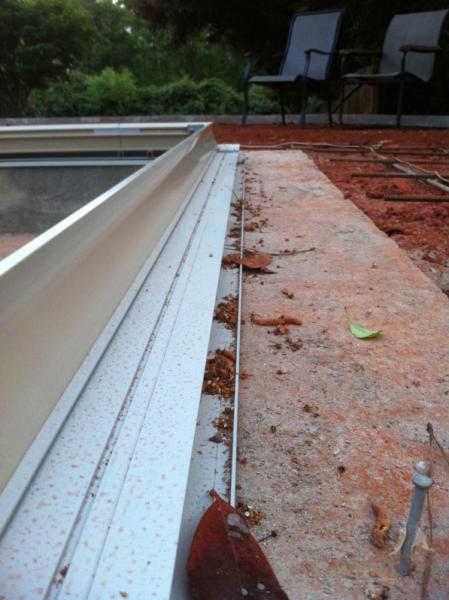
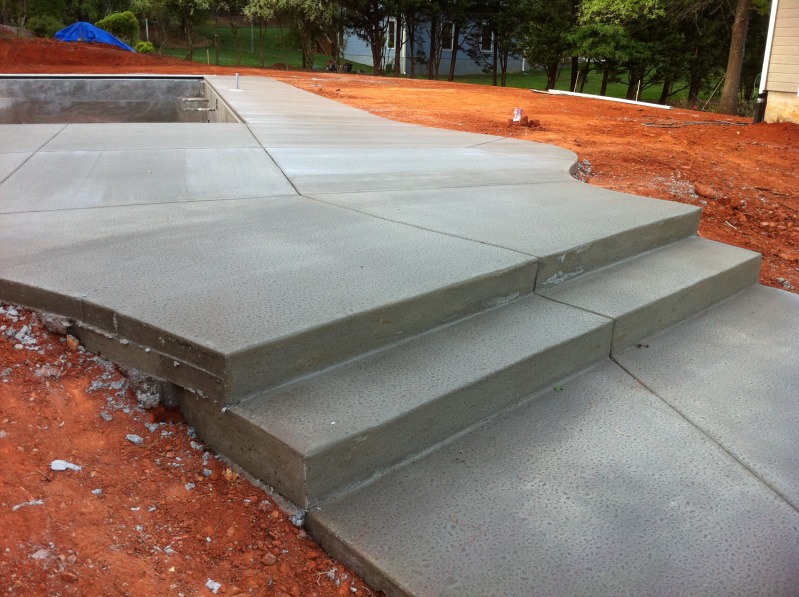
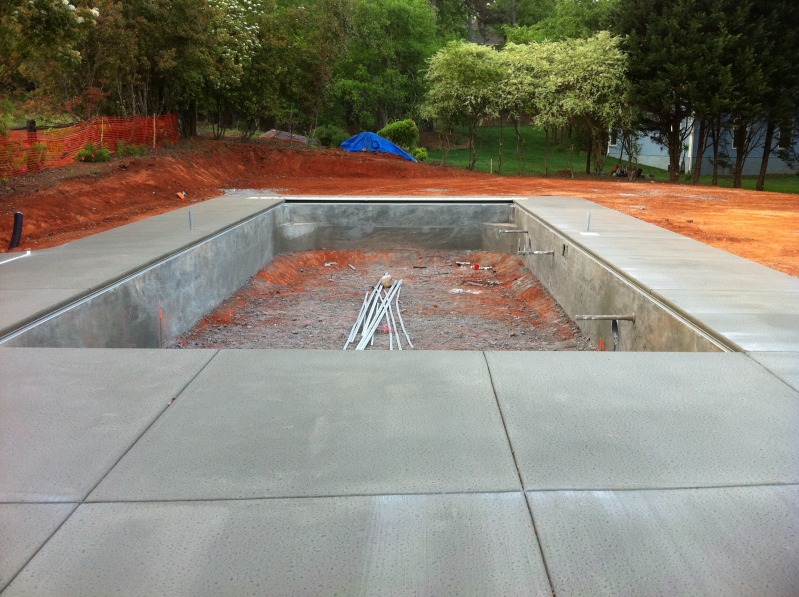
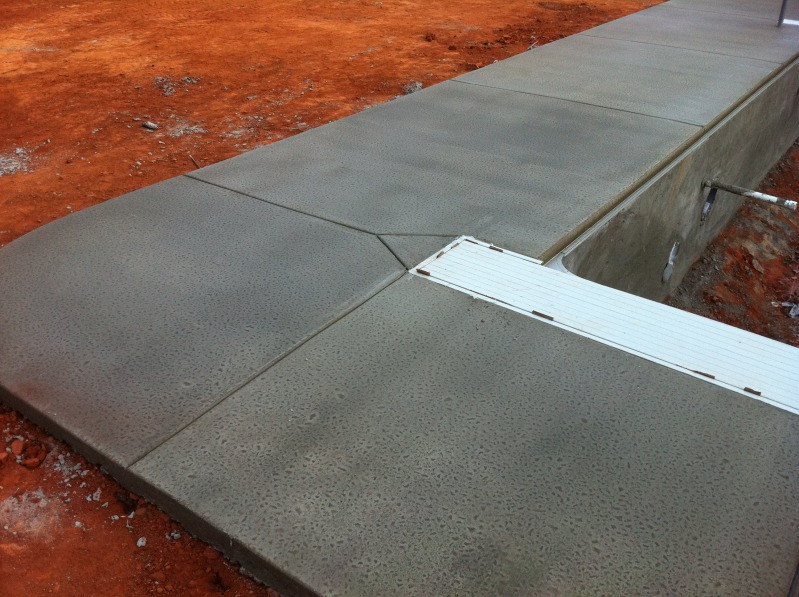
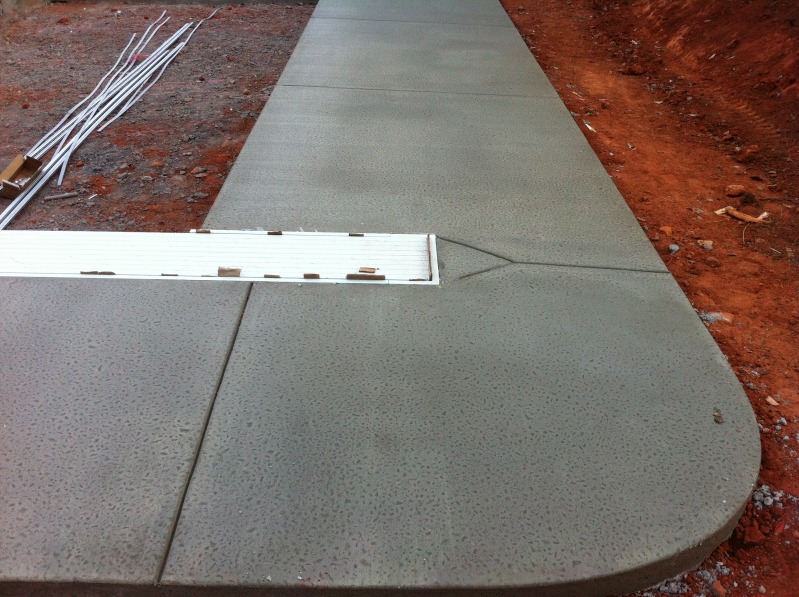
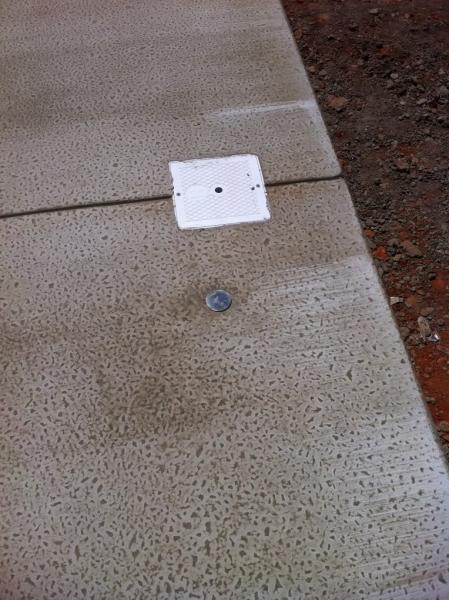
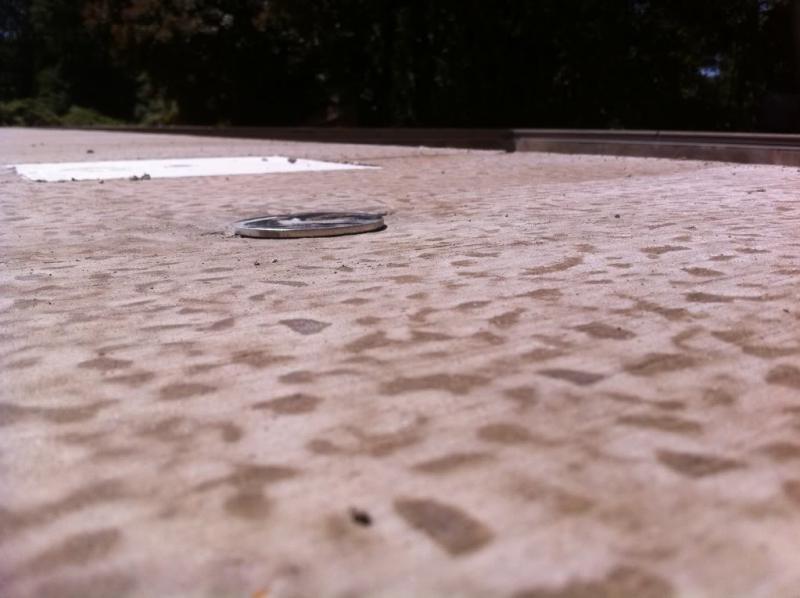
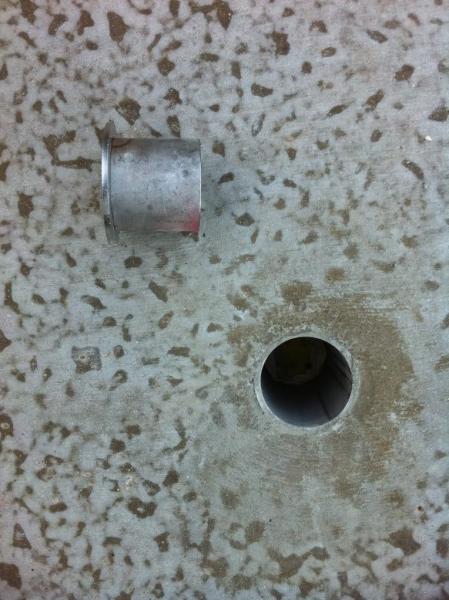
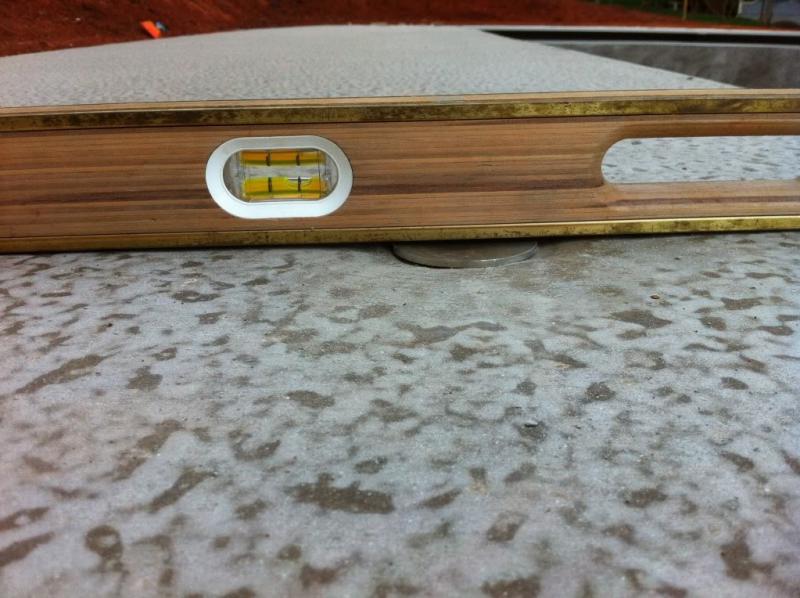
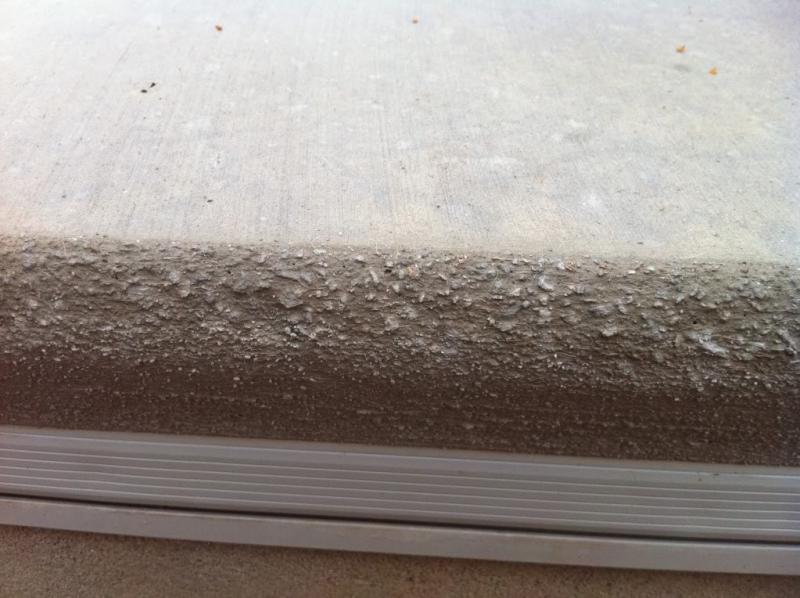
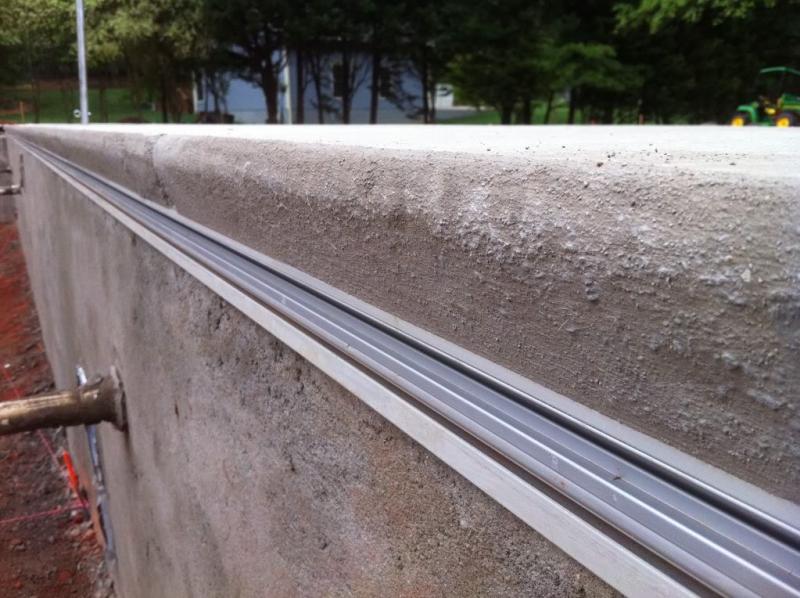
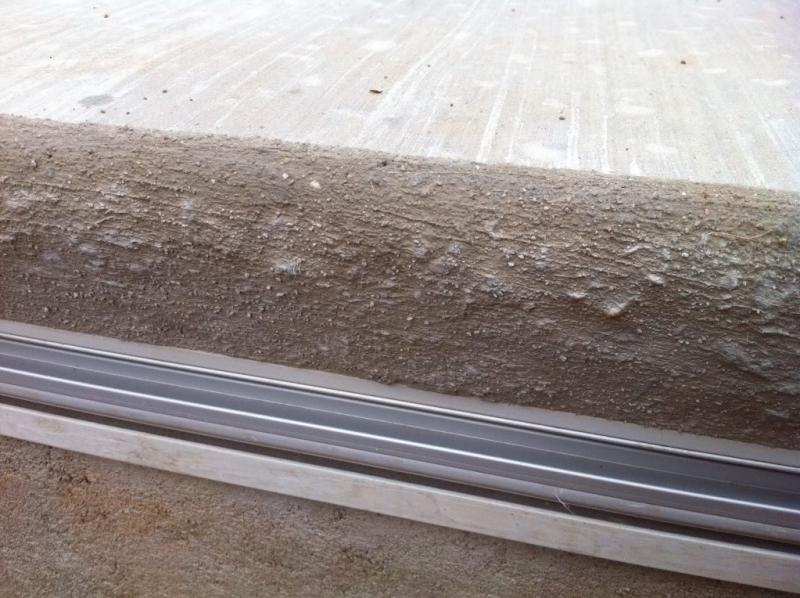
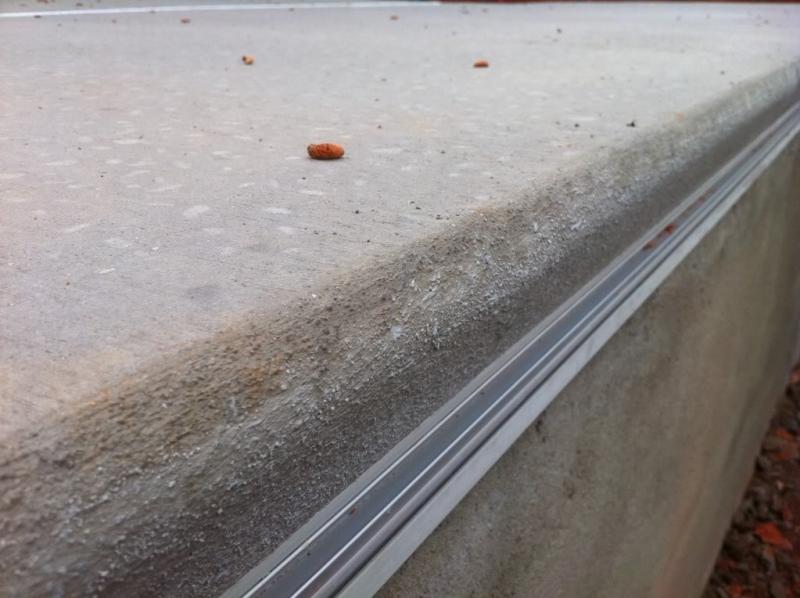
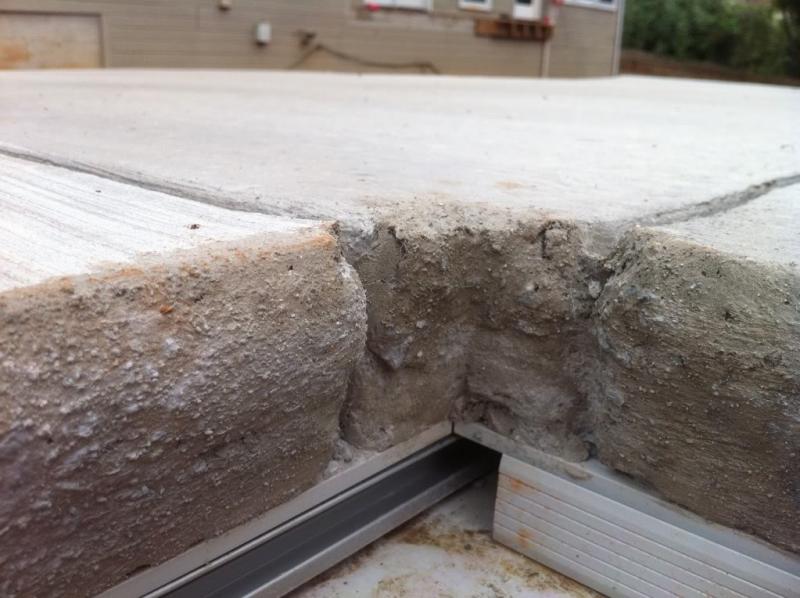
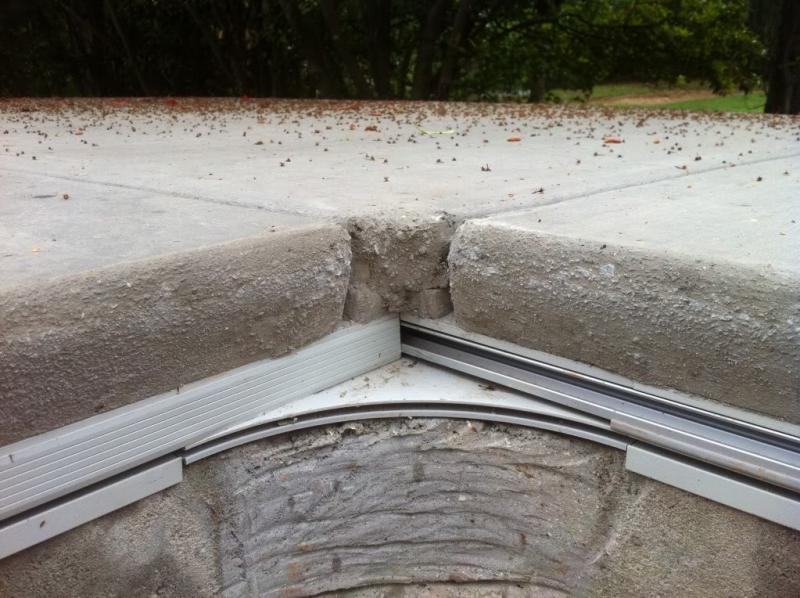
After I was able to walk on the concrete and inspect it from the pool I noticed something I am not happy about. I asked the PB about it and he said that's the way it's supposed to be, something about sponge finished....at any rate there is exposed aggregate in the coping, specifically the cantilevered part of the coping only, where the aluminum form was. Here are the pictures

IMG_2095-1.jpg


IMG_2090-1.jpg


IMG_2089-1.jpg


IMG_2094-1.jpg


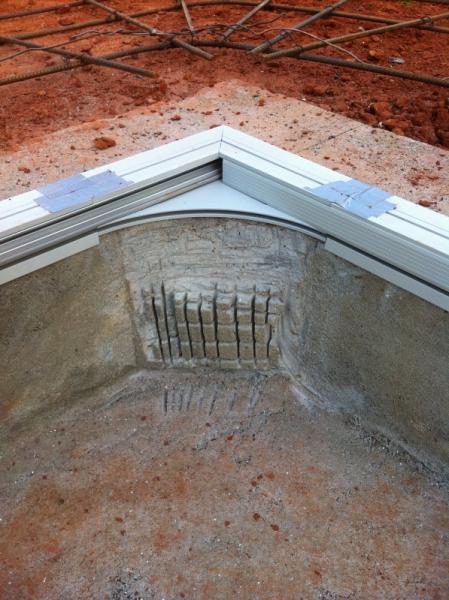
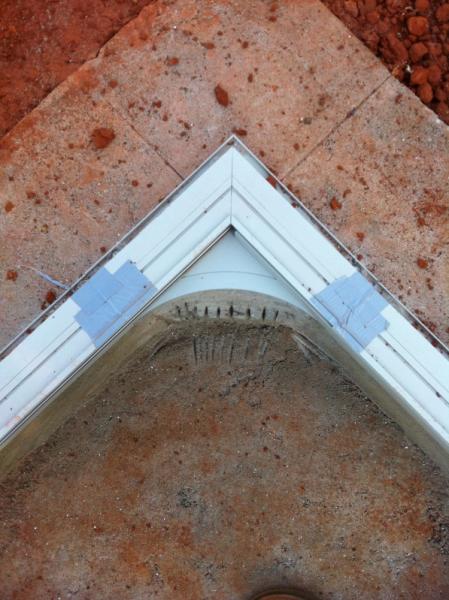
Now maybe that's as good as can be expected. I have to admit i haven't seen any other pools with this type of coping in person for years, so I don't know. It does however seem really rough, and if you rubbed you body up against it you will get scraped.

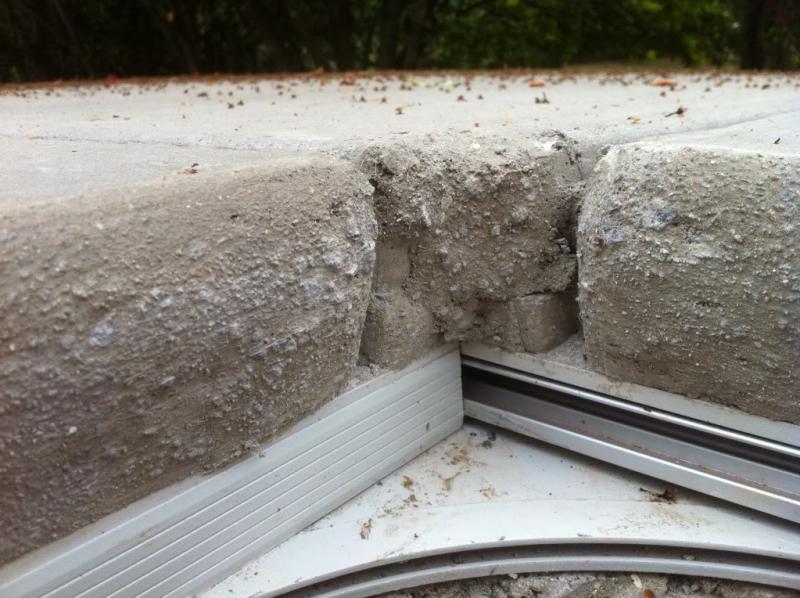
The other issue is these two corners don't look right, there was one continuous form that went around the 3 sides getting coping (1 side is pit for auto cover). It looks like after they took the form off somebody took a scoop of concrete and stuck it in the corner with their fingers, but who knows....

IMG_2092-1.jpg


IMG_2091-1.jpg


IMG_2093-1.jpg


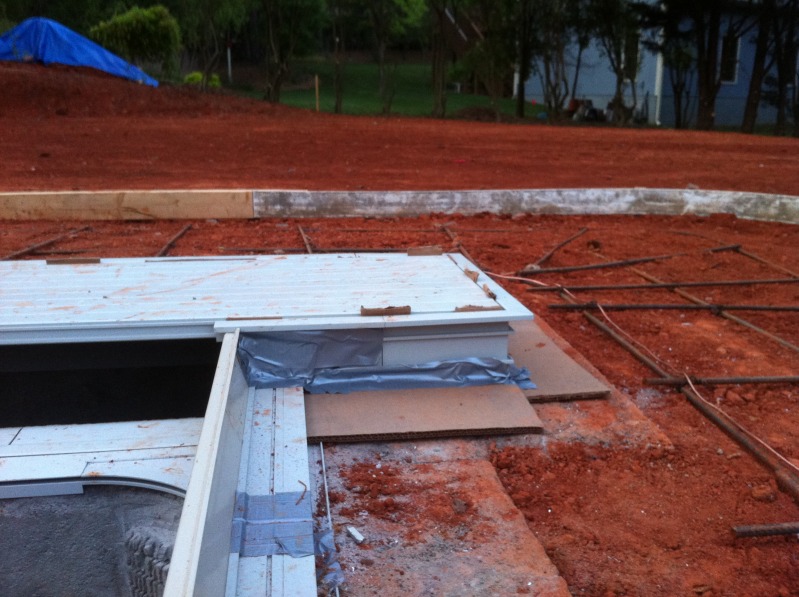
I've already done some research on concrete "sanding" so i realize it is possible that i could get some diamond grinder cups for my angle grinder and go at it once it's cured a little longer to make it so I won't come out a bloody mess after leaning up against the side.....but along with grinding comes the risk of hitting the embedded auto cover track, or cutting smiley faces into the coping on accident when the disc grabs too much.

At any rate the PB currently is dismissing my concerns, and saying my concrete job is in the top 1% of those he sees.....
 
Harley-

I have not seen cement cantilever coping on rectangular corners, but on radiused pools they don't have transitions such as that. To be honest that looks fairly poor. The only cantilever rectangulars I have seen use a Bull nose brick or stone in the corners.

My Coping on my free form pool (first one I had built prior to moving) had smooth cantilever edges with little to no aggregate exposed.

Most grecian or rectangular pools I see with rolled over edges use bull nosed type bricks. That is how my grecian I currently have it done. I am sure someone has this style and will be a long shortly to comment!!!
 
Well anyone have experience/suggestions on smoothing it out a little? Grinder/diamond cups? Wait till it's good and hard so I don't knock out the aggregate?

I'm guessing I'll probably have to live with the corners, might be hard to get in there with a 6" circular blade. Not sure maybe a good rotary air tool would work with a smaller blade.

Guess I'll need to research a bunch and see what tools are available.
 
Looks like the form was removed after concrete had set. The forms should have Been taken of and finished with the deck. I am about to do same cover with coping forms myself. Not shure there is a good way grind it down. Some type of top coat may be best.
 
Melt In The Sun said:
I think the responsibility for fixing that lies with the pool builder.

Pool Builder told me that was the way it was supposed to be, that it was normal. The concrete guy must think it's acceptable as that's the way it was done. I agree it looks like they waited too long to take the forms off, then the couldn't finish it without screwing it up so the just tried to do the best they could with a bucket and sponge. I think the corners are like they are because when they continued the rub joint to the vertical surface of the coping they knocked cement out of the corners, and just put it back with their hands, which is why it's not perfectly square there like the form was.

I don't see too many options. I can insist they try and fix it. How? Cut it out and repour? I don't know if I want that done.

I've been reading about how these guys that pour concrete counter top's finish their's, that's where i got the idea about diamond cups and grinder. I think something like that is a good option for all the sides, just not the corners.

Maybe aluminum coping could be installed over it? But isn't that usually in place and then poured into?

The other part of me thinks, am I goning to ask a guy who think dog poop looks like a hot dog to fix this?
 
I would want them to cut it out and redo it for a couple reasons. One, the edge looks like garbage, especially that corner. Two, it's a good idea to have the coping separated from the deck by a movement joint. Otherwise you will end up with a crack about a foot back from the edge of the pool as the shell moves differently than the deck.
 

Enjoying this content?

Support TFP with a donation.

Give Support
Thread Status
Hello , This thread has been inactive for over 60 days. New postings here are unlikely to be seen or responded to by other members. For better visibility, consider Starting A New Thread.