Project Hoss's new pool - Updated 8/8

Shop vac the sand out of the tracks. Now the hard part-undo the liner where you are working making sure to clip it GOOD so it can't all walk out on either side. Sweet talk wife into getting between the liner and wall inside the pool. She will need to use her feet to GENTLY nudge/push/kick the wall back into place. YOU on the outside might need to nudge/push/kick the bottom rail to help the wall get back in the track.

You might even have to wiggle the wall some to get it to move a bit.
 
  • Like
Reactions: Newdude
Gotta get the wall back into the track before you can move on. Hopefully the rain held off a bit for you to get it.
 
  • Like
Reactions: Newdude
Gotta get the wall back into the track before you can move on. Hopefully the rain held off a bit for you to get it.
Unfortunately it stormed the entire 2nd half of the day and all night. So we are holding off until the weekend when I have some more volunteers. I think there are 4 places the wind pulled the wall from the track.

Also, another concern, these metal support strips are a real PITA to get on. I'm so worried that I'm gonna rip the liner getting them back off. Any advice on that?
 
GUrrrrrrrrrrrrrr you poor thing! SO close!!! It will all be a distant memory when you are floating with an adult drink in your hand!


Not sure of these. Do you mean the ones on the bottom of the pool?
No, I'm talking about the metal track that you push down over top of the liner. We had to use a small rubber mallet to get them seated. Just seems sketchy to put sharp metal directly on vinyl.
 
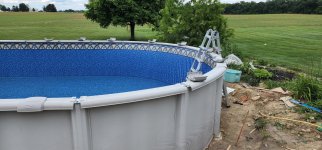
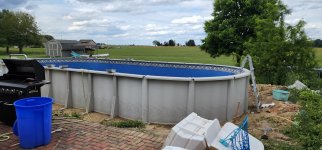
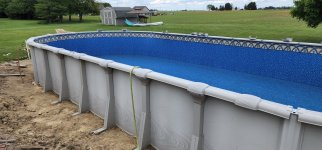
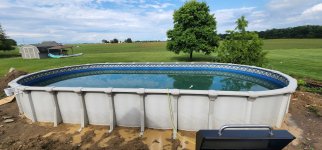
Good Monday morning!!! Well the weekend was productive. We got all of the sand out of the track, the wall back into the track, and final assembly completed!!!!!! A shop vac and a screwdriver and 3 of my buddies teenage boys did the trick. Those young kids can work for hours and not be phased!!! I also had 10,200 gallons of water delivered and everything looks good and the pool hasnt collapsed!!! Lol. What a journey!

Left I have to run the plumbing and reconnect the electric. The electric will be easy as the same pump was already hooked up to the same circuit. It's just a matter of cleaning it up and making it a little cleaner installation.

20220611_171006.jpg
20220611_164836.jpg
20220611_171005.jpg
20220612_170707.jpg
It's gonna be HOT here in Ohio this week so hoping to get the pump running this evening after work, and then hopefully by EOD Tuesday we will be in it. The water delivery was a little green, hoping a few hrs running through the filter will clean it up!

Still TONS of work to do, will backfill on the side facing the house to make level with the patio. And then will be spreading sand/aggregate around the rest of the giant mud pit, this way we can start swimming while we finish up the design of the deck!
 
Hoss, please talk to us about the details and steps it took to get the wall back in. This will be helpful in the future when I use YOUR build to help others! The shop vac and 3 teenagers I get..............not so much the screwdriver???

I would get some chlorine in the water to make sure it does not go green from algae. Do you have a pool store you can run some of the water to to be tested for metals?

Kim:kim:
Hey Kim.

We had to unhook the liner from the wall and pull it back far enough to dig out the sand (by hand) from the wall. Without this step, as you clean out the track, more sand just pours into it.
A medium sized flat head screwdriver was used to scrape/push the sand out of the track. So 1 person was using the screwdriver at an angle to push the sand out of the track, while another person was in front of them with the shop-vac.

We have put a total of 6 gallons of liquid chlorine into the pool so far. Our fill water has a good bit of iron in it. We have a filter that goes on the end of the hose. 80% of the water was tanked in from the local water municipality treatment center so it should be mostly clean.
Is metal not something I can test with my Taylor kit??
 
  • Like
Reactions: kimkats
Is metal not something I can test with my Taylor kit??
Metals need to be sent to a lab for analysis or with an expensive home kit. The pool store does 'good enough' for free. Just make sure they can test copper and iron individually. They have 2 distinct cures and some of the pool stores only tell you that you have metals in general. (And promptly sell you a cure all, which doesn't cure any, much less all)

Smile and nod at their advice and thank them for the test. You will need Mrs Hoss's approval for anything as you are only there to help, running her errand. She will return to manage the water. (Wink Wink)
 

Enjoying this content?

Support TFP with a donation.

Give Support
Thanks for the details on how you got it all fixed up!! :hug:

Yeah metals, they equal a trip to the pool store. Like Dude said just smile and tell them thank you as you walk out to let us know what the repost says. We will go from there.

Kim:kim:
 
My favorite part is when 3 rando ladies show up later that day with metals problems, the employees will ponder and vote which one was Mrs Hoss. :devilish:
 
  • Haha
Reactions: kimkats
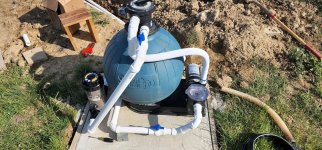
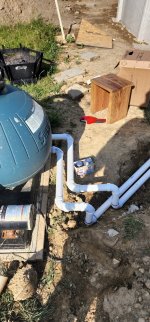
Thanks for the input. I'll see what pool stores are close to me and try to get that done this weekend. I am about 1/2" of water away from testing out the pump. So, I have not done much PVC solvent welding in the past, so this was an entirely new process for the most part. I think I did ok, maybe a B-, will see how it holds up and maybe will re-do it at a later date if I have any problems. I mocked everything up before I started gluing them together. It looks ok, it's still a huge improvement over the old pool.

Criticism welcome, but be gentle. Unfortunately the Hayword valve isnt layed out in a way where i can read the valve right side up, and awe the glass and pressure dial. It was a learning experience.
20220614_174654.jpg

20220614_174706.jpg
 
  • Like
Reactions: Lanzz and Newdude
What do your clothes look like? Any extra purple on them? LOL I get that stuff everywhere :roll:

Looks like you did a fine job of it! I hope the water test says the same thing!

Did you put valves right under the skimmer and return? How about unions so you can clean the filter?

Kim:kim:
 
I have not done much PVC solvent welding in the past, so this was an entirely new process for the most part.
If you are a person that actually likes to read manufacturer product labels/directions before giving it a go, :p I find that labels on the solvent cans are not always easy to read. So, attached are a couple of PDFs that are easy to put on a bigger screen. The Oatey one is relatively generic, the Weld-On is quite comprehensive. One thing that I wondered about until I read those was whether or not there should be a delay between primer application and solvent application. Both state that the solvent should be applied before the primer dries. The Weld-On PDF says "while surfaces are still wet, immediately apply the appropriate Weld-On® cement."
 

Attachments

  • Weld-On Solvent Welding Guide.pdf
    1.4 MB · Views: 1
  • Oatey_raw_01_HowToSolventWeld_ProdInstructions_LCS358G.pdf
    3 MB · Views: 0
  • Like
Reactions: Newdude and Hoss81
What do your clothes look like? Any extra purple on them? LOL I get that stuff everywhere :roll:

Looks like you did a fine job of it! I hope the water test says the same thing!

Did you put valves right under the skimmer and return? How about unions so you can clean the filter?

Kim:kim:
Haha, my clothes aren't too bad. My hands though, I look like Grimmace.

I have threaded unions on both pump and return side so I can clean the filter and replace the sand without having to cut anything!
 
  • Haha
Reactions: Newdude and kimkats
Last weekend I did my first pvc job of my life installing an swg and I was way messier than you with that purple primer and blue glue. One thing, your 90s kind of look like drain, waste, Vent (DWV) fittings? If so I don't believe they are rated for pressure. I almost made that mistake but the TFP review team spotted it before I went to far. Cutting it off is why the elbow now sits on this stone.
 

Attachments

  • Resized_Resized_20220611_195755.jpeg
    Resized_Resized_20220611_195755.jpeg
    752.5 KB · Views: 27
Well done on the threaded unions! I hoped you had them but was not sure!

LOL on your hands! My husband will see me in my "dirty clothes" and remind me to take wedding ring off as it is a beast to get clean WHEN I get stuff on it LOL
 
That looks pretty good for a novice PVC job - it definitely takes a bit of practice.

Unfortunately I agree with @Pauls234 though, those 90s look like they are the drain/waste/vent type with the short overlap, that's not meant for pressure pipe... you might be OK for a bit, but if that's the case, you're better off replacing it now that you have some experience!
That's a good call out. I got all this from Home Depot. Never thought to check the 90's. Would they be in the same aisle?
 

Enjoying this content?

Support TFP with a donation.

Give Support
Thread Status
Hello , This thread has been inactive for over 60 days. New postings here are unlikely to be seen or responded to by other members. For better visibility, consider Starting A New Thread.