If a piece of equipment has its own power supply, then you typically do not use the power wires #1 ground black or #4 (15 volt) red and you only use the two center data wires #2 (-DT) Green and #3 (+DT) Yellow.
You might not want the two power wires connected.
The power wires would only be used for an external device like a Spa Side Controller that did not have its own power supply.
It is always best to follow the manufacturer's color coding to avoid mixing up the wiring from one side to the other.
Check all wiring to make sure that it is correct.
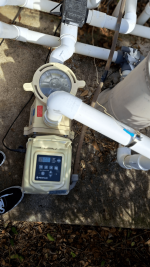
The J20 is the COM port where the pump and Intellichlor connect using the green and yellow center wires.
CAUTION - Wire the Power Center AC to the filter pump relay on the LOAD SIDE for maximum safety.
To connect IntelliChlor Power Center four wire cable to the IntelliTouch, EasyTouch or SunTouch Control System
load center:
1. Remove the cover screw securing the Power Center cover. Remove the cover.
2. Run a UL approved four conductor cable (22 AWG) from the IntelliChlor Power Center to the Load Center.
The preferred wire color scheme is red, yellow, green, and black.
3. Remove the cover screw securing the Power Center cover.
Remove the cover.
4. Remove one (1) of the knockouts from the underside of the Power Center.
5. Route the four conductor cable up through the lower hole.
6. Strip back the cable conductors 1-1/4 in. Insert the wires into the screw terminals (provided in the kit).
Secure the wires with the screws.
Make sure to match the color coding of the wires:
Red = +15, Yellow = +DT, Green = -DT, and GND = Black.
7. Plug the screw terminal onto the four (4) pins located on the Power Center board.
8. Reinstall the cover and secure with the cover screw.
9. Proceed to “Connecting IntelliChlor to an IntelliTouch Control System,” on page 25, “Connecting IntelliChlor to an EasyTouch Control System,” on page 26, and “Connecting an IntelliChlor SCG to a SunTouch Control System,” on page 26.
Connecting IntelliChlor® SCG Communication Cable (RS485):
1. Unlatch the load center/power center enclosure door spring latch, and open the door.
2. EasyTouch® / IntelliTouch® Control System: Loosen the two (2) retaining screws from the control panel.
(a) Lower down the control panel on its hinges to access the motherboard located behind the control panel.
(b) Route the four conductor cable up through the low voltage raceway in the load center to the
motherboard.
Note: For SunTouch® Control System see page 26 for details.
3. Strip back the cable conductors ¼ in. Insert the wires into the connector screw terminals (provided in the kit).
Secure the wires with the screws.
Make sure to match the color coding of the wires; Red = +15, Yellow = +DT, Green = -DT, and GND = Black.
4. Insert the connector screw terminal onto the COM Port pins on the circuit board: (EasyTouch J20, IntelliTouch J7/8).
7. When the connection is completed: EasyTouch/IntelliTouch: Close the control panel and secure it with the two (2) retaining screws.
8. Close the load center front door.
Fasten the spring latch.


![20240210_120036[1].jpg](/data/attachments/292/292562-8b5a071bbbf9d4a6ff66136674722963.jpg)

![20230220_102255[1].jpg](https://www.troublefreepool.com/data/attachments/292/292569-23ee3cf38a8067c631e051228f8e9bfb.jpg "20230220_102255[1].jpg")