
- Jun 6, 2022
- 14
- Pool Size
- 8500
- Surface
- Vinyl
- Chlorine
- Salt Water Generator
- SWG Type
- Intex Krystal Clear
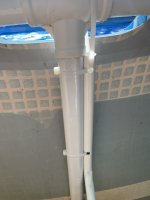
I’m in charge of maintaining my in laws AGP. We decided to try a solar cover this year but need a way to store it. See below for what I came up with.

Materials for 6 hooks:
Misc Tools Used:
Build jig using the bucket lid, screws, similar to below. Didn’t make measurements of the jig, sorry. I personally used a straight pieces of pipe to put in a few screws to get general spacing. Once first bent one was placed, added more screws to support it tight to lid.

Cut PVC pieces at about 40” wit pipe cutters… cap one end and fill with dry sand using funnel. Pour that sand into the pot, plus about a shot glass more.
WARNING: IF YOU TRY THIS...BE CAREFUL WITH HOT STUFF...400F SAND CAN BURN YOU IMMEDIATLY. OVEN MITS/GLOVES/LEATHER GLOVES RECOMMENDED. NO PLASTIC COATED PALM GLOVES AS IT MAY MELT.
Heat sand on the stove or grill side burner, stir up a bit, until even temp around 350-400F.
Pour the hot sand back into the pipe through the funnel and loosely cap the open end. It will become flexible quickly. It only took about 10 seconds before the next step.
Place the pipe into the jig. I found that the end I poured the sand into to be the most flexible so when placing in the jig that was the "short" side of the J. Uncap, pour sand back into the pot. Return pot to the stove/burner for the next one.
I would use small blower/inflator to cool the pipe quickly and remove from the jig. If this is not an option, you may have to wait longer before removing from the jig. Pouring water over it may help, but may leave your jig wet and cause the next one to stiffen prematurely.
Repeat above steps as needed.
To finish, drill a 1/2” hole about 1.5” from top, perpendicular to the curve direction. Drill another right at top of the curve. Also at the bottom of the J, only on the bottom, I drilled a 1/4” hole to allow water to drain out.
Cap the short end of the curve and glue on if desired.
Used 24” zip ties from Harbor Freight to attach to the pool frame.


PS: to determine quantity needed. Take width of the pool and go around the pool with a tape measure starting at a pole until you reach width, count the number of poles back to start. I ended up making double as didn’t think this part through at the beginning.
Edited: Updated for clarity on some steps, added warning, and costing.
Materials for 6 hooks:
- 2 x 3/4” Class 200 PVC 10ft ($4.50-$5.00ea, makes 3 hooks)
- 6 x 3/4” PVC caps ($0.75-$1.00ea, 1 for each hook)
- 18 large zip ties (24” Harbor Freight - $2.00, 3 per hook)
Misc Tools Used:
- Pipe cutters
- 5gal bucket lid
- Plywood
- Screws
- Drill/Driver w/ bit for your screws
- Drill/Drill bit (avoid cracking by using step bit - Harbor Freight 3 pack, used 3/16 to 1/2 one)
- Dry sand (if wet, dry in oven on cookie sheet at 1/4 thick layer @ 300F for 30 mins to an hour)
- Funnel (used silicone so it wouldn't melt)
- Pot
- Thermometer
- Micro Flush Cutters (Harbor Freight)
Build jig using the bucket lid, screws, similar to below. Didn’t make measurements of the jig, sorry. I personally used a straight pieces of pipe to put in a few screws to get general spacing. Once first bent one was placed, added more screws to support it tight to lid.
Cut PVC pieces at about 40” wit pipe cutters… cap one end and fill with dry sand using funnel. Pour that sand into the pot, plus about a shot glass more.
WARNING: IF YOU TRY THIS...BE CAREFUL WITH HOT STUFF...400F SAND CAN BURN YOU IMMEDIATLY. OVEN MITS/GLOVES/LEATHER GLOVES RECOMMENDED. NO PLASTIC COATED PALM GLOVES AS IT MAY MELT.
Heat sand on the stove or grill side burner, stir up a bit, until even temp around 350-400F.
Pour the hot sand back into the pipe through the funnel and loosely cap the open end. It will become flexible quickly. It only took about 10 seconds before the next step.
Place the pipe into the jig. I found that the end I poured the sand into to be the most flexible so when placing in the jig that was the "short" side of the J. Uncap, pour sand back into the pot. Return pot to the stove/burner for the next one.
I would use small blower/inflator to cool the pipe quickly and remove from the jig. If this is not an option, you may have to wait longer before removing from the jig. Pouring water over it may help, but may leave your jig wet and cause the next one to stiffen prematurely.
Repeat above steps as needed.
To finish, drill a 1/2” hole about 1.5” from top, perpendicular to the curve direction. Drill another right at top of the curve. Also at the bottom of the J, only on the bottom, I drilled a 1/4” hole to allow water to drain out.
Cap the short end of the curve and glue on if desired.
Used 24” zip ties from Harbor Freight to attach to the pool frame.
PS: to determine quantity needed. Take width of the pool and go around the pool with a tape measure starting at a pole until you reach width, count the number of poles back to start. I ended up making double as didn’t think this part through at the beginning.
Edited: Updated for clarity on some steps, added warning, and costing.
Attachments
Last edited:


