Stenner with Tank Mounting

I was wondering, if this is the right thread for me to add my step by step install for Stenner/w tank? I have learned a lot from previous posts and that is the only reason I want to do this. Do I post every step I take to install or wait until the install is complete. My selfish reason to post every step every time is that if there is a better way to install or if I am not code compliance, some members would point it out. If I post at the end of the install, it would be more work to fix those deficiencies.

You should start your own thread for that. Then maybe come back here to offer the link to it.
 
Thanks for the pic and the dimensions. Looks like I have the same space constraint issue. The location of the Liquidator on my pad is too small for the Stenner tank so it will need to go to the outside of the other equipment.

I look forward to you posting your step by step install procedure. :D

Another reason I'm interested in moving to a Stenner system is to use the heater bypass in full open position to increase flow with lower pump speed. The liquidator requires some back pressure to get it to operate correctly so flow through the bypass had to be limited.
 
Here is what electrical hardware I bought for powering the Stenner. A 6 foot 1/2 inch liquid tight flex conduit with wires already installed with fittings, 250 volt receptacle for Stenner, surface mount non metallic electrical box and weatherproof cover. So one end of the wires will be hardwired to Intermatic timer terminals that power the pool pump. The other end of the wires will terminate in 250 volt receptacle. Sorry if this sounds rudimentary. The installation will have to wait until next week. Other projects took priority such as broken sprinklers etc. A picture is attached.Stenner Ele layout.jpg
 
You should start your own thread for that. Then maybe come back here to offer the link to it.

So sorry, Andy, I got the various posters mixed up. I thought that someone else was coming in and proposing to describe his installation. This is your thread, and absolutely the right place to tell your tale.
 
Hi Andy - not sure if this idea was floated, but is there any dirt area clear of pipes where you could bury it up to the fill line? (Keeps the sun exposure down and keeps the bleach cooler with the ground temp.) We stuffed our (3) 30 gallon units into (2) Suncast storage sheds from Home Depot to keep the sun off of them. Not as cool (temperature-wise) as the buried solution, but keeps the tanks out of the sun. It also makes it easy to see the fill level(white plastic) - not an option if painted or buried though....

Not sure if either of these options are viable, but you do have some reach with the polyethylene pipe.

One tip - buy some white duct tape to wrap your poly pipe with to keep it from cracking out from sun exposure. Ours started cracking after about 6 months in the Texas sun.

742870c69e704a91d8e75d2bf0dfcf6a.jpg
 

Enjoying this content?

Support TFP with a donation.

Give Support
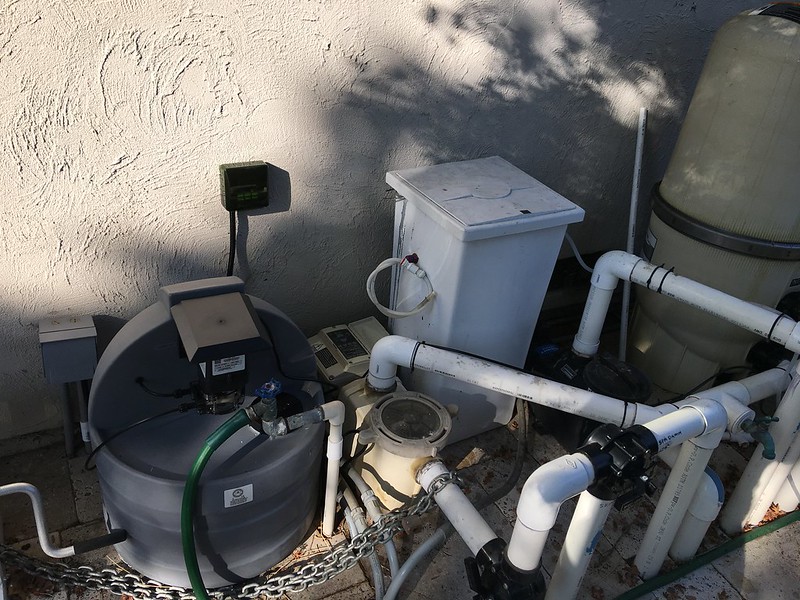
Received my Stenner a couple weeks ago and finally got everything installed and running today. Had to place it left of the current equipment same as the OP because the space occupied by the Liquidator is too small.

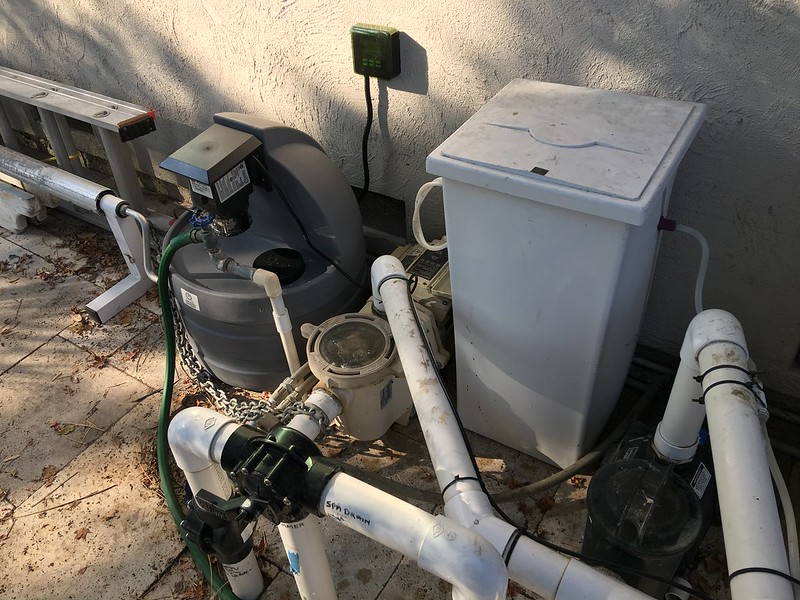
Liquidator disconnected, but still in place. Still need to relocate a water bib that's in front of the Stenner. Happy we went with a travertine pavers so it's fairly easy to make changes.

44025666351_421f7c2e5a_c.jpg


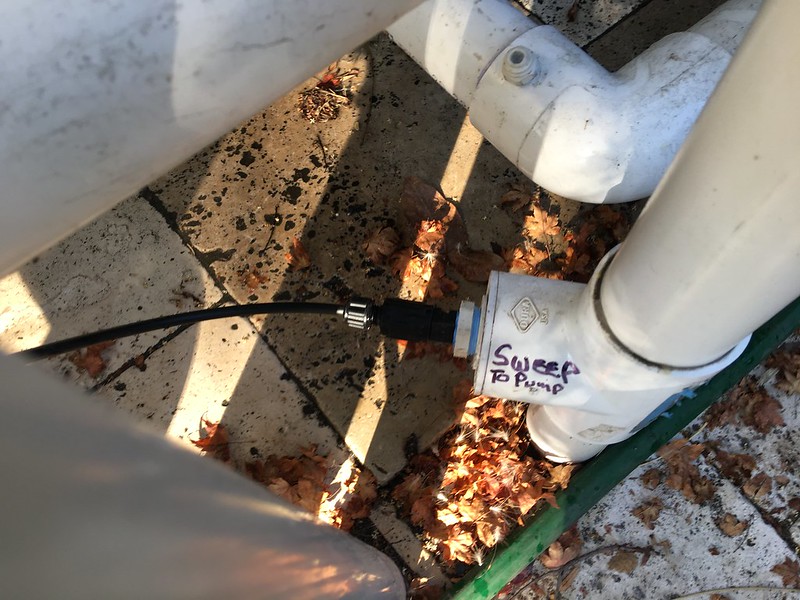
Had a 3/4" threaded port for installing a sweep pump at a later date if we wanted, so I just used that to plumb in the Stenner feed line after all the equipment. Couldn't find a 1/4" PVC plug for the hole in the plumbing, so I picked up a 1/4" fitting at HD and filled it with clear RTV.

43306811604_21f71c9e42_c.jpg


Used a 16gauge appliance extension cord with right angled plug to the timer to allow mounting further from the 110v outlet and allows for the cover to be mostly closed. The cord was soldered to the electronics board so some soldering was required. Used some wire loom to keep UV from affecting the cord. It required a Y shaped screw driver to open the timer housing which was a PITA to find. Luckily the Ace down the street had something I could make work.

44025666281_e5079621af_c.jpg


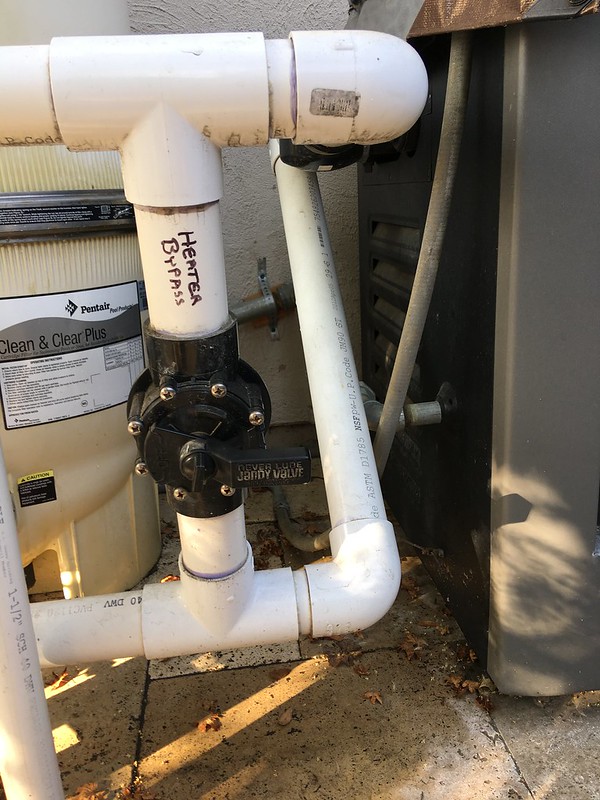
I installed a variable speed pump to save electricity when we did our pool remodel. One of the reasons for changing to the Stenner was to allow the heater by-pass to be opened all the way to reduce back pressure in the system caused by the heater. The Liquidator requires some back pressure to make it work, so the by-pass valve was used as a mixer valve to get the best flow possible with the Liquidator still operating at a low pump speed.

43306811634_14cc780707_c.jpg


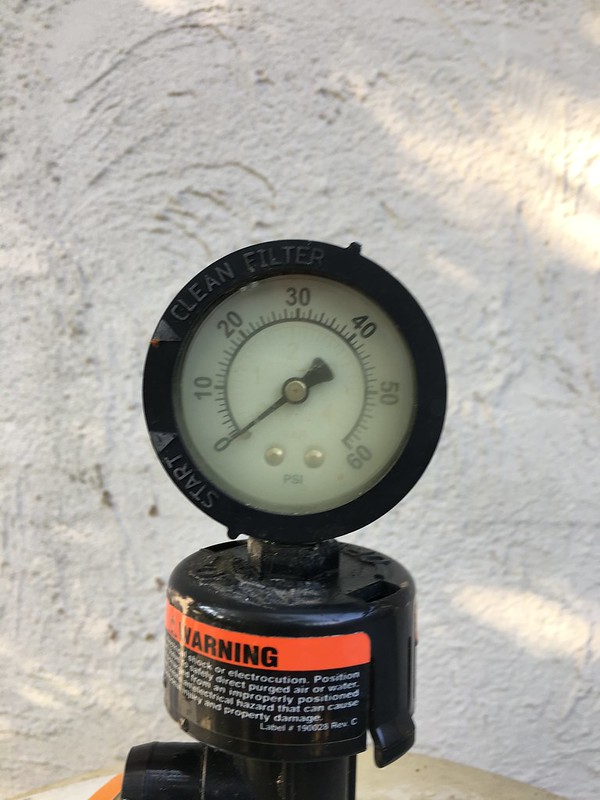
After all was done and pool equipment on, the pressure drops to zero with the heater by-pass open at the same pump speed that was previously at about 4 psi. Flow off the spillway is greater now without changing pump speed. Hoping to reduce pump run time with the Stenner since the flow rate is improved. Been running about 11 hrs a day in the summer.

43306811444_9b88792010_c.jpg
 
One tip - buy some white duct tape to wrap your poly pipe with to keep it from cracking out from sun exposure. Ours started cracking after about 6 months in the Texas sun.

The white Stenner tubing is not UV rated and will fail quickly in direct sunlight. Stenner also offers black tubing that is UV rated and works well outside.
 
Thread Status
Hello , This thread has been inactive for over 60 days. New postings here are unlikely to be seen or responded to by other members. For better visibility, consider Starting A New Thread.