
| (30 intermediate revisions by the same user not shown) | |||
| Line 1: | Line 1: | ||
| − | |||
| − | Below is a typical cross section of a pool wall showing the proper placement of a waterproofing membrane: | + | =Waterline Tile in Plaster Pools= |
| + | Questions involving the construction process for waterline tile installation come up often enough, so hopefully, this should clarify the best practices for new pools and remodels alike. This is not meant to replace any product or material manufacturer’s guidelines.<ref>https://www.troublefreepool.com/threads/waterline-tile-installation.191389/post-1686118</ref> | ||
| + | |||
| + | Below is a typical cross-section of a pool wall showing the proper placement of a waterproofing membrane: | ||
[[File:Waterline Tile Installation.png|600px|thumb|Waterline Tile Installation]] | [[File:Waterline Tile Installation.png|600px|thumb|Waterline Tile Installation]] | ||
| + | |||
| + | NPT has a [http://www.nptglasstile.com/pdf/NPT_InstallGuide2012.pdf Tile Installation Guide] with general guidelines for installing Oceanscapes and Aquascapes in pools and water features. | ||
| + | |||
| + | Oceanside Glass and Tile has documents on [https://www.glasstile.com/pages/installation-guidelines Installation Guidelines]. | ||
==What is the Purpose of Waterline Tile?== | ==What is the Purpose of Waterline Tile?== | ||
| − | Tile is used at the waterline of pools as a decorative touch | + | Tile is used at the waterline of pools as a decorative touch. Still, it serves a more important purpose since it can be cleaned of deposits relatively easily and is stable both in and out of the water (unlike plaster, quartz, and pebble, which must remain submerged). The waterline fluctuates greatly during times of use and evaporation/refill, which makes it important to have a material present that can withstand the Wet/Dry cycles it may encounter without failing. |
| + | |||
| + | ==Tile Selection== | ||
| + | |||
| + | Ceramic or glass tiles? Large format or 1"x 1" tiles? There are many choices in tiles—materials, size, color, and texture. | ||
| + | |||
| + | Glass tiles look beautiful, but they come with installation and maintenance challenges. | ||
| + | |||
| + | On a spa spillover and wall, you want to use large-format tiles or smooth stone to minimize the grout lines and seams that can leak water in. Flowing water is abrasive, and it is what created the Grand Canyon. A single piece of stone is the best material for the spillover with large-format tiles on the spa wall. | ||
| + | |||
| + | Glass tiles are more prone to fracturing, cracking, and chipping than porcelain tiles. If you install glass tiles, you should keep extra tiles to replace ones that break over time. | ||
| + | |||
| + | Pool industry articles on glass tile problems include: | ||
| + | *[https://www.poolspanews.com/how-to/design-construction/pros-voice-glass-tile-concerns_o PoolSpaNews:Pros Voice Glass Tile Concerns] | ||
| + | *[https://www.poolspanews.com/how-to/design-construction/special-report-glass-tile_o PoolSpaNews:Special Report Glass Tile] | ||
| + | *[https://readconsulting.com/failure-analysis-of-cracking-glass-pool-tiles/ Failure Analysis of Cracking Glass Pool Tiles] | ||
| + | *[https://www.aquatictechnology.com/editorials/failure_of_glass_mosaic_tile.htm Failure of Glass Mosaic Tile] | ||
==Mortar Bed== | ==Mortar Bed== | ||
| − | The pool’s bond beam should be cut square and as straight as possible during the gunite/shotcrete process but slight variations will occur and should be anticipated. A “mortar bed” is typically created to straighten the wall and provide the necessary additional spacing (1/2”-3/4”) for the plaster to be of the appropriate thickness and | + | The pool’s bond beam should be cut square and as straight as possible during the gunite/shotcrete process, but slight variations will occur and should be anticipated. A “mortar bed” is typically created to straighten the wall and provide the necessary additional spacing (1/2”-3/4”) for the plaster to be of the appropriate thickness and finish off flush with the tile. The mortar bed is commonly built up with Type S mortar (3:1 Sand/Portland cement ratio), which, like most forms of concrete, can present problems down the life of the pool if not adequately addressed. |
==Thinset & Waterproofing Agent== | ==Thinset & Waterproofing Agent== | ||
| − | + | Most forms of concrete and mortar are not waterproof. While the tile is not affected by water, the thin-set, mortar, and gunite/shotcrete do not hold up particularly well when continuously submerged, which can lead to the tile separating from the shell over time. A cementitious waterproofing agent should be applied after the mortar bed to combat this. A thinset rated for continuous submersion should be utilized (most thinsets are only rated for partial water exposure encountered in bathrooms and showers). | |
| + | |||
| + | The thinset used to apply glass tile must be specified for glass and water submersion use. Not all thinsets are the same. | ||
| + | |||
| + | The thinset should be applied to the mortar bed with a notched trowel, and the backside of the tile should be "buttered" with a thin layer of thinset to ensure 100% contact between the tile, thinset, and mortar bed and be free or air pockets. | ||
| + | |||
| + | [[File:Tile Application.jpg|thumb]] | ||
| + | |||
| + | The thinset should have at least 95% coverage on the back of the tiles. We see the poor practice of putting a blob of thinset on the back of the tile and sticking it to the wall. That leads to poor adhesion and tiles coming loose. | ||
| + | |||
| + | Special care should be taken when choosing a waterproofing agent to ensure compatibility with the other materials used in the pool. Not all waterproofing agents are compatible with plaster; some can only be applied to the positive or negative side of a spa dam wall, weir wall, or trough. Refer to the manufacturer when in doubt about your application. | ||
| + | |||
| + | ==Fill Tile Joints with High-Quality Epoxy Grout== | ||
| + | Lastly, the tile joints should be filled with high-quality grout (which also should be rated for submersion). Epoxy grouts are more expensive and require added skill and attention to install, but they have proven to be superior to the standard grout offerings. | ||
| + | |||
| + | ==Under Waterline Tile Repair== | ||
| + | ===Materials=== | ||
| + | Henry 1 Pound Under Water Tile Repair<ref>https://hdsupplysolutions.com/p/henry-1-pound-under-water-tile-repair-p807017</ref><ref>https://www.troublefreepool.com/threads/what-to-use-to-reinstall-tiles-under-waterline.189584/post-1670263</ref> | ||
| + | |||
| + | Laticrete 254 is a modified thinset rated for submersion. | ||
| + | |||
| + | =Grout Maintenance and Repair= | ||
| + | |||
| + | Over time, grout around tiles will develop hairline cracks or worse. Hairline cracks are caused by slight movement of the pool structure or thermal heating and cooling, which causes expansion and contraction movements. Grout can also crumble and come loose. | ||
| + | |||
| + | New grout can be put directly over hairline cracks in solid grout. If the grout is loose, then it should be removed before the new grout is applied. | ||
| + | |||
| + | Repairing cracks in grout around tiles can be a DIY job. | ||
| + | |||
| + | At a high level, the repair process is: | ||
| + | #Lower the water below the tile line. | ||
| + | #Clean up cracked and loose grout areas by hand using a grout saw or an oscillating tool with a grout blade. | ||
| + | #Mix a batch of grout in a plastic cup. | ||
| + | #Apply the grout to the joints | ||
| + | #Clean the tile with a sponge | ||
| + | #Let the grout set for 24 hours before raising the water level. | ||
| + | |||
| + | [https://e-zpatch.com/product/e-z-patch-4-white-pool-tile-grout-repair/ E-Z Patch] has good repair materials and tools. | ||
| + | |||
| + | Preparation is 70% of a quality job. | ||
| + | |||
| + | You can read [https://www.troublefreepool.com/threads/spa-spillover-grout-repair.168735/post-1487345 Spa Spillover Grout Repair] | ||
| + | |||
| + | There are lots of YouTube videos showing how to grout tiles. | ||
| + | |||
| + | =Waterline Tile in Fiberglass Pools= | ||
| + | Waterline tile in fiberglass pools is decorative—some people like the clean look without tile, and others like a decorative tile border. | ||
| + | |||
| + | ==Materials to Install Waterline Tile on Fiberglass== | ||
| + | Materials used to attach the tile to fiberglass include traditional thinset and specialized Silicone Tile Adhesive, and Silicone Tile Grout for Pool & Spa. Manufacturers include [https://novagard.com/products/leisure-pool-spa-rv/ Novagard] and [https://flextile.com/ Flex-Tile].<ref>https://www.troublefreepool.com/threads/maintaining-and-or-replacing-waterline-tile-on-fiberglass-pool.193410/post-1706176</ref> | ||
| + | |||
| + | If you buy Novagard, verify the date on the bottom of the bottle because you don't want to use an old product.<ref>https://www.troublefreepool.com/threads/maintaining-and-or-replacing-waterline-tile-on-fiberglass-pool.193410/post-1706254</ref> | ||
| + | |||
| + | ==How To Install Waterline Tile on Fiberglass== | ||
| + | *It is best to install the tile before the coping, but it can be done after<ref>https://www.troublefreepool.com/threads/maintaining-and-or-replacing-waterline-tile-on-fiberglass-pool.193410/post-1706080</ref> | ||
| + | *Use silicone-based adhesive and caulk | ||
| + | *Drop the waterline down to where you want the bottom of the tile to start.<ref>https://www.troublefreepool.com/threads/maintaining-and-or-replacing-waterline-tile-on-fiberglass-pool.193410/post-1706147</ref> | ||
| + | *Get a wax pencil and make a line around the pool at that level. | ||
| + | *Drop the water more. | ||
| + | *Tile up to the underside of your coping, leaving a small gap between the top of the tile (cut if necessary) and the coping. | ||
| + | *Let set. | ||
| + | *Buy a bunch of [https://www.amazon.com/s?k=B07DP3VB44&ref=nb_sb_noss scrubbies] | ||
| + | *Apply the silicone grout liberally over the tile. | ||
| + | *Grout right up to the underside of a cantilevered deck sealing the tile/pool to the deck. That bond with silicone allows for the movement between pool and deck and has remained solid. | ||
| + | *Get a bucket of warm water and add a little dish soap. | ||
| + | *Soak a scrubby in it and smear the silicone into the cracks. The soap repels the silicone, pushing it into the gaps and cleaning the tile and pool surface. | ||
| + | *When the scrubby gets completely gunked up, toss it and get a new one. It takes a bit to get the hang of it, but not too much. | ||
| + | *When you finish, let it dry, and you are done. | ||
| + | |||
| + | This is a good thread describing the [https://www.troublefreepool.com/threads/new-pool-proj-flagstoning-around-and-on-my-fiberglass-pool.39533/ installation of a fiberglass pool and tiles] with pictures. | ||
| + | <gallery> | ||
| + | File:Novagard Silicon Tile Adhesive.png|100px|thumb|Novagard Tile Adhesive | ||
| + | File:Tiling Fiberglass Pool 1.png|200px|Planning layout | ||
| + | File:Tiling Fiberglass Pool 2.png|200px|Installing tile | ||
| + | File:Tiling Fiberglass Pool 3.png|200px|Tile complete | ||
| + | </gallery> | ||
| − | + | ==How to Remove Waterline Tile on a Fiberglass Pool== | |
| − | + | Use a putty knife/scraper. It should just peel off.<ref>https://www.troublefreepool.com/threads/how-to-remove-damaged-waterline-tile-from-a-fiberglass-pool.272600/post-2390055</ref> | |
| − | |||
Latest revision as of 19:57, 18 December 2024
Waterline Tile in Plaster Pools
Questions involving the construction process for waterline tile installation come up often enough, so hopefully, this should clarify the best practices for new pools and remodels alike. This is not meant to replace any product or material manufacturer’s guidelines.[1]
Below is a typical cross-section of a pool wall showing the proper placement of a waterproofing membrane:

NPT has a Tile Installation Guide with general guidelines for installing Oceanscapes and Aquascapes in pools and water features.
Oceanside Glass and Tile has documents on Installation Guidelines.
What is the Purpose of Waterline Tile?
Tile is used at the waterline of pools as a decorative touch. Still, it serves a more important purpose since it can be cleaned of deposits relatively easily and is stable both in and out of the water (unlike plaster, quartz, and pebble, which must remain submerged). The waterline fluctuates greatly during times of use and evaporation/refill, which makes it important to have a material present that can withstand the Wet/Dry cycles it may encounter without failing.
Tile Selection
Ceramic or glass tiles? Large format or 1"x 1" tiles? There are many choices in tiles—materials, size, color, and texture.
Glass tiles look beautiful, but they come with installation and maintenance challenges.
On a spa spillover and wall, you want to use large-format tiles or smooth stone to minimize the grout lines and seams that can leak water in. Flowing water is abrasive, and it is what created the Grand Canyon. A single piece of stone is the best material for the spillover with large-format tiles on the spa wall.
Glass tiles are more prone to fracturing, cracking, and chipping than porcelain tiles. If you install glass tiles, you should keep extra tiles to replace ones that break over time.
Pool industry articles on glass tile problems include:
- PoolSpaNews:Pros Voice Glass Tile Concerns
- PoolSpaNews:Special Report Glass Tile
- Failure Analysis of Cracking Glass Pool Tiles
- Failure of Glass Mosaic Tile
Mortar Bed
The pool’s bond beam should be cut square and as straight as possible during the gunite/shotcrete process, but slight variations will occur and should be anticipated. A “mortar bed” is typically created to straighten the wall and provide the necessary additional spacing (1/2”-3/4”) for the plaster to be of the appropriate thickness and finish off flush with the tile. The mortar bed is commonly built up with Type S mortar (3:1 Sand/Portland cement ratio), which, like most forms of concrete, can present problems down the life of the pool if not adequately addressed.
Thinset & Waterproofing Agent
Most forms of concrete and mortar are not waterproof. While the tile is not affected by water, the thin-set, mortar, and gunite/shotcrete do not hold up particularly well when continuously submerged, which can lead to the tile separating from the shell over time. A cementitious waterproofing agent should be applied after the mortar bed to combat this. A thinset rated for continuous submersion should be utilized (most thinsets are only rated for partial water exposure encountered in bathrooms and showers).
The thinset used to apply glass tile must be specified for glass and water submersion use. Not all thinsets are the same.
The thinset should be applied to the mortar bed with a notched trowel, and the backside of the tile should be "buttered" with a thin layer of thinset to ensure 100% contact between the tile, thinset, and mortar bed and be free or air pockets.

The thinset should have at least 95% coverage on the back of the tiles. We see the poor practice of putting a blob of thinset on the back of the tile and sticking it to the wall. That leads to poor adhesion and tiles coming loose.
Special care should be taken when choosing a waterproofing agent to ensure compatibility with the other materials used in the pool. Not all waterproofing agents are compatible with plaster; some can only be applied to the positive or negative side of a spa dam wall, weir wall, or trough. Refer to the manufacturer when in doubt about your application.
Fill Tile Joints with High-Quality Epoxy Grout
Lastly, the tile joints should be filled with high-quality grout (which also should be rated for submersion). Epoxy grouts are more expensive and require added skill and attention to install, but they have proven to be superior to the standard grout offerings.
Under Waterline Tile Repair
Materials
Henry 1 Pound Under Water Tile Repair[2][3]
Laticrete 254 is a modified thinset rated for submersion.
Grout Maintenance and Repair
Over time, grout around tiles will develop hairline cracks or worse. Hairline cracks are caused by slight movement of the pool structure or thermal heating and cooling, which causes expansion and contraction movements. Grout can also crumble and come loose.
New grout can be put directly over hairline cracks in solid grout. If the grout is loose, then it should be removed before the new grout is applied.
Repairing cracks in grout around tiles can be a DIY job.
At a high level, the repair process is:
- Lower the water below the tile line.
- Clean up cracked and loose grout areas by hand using a grout saw or an oscillating tool with a grout blade.
- Mix a batch of grout in a plastic cup.
- Apply the grout to the joints
- Clean the tile with a sponge
- Let the grout set for 24 hours before raising the water level.
E-Z Patch has good repair materials and tools.
Preparation is 70% of a quality job.
You can read Spa Spillover Grout Repair
There are lots of YouTube videos showing how to grout tiles.
Waterline Tile in Fiberglass Pools
Waterline tile in fiberglass pools is decorative—some people like the clean look without tile, and others like a decorative tile border.
Materials to Install Waterline Tile on Fiberglass
Materials used to attach the tile to fiberglass include traditional thinset and specialized Silicone Tile Adhesive, and Silicone Tile Grout for Pool & Spa. Manufacturers include Novagard and Flex-Tile.[4]
If you buy Novagard, verify the date on the bottom of the bottle because you don't want to use an old product.[5]
How To Install Waterline Tile on Fiberglass
- It is best to install the tile before the coping, but it can be done after[6]
- Use silicone-based adhesive and caulk
- Drop the waterline down to where you want the bottom of the tile to start.[7]
- Get a wax pencil and make a line around the pool at that level.
- Drop the water more.
- Tile up to the underside of your coping, leaving a small gap between the top of the tile (cut if necessary) and the coping.
- Let set.
- Buy a bunch of scrubbies
- Apply the silicone grout liberally over the tile.
- Grout right up to the underside of a cantilevered deck sealing the tile/pool to the deck. That bond with silicone allows for the movement between pool and deck and has remained solid.
- Get a bucket of warm water and add a little dish soap.
- Soak a scrubby in it and smear the silicone into the cracks. The soap repels the silicone, pushing it into the gaps and cleaning the tile and pool surface.
- When the scrubby gets completely gunked up, toss it and get a new one. It takes a bit to get the hang of it, but not too much.
- When you finish, let it dry, and you are done.
This is a good thread describing the installation of a fiberglass pool and tiles with pictures.
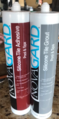
Novagard Tile Adhesive
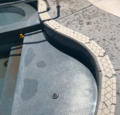
Planning layout
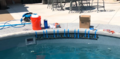
Installing tile
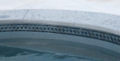
Tile complete


How to Remove Waterline Tile on a Fiberglass Pool
Use a putty knife/scraper. It should just peel off.[8]
- ↑ https://www.troublefreepool.com/threads/waterline-tile-installation.191389/post-1686118
- ↑ https://hdsupplysolutions.com/p/henry-1-pound-under-water-tile-repair-p807017
- ↑ https://www.troublefreepool.com/threads/what-to-use-to-reinstall-tiles-under-waterline.189584/post-1670263
- ↑ https://www.troublefreepool.com/threads/maintaining-and-or-replacing-waterline-tile-on-fiberglass-pool.193410/post-1706176
- ↑ https://www.troublefreepool.com/threads/maintaining-and-or-replacing-waterline-tile-on-fiberglass-pool.193410/post-1706254
- ↑ https://www.troublefreepool.com/threads/maintaining-and-or-replacing-waterline-tile-on-fiberglass-pool.193410/post-1706080
- ↑ https://www.troublefreepool.com/threads/maintaining-and-or-replacing-waterline-tile-on-fiberglass-pool.193410/post-1706147
- ↑ https://www.troublefreepool.com/threads/how-to-remove-damaged-waterline-tile-from-a-fiberglass-pool.272600/post-2390055