- May 27, 2021
- 1,278
- Pool Size
- 17000
- Surface
- Fiberglass
- Chlorine
- Salt Water Generator
- SWG Type
- Pentair Intellichlor IC-40
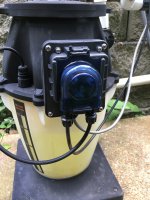
So this post was intended to be a rebuild of a locked up motor and pump head that I discovered when I fired up the IPh this season. However, plans changed slightly the deeper I got into the seized IPh and the more replacement research I performed. It became evident the economics were in favor of just replacing the unit, which is ultimately what I did.
After my water was balanced upon opening, I waited a day or so the fired up the IPh in addition to the SWG. I set the output to off in order to manually drop ph and once adjusted to my liking I turned on the IPh and all seemed to function normally. As a test I manually requested an acid dispense at the controller. The screen indicated it was dispensing, however the pump was not turning. Uh-oh.
At this point I opened the pinch tube cover and manually tried to rotate the dispensing wheel. No joy - it’s clearly locked up tight. Time to dig deeper. I grabbed the dispensing wheel to remove it as it should slide off. Nope seized on to the shaft. With two thin putty knives I worked the blades behind the wheel and was able to carefully pry it off the shaft. It clearly needs some love.
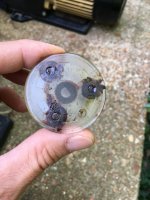
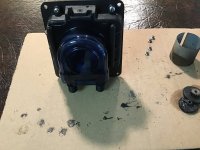
The rollers were seized, but I should be able to clean it up and free them once again. Here‘s the shaft and faceplate.
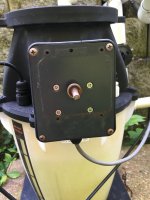
The shaft is still seized up tight. Time to remove the faceplate screws.
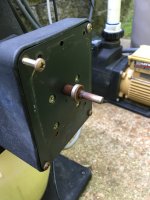
The roller bearing attached to the shaft is really seized on. This will become a problem later.
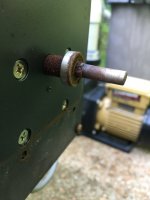
Time to remove the whole unit to inspect the motor.
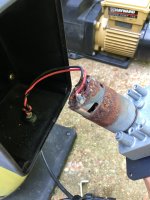
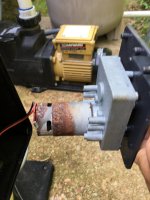
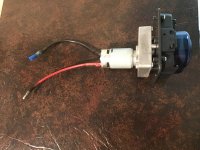
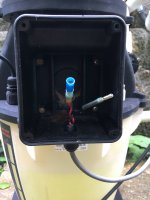
Well the rust pretty much explains the windings are rusted solid to the motor shaft. The design is fairly bad as there is no gasket that seals the mounting plate into the housing. Given the unit sits in the weather you’d think a better job of weather resistance would have been designed. The motor leads are also significantly rusted. I’ve got a fix in mind to help prevent weather wear, but I first have to clip the leads to get the motor to the bench for a tear down. Once the motor is on the bench, I need to remove the bearing from the shaft to get to the internal gears and separate the motor from the gearbox.
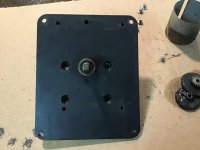
Theoretically this should be a no brainer. I grabbed my small two jaw puller and set about removing the bearing. The bearing doesn’t move. I grab my bigger two jaw puller…..the bearing still doesn‘t move. I grab my biggest jawed pulley remover I used to use on car rebuilds….the bearing just laughs at my efforts! Well now what…I need to get the bearing off to get into the gear box. After some ingenuity and fiddling I slide the faceplate forward snug to the bearing and remove the star headed screws so I could at least inspect the internals. Here’s what I found…
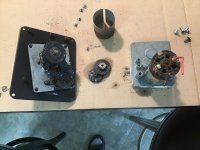
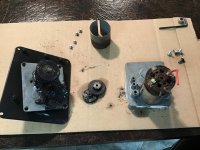
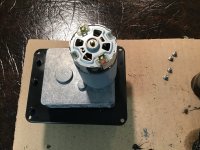
The internal gears are well lubricated and are free. The motor is seized tight and worse seized to the gearbox. I could press the motor out of the gearbox after fiddling with the lock ring but I’d still be stuck without a way to remove the bearing that’s conveniently seized to the shaft. What to do…..
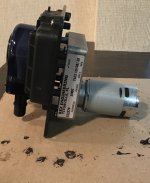
After some searching I find a listing for the older style shure flo pump head on pool zoom. The picture however looks like a Stenner Econ pump head which is what I’m after. I called the company and sure enough confirmed it’s actually an old reference but is the updated stenner Econ pump head. All for $68 plus shipping…ship it! Here’s the link: Shurflo Pump Head For Intelliph Controller
When the pump arrives, it’s indeed the Stenner Econ.
To be continued….
After my water was balanced upon opening, I waited a day or so the fired up the IPh in addition to the SWG. I set the output to off in order to manually drop ph and once adjusted to my liking I turned on the IPh and all seemed to function normally. As a test I manually requested an acid dispense at the controller. The screen indicated it was dispensing, however the pump was not turning. Uh-oh.
At this point I opened the pinch tube cover and manually tried to rotate the dispensing wheel. No joy - it’s clearly locked up tight. Time to dig deeper. I grabbed the dispensing wheel to remove it as it should slide off. Nope seized on to the shaft. With two thin putty knives I worked the blades behind the wheel and was able to carefully pry it off the shaft. It clearly needs some love.

The rollers were seized, but I should be able to clean it up and free them once again. Here‘s the shaft and faceplate.

The shaft is still seized up tight. Time to remove the faceplate screws.

The roller bearing attached to the shaft is really seized on. This will become a problem later.

Time to remove the whole unit to inspect the motor.


Well the rust pretty much explains the windings are rusted solid to the motor shaft. The design is fairly bad as there is no gasket that seals the mounting plate into the housing. Given the unit sits in the weather you’d think a better job of weather resistance would have been designed. The motor leads are also significantly rusted. I’ve got a fix in mind to help prevent weather wear, but I first have to clip the leads to get the motor to the bench for a tear down. Once the motor is on the bench, I need to remove the bearing from the shaft to get to the internal gears and separate the motor from the gearbox.

Theoretically this should be a no brainer. I grabbed my small two jaw puller and set about removing the bearing. The bearing doesn’t move. I grab my bigger two jaw puller…..the bearing still doesn‘t move. I grab my biggest jawed pulley remover I used to use on car rebuilds….the bearing just laughs at my efforts! Well now what…I need to get the bearing off to get into the gear box. After some ingenuity and fiddling I slide the faceplate forward snug to the bearing and remove the star headed screws so I could at least inspect the internals. Here’s what I found…


The internal gears are well lubricated and are free. The motor is seized tight and worse seized to the gearbox. I could press the motor out of the gearbox after fiddling with the lock ring but I’d still be stuck without a way to remove the bearing that’s conveniently seized to the shaft. What to do…..
After some searching I find a listing for the older style shure flo pump head on pool zoom. The picture however looks like a Stenner Econ pump head which is what I’m after. I called the company and sure enough confirmed it’s actually an old reference but is the updated stenner Econ pump head. All for $68 plus shipping…ship it! Here’s the link: Shurflo Pump Head For Intelliph Controller
When the pump arrives, it’s indeed the Stenner Econ.

To be continued….
Last edited:


