
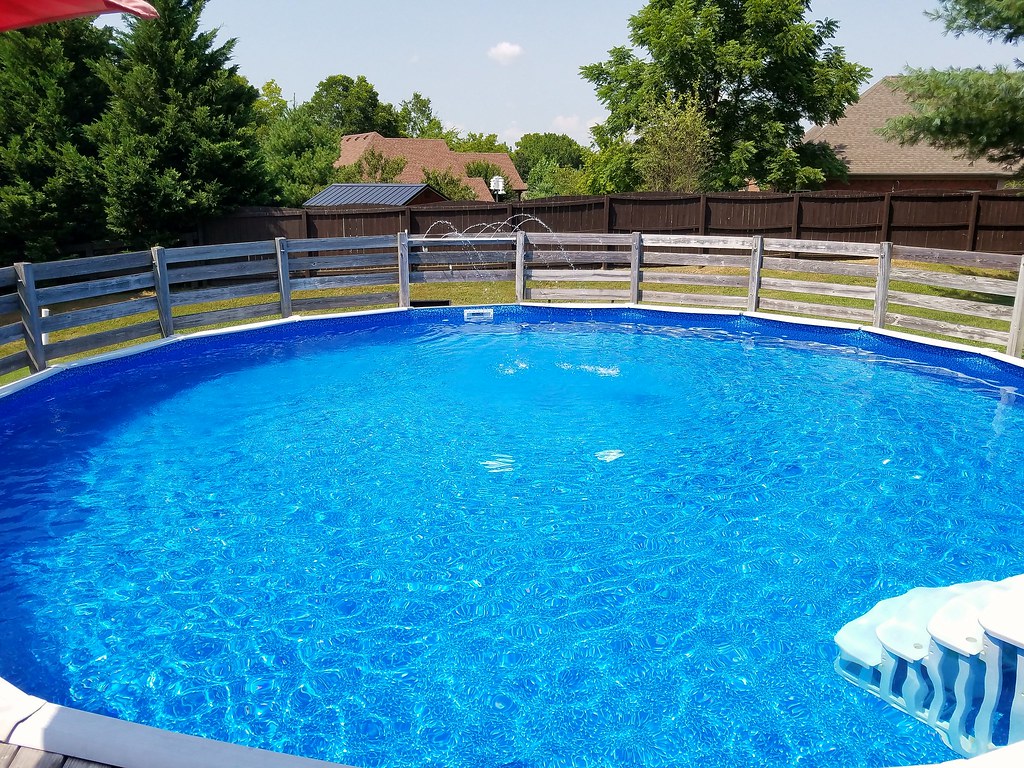
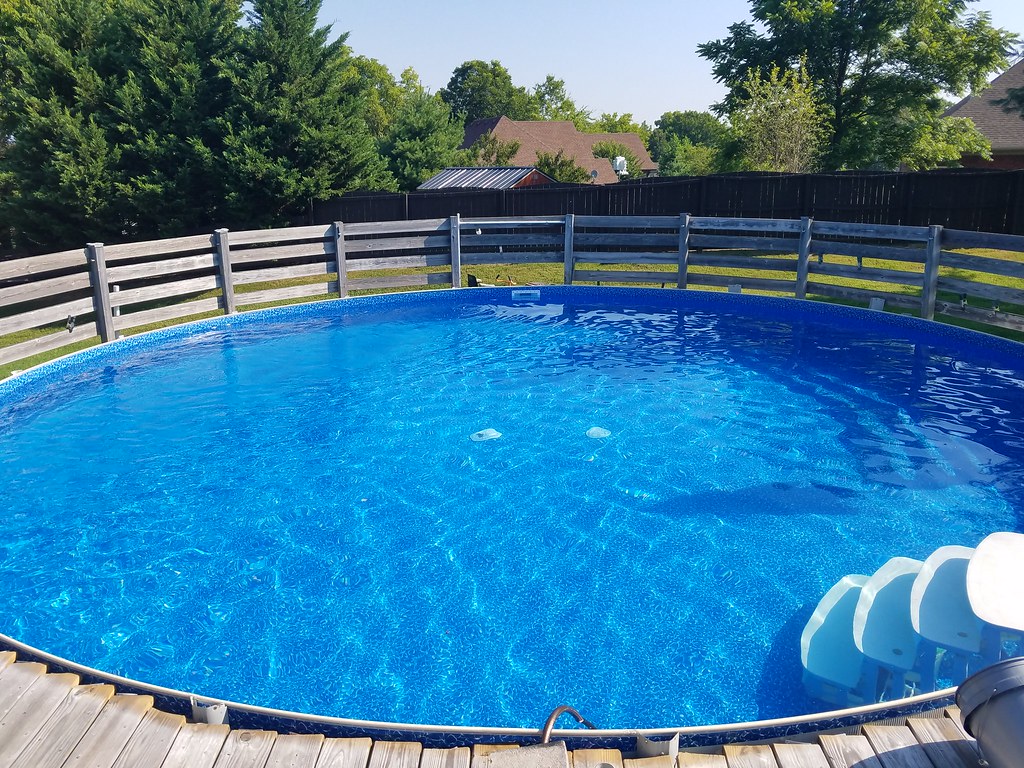
FINISHED PHOTO FIRST!!!
==================================================================================================
Over in the Above Ground sub-thread I have a thread about concerns regarding adding main drains to my 27' ag pool.
Had to replace the liner, due to a cut last fall so I left it uncovered all winter. Which made things harder, don't be lazy like I was. lol
Regardless, it's no fancy inground but I'm pretty excited about what we did!
Pulled the old liner out once everything I needed was here.
New Liner
Wall Foam
Cove Pieces
Gorilla Underpad (Which is just thick felt, but boy did it make an incredible difference when it came to laying the liner in)
New Main Drains! Pretty excited about this one, Main drains on an above ground it kind of a new thing from my research but it will reduce weekly maintenance and that's what i'm after!
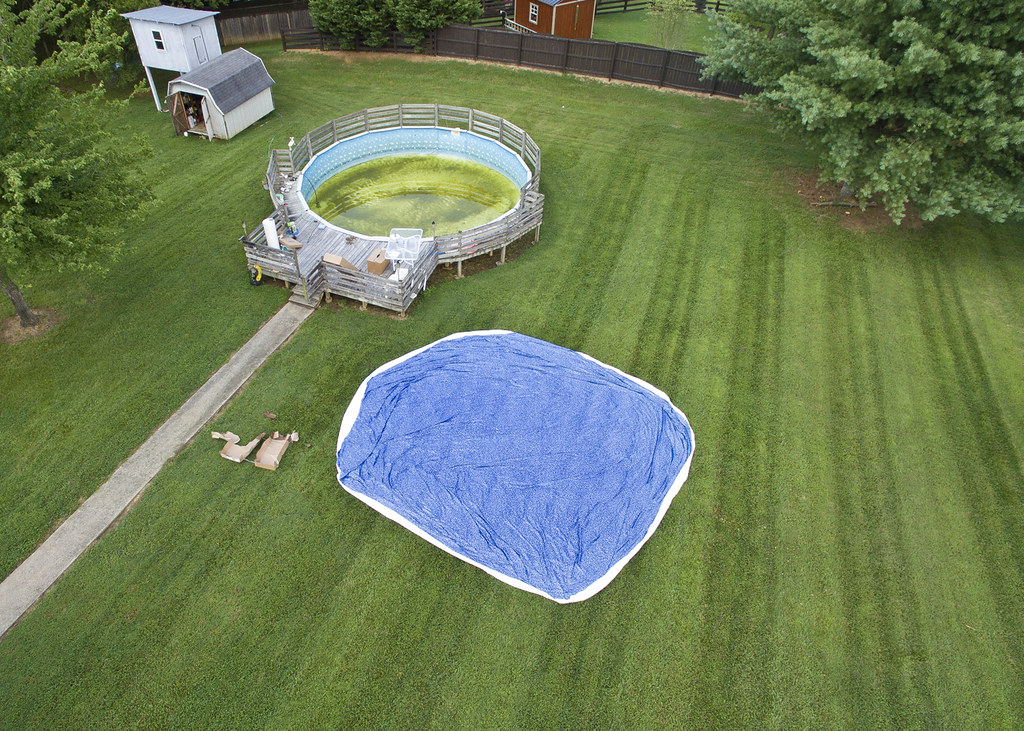
Old gross pull almost done draining and new liner layed out. I should have waited, I didn't put the new liner in this day and it killed my grass just one day with no sun! (It baked the grass underneath actually)

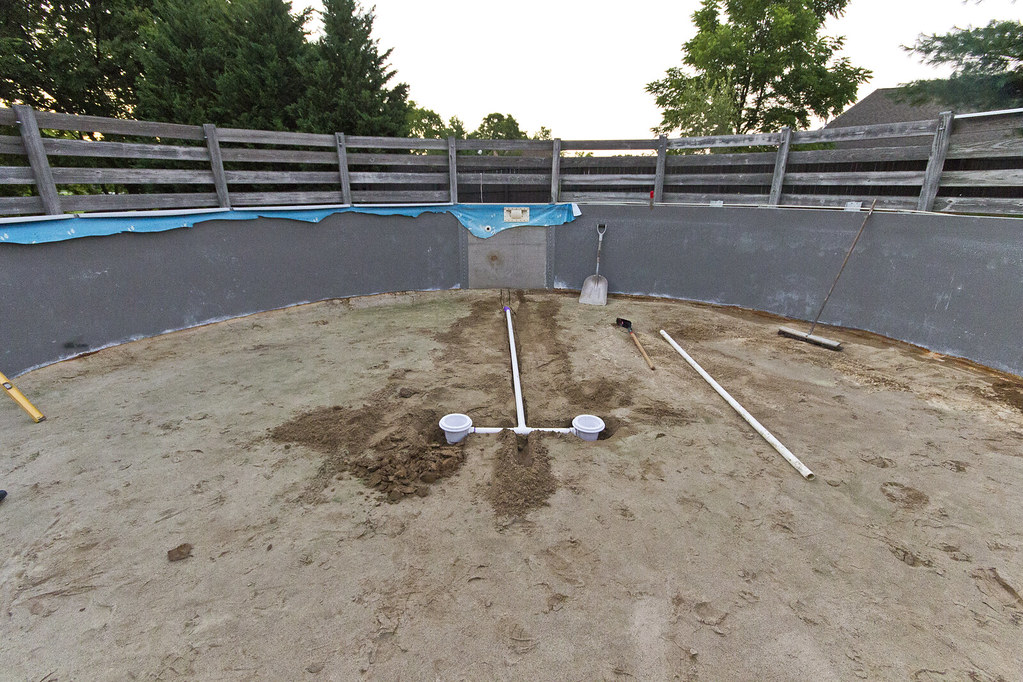
Old liner out, and measured and dug for the new main drains. Install wasn't complete hear, but it was getting close.
My parents came over to help, they're still awesome.
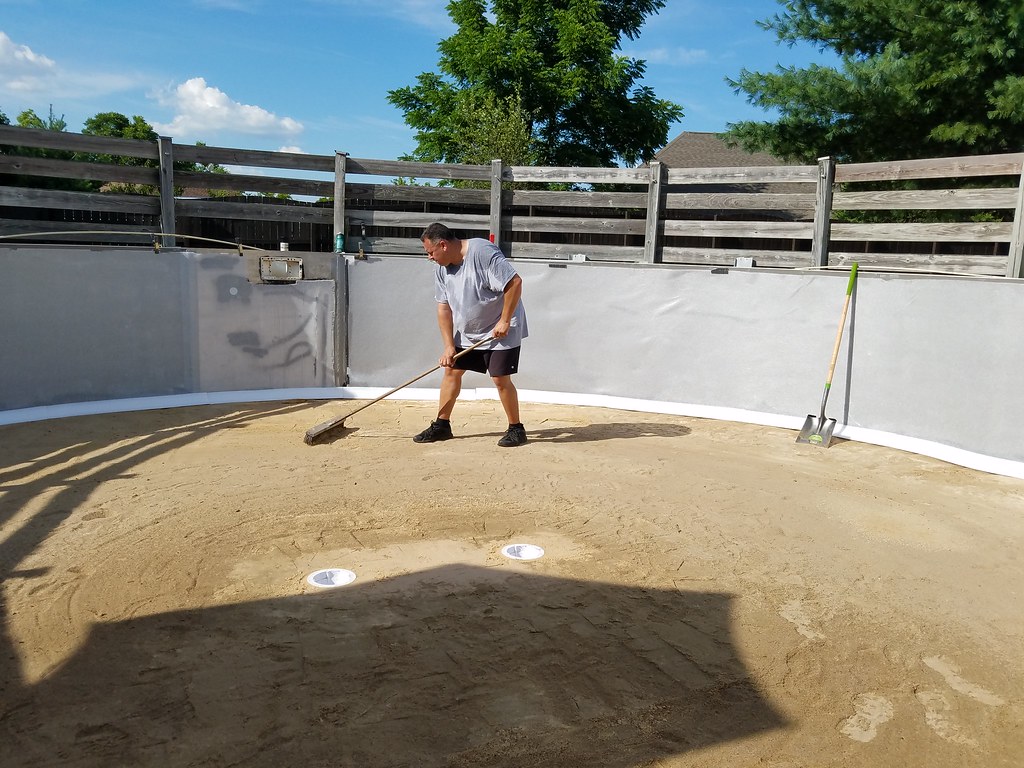
Drains installed and dad helping level out the sand and tap it. Wall foam and cove pieces are installed here as well.
Sand leveled, sort of. Gorilla pad layed out. Still had to wet it and smooth it out.
Layed out, Cut for the drains and the liner ready to be layed out and rough installed.
TIP!: When installing the under gasket that goes between the drain and the under side of the liner use High Tack Gasket Sealant to keep it from moving around as the liner is drug over it and properly placed.

Liner is in! Obviously the walls aren't stretched up yet. It's a waste of time until a couple inches of water is placed. (this isn't my first liner job ive done)
This little guy is the reason I'm doing this. I enjoyed it growing up, and I want him to have the same enjoyment as well. Plus, being the parent now I'd rather people be at our house so I can keep an eye on em than another house. SMH I'm my dad...
He's loving it already!
So last night at midnight I took this long exposure, it's all looking good!
And this morning I took this one. Still looking good!
It's all done and I'm pretty happy!
So I finally got the pool up and running today. I had to find the time to do the plumbing and clean the filter and assemble it all back together.
It's not straight, but im not a plumber either. haha. It works though! Next step is to clean it all up. Dig it out, place weed material and then paver stones ontop for the pump/filter stand to sit on top of.
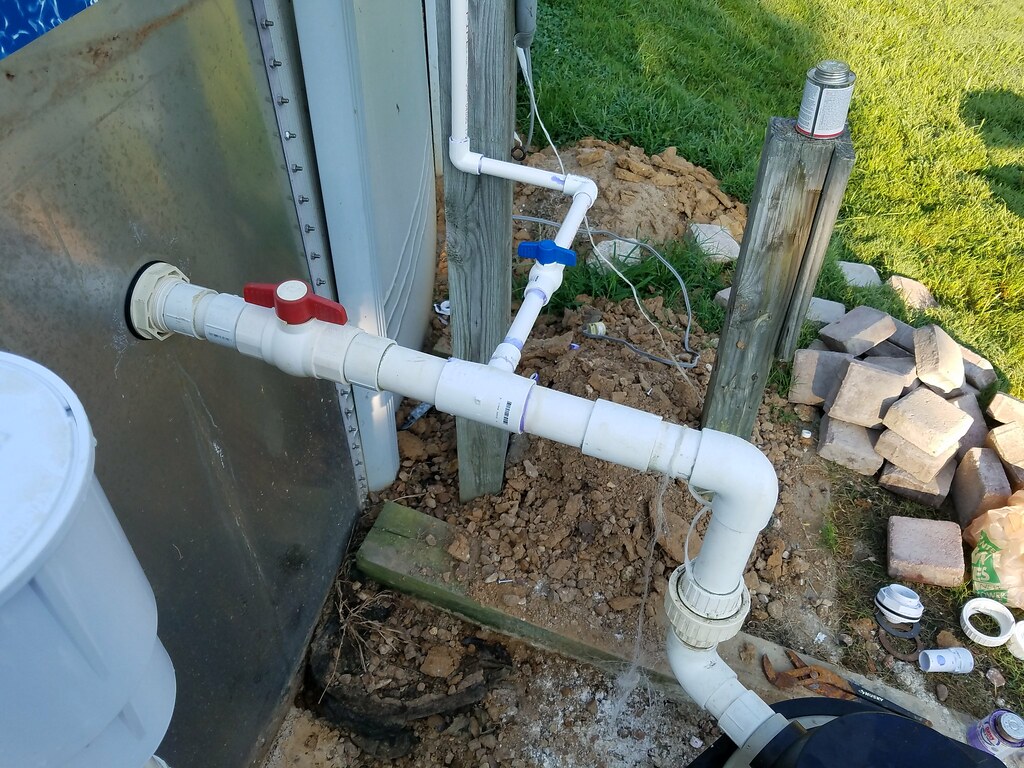
Also have to build or buy a box to house that lower main drain valve. A big mistake, I should have brought the valve up above ground. Live and learn.
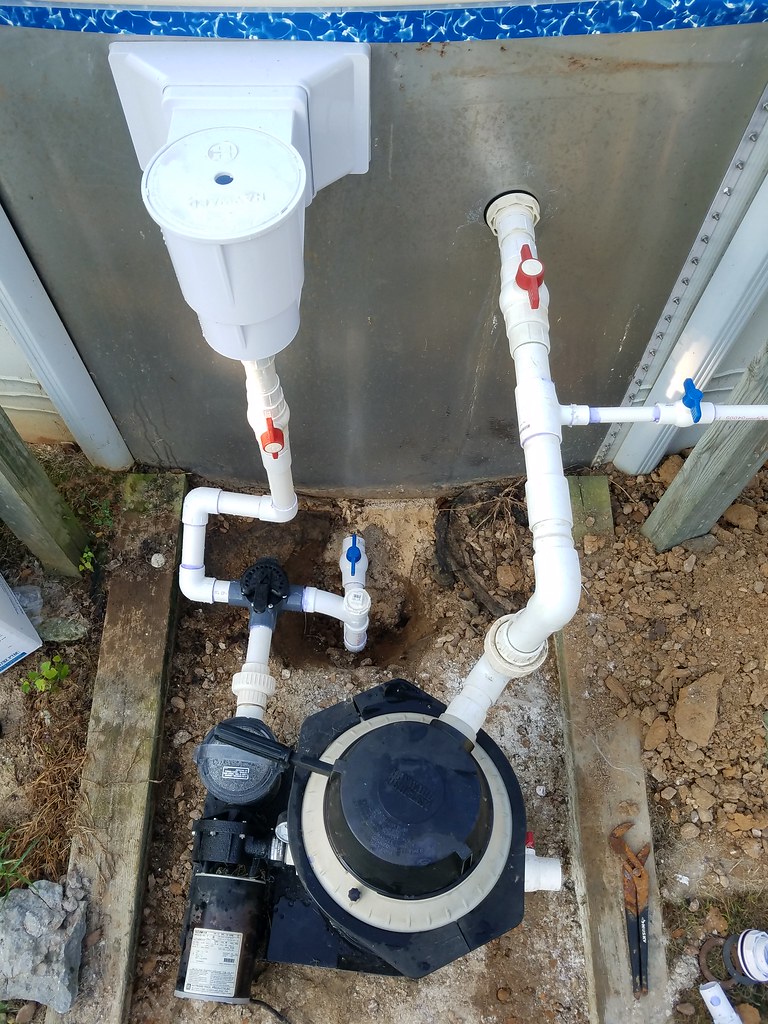
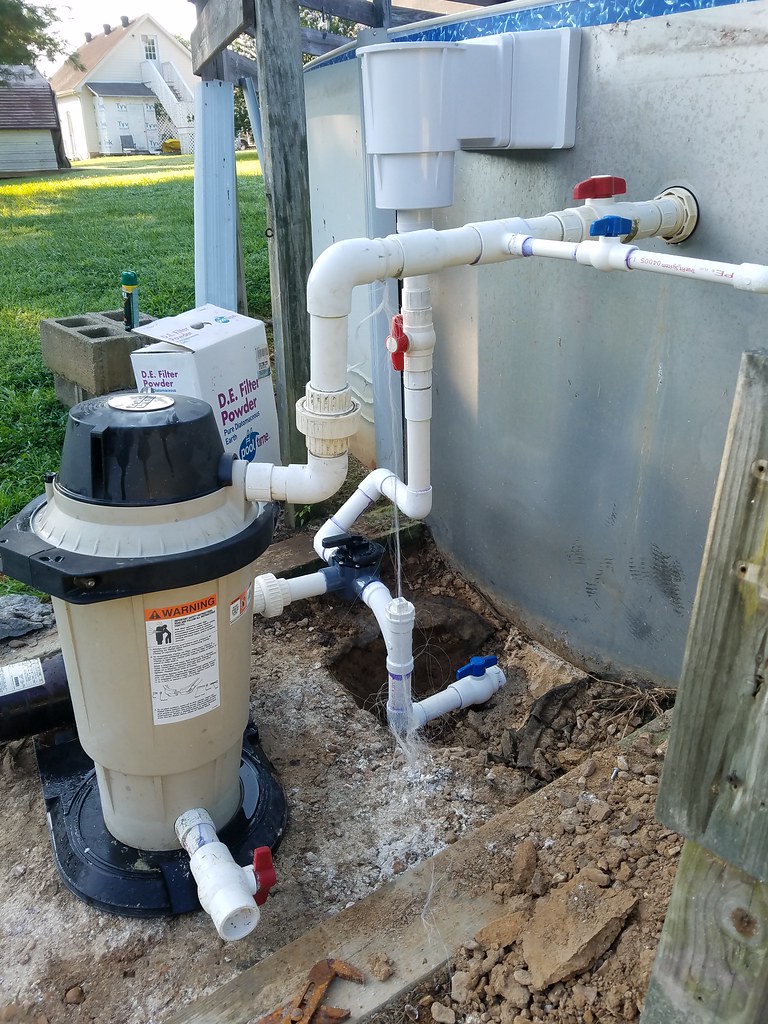
I added a clean out adapter to the main drain so in the winter I could open it, and suck all the water out after plugging the main drains for winter time.

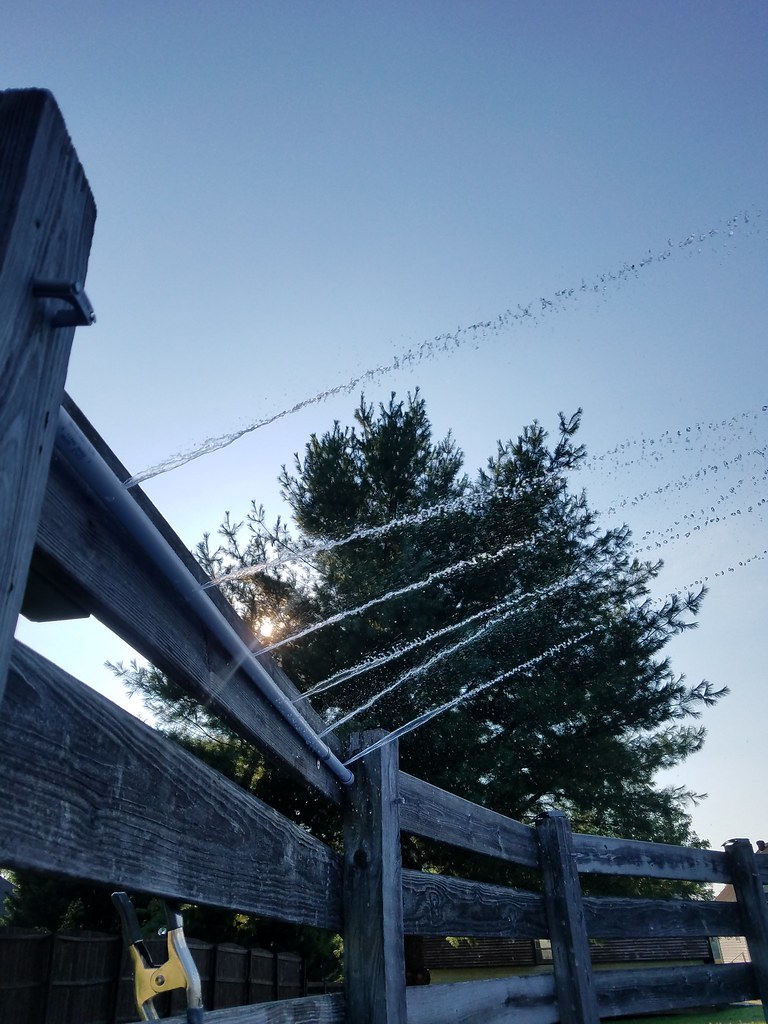
The small 1/2" line that goes off to the side is a water cooler. It'll spray streams through the air and it cools the water. It's not fast, but overnight it can cool the water 20*f if it gets too hot.
About to go out and finish the tops of the walls and it'll be complete. That water looks refreshing.
Put most of the tops on time for a break. lol I'm calling it done though!
==================================================================================================
Over in the Above Ground sub-thread I have a thread about concerns regarding adding main drains to my 27' ag pool.
Had to replace the liner, due to a cut last fall so I left it uncovered all winter. Which made things harder, don't be lazy like I was. lol
Regardless, it's no fancy inground but I'm pretty excited about what we did!
Pulled the old liner out once everything I needed was here.
New Liner
Wall Foam
Cove Pieces
Gorilla Underpad (Which is just thick felt, but boy did it make an incredible difference when it came to laying the liner in)
New Main Drains! Pretty excited about this one, Main drains on an above ground it kind of a new thing from my research but it will reduce weekly maintenance and that's what i'm after!
Old gross pull almost done draining and new liner layed out. I should have waited, I didn't put the new liner in this day and it killed my grass just one day with no sun! (It baked the grass underneath actually)
Old liner out, and measured and dug for the new main drains. Install wasn't complete hear, but it was getting close.
My parents came over to help, they're still awesome.
Drains installed and dad helping level out the sand and tap it. Wall foam and cove pieces are installed here as well.
Sand leveled, sort of. Gorilla pad layed out. Still had to wet it and smooth it out.
Layed out, Cut for the drains and the liner ready to be layed out and rough installed.
TIP!: When installing the under gasket that goes between the drain and the under side of the liner use High Tack Gasket Sealant to keep it from moving around as the liner is drug over it and properly placed.
Liner is in! Obviously the walls aren't stretched up yet. It's a waste of time until a couple inches of water is placed. (this isn't my first liner job ive done)
This little guy is the reason I'm doing this. I enjoyed it growing up, and I want him to have the same enjoyment as well. Plus, being the parent now I'd rather people be at our house so I can keep an eye on em than another house. SMH I'm my dad...
He's loving it already!
So last night at midnight I took this long exposure, it's all looking good!
And this morning I took this one. Still looking good!
It's all done and I'm pretty happy!
So I finally got the pool up and running today. I had to find the time to do the plumbing and clean the filter and assemble it all back together.
It's not straight, but im not a plumber either. haha. It works though! Next step is to clean it all up. Dig it out, place weed material and then paver stones ontop for the pump/filter stand to sit on top of.
Also have to build or buy a box to house that lower main drain valve. A big mistake, I should have brought the valve up above ground. Live and learn.
I added a clean out adapter to the main drain so in the winter I could open it, and suck all the water out after plugging the main drains for winter time.
The small 1/2" line that goes off to the side is a water cooler. It'll spray streams through the air and it cools the water. It's not fast, but overnight it can cool the water 20*f if it gets too hot.
About to go out and finish the tops of the walls and it'll be complete. That water looks refreshing.
Put most of the tops on time for a break. lol I'm calling it done though!