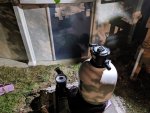
After about 2 weeks of intensive research I made the dive (pun intended) and ordered my first "real" Above Ground Pool (only inflatables up to now).
I might be crazy but I am trying to DIY this entire setup between my Father and I.
We are both very mechanically inclined and have done a lot of research and now we think we have a plan.
Ever since we sent the order we have been none stop leveling, clearing, collecting supplies, and praying for rain to go away.
Details:
- Saltwater 8000
- Solaxx Saltron Retro XL
- Hayward S180T 18" Sand Filter system with 1.5HP Power-Flo pump
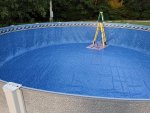
- 25 Gauge Unibead Liner
We have also purchased:
- Cheapest Solar Cover I could find on Amazon
- Taylor K-2006
- Taylor K-1766 (salt test)
- Blue Wave Peel and Stick Cove
- 400 lbs of Salt
- 150 lbs of Filter Sand
- 20 Concrete Pavers
- Bonding supplies (100ft #8 with a bunch of split bolts and direct burry bolts)
Still to get:
- Limesand (for level skim)
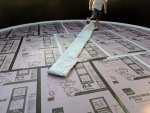
- XPS 1" Tongue and Groove Foam
- GFCI box installed (electric already run)
The Plan:
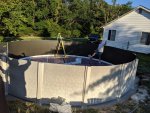
I have dug about 18" on 3 sides of the pool and plan on semi-inground.
I will have native ground level within 1/4" on my wall line and 3/4" inside that.
I will then add Limesand for a final level and tamp it solid.
Foam Board on top of that, followed by my foam cove.
Still trying to figure out the backfill on my 18" hole.
The Build:
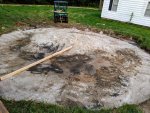
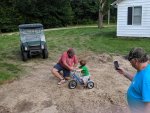
Day one of the dig, notice how happy everyone is.
This version of me had no idea what he had gotten himself into !
!
After getting the outer ring very close to level ... Rain hit. 3 days straight.
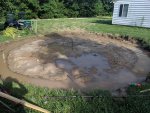
At this point I knew if I didn't do something we would never get the dirt work finished. So I sacrificed my level, and dug some drainage ditches.
At the low end I stuck an old sump pump and came out and manually turned it on about every hour to help take water off the top and keep it from soaking in.
I was very proud of these results (lots of hard work in the middle of the night)
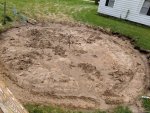
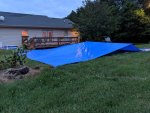
After another day of ground prep I got smart. I went and bought a HUGE tarp from Harbor Freight and covered the work I was so proud of.
Ridgeline worked great, but I did have to prop up a few places due to the weight of the tarp.
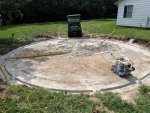
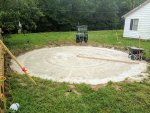
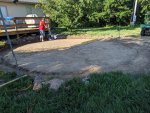
Next came the compactor. Now we are getting somewhere! at this point the middle is within 1/2" of level and the outer ring is 1/4" level.
Compacting the center did affect the overall smoothness, but overall level was still very close.
Since I have more layers to go on top here, I didn't worry too much about being perfectly smooth at this layer, just overall level.
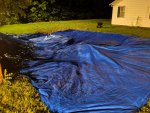
And then of course ... more rain! Its about this time I realized starting this project in June was such a bad idea.
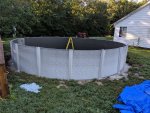
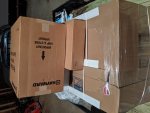
But to cheer me up, a very large package arrived!
On to the next post!
I might be crazy but I am trying to DIY this entire setup between my Father and I.
We are both very mechanically inclined and have done a lot of research and now we think we have a plan.
Ever since we sent the order we have been none stop leveling, clearing, collecting supplies, and praying for rain to go away.
Details:
- Saltwater 8000
- Solaxx Saltron Retro XL
- Hayward S180T 18" Sand Filter system with 1.5HP Power-Flo pump
- 25 Gauge Unibead Liner
We have also purchased:
- Cheapest Solar Cover I could find on Amazon
- Taylor K-2006
- Taylor K-1766 (salt test)
- Blue Wave Peel and Stick Cove
- 400 lbs of Salt
- 150 lbs of Filter Sand
- 20 Concrete Pavers
- Bonding supplies (100ft #8 with a bunch of split bolts and direct burry bolts)
Still to get:
- Limesand (for level skim)
- XPS 1" Tongue and Groove Foam
- GFCI box installed (electric already run)
The Plan:
I have dug about 18" on 3 sides of the pool and plan on semi-inground.
I will have native ground level within 1/4" on my wall line and 3/4" inside that.
I will then add Limesand for a final level and tamp it solid.
Foam Board on top of that, followed by my foam cove.
Still trying to figure out the backfill on my 18" hole.
The Build:
Day one of the dig, notice how happy everyone is.
This version of me had no idea what he had gotten himself into

After getting the outer ring very close to level ... Rain hit. 3 days straight.

At this point I knew if I didn't do something we would never get the dirt work finished. So I sacrificed my level, and dug some drainage ditches.
At the low end I stuck an old sump pump and came out and manually turned it on about every hour to help take water off the top and keep it from soaking in.
I was very proud of these results (lots of hard work in the middle of the night)

After another day of ground prep I got smart. I went and bought a HUGE tarp from Harbor Freight and covered the work I was so proud of.
Ridgeline worked great, but I did have to prop up a few places due to the weight of the tarp.

Next came the compactor. Now we are getting somewhere! at this point the middle is within 1/2" of level and the outer ring is 1/4" level.
Compacting the center did affect the overall smoothness, but overall level was still very close.
Since I have more layers to go on top here, I didn't worry too much about being perfectly smooth at this layer, just overall level.

And then of course ... more rain! Its about this time I realized starting this project in June was such a bad idea.

But to cheer me up, a very large package arrived!

On to the next post!
Last edited:


