Aurora semi inground pool

I realized I should not have started another thread regarding our semi inground build so am including the links to the other thread

 
I have a question about drainage - the concrete pad under the pool extends 1 1/2 to 2 feet beyond the pool. We plan on backfilling with the sandy dirt excavated and add a border of yet to be decided river rock or rubber mulch or mulch and pavers. (It has been too fricking hot to think beyond getting the pool set up lol) The contractor for the concrete poured it without using a frame other than the dugout wall to help with drainage ? There are a few lower spots around the edge where the concrete met the dugout wall but the pad does not slope like a patio. When the guy excavated the area he said the pit area slopes 5 to 6 inches right to left and 7 to 8 inches from the right edge (H) of the pit to our fence. ( We gave our neighbors half of the dirt because their side of our fence is 6 inches lower than our side. They have 2 dogs that run along the fenceline when they are let out to see if our dog is out. Fortunatly, they do not bark often)

So my question... do we need to put a layer of rocks on the concrete or a drainage pipe or will our sandy, fast draining fill dirt be sufficient for drainage ?


289420765_888710522109697_8328492221825368673_n.jpg
High to low

289740334_1718579791874784_771156617528358497_n.jpg

Concrete pad and our mostly sand dirt.


Thank you so much for all the previous and future information !
 
That sand should help to absorb quite a bit, although I would still encourage a nicely graded topsoil surface for the landscaping dressing to go on from high to low. When you get those seasonal heavy rains, hopefully a majority of the surface water will run-off and around the pool.
 
That sand should help to absorb quite a bit, although I would still encourage a nicely graded topsoil surface for the landscaping dressing to go on from high to low. When you get those seasonal heavy rains, hopefully a majority of the surface water will run-off and around the pool.
Thank you !!
 
I think I already know the answer to this question but am going to ask anyway with the hope of not having to redo this. :cry:

Installed the Hayward skimmer tonight, the water was about 4 inches from under the skimmer opening. I was outside the pool holding the skimmer while my husband installed the face plate. I know after installing the 4 corner screws he used a small screwdriver to poke a hole through the liner across the bottom screw holes but I don't think he check to make sure the liner had not slipped.

So my question is ... do we have to remove the skimmer and make sure the liner is in place or can I continue filling the pool and watch to see if the liner slips more ?

Is it possible to remove all the screws except for the top screws and be able to push/slide the liner back up along the bottom ?289805138_413188127223591_1325110467921433578_n.jpg
 
Last edited by a moderator:
Oh my. I bet that was an interesting discussion around the pool. :poke: 
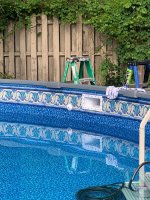
Okay, if you want to remove the screws to check now's the time to do it before the liner really gets itself firmly in place. You might get lucky - maybe.
 
Thanks Texas Splash ! Do you think if I remove all the bottom screws and the 2 bottom side screws there would be enough space for me to push the liner back up ? Do you think it would help my chances if I used some precut duct tape and stick one end to the liner and one into the skimmer mouth to keep the liner in place while I get the screws back in ?
My husband has to work tomorrow so I was thinking of trying to sort it out in the morning. I really need to get chemicals in the water and the filter and pump running. We only put a couple inches of water in it Friday afternoon to get the wrinkles out of the liner floor. Saturday & Sunday the water ran all day and over night on Saturday. I put half a bottle of bleach in on Saturday and Sunday and ran the Dolphin for 3 hours both days to circulate the water some. Today I put a full bottle of bleach in a little at a time in and ran the Dolphin 3 hours . The pool gets full sun from 11 a.m. till 6 or 7 p.m. and I worry about ending up with a green pond to deal with.

Side note..just saw that you are in San Antonio. My husband was stationed at Randolph for 8 years.. we loved San Antonio !
 
Ha. I retired at Randolph and still work here Civil Service. :)

My main concern about trying to adjust the liner is the weight of the water. You may find that with the pool full, the liner won't budge, or perhaps could even pull lower. Let me ask @Mdragger88 to join-in on this one for another opinion.
 
  • Like
Reactions: lattedah
I decided to drain the water down 4 to 6” and wait until this afternoon to try to fix the issue. I have a sump pump on the 2nd lowest pool step with the hose connected to a water sprinkler. Our grass is brown and thirsty in spots due to lack of rain. Hopefully after several hours in the afternoon sun the liner will be easier to work with.
 

Enjoying this content?

Support TFP with a donation.

Give Support
I decided to drain the water down 4 to 6” and wait until this afternoon to try to fix the issue. I have a sump pump on the 2nd lowest pool step with the hose connected to a water sprinkler. Our grass is brown and thirsty in spots due to lack of rain. Hopefully after several hours in the afternoon sun the liner will be easier to work with.
This sounds like a good plan - it’s definitely not something u wanna rush with.
Is the liner cut exactly like the skimmer hole or does it have slits & have excess folded over the wall?
If it has the “flap” folded over the wall between the gaskets you may be able to gently pull it from the outside after removing all the bottom screws. If not, i like the tape idea 💡
 
  • Like
Reactions: lattedah
I was 15 minutes away from having the liner fixed and it started pouring down rain. Accuweather showed only a 5% chance of rain till later this evening ! I took out the bottom screws and the two lower screws on the side and I could easily press the liner up where it should be. Just as I started to use an old credit card to ease the liner under the gasket it started pouring down rain. :( It is only sprinkling now so I have the sump pump going again and hopefully the sun will come out to warm the liner.
 
  • Like
Reactions: Mdragger88
Success ! We took the skimmer off, pulled the liner up enough to fold it over the pool wall for the skimmer opening, used strips of duct tape to hold it in place, and put the skimmer back on. Hopefully it doesn't leak because of the extra thickness with the folded over pool liner and duct tape but if it does I will add a line of silicone . It is a resin pool so rust is not an issue. I will remove the duct tape showing under the skimmer in time, right now I need to get this pool up and running.
 

Attachments

  • 289961786_548563973666238_4272816294210207430_n.jpg
    289961786_548563973666238_4272816294210207430_n.jpg
    870.7 KB · Views: 16
full
 
Mine is folded over like that with no drippy issues- the “pro’s” did it so it’s gotta be right! Lol. U don’t wanna see the rest of my liner 🤦‍♀️
 
I thought I had reached the promised land - I was just waiting for the water level to get high enough to be able to backwash the new filter and I would be good to go. The skimmer leaks ! :cry: It is a Hayward dyna-skim widemouth kit and it leaks right where the widemouth part meets the regular part. 3 steady straight down streams. I had no idea why it leaks but looked in the box thinking I must have forgotten a gasket in between the skimmer body and the widemouth extension and but only saw the small butterfly gasket. It took a few minutes of staring at the diagram in the instructions for me to realize I was supposed to use the dang small butterfly gasket ! o_O :cry:
 
Last edited:

Enjoying this content?

Support TFP with a donation.

Give Support
Thread Status
Hello , This thread has been inactive for over 60 days. New postings here are unlikely to be seen or responded to by other members. For better visibility, consider Starting A New Thread.