Renovations on Pump/Filter Plumbing

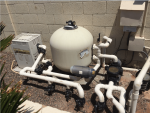
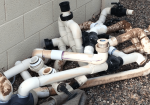
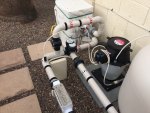
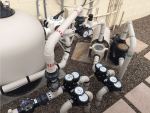
Recently I had to repair a broken line on the pool return and have always wondered about why the routing was done like it was, see below circled in red.Capture.PNG

Can anyone think of a functional reason why this line was run like this? Right now my assessment is that the main portion of the line was laid in the wrong position and this was the sloppy fix to it. this summer I plan on redoing the above ground portion of the routing and pouring a new slab and plan on correcting this if there is no functional reason for it.
 
727Pool_Life
I can't see any reason for that.
Maybe it was some sort of modification made to pool equipment after the original build, and the plumber (or whoever did it), did not want to dig all of the dirt out and just plumbed it like that because it was easier?
r.
 
Thank guys :) I figured as much, even the display setups in local pool places dont show the pool return line with that kind of funky routing.
727Pool_Life
So are you going to be renovating your entire pad? New equipment?
Just curious. I did that about a year ago, so that is why I ask (not being nosy) :p .
Thanks...
r...
 
Would that have been a good spot for a chlorinator/acid dispenser ? Only guess i have is that they wanted the slab to support the weight of something added later. That never got added. For the recent repair guy, it probably seemed easier to replace it like it was. It actually would have been easier to go straight down from the valve, smack a 90 on it and go right to the pipe in the dirt.
 
Thanks for all the input.

727Pool_Life
So are you going to be renovating your entire pad? New equipment?
Just curious. I did that about a year ago, so that is why I ask (not being nosy) :p .
Thanks...
r...

The equipment is pretty new so all that stays, the routing is what is terrible and there is a lot more pressure losses (Mech Eng here) than there needs to be, plus some of the pipes are sized incorrectly (part of the certain runs of pipe is 2" and then a small section necks down to 1.5" in that same section) just crazy. I added a heater last year and there is just a make shift slab there for it and want to make it all on one slab, plus the currently slab could use some rehab.

Would that have been a good spot for a chlorinator/acid dispenser ? Only guess i have is that they wanted the slab to support the weight of something added later. That never got added. For the recent repair guy, it probably seemed easier to replace it like it was. It actually would have been easier to go straight down from the valve, smack a 90 on it and go right to the pipe in the dirt.

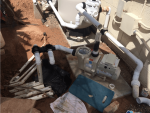
It is tough to see from the angle but this cant be done since the first pipe from the left on the suction side is blocking a direct hook up to the pipe in the dirt. Thats what makes me think it was a error from the start. They plumbed up the suction side and didnt realize they blocked the return line and that was their fix. When the times comes I will need to redo the entire pipe for that return most of the way to to pool, which is fine I need to dig up the rest of the pipes as I need to cut back 25 ears worth of tree root growth since there are several large FL oak trees back there. I was cutting out 3/4" tree roots when I dug this section up.
 

Enjoying this content?

Support TFP with a donation.

Give Support
A sawzall works wonders cutting tree roots. Milwaukee makes a blade that is 2 or 3 times thicker for strength. I think its called 'the axe'. If there is nothing else nearby, you dont even have to dig up the root. The sawzall will cut through thr dirt and root together
 
Thanks for all the input.
The equipment is pretty new so all that stays, the routing is what is terrible and there is a lot more pressure losses (Mech Eng here) than there needs to be, plus some of the pipes are sized incorrectly (part of the certain runs of pipe is 2" and then a small section necks down to 1.5" in that same section) just crazy. I added a heater last year and there is just a make shift slab there for it and want to make it all on one slab, plus the currently slab could use some rehab.
It is tough to see from the angle but this cant be done since the first pipe from the left on the suction side is blocking a direct hook up to the pipe in the dirt. Thats what makes me think it was a error from the start. They plumbed up the suction side and didnt realize they blocked the return line and that was their fix. When the times comes I will need to redo the entire pipe for that return most of the way to to pool, which is fine I need to dig up the rest of the pipes as I need to cut back 25 ears worth of tree root growth since there are several large FL oak trees back there. I was cutting out 3/4" tree roots when I dug this section up.
727Pool_Life
Good plan. Please consider using the Praher/CMP style family of high temp unions at least at the inlet / outlet of the pumps. If you think that you may ever use valve actuators associated with automation sometime in the future, please leave yourself enough room between the Jandy valves.
View attachment 111861

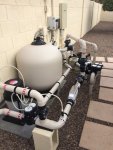
Just to give you an idea of what is possible, here is what my pad looked like originally (kind of embarrasing actually :( )

113460


In progress

113461

113463

113462


Final Results
113464

113465

113466

I hope this is helpful to you as you begin to plan your equipment pad upgrade project. If you want to review some of the challenges and discoveries that I incurred during my pad upgrade and maybe a tip or two to consider, please see the below thread.

Good luck with your upcoming project and please feel free to ping me if there is anything that I can possibly help with.
All the best...
r..
 
A sawzall works wonders cutting tree roots. Milwaukee makes a blade that is 2 or 3 times thicker for strength. I think its called 'the axe'. If there is nothing else nearby, you dont even have to dig up the root. The sawzall will cut through thr dirt and root together

Good idea, I will check that out


727Pool_Life
Good plan. Please consider using the Praher/CMP style family of high temp unions at least at the inlet / outlet of the pumps. If you think that you may ever use valve actuators associated with automation sometime in the future, please leave yourself enough room between the Jandy valves.
View attachment 111861

Just to give you an idea of what is possible, here is what my pad looked like originally (kind of embarrasing actually :( )

View attachment 113460

Final Results
View attachment 113464

View attachment 113465

View attachment 113466

I hope this is helpful to you as you begin to plan your equipment pad upgrade project. If you want to review some of the challenges and discoveries that I incurred during my pad upgrade and maybe a tip or two to consider, please see the below thread.


Good luck with your upcoming project and please feel free to ping me if there is anything that I can possibly help with.
All the best...
r..

Nice work, thats an impressive setup, I will def check your thread out. What labels are you using for the valves and water flow? How durable are they?
 
Nice work, thats an impressive setup, I will def check your thread out. What labels are you using for the valves and water flow? How durable are they?
Hi 727Pool_Life
Thank you! It was quite the project I must admit, but if one just takes their time and attempts to be "detail oriented" the result can be something that you can be proud of and it will be much better than what you would get, then if you paid someone to do it. :)
The valve labels that I used are these..

The water flow directional arrows that I used are Brady. Here is the link for the black and white ones. They have other colors as well.
White: 91413, Blue: 91427, Red: 92426 and Green: 91425
Take care and feel free to ping me if there is anything else that I can do to assist.
All the best
r.
 
Thread Status
Hello , This thread has been inactive for over 60 days. New postings here are unlikely to be seen or responded to by other members. For better visibility, consider Starting A New Thread.