5 boys and a grain bin...new AGP build DIY

Sand Cove OVER OR UNDER Foam Wall Insulation?

Is there any reason I can't build my sand cove (6" tall from everything I have read) and THEN hang the 1/8" foam wall insulation so that it hangs down slightly overlapping ON TOP OF the sand cove?

Here is why I'm leaning this way:

- We are right between rains again and trying to get everything done in bits and pieces now. We do as much as we can, then tarp everything to protect it, then uncover/dry/proceed. Slow, but definitely progress.

- Liner can't be installed until Monday at the earliest, and I don't want to hang the wall insulation very far ahead of that (would even like it to be on the same day liner starts so that I don't risk it falling down as we wait through the inevitable delays, weather, etc).

- Got the sand spread across the bottom with a large pile left for the cove...hoping this is a next step I could finish so it wouldn't have to be done after the wall insulation, which would make it the same day we do liner (because I anticipate it will take a LONG time to fill this enormous pond enough to smooth & adjust liner, so I really want to start with the liner as early in a day as we can). Therefore, if I COULD do the cove ahead and lap the wall foam on top of it later, this would be a time-saving jump start for my liner installation day.

- Figured that if an important factor of the cove is to keep liner from slipping down between it and wall, it would be an advantage to have the insulation draped over the place where sand meets wall??

However, if the foam wall nsulation may not be super easy to work with or drape smoothly, I don't want to go down the wrong path. Advice anyone?

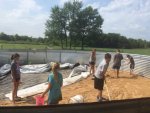
Thanks in advance. I appreciate all the help here. Will post more pictures from the crew soon. Katie
 
Update from the KPBPK (Kid Pool Builders Professional Krew)---

In past 2 days of 110 degree heat indexes, we:

- put the pool's colorful "rain jacket" (tarps) back on and got the deep end pumped out AGAIN
- got the last of 8 tons of sand out of the truck and dumped into the pool
- improvised some patio umbrella shade for the chief sand loading boys
- built up enough dirt around the outside wall to try to keep the next rain from leaking beneath our tarp
- spread sand about 2" thick all across shallow end
- made a plan for the skimmer insertion (actually, I used posterboard and made a 3D model of the wall, steel plate, liner, gaskets, etc so I could really visualize it)
- got a person with a plasma cutter lined up to come Monday morning (fingers crossed for clear forecast) to make the holes for skimmer and returns
- have a big crew scheduled for most of the day tomorrow (it's supposed to be high 80's and DRY---wahoo!!!!)

My grandfather used to say this about boys:

"One boy is a pretty good boy. Two boys is half a boy. Three boys is no boy at all." I think half my job is keeping the boys on separate jobs or paired with a sister just to keep everyone on task. Tomorrow's list is long. Wish us luck. And PLEASE, if you have any ideas about the order of the COVE and THE WALL INSULATION (see post before this), shoot me some advice so I don't make a mess.

Pictures of the day:

View attachment 53288
View attachment 53289
 
I have no direct experience with this but I have been doing some visualizing on that. While it is true that part of the job of the cove is to stop the liner from poking under the wall, it's also there to ease the transition from wall to floor. If you place the wall insulation over the cove you lose that. Plus, you would create a place for the liner to migrate to, between the cove and the insulation.
 
Like Bob I have been doing some visualizing of this. I also talked it over with my husband so he could help me work out (we make a good team).

Our thoughts are foam against the wall with sand over it :( I SO wanted to say how you wanted to do it but it just does not work out. Here are some of our thoughts:

Foam over sand:

-the foam will not make a smooth transition from the bumps of the wall to the smoothness of the sand. Our fear is that it will will be "bumpy" and not lay flat against the sand.

Foam under sand:

-the sand will help the foam form to the bumps on the wall and make a smoother transition.

Husband says to get some (for you a LOT with the size of your pool) contact adhesive to put the foam up with. He says you can use the spray kind or the brush kind. Put some on both surfaces, wait until it is tacky before you put the foam up (he says it will try to stick to your finger and pull up in a "string"). Put the two pieces together (foam to wall) and smooth it out. You can use hands or pie crust roller (this is the only thing it is used for in my house LOL)

LOL on keeping the boys apart! That saying says it all!

:hug: I wish I could say do it your way :(

:kim:
 
I second the adhesive for the foam!

And I don't have enough experience with pools, but I'll admit that if it was me for a reservoir, it would be a sand only cove, about 6" or 8" up the steel. I'm a bit cheap, ya know.
 
I appreciate the responses about the wall foam...so helpful. I think I had imagined that I would merely attach the foam at its top (with a margin of adhesive on the back and a strip of gorilla tape on top) and let it hang down free. As if it was a slip under a skirt or something. And I think I thought it would simply be pushed into the "ridges" of the bin sheet by the weight of the water and didn't need to be pasted into the ridges and valleys all the way from top to bottom. Is this a wrong idea because the liner and water will pull at it or move it or knock it loose?

I'm off to spread sand on the evening shift. Man, that galvanized steel and the bright sun are a STRONG combination. Mid-day makes that pool like a super-powered crockpot or something. :) It was cooler and dry today, so we had a big day. Got the electric run to the subpanel and the pipe laid in trench around the pool. Will try to re-post the previous pictures and some new ones when I can get them unloaded and get done repairing the deep end.

I am going to work ALONE tonight and give my brain a break from supervising these wonderful, energetic kids and let them watch Olympic athletes while they assemble our fancy new pool stairs in the living room floor. I did tell my husband last night that perhaps we have raised a crop of thinkers...or backtalkers. :) I can start giving half a set of instructions and immediately they say, "But Mom, what if we did...?" or "But why aren't we...?" Sheesh. Love them and their bright spirits and good minds and strong muscles (because mine are NOT!), but I need a bossing break. :)
 
Again I worry about wrinkles with just letting it hand and hope the liner/water will push it where it needs to go.

Lets think this out...........

The sand will push the foam into the ridges on the bottom.........so my thoughts are you need to push and keep the foam in at the top as well.

Here is another idea if you do not want to go the adhesive way........using the tape on the top and tape OVER the wall inside the inner ridge of the wall. _-_-_-_-_-_ the tape would be on 2,4,6,8, etc. That will make sure you have it so there are not gaps caused by the bumps on the walls making you need more foam than you thought you would need.

I hope you understand what I am saying.

I SO hear you on the bossing break........now tell me this.........where any of their ideas good ones????

:kim:
 
Thanks so much for the encouragement. I have just checked weather and think we have a realistic chance of starting the liner installation Monday morning before rain later that day. So, some questions:

1) Is it okay to get the liner underway WHILE expecting rain, smoothing as we go and aiming for having enough water in to keep it basically in place? I really, really, really do not want to have to cover the whole thing again and try to protect the wall foam and cove and deep end prep from ANOTHER rain. And I'd be really glad to get a little heavenly help filling the water, since we intend to fill this monster with just our two water hoses. But what are the compelling reasons to NOT start a liner install if rain is a possibility in 8 hours or so (other than actual thunderstorm warnings or high wind)?

2) I'm going to attempt the wall foam tomorrow instead of waiting for liner day...still trying to figure out exactly what my strategy will be. Kim, I have read and re-read your wonderful suggestion...and I cannot figure it out. I must be too tired. I had wondered about painting adhesive on all the "ridges" of the wall and not bothering with the "valleys" but I can't seem to grasp how I would tape in such a manner? Or do you mean something completely different? Thank you (and your hubby!) for trying to help me think this through. If I put up the foam tomorrow and cannot get the liner in before the rain, I will just have to re-tarp it all and hope it stays.

3) If I can get the wall foam up and the deep end repaired and the sand utterly smooth again, I have to decide what to do about the "pad" which I want for weed and puncture prevention. I scored a bunch of heavy-duty plastic/vinyl agricultural tarp (not typical kind). I am debating putting it ON TOP OF MY SAND across the entire pool (it is a 47'x50' piece, so it would work), but I am getting lazy and dreading the logistical challenge of hefting the whole thing into the pool and trimming it to fit the circle. If I do NOT use it on the entire pool, I would still like to at LEAST use pieces of the same stuff (I have 2 smaller ones that can be cut) on top the 18" ground-level "ledge" around the wall of the deep end and behind the cove around all the wall in order to help keep the sand from eroding with any water than can come in under the wall. It seems like putting it UNDER the sand next to the wall and floor, with sand and cove on top would be easiest.

Too late for pics tonight...will keep asking kids to take them along the way and post them later.

Thanks for all the help. This crazy weather. Now I suddenly feel like we're catapulting to a finish line I wasn't quite prepared for yet.
 

Enjoying this content?

Support TFP with a donation.

Give Support
Kate my idea is to put the foam into the valleys and tape it like your hand is holding it by folding over the wall. The heel of your hand will be on the outside of the wall and your fingers will be on the inside of the wall inside the valley. The top edge of the wall will be inside your hand where it folds over the wall. BUT instead of your hand it will be tape. Does that help you "see" it?

As for the liner and possible rain...............I really think with all of the help you have you should be able to get it up IF you have front loaded enough. Talk it through with the helpers so any and all questions or suggestions are already out of the way.

Idea to help with wrinkles once the liner is in place............bags of water! My installer got big garbage bags and filled them with water and put them along the bottom edge of the pool. This helped keep the liner against where the wall and floor meet. He folded the top of the bags over and taped it shut. Once the bags started floating he just cut it and let the water out and threw the bags away.

If you cannot see what I am talking about let me know. I will take a pic of what I am thinking of but we are about to head out to the rive with the Seadoo so it might be a while.

:kim:
 
Great day of progress:

-- walls cut for skimmer and returns (thank you, big brothers of mine!!!)
-- holes caulked with silicone and cut edges padded with foam insulation
-- sand spread and smoothed and watered
-- walls washed AGAIN
-- wall insulation hung with gorilla tape at top and spray adhesive on wall (and a lot of helping hands)
-- cove built of sand, overlapping the bottom of the insulation
-- tough tarps pieced to cover sand floor as a protection against small rocks in sand
-- walls draped with plastic and tarps, sump pump in place, just in case rain should come overnight
-- crew lined up for tomorrow mid-morning to lift liner in pool and help stretch it to begin filling
-- my kids' alarms set for 6 a.m. to help me with a long list of prep before liner crew arrives

But now, the most unbelievable thing of the summer:

After an entire summer of BROIL and RAIN, we get everything ready and have a dry day in our sights. And now the weatherman says it will be in the 60's or low 70's most of the day and CLOUDY. So much for warming and softening the liner. We plan to take it out and spread it on my enormous black tarp, hoping for enough sun to get it ready to stretch. If not, it will be a waiting game. The current chances for rain are immediately after it warms up and gets sunny in the late afternoon. Crazy weather.

No pics tonight, but hope some were taken today in the chaos. 8 adults and 10 kids worked for me today...oh me, oh my. I can't figure out how to answer questions and be in enough places at once. I am giving up some of my control-freak OCD preferences and learning to just be so very, very grateful for good help and the prospect of really having a pool this week. I ordered my test kit early this a.m. because I really believe we are FINALLY going to get this show on the road.
 
Hey post a close-up of both sides of the skimmer and return openings. Thanks so much. Just thinking some experts here will know that the vinyl will be safe when the water hits.

Love your kids! When they make waves in it, they're going to be big waves :) :) :)
 
3 quick questions that I totally neglected:

1) WINTERIZING QUESTIONS: AQUADOOR FOR SKIMMER? DEPTH OF PIPE BURYING?


One installer and another salesperson originally told me they really think aquadoor is best for winterizing? I keep forgetting to look up pipe suggestions and processes (does it get blown empty for winter? What do I need to do RIGHT NOW so that the skimmer and pipe are properly installed and not a problem for winter factors?

2) PARTS FOR RETURN FITTINGS??


I bought Hayward SP1408 inlet fittings and have them nicely installed in my wall, but I forgot to ever do anything about "eyeballs" or whatever you call the stuff that directs the water...what do I need to get??

3) MANUAL VACUUM RECOMMENDATION?


I keep forgetting to research what length/strength of hose I need, what is a good brand or style of vacuum head, or what else I need. I plan to get the skim plate to go with my Hayward SP 10841OM...what else do I need?? I have to exchange an extra skimmer, so getting supplies I will be needing would be a handy deal.

Thanks, TFP People. You guys are great.
 
For the return eyeball these

Amazon.com: Hayward SP1419D White 3/4-Inch Opening Hydrostream Directional Flow Inlet Fitting with 1-1/2-Inch MIP Thread: Patio, Lawn Garden

or

Amazon.com : Hayward SP1419E White 1-Inch Opening Hydrostream Directional Flow Inlet Fitting with 1-1/2-Inch MIP Thread : Swimming Pool Supplies : Patio, Lawn Garden

should do.

Your vacuum hose should be at least 1/2 again as long as the diameter of the pool. For a 36' pool you need 54' of hose but you can probably get away with buying a 50' hose. If you have difficulty reaching all areas of the pool you can get Amazon.com: PoolSupplyTown 1.5 Garden and a 12' hose to get the extra length you need.

As far as pipes go if they are above the frost line you blow them out and cap them off. Some folks add pool antifreeze to the lines for extra insurance. Even if you get an aqua door for the skimmer you will want to plug the line and add some empty plastic bottles or cut up pool noodles to the skimmer so that they will absorb the crush force of ice in the skimmer over winter.
 
When the holes were cut and the plates welded in, did they spray zinc paint on the cuts and welds? It's far from being as good as the galvanizing, but I've seen it last a very long time (years) protecting cuts and drilled holes in greenhouses where the environment is harsh on metal. Mentioning it just in case, cause I suspect they would have, but there's also people who just say 'waste of time' on that topic.
 
All who have posted recently...thank you for the encouragement and advice. We are so, so tired. :)

Thank you, Zea3, for such a prompt answer and for the links! Does anyone have advice about a kind of vacuum head that is super-durable and effective?

Needsajet, I don't think any zinc was applied. Wish I had thought of it. They swooped in, cut holes, and smeared silicone. With any luck, it will work as it is? Hopefully, the pics we took will show the results.


Today's update:

Crazy weather was 60's and cloudy all day until evening, but our forecasted rain is delayed to later in the week, so I decided to postpone liner for tomorrow. That allowed me to be a bit more precise with the finishing details after yesterday's rushing, plus we got to work in PLEASANT weather today. Here's what we had time for:

- cut the excess bolt lengths off the top seam (which is 10" below the top edge)
- cut the extra wall foam into narrow strips to pad and tape over that upper/outer seam and its trimmed bolts (making it safer for the crew to pull overlap liner down the outside wall without tearing it)
- cleaned and taped together all the tarp pieces we had laid out for the protective cover over the sand base (so it won't shift as we're placing the liner)
- pulled back the base tarp to re-pack and smooth the floor half the pool at a time (with kids wearing "snow shoes" and "knee pads" made from an old sheet of foam board to minimize dents in the floor and the deep end wall
- spread copper sulfate over the sand (to prevent root invasion)
- trimmed and re-packed the sand cove more consistently around the whole perimeter (many hands had shaped it yesterday; today one kid with a hard clipboard the right size and one kid with a trowel got it all the same size)
- taped wide strips of 20-year landscape fabric (similar to the gorilla pad material) onto the bottom of the wall foam so that it drapes across the cove and down to the tarp which covers the floor tarp
- re-positioned the whole floor-cover tarp onto the finished base, spreading it as flat as possible
- got our heavy old Intex pool cut into strips to line the trench outside the wall to serve as a weed and water barrier under some future rock
- cut even MORE extra wall foam into narrow strips to fill in the top inner wall (yesterday, to beat the rain, we only hung one layer of the insulation and placed its top to cover the top seam inside and hang down low enough to go behind the cove (which worked well according to the good advice here and with the cooperation of our missed rain prediction)...but today we had extra time, extra foam, extra hands, and several more rolls of duct tape, so we have completely insulated/padded the inner wall from top rubber strip down to the cove, and I am glad about that
- covered the walls with tarps and plastic sheeting AGAIN tonight to protect the insulation and tape from our 94% humidity's heavy overnight dew

Tomorrow's plan:

- 7 a.m. (should be sunny) lay out the 47'x50' tarp (black side up) in our "baseball field" where there is no shade to be a dry surface
- open and spread the liner on the tarp to start warming
- 9:30 a.m. extra hands arrive to help fold and lift the giant into the pool
- hope for success as we figure out how to distribute the vinyl across the space leaving enough but not too much for the deep end (yikes)
- start filling and working out wrinkles and letting down the walls

Pics of the hole results:

The steel plate adaptor my brother made for me to mount the skimmer to (attached to bin with bolts)
steel plate adaptor mounted for skimmer.jpg

The inground "fat" return fitting which was able to be mounted without any adapting (will add gasket and interior faceplate on top of liner)
thick inground return fitting mounted.jpg
 

Attachments

  • pumping it out again.jpg
    pumping it out again.jpg
    28.9 KB · Views: 285
  • smoothing the sand.jpg
    smoothing the sand.jpg
    39.6 KB · Views: 288
  • shade for sand loaders.jpg
    shade for sand loaders.jpg
    25.1 KB · Views: 286

Enjoying this content?

Support TFP with a donation.

Give Support
Thread Status
Hello , This thread has been inactive for over 60 days. New postings here are unlikely to be seen or responded to by other members. For better visibility, consider Starting A New Thread.