
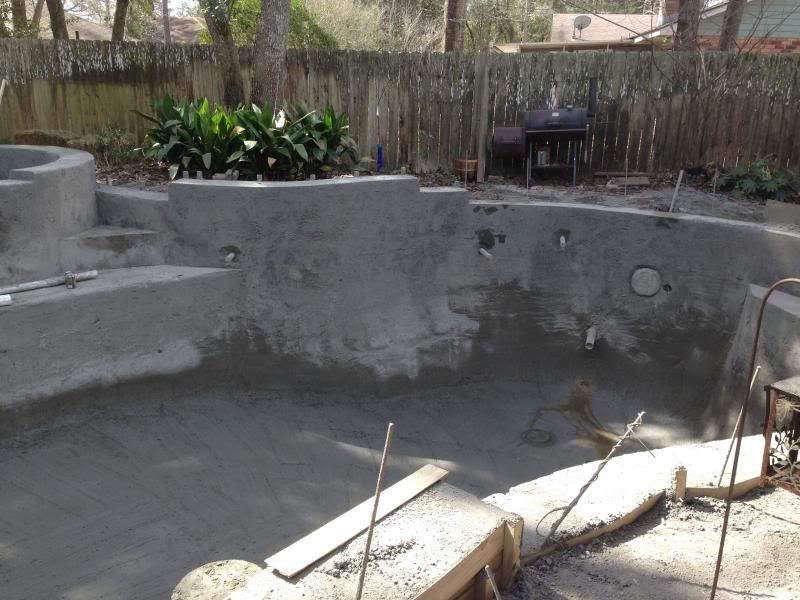
Gunite crew showed up as scheduled and worked into the night.
We had one snag during the shoot. About 1 hour in, the water main broke and left the entire neighborhood with 0 water pressure. Gunite guys were about to pack up and head out when everyone on my street pitched in garden hoses to help us run off a neighbors well on the next street over and 3 houses down. Water pressure from the well was fine, so the crew got back to work.
Unfortunately, my memory card in phone went bad and these are the only post gunite photos that I have.
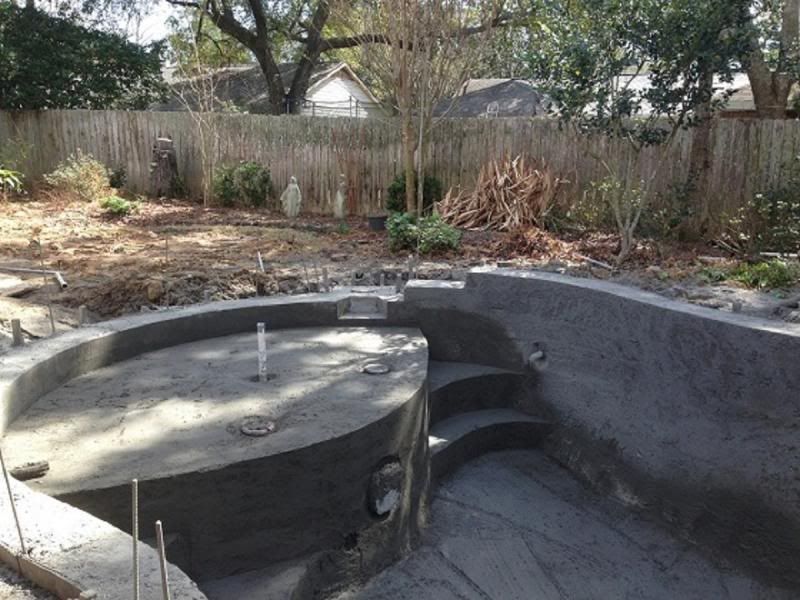
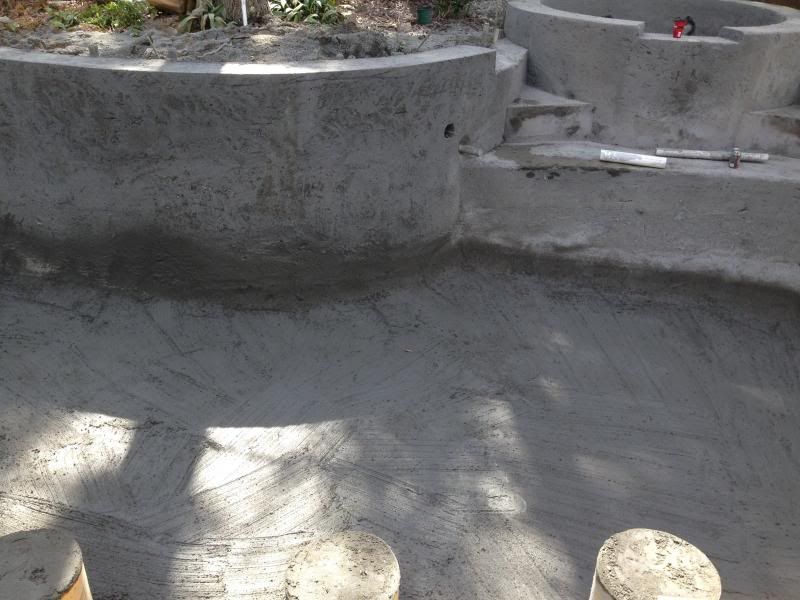
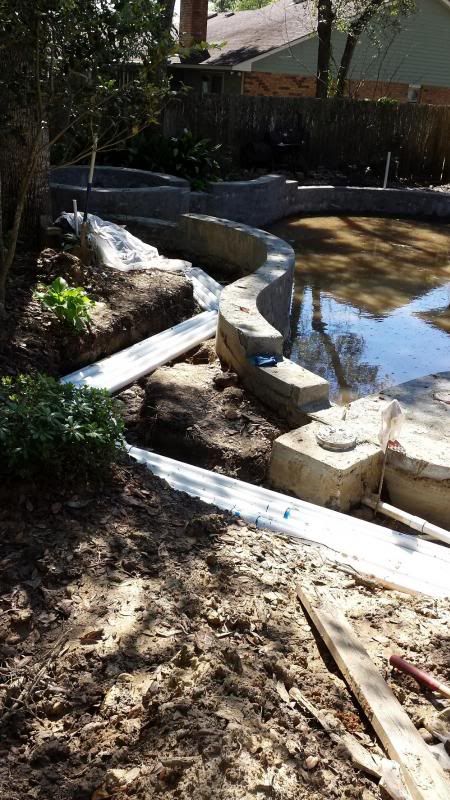
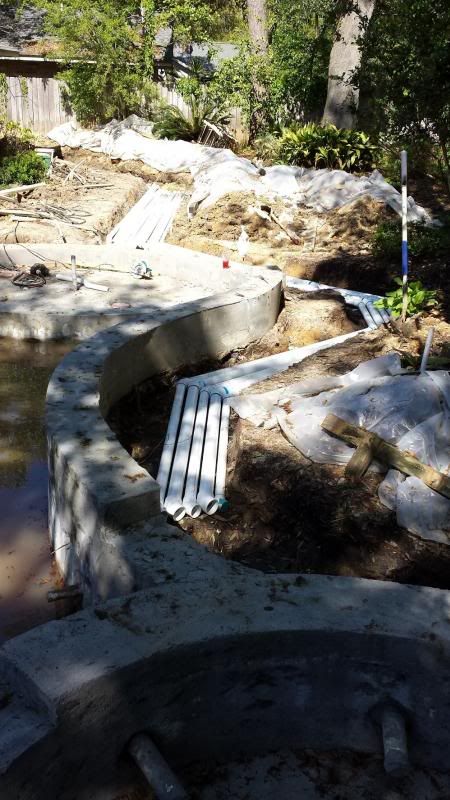
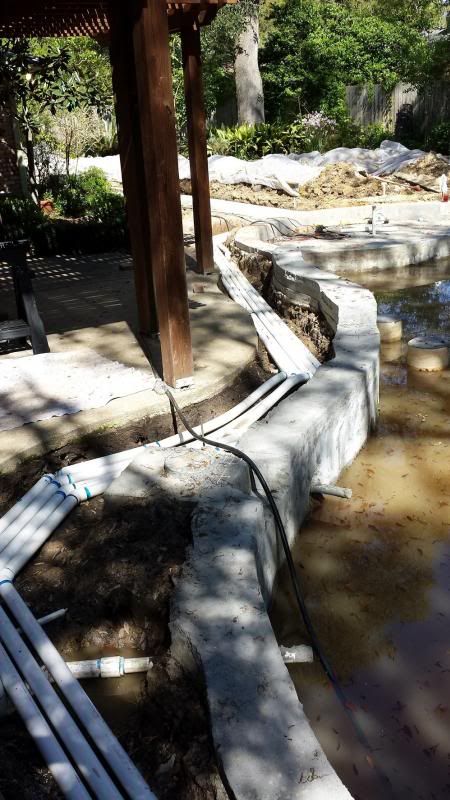
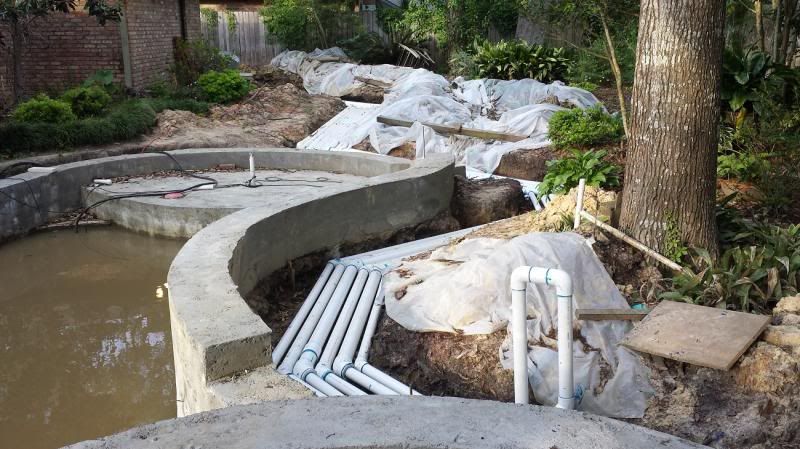
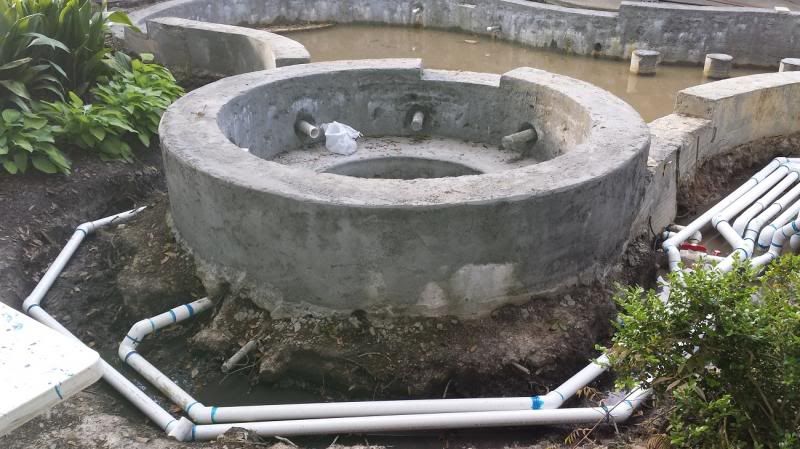
After gunite I waited a few weeks to start breaking down the forms, cleaning up, and starting plumbing.
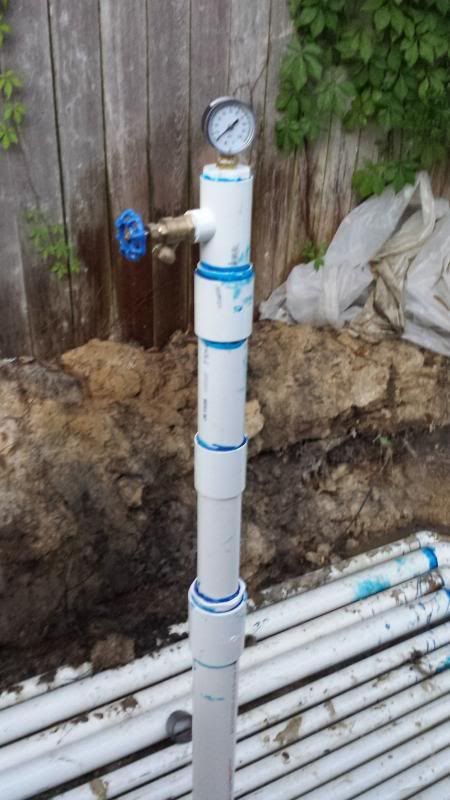
The plumbing turned out to be a bigger challenge than I thought, but I'm very happy with it now that it's done. I made a simple pressure tester and everything held.
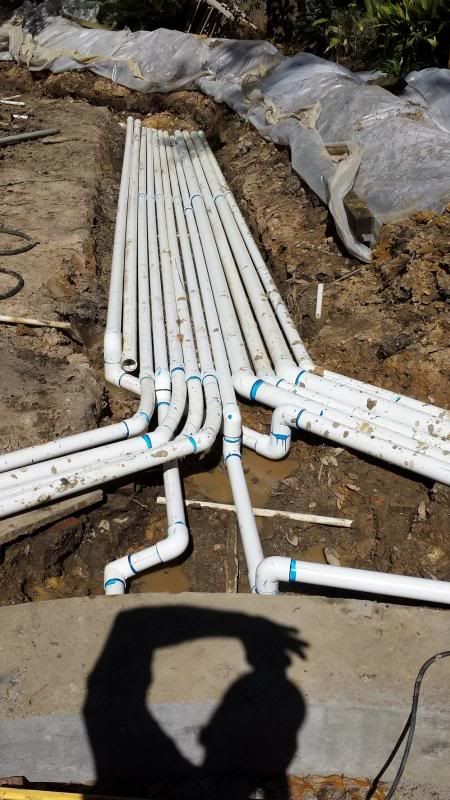
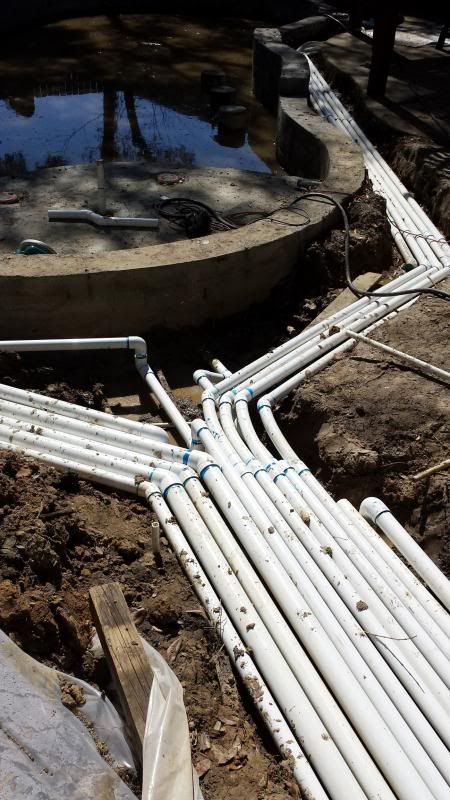
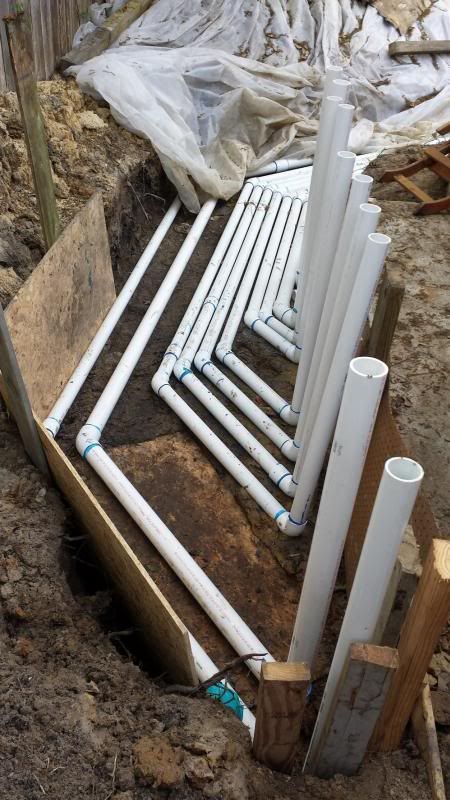
Lots of 45's, but I really had no choice since I had trees and and existing patio to contend with.
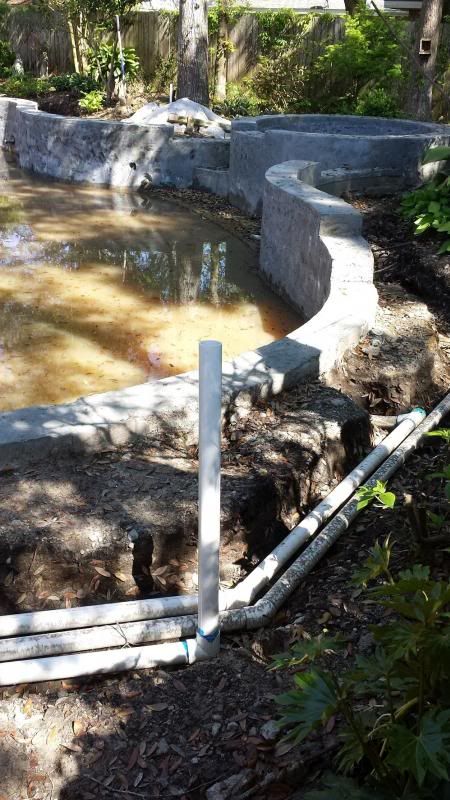
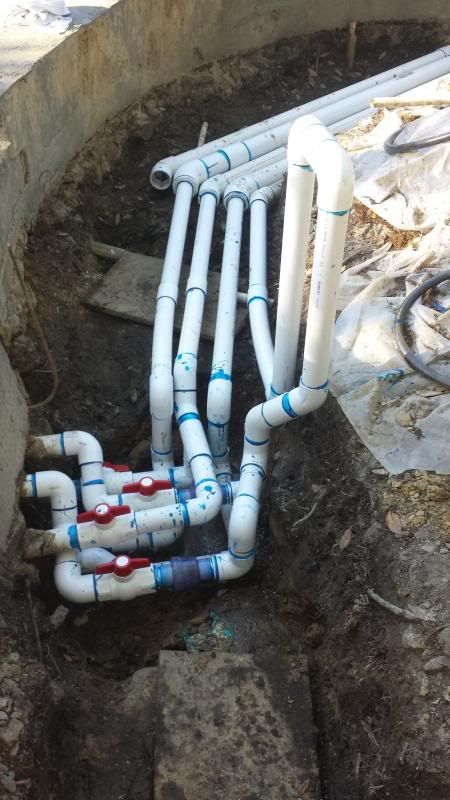
I'm a little concerned about how my spa jets will function, so I plumbed them with separate lines and valves (8 jets on back, 4 jets on legs). If my 3 hp therapy jet pump and 2hp blower motor don't push the jets hard enough, I'll use the valves to direct more to the top 8 jets and just take what I can get from the bottom ones. I also installed a couple of air check valves right by the spa to keep water out of the long blower line. A hartford loop also will help prevent this.
A few things that I learned for any rookie pool plumbers like me ...
Don’t diy unless you can get fittings from a local wholesaler. I found fittings at less than 1/2 the big box price.
Follow the rules: complete coverage of glue on both parts to be attached, Spin 1/4 when attaching, keep hard pressure on the pipes for at least 30 seconds, use primer. I used the rain or shine blue cement, but I guess that's all personal preference. The blue stuff gives you very little time to work, but I felt more comfortable going to the next piece with it curing so fast.
Don’t underestimate the amount of physical strength it takes to keep pressure on all those connections .. It's tiring.
Larger pipe diameters … the 3 inch .. proved to be very difficult. Might have just been my the fittings I had because the 90's went together easily, but the couplers were very tough. Also, I would have considered reducing the number of runs. 12 runs was a lot.
20 foot pipe lengths are well worth it if you can find an easy way to transport … but very few vehicles can handle this. If you can do it, you reduce work, reduce points of failure, and you avoid the additional fittings.
It is critical to get the pipes aligned. This may seem simple/fundamental, but you'd be surprised how many times I ended up in a panic'd stuggle trying to get a 3 inch pipe in a fitting. Then you end up applying a second coat of glue which is too much, etc, etc. The 3's are heavy, bulky, and not too terribly easy to grip at times … unless you're lebron.
In summary … plenty of satisfaction now that it's done … but it was a challenge.
- - - Updated - - -
BTW, pool is part filled with nasty water to try to make sure that I don't have a pool pop out. Ugly, but I just can't afford to take the risk.
We had one snag during the shoot. About 1 hour in, the water main broke and left the entire neighborhood with 0 water pressure. Gunite guys were about to pack up and head out when everyone on my street pitched in garden hoses to help us run off a neighbors well on the next street over and 3 houses down. Water pressure from the well was fine, so the crew got back to work.
Unfortunately, my memory card in phone went bad and these are the only post gunite photos that I have.


After gunite I waited a few weeks to start breaking down the forms, cleaning up, and starting plumbing.
The plumbing turned out to be a bigger challenge than I thought, but I'm very happy with it now that it's done. I made a simple pressure tester and everything held.


Lots of 45's, but I really had no choice since I had trees and and existing patio to contend with.


I'm a little concerned about how my spa jets will function, so I plumbed them with separate lines and valves (8 jets on back, 4 jets on legs). If my 3 hp therapy jet pump and 2hp blower motor don't push the jets hard enough, I'll use the valves to direct more to the top 8 jets and just take what I can get from the bottom ones. I also installed a couple of air check valves right by the spa to keep water out of the long blower line. A hartford loop also will help prevent this.


A few things that I learned for any rookie pool plumbers like me ...
Don’t diy unless you can get fittings from a local wholesaler. I found fittings at less than 1/2 the big box price.
Follow the rules: complete coverage of glue on both parts to be attached, Spin 1/4 when attaching, keep hard pressure on the pipes for at least 30 seconds, use primer. I used the rain or shine blue cement, but I guess that's all personal preference. The blue stuff gives you very little time to work, but I felt more comfortable going to the next piece with it curing so fast.
Don’t underestimate the amount of physical strength it takes to keep pressure on all those connections .. It's tiring.
Larger pipe diameters … the 3 inch .. proved to be very difficult. Might have just been my the fittings I had because the 90's went together easily, but the couplers were very tough. Also, I would have considered reducing the number of runs. 12 runs was a lot.
20 foot pipe lengths are well worth it if you can find an easy way to transport … but very few vehicles can handle this. If you can do it, you reduce work, reduce points of failure, and you avoid the additional fittings.
It is critical to get the pipes aligned. This may seem simple/fundamental, but you'd be surprised how many times I ended up in a panic'd stuggle trying to get a 3 inch pipe in a fitting. Then you end up applying a second coat of glue which is too much, etc, etc. The 3's are heavy, bulky, and not too terribly easy to grip at times … unless you're lebron.
In summary … plenty of satisfaction now that it's done … but it was a challenge.
- - - Updated - - -
BTW, pool is part filled with nasty water to try to make sure that I don't have a pool pop out. Ugly, but I just can't afford to take the risk.


 Shipment was recd 4 days after ordering.


