Hi All,
As promised I finally have a few free moments while sitting in the airport to post some pics of my build. I have been working on it for the past 3 weekends and will post pics of the progress for each day that I worked on it. Not being good with cad software I opted to draw by hand my outdoor kitchen with rough dimensions to get an idea of size available for the components. This worked well so I ordered all the components (Grill, Side Burner, Recessed Cooker, doors, sink, refrigerator, trash bin etc.) to have on hand prior to starting the build.
[attachment=2:1bkv8vzz]2009_02_05 014 (2).jpg[/attachment:1bkv8vzz]
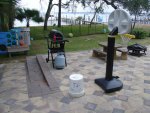
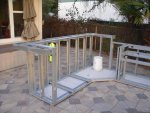
The Site for the outdoor kitchen.
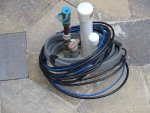
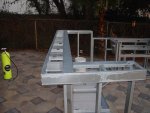
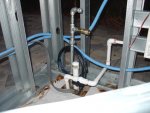
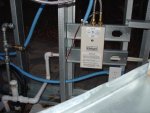
The first day working on the island was running the water, natural gas, electrical, cable, cat 5 and drain lines under the paver. When finished this is what it looked like stubbed out.
[attachment=1:1bkv8vzz]2009_02_05 016 (2).jpg[/attachment:1bkv8vzz]
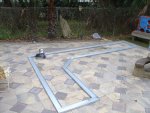
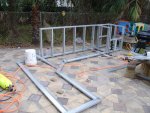
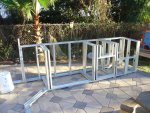
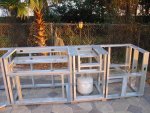
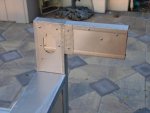
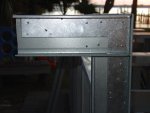
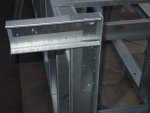
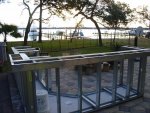
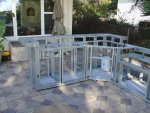
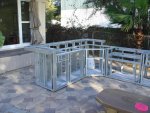
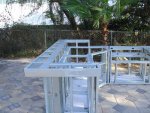
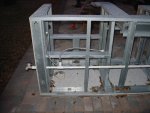
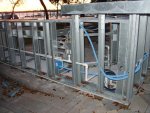
The first day framing I spent laying out the frame and verifing dimensions of all components and making sure I could fit everything in the layout taking into account the width of the metal studs for framing in each component. Once I confirmed all dimensions I began cutting and assembling the base of the island.
[attachment=0:1bkv8vzz]2009_02_05 017 (2).jpg[/attachment:1bkv8vzz]
Seems I will have to break the post up due to the 3 attachment limit per post. Please see next post for further details.
As promised I finally have a few free moments while sitting in the airport to post some pics of my build. I have been working on it for the past 3 weekends and will post pics of the progress for each day that I worked on it. Not being good with cad software I opted to draw by hand my outdoor kitchen with rough dimensions to get an idea of size available for the components. This worked well so I ordered all the components (Grill, Side Burner, Recessed Cooker, doors, sink, refrigerator, trash bin etc.) to have on hand prior to starting the build.
[attachment=2:1bkv8vzz]2009_02_05 014 (2).jpg[/attachment:1bkv8vzz]
The Site for the outdoor kitchen.
The first day working on the island was running the water, natural gas, electrical, cable, cat 5 and drain lines under the paver. When finished this is what it looked like stubbed out.
[attachment=1:1bkv8vzz]2009_02_05 016 (2).jpg[/attachment:1bkv8vzz]
The first day framing I spent laying out the frame and verifing dimensions of all components and making sure I could fit everything in the layout taking into account the width of the metal studs for framing in each component. Once I confirmed all dimensions I began cutting and assembling the base of the island.
[attachment=0:1bkv8vzz]2009_02_05 017 (2).jpg[/attachment:1bkv8vzz]
Seems I will have to break the post up due to the 3 attachment limit per post. Please see next post for further details.