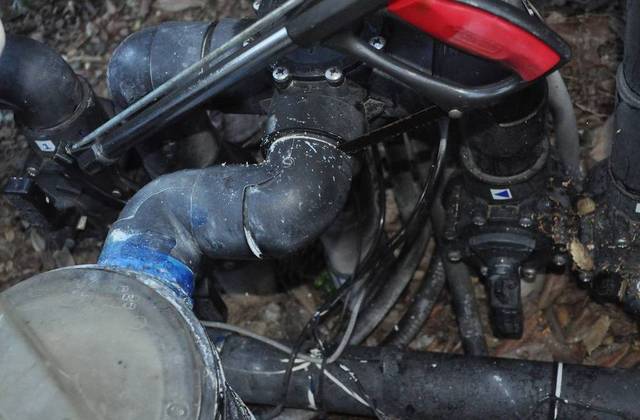
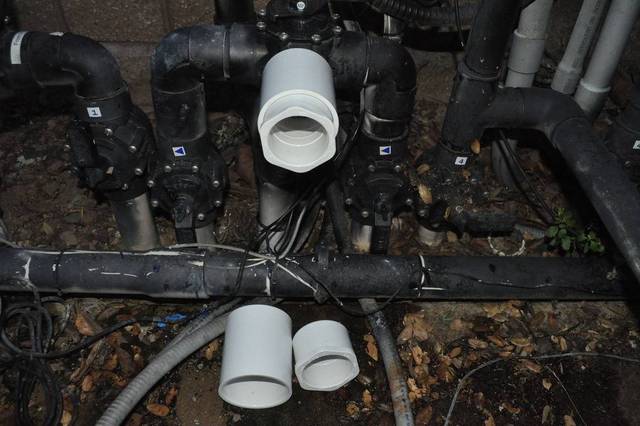
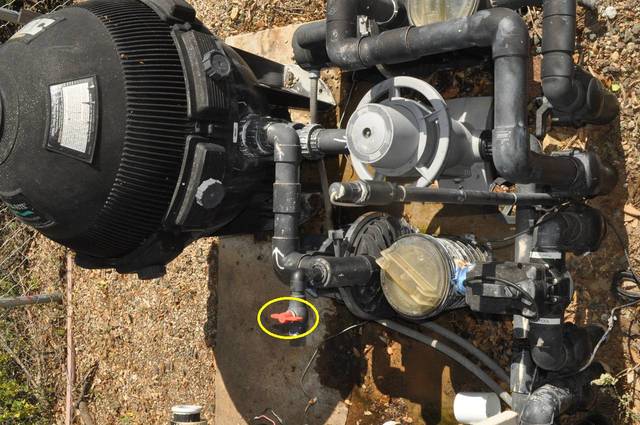
Is there a pump fitting adapter to stop this inlet leak?

keene3b07 said:
you should cut at the jandy valve and use a 2.5 in coupling though because it will give you a little more space.

Today I looked for a 2.5" coupling and the 2" boring tool; but couldn't find any at the box stores.
I also couldn't find any fitting that would either go OUTSIDE the Jandy valve; or inside.

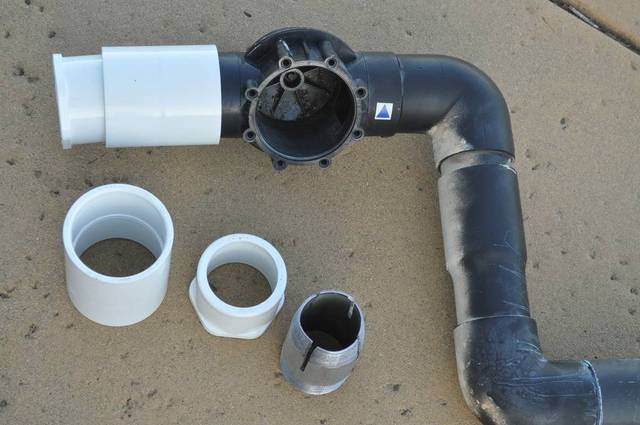
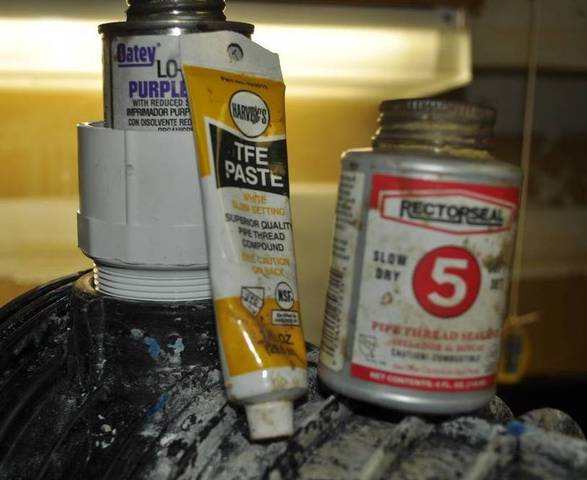
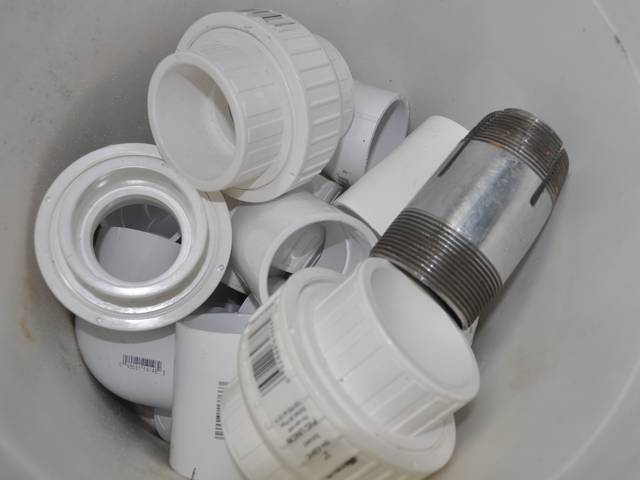
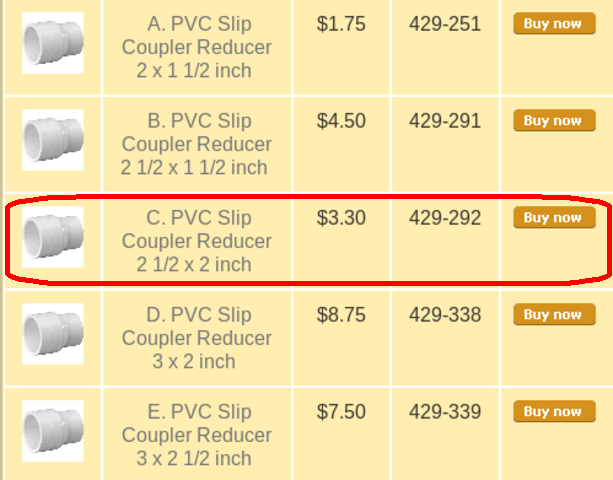
I did pick up a few of all the standard 2 inch couplings and elbows and pipe though:
12799785.jpg

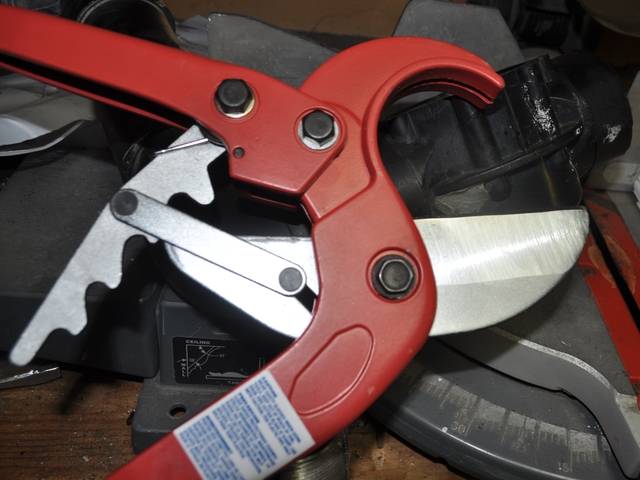
And, I bought this tool for cutting 2" PVC pipe:
12799786.jpg

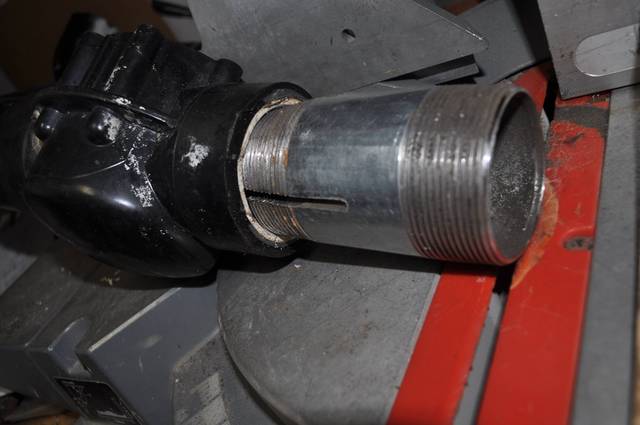
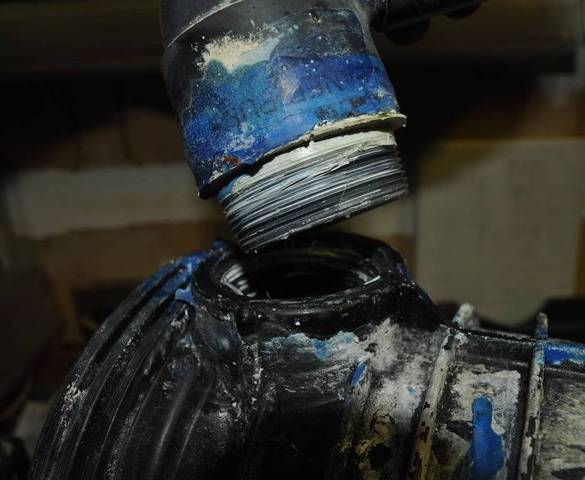
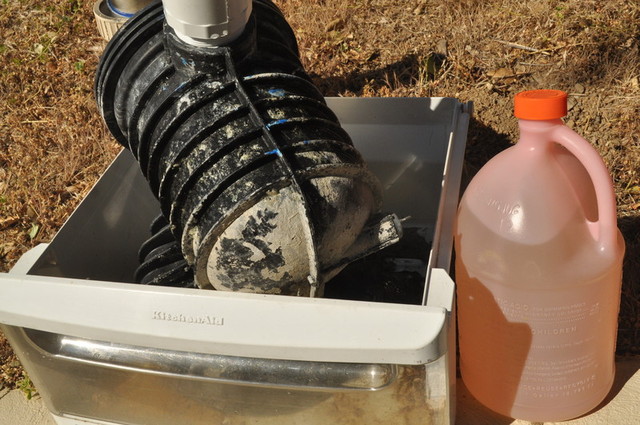
And, since I couldn't find the 2-inch boring tool at the box stores, I made this 2" pipe thread tap:
12799791.jpg

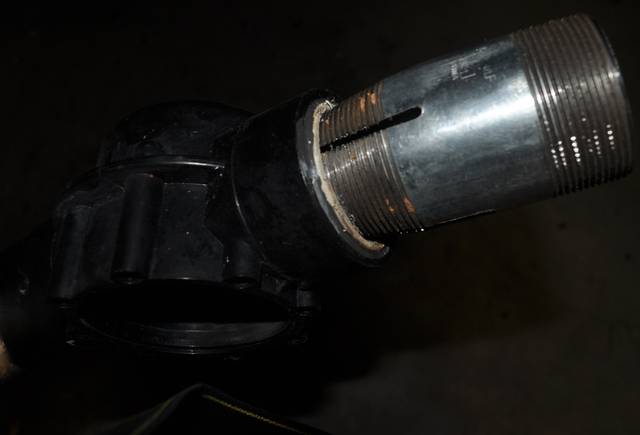
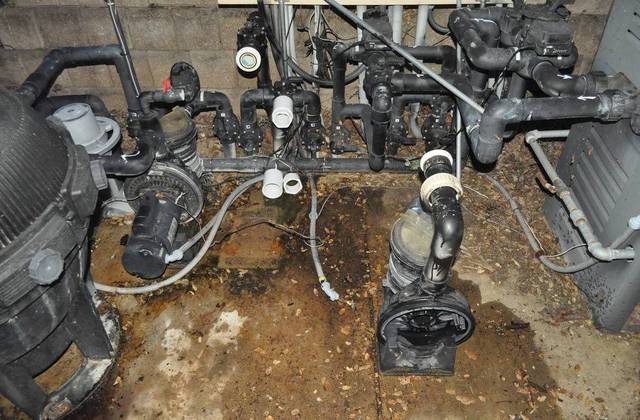
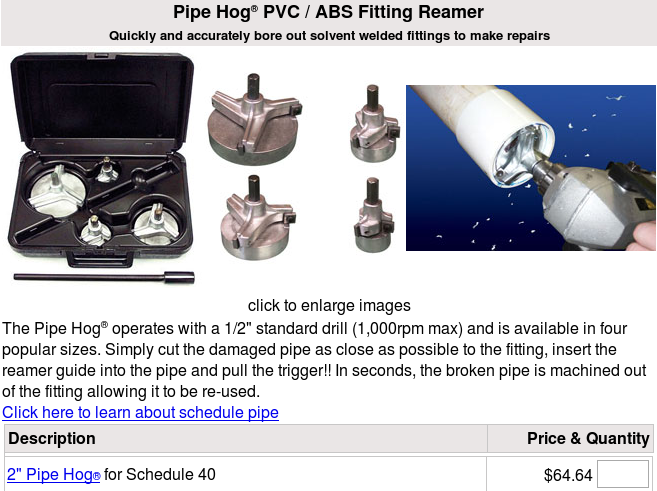
I plan on moving both pumps back, but first, to line up my ducks, I may need to buy this 2" boring tool:
12799895.png

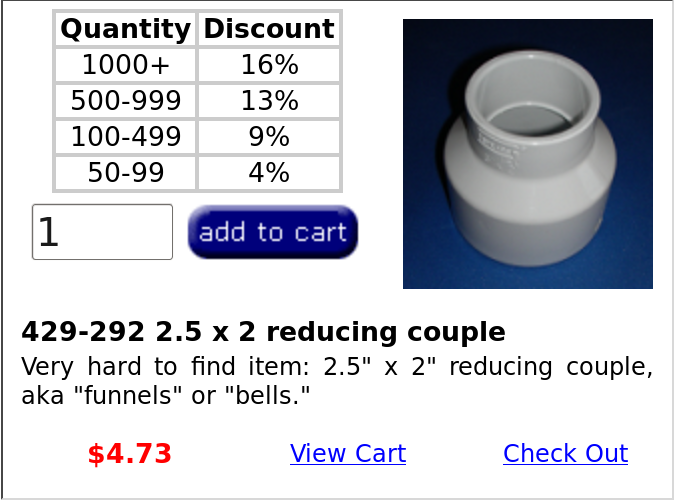
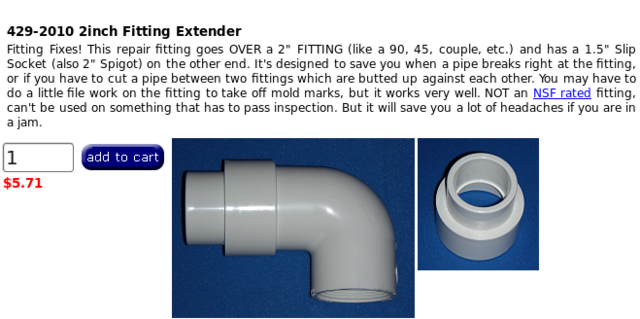
And/or this special fitting to go OVER the Jandy valve outlet:
12799954.png

Or, a special 2-inch fitting extender to go INSIDE the Jandy valve outlet (which already has a 2" pipe glued to it):
12799991.png
 
jblizzle said:
You do not need to bore out the pipe if you are using a 2.5" coupler

The 2.5 inch coupler seems the perfect way to go if it fits over an already-used Jandy valve - and - if the other end uses standard 2" pipe fittings from the big box stores.
My problem is finding the 2.5 inch to 2 inch coupler in the San Jose vicinity.

I wasted my free time on Saturday finding out that it's not at ACE, Lowes, or Home Depot in my area.
I'll try plumbing supplies, such as RV Cloud; but they're closed on Sundays.
Also I'll try irrigation supplies, such as Lane Irrigation; but they're also closed on Sundays.

Any idea where I can get a 2.5" to 2" coupler in the Silicon Valley on a Sunday?
(I'd rather fit the pieces in my hand than order the wrong parts off the web.)

BTW, I tried tapping the inside of an old spare Jandy valve with a cross-cut pipe nipple - in the hopes I could thread an insert inside the Jandy valve - but I failed miserably so I'm going to need to go on the outside:
12803884.jpg
 
You probably will have to check with true plumbing stores to find the larger fittings ... tough to do on Sunday though.

Posted from my Droid with Tapatalk ... sorry if my response is short ;)
 
jblizzle said:
You probably will have to check with true plumbing stores to find the larger fittings ... tough to do on Sunday though.
UPDATE:

No matter how many plumbing or irrigation supply places I visited in San Jose today, I couldn't find this simple 2.5" to 2" reducer:
12814178.png


So I picked up a standard 2.5" coupling + a bushing:
http://www3.picturepush.com/photo/a/128 ... 814556.jpg
12814631.jpg


Then, I cut the 90 degree elbows off the Jandy valve:
http://www2.picturepush.com/photo/a/128 ... 814560.jpg
12814636.jpg


The 2.5" coupler and bushing should fit perfectly:
http://www4.picturepush.com/photo/a/128 ... 814562.jpg
12814639.jpg


I think I'll move the motor back and to the right a bit (and maybe I'll get rid of the outlet directly OVER the pump basket making it hard to open):
http://www5.picturepush.com/photo/a/128 ... 814563.jpg
12814641.jpg


I put the pump in a vise and easily spun off the inlet fitting:
http://www2.picturepush.com/photo/a/128 ... 814565.jpg
12814643.jpg


I'm not sure if the new threaded fitting takes pipe dope or not?
http://www5.picturepush.com/photo/a/128 ... 814568.jpg
12814645.jpg


I think I bought the wrong electrical box, because the existing 1"-to-1/2" elbow from conduit to motor was connected to a one-inch conduit but I seem to have bought a 3/4" conduit box.
http://www4.picturepush.com/photo/a/128 ... 814567.jpg
12814644.jpg


Tomorrow I should wire it up - but I'm confused about the following:
http://www1.picturepush.com/photo/a/128 ... 814564.jpg
12814642.jpg


Q1: Do we use pipe dope on the pump threads? (What kind?)
Q2: What gauge do you think the electrical wire is?
Q3: If I buy a 1" box, can I hook both pumps to the same box?
(i.e., two conduits in, and two conduits out, each a separate line)
Q4: How do we tie the lines together at the box (wire nuts)?
Note: I've never done 220V wiring before.
 
Well the fittings you ended up with is exactly what I was picturing the whole time.

You want to use a non hardening pipe dope. The 2 you showed appear to be hardening?

Wire is either 14 or 12 awg. What size breaker is on the pumps? The 2 pumps are on separate breakers correct? 12 awg would be fine either way, but maybe oversized.

I think you should be able to have the wiring in the same box. And just use the right size wire nuts for the wires you are connecting.

Posted from my Droid with Tapatalk ... sorry if my response is short ;)
 
jblizzle said:
use a non hardening pipe dope
I snapped this picture for you of the labels:
- The tube says "slow setting"
- The can says "slow dry" & "soft set"
Is there a specific non-hardening type or brand that I should look for at the box stores?
12817344.jpg

jblizzle said:
Wire is either 14 or 12 awg. What size breaker is on the pumps? The 2 pumps are on separate breakers correct?
I tested the breakers just now and snapped this picture for you:
- The breaker handles both the filter pump and the cleaner pump (but not the spa jet pump)
- It's 10 amps (#2, top right in the photo)
12817418.jpg

jblizzle said:
I think you should be able to have the wiring in the same box
So they do simply use wire nuts!
I'm surprised. I'd rather a "junction box" of some sort where I could bolt them together.

Is there any special flexible wire I can use?
The reason I ask is that it's fantastically difficult to get the 90º elbow off at the motor (you have to spin the entire motor!).
12817431.jpg


Also, what size conduit should I get for the run from the box to the motor?
There is a 1 inch conduit currently, which is stepped down to 1/2 inch at the frustratingly small 90º elbow at the motor.
I'd rather make that a straight shot into the motor so it spins off more easily - and - perhaps drop it down to a 1/2 inch conduit?
Would that work?

This is a frustrating setup because the whole motor has to spin to get the elbow off!
12817451.jpg
 
It appears that both Harvey's and Rectorseal 5 is fine for using on plastic pipes.

As for the conduit you should be able to get the wires in ½" with ease. You can use a straight fitting to make it easier to manuver the wires into the motor box.
 
Bama Rambler said:
It appears that both Harvey's and Rectorseal 5 is fine for using on plastic pipes.
Thanks.
Before I received this, I called Sky Blue Pools who said that they use "Plumbers Silicone Sealant" at about $7 per tube.
I called Ernie's Pool Supply also, who said they had two kinds, "Join Stick" and "Silicone".
If the silicone is the same as what I already have (kitchen white silicone glue), it looks like I have four choices:
12818565.jpg


Bama Rambler said:
for the conduit, you should be able to get the wires in ½" with ease. You can use a straight fitting
OK. I think I'll pick up from Home Depot the following:
A. 3 feet of ½" conduit
B. A straight ½" to ½" fitting
C. 3 feet of 12 AWG stranded copper wire (black, red, and green)
D. A junction box for ½" holes (mine is 3/4 inch holes)
E. Wire nuts for 23AWG stranded wire
F. Space and u-shaped crimp-on connectors (are they 1/4" for the motor screws & tabs?)

Does that look about right for the thread sealant and electrical supplies before I start?
 
You do not have to spin the motor. You just pull the conduit and wires out of the 90 deg fitting and then spin the fitting. To install you spin on the fitting and then feed the wires through and tighten down the nut on the conduit.

I would not use silicone, use one of the other for pipe threads.

If the breaker is only 10 amps, then 14 AWG is more than enough. Although I am surprised that both pumps are on the same breaker and that running together is not more than 10 amps???

The wire nuts are not sized like that. They will say for up to 2x 12 AWG or 3x 14 AWG ... etc
 

Enjoying this content?

Support TFP with a donation.

Give Support
jblizzle said:
You just pull the conduit and wires out of the 90 deg fitting and then spin the fitting.

Just to explain, I've replaced three of these pumps (filter, cleaner, and spa jet), and all three had to have the end cap destroyed to remove it.
It would have been nice had I been able to disconnect the wires outside the pump, so that I could have brought the pump to the repair guy who would have been able to remove the rusted cap bolts more gracefully.
12818863.jpg


Also, the very thick wires have even thicker crimped-on connectors (as can be seen in a previous picture), which makes pulling them out the restrictive 3/4 to 1/2 inch 90-degree elbow problematic:
http://www3.picturepush.com/photo/a/128 ... 817431.jpg

The end result is that 90% of the time, I end up spinning the motor instead of spinning the fitting (as shown in a previous picture), in order to remove the wires; hence the desire for a junction box! :)
http://www3.picturepush.com/photo/a/128 ... 817451.jpg
 
keene3b07 said:
you just need to wiggle the wires and they will come out of the 90 pretty easily

I understand what you're saying - but the geometry involved in my pool pump must be very different than most.

Here is the spa motor, with a straight-through ½" to 1" fitting in place; this is easy to spin off:
12827457.jpg


However, here is the filter pump, with the 90° ½" to 1" elbow in place:
12827455.jpg


The problem is that half the time, I can't get the motor end caps off, and, disconnecting the conduit at the control panel is problematic:
12829143.jpg


Worse, as you can see here, the 90° ½" to 3/4" elbow is screwed into the motor housing so it has to be spun off:
12827812.jpg


And, as can be seen here, there is precious little room to pull the crimped-connector 10AWG stranded wire out:
12827819.jpg


The result is that I have to spin the entire motor in order to remove the 90°elbow:
12827817.jpg


Unfortunately, that spinning process destroys the insulation on the 10AWG wires:
12827820.jpg


So, I'm hoping by adding these four straight-through ½" to ½" connectors, I won't have to spin the motor anymore!
12827453.jpg
 
BTW, since I already had the pool pump disassembled, I poured some 28% HASA muriatic acid on it, and boy, does that stuff clean off the white deposits instantly!

Here I dipped the pump in a basin of acid for only about 20 seconds:
12827578.jpg


Then, I moved the pump onto the concrete to hose it down:
12827579.jpg


Within seconds, it was almost totally black again - so that I could look for cracks, if any:
12827581.jpg


I poured the acid on some of the more stubborn deposits, as I checked for cracks (didn't see any):
12828872.jpg
 
Those sealtight 90's are hard to deal with when you have crimped lugs on the wires. I like using straights wherever I can too. If i were going to install a junction box I'd install a weather resistant one right onto the side of the motor with a close nipple. And use filled wire nuts to make the connections.
 
Bama Rambler said:
Yuuup, they're the right ones. :)

Thanks. I think I'm all set.

Right now, I'm figuring out where to put both pumps. One of the pumps has this red valve which I've never ever used.
It seems to be a drain valve of sorts - for the cloth cartridge filter perhaps? I've never needed it since I can easily drain the pool simply by removing the pump basket cover (the equipment is 8 feet below the waterline).

Would you bother replacing this drain valve or just eliminating it altogether?
(Does it serve a useful purpose?)
12834912.jpg
 

Enjoying this content?

Support TFP with a donation.

Give Support
Thread Status
Hello , This thread has been inactive for over 60 days. New postings here are unlikely to be seen or responded to by other members. For better visibility, consider Starting A New Thread.