Help - 4 tiles and a chunk of mortar just came off!

ladylonghorn

Active member
Jan 14, 2016
43
Frisco, TX
Pool Size
16700
Surface
Plaster
Chlorine
Liquid Chlorine
TFP has never steered me the wrong way so hoping with advice here and my DIY nature I can tackle this myself....

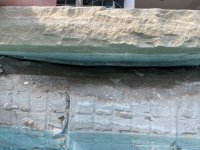
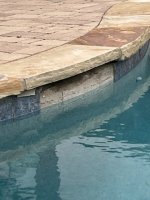
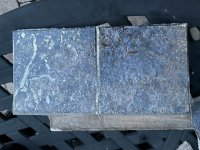
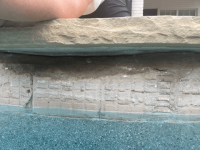
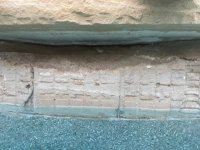
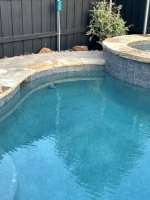
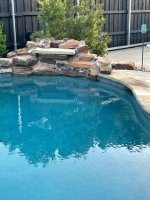
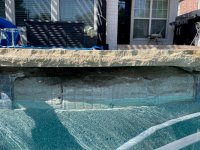
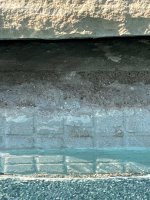
Kids were playing in the pool and 4 pool tiles came completely off. I had noticed they seemed loose but clearly they were more than loose. Two are still connected by a chunk of mortar. These tiles are at the water line and depending on how full the pool is, the bottom 1 - 2" is submerged in water. I'm in North Texas, and in 90+ degree temps.

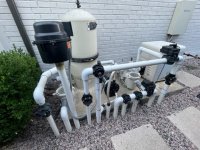
What product do I use to reattach without having to drain the pool below the water line? I know if my pool goes below the tile, my pump won't work and then in these high heat temps - - not a good thing. Also what type of mortar to use? I'm assuming I need to shove some under the flagstone to -- thinking I could accomplish this like decorating a cake and "pipe" it in since the flagstone is still secure.

I have done tiling before so not at all worried about doing this myself other than knowing what product to use and dealing with the fact that the tile is partially submerged.
 

Attachments

  • pool tile close up.jpg
    pool tile close up.jpg
    52.8 KB · Views: 43
  • pool tile from side.jpg
    pool tile from side.jpg
    46.1 KB · Views: 42
  • 2 pool tiles together.jpg
    2 pool tiles together.jpg
    56.2 KB · Views: 40
Better to drain the water down below the tile for 24 hours.

Raise your FC level up towards SLAM level and your water will be fine with the pump off for a day or two.

An oscillating tool would be good to clean the old thinset off of the wall and tile and get a smooth surface...


Use thinset to set the tiles...


Then grout to fill in the gaps around it....

 
Hers is an example of how it is done...

 
How big is big?

Post a pic of the area you are discussing.
 
if you adjust your Valves to just pull water from the main drain and not from the skimmers then you could drop your water level below the tiles and still leave the pump running couldn’t you?
 
How big is big?

Post a pic of the area you are discussing.
Here are more pictures.

1. Deep end of the pool with 4 "drains" at the bottom and the deep end waterline skimmer
2. Pool shallow end with waterline skimmer
3 & 4. Pictures of the gap under the flagstone. Again - these are 6" tiles so the total width of the area to be retiled is 24". The gap is widest and deepest behind what would be the 2nd tile from the left but it there is also a gap, smaller and less deep where tiles 1 and 3 will go.
5. Close of up the left side of my equipment. I know this far left valve and pump control the waterfall.
6. Close up of the right side of my equipment - - this is my main pump that I see running daily on the schedule.
7. Full view of all the equipment.
 

Attachments

  • Equipment 1.jpg
    Equipment 1.jpg
    62 KB · Views: 17
  • Equipement Close Up Right.jpg
    Equipement Close Up Right.jpg
    56.7 KB · Views: 15
  • Equipement Close Up Left.jpg
    Equipement Close Up Left.jpg
    54.5 KB · Views: 19
  • Flagstone gap 2.png
    Flagstone gap 2.png
    96.3 KB · Views: 57
  • Flagstone gap 1.jpg
    Flagstone gap 1.jpg
    53.7 KB · Views: 59
  • Pool shallow end skimmer.jpg
    Pool shallow end skimmer.jpg
    48.6 KB · Views: 20
  • Pool deep end and water line skimmer.jpg
    Pool deep end and water line skimmer.jpg
    53.6 KB · Views: 19
The "gap" is in the shadow and these pics are too small for me to zoom in on so I don't understand the problem to comment.

I see a small separation crack that can filled with some mortar or grout.

flagstone-gap-1-jpg.421994


flagstone-gap-2-png.421995
 
I've done a lot of tile repair on my own pool in Michigan where we get extreme expansion and contraction over the winters. All you really need is "Megalite" thinset by custom building products usually
at home depot. It's rated for swimming pool use. The key is removing all the old thinset.
 
I got in and took these pictures. Can't get any other angle at the moment as my phone was about to be in the water.
 

Attachments

  • pool from inside 1.jpg
    pool from inside 1.jpg
    479 KB · Views: 55
  • pool from inside 2.jpg
    pool from inside 2.jpg
    411.9 KB · Views: 16
  • pool from inside 3.jpg
    pool from inside 3.jpg
    470 KB · Views: 18

Enjoying this content?

Support TFP with a donation.

Give Support
This picture shows a cracked and eroded bond beam. The cracks may have been caused by a compromised expansion joint.


You have no wall to put the tiles back onto.

The proper fix is to pop off the coping and determine how wide spread the deterioration is. Then build up the bond beam with some forms and hydraulic cement. Then use Type S mortar to cement the coping back down. Then replace the tile on the bond beam wall and regrout.

pool-from-inside-1-jpg.423139
 
Thread Status
Hello , This thread has been inactive for over 60 days. New postings here are unlikely to be seen or responded to by other members. For better visibility, consider Starting A New Thread.