
I recently replaced my ancient HASA Liquidator with a new HASA Liquid Feeder. Some problems with the installation, including the availability from HASA of replacement parts to fix a manufacturing defect, are documented at:
 www.troublefreepool.com
There are three modifications that I would recommend to make the Liquid Feeder easier to use and to clean. (The same modifications, especially the first two, could also be made to a Liquidator.)
1) Take It To The Max
When installing the Liquid Feeder, fill it with 8 gallons of water and/or chlorine and then mark the maximum fill level for chlorine using an indelible marker. (The Liquidator has a 7 gallon max.) If you want, you could also mark one gallon increments. (For those of you that have already installed your Liquid Feeder, my Max Fill line is 13.25 inches above the ground.)

2) Suck It Up
Depending on your water chemistry, the tubing, flowmeter, etc. on the suction/out side of the Liquid Feeder (and Liquidator) will sooner or later become coated (and possibly clogged) with a precipitate. I plumbed in a tee, a short length of tubing and a valve. I can attach another short length of tubing to the valve, stick that tubing in a jug of dilute acid, open the valve and suck the dilute acid through the suction/out side. The precipitate will be cleaned out in a matter of seconds. You can use 5:1 to 10:1 diluted acid. (Reminder - Always add acid to water.) I discovered that this is the same cleaning method used by one of HASA's own technicians. I did something similar for years with my Liquidator, and I haven't seen any indication of damage from the acid to the spider gasket in the multiport valve.

I used John Guest brand fittings from Amazon. Some folks prefer the Parker brand, but they can be hard to find. I did add these locking clips to all my Liquid Feeder fittings. Note also that I used transparent tubing instead of the opaque blue tubing that comes with the Liquid Feeder.
3) Let There Be Light
The "sight glass" on the corner of the Liquid Feeder to see the chlorine level probably looked great on the drawing board, and definitely looked great in the marketing material. Unfortunately, with the cover in place on the Liquid Feeder there isn't enough light to see the chlorine level.
The solution is to add some light. Testing showed that shining the light in from the outside didn't work, so the light had to be added inside the Liquid Feeder.
I purchased a 12-volt, submersible LED light.

 www.aqlightinggroup.com
I added some silicone lubricant around the lens seal to try and further protect the light from chlorine fumes.
I then drilled two holes slightly larger than 1/4 inch in the base of the light. (Drill carefully. There is a metal plate inside the plastic base.) I mounted the light on the back wall of the Liquid Feeder, with the light aimed at the bottom right corner of the Liquid Feeder, where the Max Fill line is. (Mounting the light on the side wall didn't work.) I used 1/4 inch nylon bolts, washers and nuts to mount the light. If the nylon doesn't stand up to the chlorine, I'll try stainless steel. The 12-volt cord was run up, over and down the back of the Liquid Feeder.
Update: To avoid immersing the light, mount it fairly near the top of the Liquid Feeder and don't add more than 2 gallons of chlorine at a time, letting the water level drop back to the top of the fill tube before adding more.


Mostly because I have a pool service come in when we are on vacation, I ran the 12-volt cord through a 5-minute spring-wound timer.

 www.zoro.com
HASA Liquid Feeder (Liquidator replacement) installation issues - SOLVED
I just replaced my ancient HASA Liquidator with the new HASA Liquid Feeder. After installing the unit and starting things up, I noticed that both floats would stick in place as the water level went up and down and then "pop" loose. The result was that the flow on the out/suction side would...
www.troublefreepool.com
There are three modifications that I would recommend to make the Liquid Feeder easier to use and to clean. (The same modifications, especially the first two, could also be made to a Liquidator.)
1) Take It To The Max
When installing the Liquid Feeder, fill it with 8 gallons of water and/or chlorine and then mark the maximum fill level for chlorine using an indelible marker. (The Liquidator has a 7 gallon max.) If you want, you could also mark one gallon increments. (For those of you that have already installed your Liquid Feeder, my Max Fill line is 13.25 inches above the ground.)
2) Suck It Up
Depending on your water chemistry, the tubing, flowmeter, etc. on the suction/out side of the Liquid Feeder (and Liquidator) will sooner or later become coated (and possibly clogged) with a precipitate. I plumbed in a tee, a short length of tubing and a valve. I can attach another short length of tubing to the valve, stick that tubing in a jug of dilute acid, open the valve and suck the dilute acid through the suction/out side. The precipitate will be cleaned out in a matter of seconds. You can use 5:1 to 10:1 diluted acid. (Reminder - Always add acid to water.) I discovered that this is the same cleaning method used by one of HASA's own technicians. I did something similar for years with my Liquidator, and I haven't seen any indication of damage from the acid to the spider gasket in the multiport valve.
I used John Guest brand fittings from Amazon. Some folks prefer the Parker brand, but they can be hard to find. I did add these locking clips to all my Liquid Feeder fittings. Note also that I used transparent tubing instead of the opaque blue tubing that comes with the Liquid Feeder.
3) Let There Be Light
The "sight glass" on the corner of the Liquid Feeder to see the chlorine level probably looked great on the drawing board, and definitely looked great in the marketing material. Unfortunately, with the cover in place on the Liquid Feeder there isn't enough light to see the chlorine level.
The solution is to add some light. Testing showed that shining the light in from the outside didn't work, so the light had to be added inside the Liquid Feeder.
I purchased a 12-volt, submersible LED light.
12V LED Submersible Light for Ponds Black Single Composite Underwater Spotlight Fountain Kit w/ Bulb Included - OUW-MRY
Make your ponds and fountains radiant with the low voltage underwater black single composite submersible fountain lights kit. Browse the AQLighting today!
I added some silicone lubricant around the lens seal to try and further protect the light from chlorine fumes.
I then drilled two holes slightly larger than 1/4 inch in the base of the light. (Drill carefully. There is a metal plate inside the plastic base.) I mounted the light on the back wall of the Liquid Feeder, with the light aimed at the bottom right corner of the Liquid Feeder, where the Max Fill line is. (Mounting the light on the side wall didn't work.) I used 1/4 inch nylon bolts, washers and nuts to mount the light. If the nylon doesn't stand up to the chlorine, I'll try stainless steel. The 12-volt cord was run up, over and down the back of the Liquid Feeder.
Update: To avoid immersing the light, mount it fairly near the top of the Liquid Feeder and don't add more than 2 gallons of chlorine at a time, letting the water level drop back to the top of the fill tube before adding more.
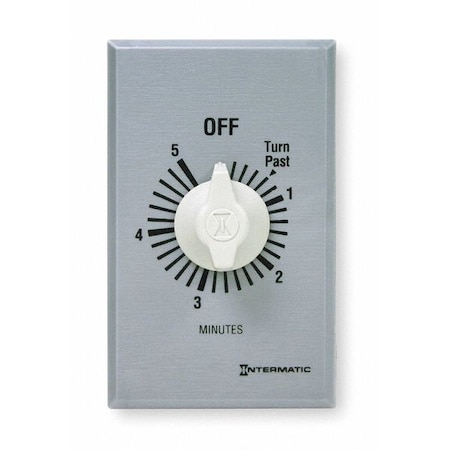
Mostly because I have a pool service come in when we are on vacation, I ran the 12-volt cord through a 5-minute spring-wound timer.
Intermatic Timer,Spring Wound (FF5M) | Zoro
Order Intermatic Timer, Spring Wound, FF5M at Zoro.com. Great prices & free shipping on orders over $50 when you sign in or sign up for an account.
www.zoro.com
Last edited:
