Update! ************
So we have the pool 95% done. We demo'd the old pool on the 20th of May, and it wasn't super hard. It made it seem like the rest of the process wouldn't be too bad.
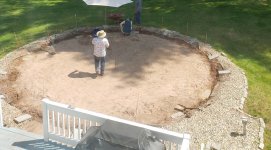
While i had hoped to get the new pool up the 21st or 22nd, that was overly optimistic for a bunch of us who've never installed a pool, and were installing a pool over a spot where the last installers seemed to have cut a lot of corners. We spent the day on Saturday the 21st digging out where the old pool ring had been, and leveling 16 new pavers because we couldn't use any of the old pavers.
We also discovered that they didn't have 3 inches of sand under the old pool, so there was a lot of pulling out rocks of we went below the 1 inch of sand that was there. By dusk, we still hadn't done much except get those pavers leveled and even with each other (using a homemade water level!).
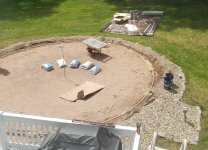
On Monday the 23rd we got the resin bottom ring installed and leveled.
On Tuesday the 24th we got the pool wall up, and staked, and adjusted the ring to fit it. Then we smoothed the sand under the pool and added some new to fill in where the foam coves were going.
It ended up taking until almost dusk to get the inside leveled (including a last minute run for 20 additional bags (1000lbs) of play sand, that made the inside floor just barely even around the edges of the pool. We would have needed at least a cubic yard of sand to fill the center hole of the old pool floor, so we left it there.
Then we rolled out the under-liner mat. The adhesive for the wall foam fought us but we managed to get it and the coves up just before it got dark. We had to use pieces of cardboard to protect the floor liner from getting sticky, wish we had done the wall foam before floor liner.
At that point, we got the liner in, but in the dark and coolness it was extra stiff, and it was pulling the pool walls out of shape in ways that were hard to see, so we made the decision to wait until the next day to put in the liner.
I took a risk and did not reinforce the pool walls because it was forecast to be very mild winds. I may have repeatedly checked on it because I was terrified it was going to get blown in, despite the garden stakes holding it up, but I was lucky and it stayed up fine.
On Wed the 25th we got the liner mostly in and filled it a few inches. I was not very precise and had to use the cover pump to lower it enough to move whole the liner over about 3 inches (I pushed too much to one side when I was getting the liner under the pool ladder, and the seam would have been 2 inches above the cove). Now I've got a bunch of wrinkles all over the bottom, because moving it also twisted it some. The wrinkles aren't very big, so I'm going to live with them.
In my effort to make every mistake along the way, my efforts to smooth the liner and get rid of wrinkles also led to a lot of unevenness in the sand base, where I moved it around while walking.
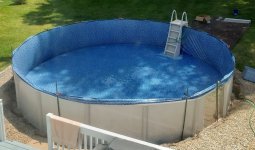
Anyway, we were able to fill it about 18 inches (24 in the center depression area)
We had it held up with the garden stakes and the liner just barely attached because i wanted the liner to soften and stretch some before I finalized securing it at the top.
The 1 foot plus of water was enough to lessen my fear of it getting wind damage, without my being terrified it would burst because the top stablizer ring and uprights weren't all set.
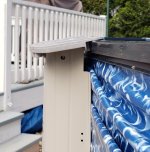
On Thursday the 26th my son and I went out and fixed the liner to actually have the plastic piece holding the liner on the whole way around. We disconnected it from the garden stakes as he and I put the stabilizer rail on, then we leveled the posts (side to side) and tightened down the post caps.
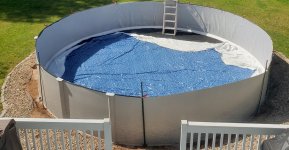
On Saturday the 28th, the pool was getting green, so I went out and added some chlorine and set up the cover pump to circulate the water for a few hours. I also skimmed it as best I could, and got up most of the tree bits at the bottom. It went back to clear/blue pretty quick.
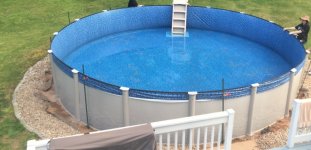
Sunday the 29th, we secured the top rail, putting the pool top to round (which fixed the couple of spots where the top of the post seemed too slanted), and then started filling it for reals.
We also set up my way too big filter (24in Doheny sand filter) and had to make a few trips to the store to get screws that fit to hold the filter pump to the base (and dremel out the base holes a little because the screws that fit in the base wouldn't go through the metal bracket, so that was extra fun). Then we got the return put in, the high pressure hose from the pump to the filter on, and the hose from the return to the filter on. We just had the skimmer to install, but it was after dark, so we put the solar cover on and called it a night.
Today, Monday May 30th - I was able to get the skimmer mounted and the hose from it to the pump hooked up, but the hose is faulty and leaks under the cuff, and it didn't occur to me to move the backwash fitting to the skimmer so I could use the 1 1/4 hoses I got by accident for that. Good thing, because I went out just as the water reached the skimmer, and it has a leak... so I've posted about that and hope to fix it and put on a new hose tomorrow. *crosses fingers*
*********
Before pictures in comment below...
Have one question below that I'm still curious the answer to... I strikethoughed the rest of the original post...
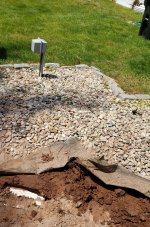
Anyone know anyone who can remove an AGP in greater Hartford, CT? A lot of companies use backhoes and heavy equipment and I am planning to install a new one in its place, so I'd rather the ground not get destroyed like that.
I reached out to a recycling place that does pool removals, but haven't heard back.
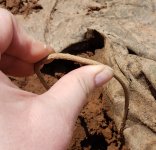
Any advice if we decide to do it ourselves? Do we need to cut the walls into pieces or will the rusty old bits still be able to be rolled? We don't have a Sawzall or many fancy tools, so is there something we should buy or borrow to make our lives easier? Turns out that's a reciprocating saw and we have one...
Thanks!
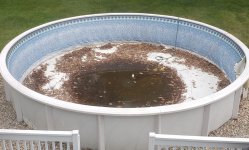
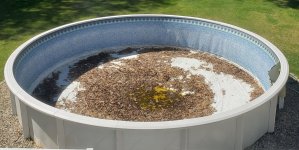
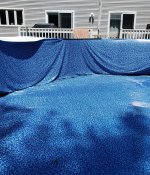
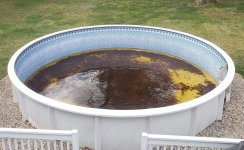
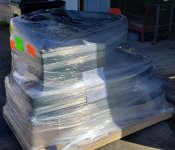
** The new pool is sitting in boxes in my garage and I'm itching to get it set up and my swamp removed... (attached are swamp old pool, and new pool before we unwrapped it and checked all the bits... I still need a filter tho... eek) its a Saltwater 5000 from the pool factory. (Diff thread has info on filter/pump)
So we have the pool 95% done. We demo'd the old pool on the 20th of May, and it wasn't super hard. It made it seem like the rest of the process wouldn't be too bad.
While i had hoped to get the new pool up the 21st or 22nd, that was overly optimistic for a bunch of us who've never installed a pool, and were installing a pool over a spot where the last installers seemed to have cut a lot of corners. We spent the day on Saturday the 21st digging out where the old pool ring had been, and leveling 16 new pavers because we couldn't use any of the old pavers.
We also discovered that they didn't have 3 inches of sand under the old pool, so there was a lot of pulling out rocks of we went below the 1 inch of sand that was there. By dusk, we still hadn't done much except get those pavers leveled and even with each other (using a homemade water level!).
On Monday the 23rd we got the resin bottom ring installed and leveled.
On Tuesday the 24th we got the pool wall up, and staked, and adjusted the ring to fit it. Then we smoothed the sand under the pool and added some new to fill in where the foam coves were going.
It ended up taking until almost dusk to get the inside leveled (including a last minute run for 20 additional bags (1000lbs) of play sand, that made the inside floor just barely even around the edges of the pool. We would have needed at least a cubic yard of sand to fill the center hole of the old pool floor, so we left it there.
Then we rolled out the under-liner mat. The adhesive for the wall foam fought us but we managed to get it and the coves up just before it got dark. We had to use pieces of cardboard to protect the floor liner from getting sticky, wish we had done the wall foam before floor liner.
At that point, we got the liner in, but in the dark and coolness it was extra stiff, and it was pulling the pool walls out of shape in ways that were hard to see, so we made the decision to wait until the next day to put in the liner.
I took a risk and did not reinforce the pool walls because it was forecast to be very mild winds. I may have repeatedly checked on it because I was terrified it was going to get blown in, despite the garden stakes holding it up, but I was lucky and it stayed up fine.
On Wed the 25th we got the liner mostly in and filled it a few inches. I was not very precise and had to use the cover pump to lower it enough to move whole the liner over about 3 inches (I pushed too much to one side when I was getting the liner under the pool ladder, and the seam would have been 2 inches above the cove). Now I've got a bunch of wrinkles all over the bottom, because moving it also twisted it some. The wrinkles aren't very big, so I'm going to live with them.
In my effort to make every mistake along the way, my efforts to smooth the liner and get rid of wrinkles also led to a lot of unevenness in the sand base, where I moved it around while walking.
Anyway, we were able to fill it about 18 inches (24 in the center depression area)
We had it held up with the garden stakes and the liner just barely attached because i wanted the liner to soften and stretch some before I finalized securing it at the top.
The 1 foot plus of water was enough to lessen my fear of it getting wind damage, without my being terrified it would burst because the top stablizer ring and uprights weren't all set.
On Thursday the 26th my son and I went out and fixed the liner to actually have the plastic piece holding the liner on the whole way around. We disconnected it from the garden stakes as he and I put the stabilizer rail on, then we leveled the posts (side to side) and tightened down the post caps.
On Saturday the 28th, the pool was getting green, so I went out and added some chlorine and set up the cover pump to circulate the water for a few hours. I also skimmed it as best I could, and got up most of the tree bits at the bottom. It went back to clear/blue pretty quick.
Sunday the 29th, we secured the top rail, putting the pool top to round (which fixed the couple of spots where the top of the post seemed too slanted), and then started filling it for reals.
We also set up my way too big filter (24in Doheny sand filter) and had to make a few trips to the store to get screws that fit to hold the filter pump to the base (and dremel out the base holes a little because the screws that fit in the base wouldn't go through the metal bracket, so that was extra fun). Then we got the return put in, the high pressure hose from the pump to the filter on, and the hose from the return to the filter on. We just had the skimmer to install, but it was after dark, so we put the solar cover on and called it a night.
Today, Monday May 30th - I was able to get the skimmer mounted and the hose from it to the pump hooked up, but the hose is faulty and leaks under the cuff, and it didn't occur to me to move the backwash fitting to the skimmer so I could use the 1 1/4 hoses I got by accident for that. Good thing, because I went out just as the water reached the skimmer, and it has a leak... so I've posted about that and hope to fix it and put on a new hose tomorrow. *crosses fingers*
*********
Before pictures in comment below...
Have one question below that I'm still curious the answer to... I strikethoughed the rest of the original post...
I reached out to a recycling place that does pool removals, but haven't heard back.
Any advice if we decide to do it ourselves?
Thanks!
** The new pool is sitting in boxes in my garage and I'm itching to get it set up and my swamp removed... (attached are swamp old pool, and new pool before we unwrapped it and checked all the bits...
Attachments
Last edited: