They said ten working days, but that could be much longer on the calendar given the weather we have been having recently.
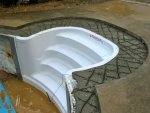
Today they did use the water hose with the saw. This was the exact same people as yesterday, and they had the hose out yesterday as well, so it wasn't like they couldn't find the water the first day. The only difference was that today all the cutting was around the stairs, in one area. While yesterday was cutting all the way around the pool twice and would have meant the hose falling into the pool every five minutes.
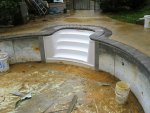
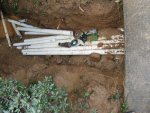
One guy spent the entire day with a sawsall cutting the coping off, the white band in yesterdays middle picture. It was connected with a fairly thick bolt, they looked like 7/16ths thick, ever four inches all the way around the pool.
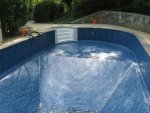
We had twelve patches added to the liner last year alone, though four of those were patching patches that had failed. The liner was way beyond it's expiration date.
Yes, the ladder anchors are in very sad shape. They are on the list of things that need to get done, but they won't make the current round. We really didn't want to be doing nearly this much work all at once. This year was supposed to just be the equipment pad re-plumbing, new filter, and replacing the pool shed. Next year was going to be the liner, coping, and steps.
Then the tree fell on the pool, the retaining wall collapsed, and we lost two of our huge trees. The filter and re-plumbing can't wait, and the liner was destroyed, so something needed to be cut to make the budget. Now, next year is the pool shed, ladder anchors, and lighting.
Today they did use the water hose with the saw. This was the exact same people as yesterday, and they had the hose out yesterday as well, so it wasn't like they couldn't find the water the first day. The only difference was that today all the cutting was around the stairs, in one area. While yesterday was cutting all the way around the pool twice and would have meant the hose falling into the pool every five minutes.
One guy spent the entire day with a sawsall cutting the coping off, the white band in yesterdays middle picture. It was connected with a fairly thick bolt, they looked like 7/16ths thick, ever four inches all the way around the pool.
We had twelve patches added to the liner last year alone, though four of those were patching patches that had failed. The liner was way beyond it's expiration date.
Yes, the ladder anchors are in very sad shape. They are on the list of things that need to get done, but they won't make the current round. We really didn't want to be doing nearly this much work all at once. This year was supposed to just be the equipment pad re-plumbing, new filter, and replacing the pool shed. Next year was going to be the liner, coping, and steps.
Then the tree fell on the pool, the retaining wall collapsed, and we lost two of our huge trees. The filter and re-plumbing can't wait, and the liner was destroyed, so something needed to be cut to make the budget. Now, next year is the pool shed, ladder anchors, and lighting.
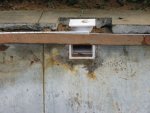

 ) If you can't afford to have it included in this rehab, you can rent a core drill to get them out and install the new ones with some quick set cement (I haven't figured out the best way to bond them but, maybe you've already figured that one out)