DIY Pool Build - Latin Latitudes - In Ground, Vinyl Lined, Perimeter Wet Edge

Re: DIY Pool Build - Latin Latitudes - In Ground, Perimeter Wet Edge, Vinyl Lined
1-IMG_3918.jpg
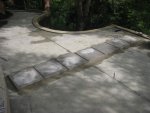
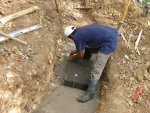
First block is set for the foundation (wall base/footing) for the round pool. The construction process is fairly complicated. We first had to set about a dozen of these blocks in a quarter circle. They provide the reference level for various retaining walls, the lower patio, the catchment basin, the round pool, the upper patio and the oval pool. The excavation work was all by hand (picks, breakup bars, shovels) and pretty hard slugging. I only wanted to move dirt once if at all possible. Material from the pool basin was used as back fill behind retaining walls and to fill/level the patio spaces. No one element could be built first and all at once. It was a continuous cycling of build a bit of retaining wall, excavate, backfill, level, install pool foundation/walls, repeated over and over again.
07-IMG_3944.jpg
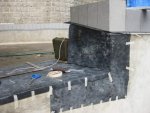
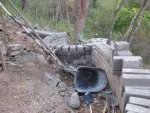
Lower patio retaining wall. Just over the right-hand corner of the tree-well you can see the top of our 10K gallon rain water cistern. It was built using the quarried blocks seen in the foreground, and waterproofed with a welded-seam "bag" made of 10 mil plastic.
08-IMG_4001.jpg
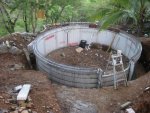
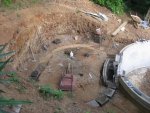
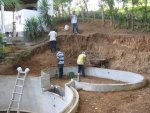
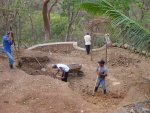
With the lower patio filled in behind its retaining wall, we get down to some serious excavation for the round pool.
09-IMG_4080.jpg
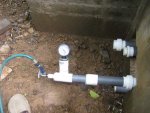
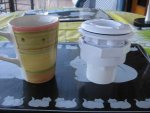
Pretty well all fittings and equipment were ordered from online pool supply stores in the U.S. and Canada. We would have the items shipped to friends for them to deliver when visiting us. In this case I wanted to provide someone with an idea of how big this fitting was and if they had space for 12 of them in their suitcase.

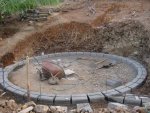
Foundation blocks for round pool. Channel cut into blocks to lay in re-bar for added strength.
10-IMG_4088.jpg
 
Re: DIY Pool Build - Latin Latitudes - In Ground, Perimeter Wet Edge, Vinyl Lined

11-IMG_4098.jpg
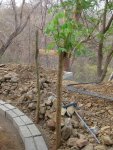
The main batter board for centering the pools and setting vertical elevations. Post took root, not unusual for many flora in this part of the world.

12-IMG_4132.jpg
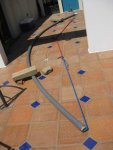
Bending tubing. This is 2" SDR 17 and does not bend easily. I probably could have used elbows to route the tubing but I wanted to minimize flow resistance (head loss) as much as possible given the relatively low power pump (Dynamo 1HP 2 speed) I wanted to use and what is probably a somewhat unusual configuration of returns (5) and drains (4). And, 45 or 22.5 degree elbows were a full day drive and $75 in gas away. I also had the time to do this before it had to be installed. So a hot deck, a couple of days of searing sun and various ropes and railing posts to control the bend worked pretty well.

13-IMG_4135.jpg
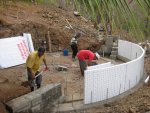
Setting the "Covintec" panels for the catchment basin. The panels come in 4x8 foot sheets and consist of a 2" styrofoam core with a wire mesh on either side. A mortar "stucco" is then applied to both sides. (A simple explanation; they are somewhat more complex in their construction.) We used these panels for our house (walls and roof). They provide an incredibly strong building system. Normally flat, we devised a unique way of curving them to the required radii.


14-IMG_4165.jpg
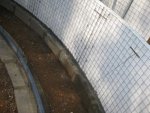
The panels have a 2"x2" wire mesh/grid on both sides. By twisting (with pliers) the horizontal wires of the mesh on one side of the panels we would shorten the length of those wires (compared to the untouched horizontal wires on the opposite side) and thus draw/shorten this side in on itself causing the panel to curve.


15-IMG_4195.jpg
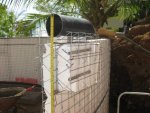
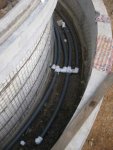
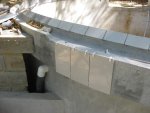
Mock-up of the construction required for the perimeter infinity edge and drainage gutter. The black tube is just to provide an idea of the radius and spacing of bottom of the gutter. The photo also provides a better idea of the structure of the panels. The 2"x2" wire mesh on both sides of the styrofoam is cross linked (with the zig-zag wires) through the styrofoam thus bonding the mesh on one side with the mesh on the other side. This also allows the mesh on each side to stand free of the styrofoam surface by 1/2" and gives the mortar/stucco something to grab onto.
 
Re: DIY Pool Build - Latin Latitudes

a very interesting build! We don't see many from down there that's for sure. I used a Weeping Willow limb once to prop up something and left it. I couldn't believe it, but it did the same thing. Not much root, but it sprouted. It was pretty old too. I would have bet, and lost big on that one. Looking forward to seeing more.
 
Re: DIY Pool Build - Latin Latitudes

Thanks for dropping in. More pics below.

16-IMG_4231.jpg
The form work for the gutter/infinity edge. Once the gutter/edge was in place we started to stucco the panels. We needed access to the panel's wire mesh to install the gutter/edge form work and therefore couldn't stucco it until the gutter/edge work was done.

17-IMG_4234.jpg
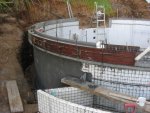
Round pool. Panels in place. Pouring infinity edge/gutter. Plumbing for the water jets (trident shaped arrangement of tubing) installed in the far edge of the round pool.

18-IMG_4258.jpg
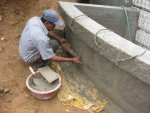
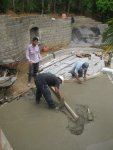
First stucco base coat going on the inside of the round pool. The wire mesh stands out from the styrofoam about 1/2" allowing the mortar/stucco to wrap around it and hold in place. This requires careful attention to the slump of the mixture--not too dry so as not to "stick" and not too wet that it slides/sloughs off the panel. All hand laid--no compressed air mortar spray tools.

19-IMG_4283.jpg
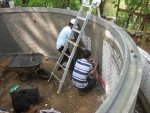
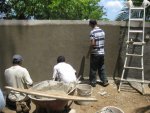
Final touches/smoothing of second stucco coat. The wood piece across the wheel barrow is the screed used to gauge the application of stucco to the curved wall. 1/2" smooth re-bar was temporarily fixed vertically every 4' to the wire mesh as screed guides after the first base coat was applied (not visible in this photo). Once the second coat has been applied to the correct thickness and smoothed, the lengths of re-bar are removed and the slot left behind is filled and smoothed over.

20-IMG_4293.jpg
Here the screed guides are cement (barely visible due to splatter of in-fill), applied to correct depth and spacing, and smoothed and left to harden (just "so") before in-fill coat; and wooden strips (top part), held in place with re-bar clamps. These guys are amazing. They know how to mix the right consistency of mortar for the task at hand, apply it, run new work into old, wait until the right moment to rough it in, and then wait again for the right moment to finish it off.
 
Re: DIY Pool Build - Latin Latitudes - In Ground, Perimeter Wet Edge, Vinyl Lined

21-IMG_4355.jpg
Round pool finished. Starting foundation of oval pool. Pit between round and oval pool contains plumbing for all returns and conduit for pool lights (12 volt LED, using standard 1.5" returns for housing).

22-IMG_4377.jpg
Plumbing for catchment basin drains, water fountain/jets, and secondary wall drains in the round pool. The round pool can drain either over the perimeter infinity edge/gutter system or through two wall drains. The wall drains provide the option of circulating the water without running over the wet edge into the catchment basin to help control aeration, cooling, evaporation and filtration.

23-IMG_4392.jpg
DIY water pressure/leak tester. All tube ends in the pool were sealed with end caps that had a small hole sealed with a threaded bolt (to release trapped air when tube is filled with water). The tube ends at the equipment pad have disconnect unions. The pressure tester has a disconnect union too. The tester was attached to each plumbing run (7 of them) and water was injected via the green garden hose to a pressure of about 40 PSI. At 40 PSI the valve (where green/blue hose attaches) was closed and the garden hose was disconnected. You can pretty well tell within a half hour to an hour if the gauge drops that there is a leak (or faster if a bigger leak). I liked to leave it overnight. Found one small leak which was easily fixed before being buried under 3 feet of dirt and 4 inches of concrete patio. Whew! This took some time and effort to do, BUT beats digging up concrete and patios later on.

24-IMG_4530.jpg
With the pool walls basically finished, it will now take about another 8 months to finish off the the remaining landscaping--a major retaining wall, access stairs from main house level and the patio deck (excavating, leveling/drainage, concrete sub-base, paver installation). Landscaping for this project took about 90% of the time and 75% of the budget.

25-IMG_4705.jpg
Setting the tiles for the infinity cascade edge. Although a round pool solved many engineering/structural hurdles, it created a few others--like setting tiles on a curved surface and leveling the top edge so that water would flow over it evenly. Happy to say that 70+ feet of wet edge was within a millimeter of being perfectly level. A little touch-up with a 4" grinder took care of that.
 
Re: DIY Pool Build - Latin Latitudes - In Ground, Perimeter Wet Edge, Vinyl Lined

26-IMG_5585.jpg
Pouring the concrete sub-base. We rented a mixer for this part of the project. The first time we have ever used any mechanical assistance for anything other than powered hand tools. But 45 bags of cement and nearly 7 yards of concrete was just going to be too much of a slug by hand.

27-IMG_5618.jpg
First row of pavers. 615 to go. This job was suppose to take 2 weeks max. It took 6. Despite being mechanically processed, not a single paver was either square, nor of uniform thickness, nor flat (many were arched or had a corner "dip")--not even by a long shot allowing for the intrinsic "hand-made" look of pavers . They had to be squared up/trimmed/flattened as much as possible with a 4" grinder and then individually set to string lines to maintain a consistent surface height with minimum lippage.

28-IMG_5816.jpg
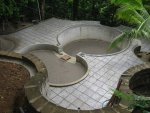
Photo from same spot as first photos at beginning of project (photos in post #20), 19 months later.

29-IMG_5822.jpg
Setting up templates (using sheet plastic) as guides for cutting liners in swim-through between round and oval pool.

30-IMG_5935.jpg
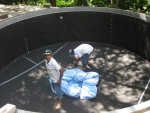
Liner padding installed (heavy duty geo-textile). Liner ready to install.
 
I decided to go with liners to waterproof the pool. Tile or plaster/pebble-tec type finishes would have been enormously expensive, almost doubling the cost of the pool. Because of the nature of the swim-through between the round and oval pools I also considered a site installed liner such as those used on large commercial/public pools. The advantage (IMHO) is being able to layout, cut and seam the vinyl in place providing a much greater degree of precision and less likelihood of something being mis-aligned or not stretching into place as planned/expected. Such an installation process and material costs were reasonable enough but the cost and grief to import the materials were more than I wanted to go through.
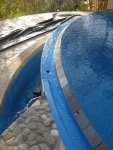
So I ordered stock liners, an 18' round x 72" expandable and a 10'x16'x42" oval. The oval was trimmed to 18" deep since it is the "shallow end", a wading/lounging/kiddie pool. I bought the cheapest ones I could. This was my first time installing a liner and if I goofed the pain would be minimal. If everything worked well I could then buy a higher end liner in a few years, having already worked out the installation details. However, it is now three months after being installed and they look great and I'm really happy with the look (colours), so any thought of doing this again any time soon is pretty distant. Two liners, the pump, the filter, and no-lube valves were ordered on-line in the U.S., shipped to friends in the U.S., packed as personal luggage the next time we visited them, and returned to Nicaragua with us on the flight home. Excess baggage charges and custom duties were minimal compared to the cost of importing this equipment through a shipper/broker.

The biggest challenge and most worrisome unknown in the entire project was how to go about cutting and joining the two liners in the swim-through. About 14 months of work all hinged on the success of this next stage (I did do a few trial runs on small pieces at the outset so this wasn't a total shot in the dark.) At the time there was absolutely no information or precedent that I could find anywhere (TFP, manufacturers, liner vendors, other DIY pool sites). A site called "Shade Builder" (http://www.shadebuilder.com/Above-Ground-Pool.html) (I have no affiliation) has some good information about installing pool liners but the site owner said he has only ever heard of (done) small repairs of a few inches. I had about 15 feet of seaming to do!


31-IMG_5939.jpg
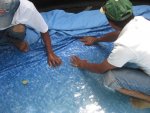
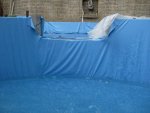
Installing liner. Working out wrinkles. This was a somewhat daunting task given the upcoming complexities of of the cut-outs and seaming for the swim-through between the round and oval pools. Those complexities precluded the use of a vacuum or lowering the liner over the edge and filling at the same time to remove wrinkles. So we filled slowly and hand smoothed the wrinkles as far as we could. Given the complexity of working around the swim-through I'm amazed by the fact we were able to position the liners, cut them out, and join them together with no visible wrinkles at all.

32-IMG_5966.jpg
Looks a bit ugly here. Somewhat due to the liner not being in its final stretched and glued position. But, amazingly, all of those wrinkles were smoothed out. The vinyl seemed to have the capacity to both stretch and to also contract/absorb wrinkles.

33-IMG_5975.jpg
And all of this done with water in the round pool to within 4" of the base of the swim through. The round pool had to be filled first, as much as possible, to position the liner and remove as many wrinkles as possible so that it could be cut out for the swim through.

34-IMG_5995.jpg
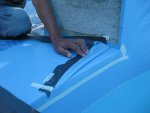
Seams had to be masked off to prevent glue spreading to where it wasn't needed and possibly melting through the liner. Had to work fast and spread glue very thinly and evenly with a putty knife. Could only do about 8-10" at a time as glue was so hot it would "curl" the edges being glued if they were not pressed together and rolled out flat within a few seconds. Could not buy or import liner glue (without Hazmat license and huge expense). A local manufacturer sold me a glue used to seam 80 mil 3-ply vinyl truck tarps; never intended for 15 mil single ply pool liners.

35-IMG_5999.jpg
Glued liner seams where swim-through passes into deeper round pool. Seams are overlapped with a second strip glued on to cover/reinforce the entire seam. For the corners, I found that (through a few trial runs) by using a "small enough" patch of vinyl that it could be folded/stretched to mold to the corner without wrinkles yet still provide a suitable waterproof patch where the 3 corner planes/surfaces meet.
 
Thanks E9A.

At the time when I started I couldn't find anything really at all about this type of construction. There was some stuff about individual components -- liners attached below the water line; negative/infinity/wet edges; "reverse" circulation (bottom > up) -- but nothing putting it all together, particularly for a perimeter wet edge. The internet is a great resource though and Duraleigh's (Dave S's) post on his pool build here at TFP was a great incentive to launch into my project.

The next set of pics show how the top edge of the liner was attached below the water line and the first few shots of the finished pool/patio.

36-IMG_5536.jpg
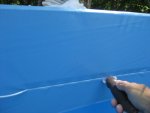
This extruded, anodized aluminum track sits beneath a 6" border of porcelain tiles. The track is fixed to the walls using a marine sealant and stainless steel screws . Not visible in the above photo, the screws pass through holes in the wide channel and the heads are then covered by a "decorator" trim strip that slips into the channel. I also folded about 1 inch of the liner into the wide channel underneath the decorator strip so that I would have something to grab if I ever had to "adjust" the liner. The extrusion was originally designed for making window screen frames.

37-IMG_6018.jpg
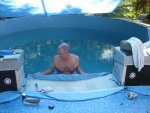
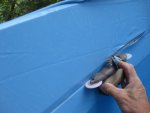
Installing the spline that holds the liner in the aluminum track and provides a waterproof seal. It appears to be working great as there are no signs of leaks. I was standing in water that was just below my hand. We filled the pool to this level before installing the spline to work out wrinkles before things became permanent. The pressure of the water, even and inch or two below the surface, helped considerably in to hold the liner in place as wrinkles were smoothed out.

38-IMG_6019.jpg
The spline tool jigged-up to follow the channel and cut the liner evenly for the circumference of the pool. Porcelain tiles extend 6 " above the liner and its sealing strip/track, to form the wet edge of the pool. The tiles take the brunt of wear and tear protecting the liner from direct, open UV exposure and abrasion from various body parts, pool toys and equipment contacting the edge.

39-IMG_6115.jpg
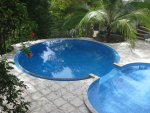
Our little oasis. A custom grate is being made to cover the gutter along the wet edge of the round pool.

40-IMG_6121.jpg
My spot. Sit back. Feet up. Relax. Part of the attraction for a perimeter infinity edge are the mirror-like reflections the appear to float up from the pool deck.
 

Enjoying this content?

Support TFP with a donation.

Give Support
Thanks Casey, Jeff. A few more pics of the wet edge.

41-IMG_6126.jpg
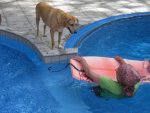
Carol and Sky. Sky is not a water dog, thankfully. Claws and vinyl liners aren't (IMO) a good mix. He's just happy having (for him) the world's largest water bowl.

100-IMG_6308.jpg
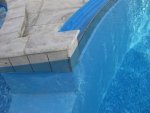
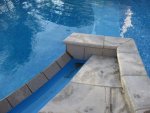
Corner detail of swim through from shallow (18") oval to deep (72") round pool. The darker, bluish grey band leading off to the right of the swim through is porcelain tile. They form a rim band 6" deep around the circumference of the round pool. An anodized, extruded aluminum liner track was fastened below this band. The liner is attached to this track using a channel/spline arrangement similar to window screens. As a side note, we had to make our own coping tiles. We used the patio pavers, cutting and shaping them with a 4" angle grinder.

100-IMG_6315.jpg
Rim, gutter, coping detail other side of swim-through.

100-IMG_6310.jpg
A "grate" is being custom made (DIY'd once again) to cover the gutter. I'm experimenting with three options: 1) using the patio pavers, cut to size and slotted in some fashion; 2) several (6-8?) lengths of (1"?) pvc tubing filling in the width and following the arc of the gutter, spaced/supported with some sort of bracket; 3) covering/cupping the gutter with lengths of pvc tubing (3"?) split in half and curved to follow the arc and then covered over with 1"-2" smoothed beach stone/pebbles.


100-IMG_6316.jpg
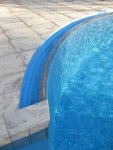
Rim, gutter, edge detail of cascade into return basin.
 
That pool is simply fantastic Alan!

Im also (self) building a 25m lap pool with full perimeter overflow, but with all drains hidden (no grating at all), so I vote for the paver option as Im heading it that direction (but more involved and I dont want to hijack your thread)

As a building contractor, Im seriously impressed with the though and work you have put into your beautiful pool.
 
Thanks all, for your kind comments and appreciation of the effort behind this build. Thankfully, being retired, I had the time (luxury even) to pick my way around the hurdles that popped up along the way. Living in a rather remote area of Nicaragua (no "pool stores" or industry to speak of), the TFP forums and the internet (often involving a trip into the nearest town for a 256K dial-up line) were great resources. One of the most useful tools was a 3D modelling program called Sketchup (free; originally from Google and now Trimble). It allowed me to visualize the pool and its components in pretty good detail to make sure things "fit" before being built.

Andrew: if you have any pics or links to your build I am very interested in seeing them.
 
Thread Status
Hello , This thread has been inactive for over 60 days. New postings here are unlikely to be seen or responded to by other members. For better visibility, consider Starting A New Thread.