Original planning started back in 2011
We fired things back up near the end of 2018
Hard a hard time deciding on a PB
I filtered out the cheapest bidders and spoke with mid and high tier PBs (my own categories based on pricing and reviews and what I got from pools reviews showed)
Our final 2 selections came down to a mid tier PB (PB1) who can do hardscape if desired but is more than happy to coordinate with someone else and a high tier PB (PB2) who also does the entire project (landscaping etc.).
This was the hardest part of our process and it broke our heart to tell one of them no. I don't usually see the decision making process in other threads so I figured this might help someone else stuck doing too much analysis.
PB2 had a great portfolio and their work is in luxury pool magazines. Unfortunately it was just way out of budget. I gave them the project budget before we started talking design to make sure I wasn't wasting their time. The first draft they showed me was AMAZING but ended up being 30k over budget and didn't include landscaping.

I was kind of expecting that because they kept asking what I wanted and I kept replying and each time I was like...are you sure this fits in the budget? At this stage I had no idea what things cost so everything on our radar was included (rope swing...slide...grotto...tons of boulder and rock work). When we scaled the project back down for the next draft the pool itself was just at the budget but didn't include any money for landscaping or the covered patio we planned.

When I started slashing again to get under the project budget reality set in. I still had to clear 25-30k off the pool. We simply didn't have enough budget for this PB to do their magic in our yard. When we decided to end the design process my wife and I were genuinely sad we didn't have a chance to work with them. My wife and kids refer to PB2 as the Lucas Lagoon builder we couldn't go with.
The experience with PB1 was very different. They had a set price sheet with the most common items. Pool size was whatever you wanted and you paid by the LF. The basic package they offered included many of the suggested items this forum insists on. They aren't trying to be the cheapest and want the customer to be happy after they leave. PB2 has great reviews and has been building in the area 10+ years. They also did a few pools on my street (which is how I learned about them). The only negative is they don't have a large portfolio of rock work (we are chasing this lagoon style dream). They aren't at 0 projects but I definitely would have been more comfortable seeing more examples before contract signing. We tried to address this issue pre-contract by including specific pictures to set expectations.
One of the things I found odd at the time but appreciate now is they tried to talk me OUT of things. One item was waterline rock or above the waterline rock. Yes waterline rock looks much better but our area is notorious for bad water. They said it was running a big risk and upping the maintenance if you want the waterline rock. This was repeated to me by all the landscapers I spoke with as well. Those familiar with our area all tried to steer me away from putting it in the water. The common message was it would look great at install but a year or so down the line I will either hate the look or hate the work required to keep it looking nice. Another item they were helpful with was spa and firepit puchases. They said they are more than happy to build it but a 3rd party spa is much more enjoyable with more features etc. Same with a portable firepit. I found this type of advice rather than offering to build anything and pad the bill helpful.
The early draft from PB1 was based on our pool only budget and more modest in comparison. The draft ended up more modern and less lagoon like. They told me the lagoon features would blow through the budget I had set. However, the guts of the pool had everything I wanted. Pebble finish. Solar heating panels. Automation. Gas heater etc. It was just the aesthetic water feature budget was too low at this time.
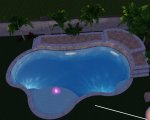
After we had our rough draft with PB1 we had to put it on hold and talked to landscapers. When I got some landscaper bids back I realized I had much more room for the pool if I wanted.
This was going about the same time we had to pass on PB2.
So we had a long talk as a family and decided we can wait and save more for the budget and a future PB2 build or see what PB1 can do for us. We were literally on the fence about just walking away and saying F this entire project at this point.
I basically combined the best ideas from everyone we had been speaking to up to this point.
At this point we didn't need to see anymore 3D models anymore and focused on just moving forward.
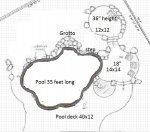
I made the sunshelf even bigger than initially proposed by any PB (PB1 had the largest sunshelf at 13 feet and PB2 was at 11 feet). I expanded that sucker to 20 feet as splash deck because I pay by perimeter and there no change to my perimeter by doing that. It will have a separate sand color pebble finish for a nice beach like entry area.
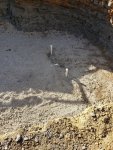
I horizontally flipped PB1s design to make a big shallow end (17' diameter) for my kids to play in and enjoy at 3'6" deep. I initially wanted 4' but my wife is only 5' tall and her argument about not wanting water near her neck was a winner. She is not going to get any taller and I can squat down. PB2 had a 12' diameter that I didn't realize was small until I put my test rope and stakes in the yard. The deep end is 15' across and 7 feet deep. The raised wall for jumping is approx. 14 linear feet and will blend into the rock work of the grotto.
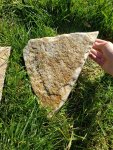
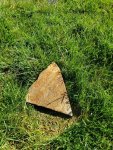
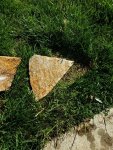
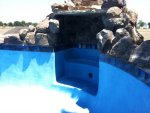
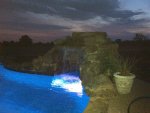
As for the rock water features I went with a modest approach above the waterline weeping wall and modest loveseat grotto and a raised wall I refer to as the fun/jump zone in the deep end. It will be faced with rock/stone as well.
Now I didn't find this picture until after design work was complete and the project began. But I have this saved as the target blue print for the project and every phase of the project this is available for sub contractor review.

If we can get close to this my wife and I will be very happy with our selection of PB1 as it includes all the other items we initially wanted in our budget as well (including front and backyard completion).
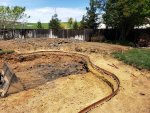
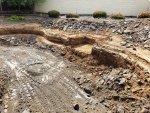
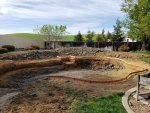
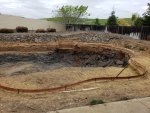
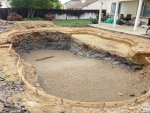
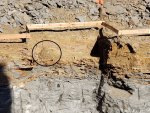
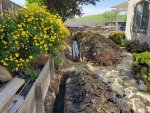
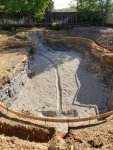
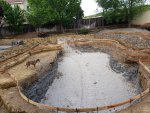
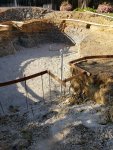
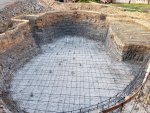
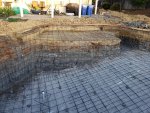
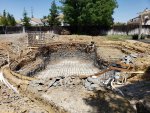
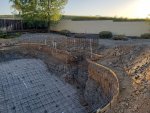
This was all going on during the unusually wet year here in the SF Bay Area so we were taking our sweet time deciding on PBs and landscapers to do the other work. The weather finally turned to spring and we have been going full speed since the rain stopped. Pool dig began on Sat 4/13 (I will always remember this as the GOT pregame show pool).
Unfortunately we don't have our final landscaper selected yet and the ones we are talking to started letting me know schedules are filling up. We set a self imposed deadline to make our decision by the end of this week. They were all notified pool dig was starting and I got feedback about what I needed to do for them. Nobody had any issues with dig starting etc.
We fired things back up near the end of 2018
Hard a hard time deciding on a PB
I filtered out the cheapest bidders and spoke with mid and high tier PBs (my own categories based on pricing and reviews and what I got from pools reviews showed)
Our final 2 selections came down to a mid tier PB (PB1) who can do hardscape if desired but is more than happy to coordinate with someone else and a high tier PB (PB2) who also does the entire project (landscaping etc.).
This was the hardest part of our process and it broke our heart to tell one of them no. I don't usually see the decision making process in other threads so I figured this might help someone else stuck doing too much analysis.
PB2 had a great portfolio and their work is in luxury pool magazines. Unfortunately it was just way out of budget. I gave them the project budget before we started talking design to make sure I wasn't wasting their time. The first draft they showed me was AMAZING but ended up being 30k over budget and didn't include landscaping.

I was kind of expecting that because they kept asking what I wanted and I kept replying and each time I was like...are you sure this fits in the budget? At this stage I had no idea what things cost so everything on our radar was included (rope swing...slide...grotto...tons of boulder and rock work). When we scaled the project back down for the next draft the pool itself was just at the budget but didn't include any money for landscaping or the covered patio we planned.

When I started slashing again to get under the project budget reality set in. I still had to clear 25-30k off the pool. We simply didn't have enough budget for this PB to do their magic in our yard. When we decided to end the design process my wife and I were genuinely sad we didn't have a chance to work with them. My wife and kids refer to PB2 as the Lucas Lagoon builder we couldn't go with.
The experience with PB1 was very different. They had a set price sheet with the most common items. Pool size was whatever you wanted and you paid by the LF. The basic package they offered included many of the suggested items this forum insists on. They aren't trying to be the cheapest and want the customer to be happy after they leave. PB2 has great reviews and has been building in the area 10+ years. They also did a few pools on my street (which is how I learned about them). The only negative is they don't have a large portfolio of rock work (we are chasing this lagoon style dream). They aren't at 0 projects but I definitely would have been more comfortable seeing more examples before contract signing. We tried to address this issue pre-contract by including specific pictures to set expectations.
One of the things I found odd at the time but appreciate now is they tried to talk me OUT of things. One item was waterline rock or above the waterline rock. Yes waterline rock looks much better but our area is notorious for bad water. They said it was running a big risk and upping the maintenance if you want the waterline rock. This was repeated to me by all the landscapers I spoke with as well. Those familiar with our area all tried to steer me away from putting it in the water. The common message was it would look great at install but a year or so down the line I will either hate the look or hate the work required to keep it looking nice. Another item they were helpful with was spa and firepit puchases. They said they are more than happy to build it but a 3rd party spa is much more enjoyable with more features etc. Same with a portable firepit. I found this type of advice rather than offering to build anything and pad the bill helpful.
The early draft from PB1 was based on our pool only budget and more modest in comparison. The draft ended up more modern and less lagoon like. They told me the lagoon features would blow through the budget I had set. However, the guts of the pool had everything I wanted. Pebble finish. Solar heating panels. Automation. Gas heater etc. It was just the aesthetic water feature budget was too low at this time.

After we had our rough draft with PB1 we had to put it on hold and talked to landscapers. When I got some landscaper bids back I realized I had much more room for the pool if I wanted.
This was going about the same time we had to pass on PB2.
So we had a long talk as a family and decided we can wait and save more for the budget and a future PB2 build or see what PB1 can do for us. We were literally on the fence about just walking away and saying F this entire project at this point.
I basically combined the best ideas from everyone we had been speaking to up to this point.
At this point we didn't need to see anymore 3D models anymore and focused on just moving forward.

I made the sunshelf even bigger than initially proposed by any PB (PB1 had the largest sunshelf at 13 feet and PB2 was at 11 feet). I expanded that sucker to 20 feet as splash deck because I pay by perimeter and there no change to my perimeter by doing that. It will have a separate sand color pebble finish for a nice beach like entry area.
I horizontally flipped PB1s design to make a big shallow end (17' diameter) for my kids to play in and enjoy at 3'6" deep. I initially wanted 4' but my wife is only 5' tall and her argument about not wanting water near her neck was a winner. She is not going to get any taller and I can squat down. PB2 had a 12' diameter that I didn't realize was small until I put my test rope and stakes in the yard. The deep end is 15' across and 7 feet deep. The raised wall for jumping is approx. 14 linear feet and will blend into the rock work of the grotto.
As for the rock water features I went with a modest approach above the waterline weeping wall and modest loveseat grotto and a raised wall I refer to as the fun/jump zone in the deep end. It will be faced with rock/stone as well.
Now I didn't find this picture until after design work was complete and the project began. But I have this saved as the target blue print for the project and every phase of the project this is available for sub contractor review.

If we can get close to this my wife and I will be very happy with our selection of PB1 as it includes all the other items we initially wanted in our budget as well (including front and backyard completion).
This was all going on during the unusually wet year here in the SF Bay Area so we were taking our sweet time deciding on PBs and landscapers to do the other work. The weather finally turned to spring and we have been going full speed since the rain stopped. Pool dig began on Sat 4/13 (I will always remember this as the GOT pregame show pool).
Unfortunately we don't have our final landscaper selected yet and the ones we are talking to started letting me know schedules are filling up. We set a self imposed deadline to make our decision by the end of this week. They were all notified pool dig was starting and I got feedback about what I needed to do for them. Nobody had any issues with dig starting etc.
Last edited:


