New Owner Build-Live Music Capital of the World (Austin)

Foosman

0
Bronze Supporter
Jul 21, 2016
371
Austin, TX
Started IG gunite pool build in late-October. I am acting as the general contractor and also handling a few jobs myself: deck removal, fence and sprinkler. Decisions on pool design, materials, etc. have been stressful, but luckily my wife has been pretty decisive on what she likes and doesn't like. So far, the build has gone well. I decided on OB after deciding I didn't want to pay the big bucks to get a top end builder and hearing the affordable builders are never around to supervise the build. I like the control aspect...I talk directly to my subs. I also got encouragement from and5555 on here and am using the same subs that he used. It really helped to have one sub that owned the dig, rebar and plumbing (he scheduled the excavator, has a rebar crew and his brother is the plumber). The biggest surprise is my subs are busy (even in the winter and lots of rain and sub-20 degree days has compressed their work days), so there's been a lot of verbal quotes on the phone, hand shakes, being flexible with their schedules and understanding that bids might creep up a bit once they show up and realize the scope of the job. So here are some pics:

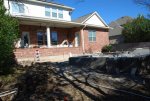
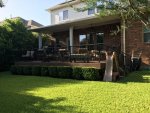
After much consideration we decided that the existing deck (that I built about 6 years ago) had to go. So, first phase was demo the deck and remove a 25' lace bark elm tree. Backyward/deck before the chaos began.
IMG_2717.jpg

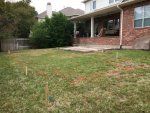
Deck removed and initial layout of pool drawn in the yard. I installed some stakes and string to help visualize the elevation change. We decided to set the patio grade at 10" above the existing ground level. We thought about bringing it up higher, but our yard slopes about 2 feet down from the front of house to the back and the pool was getting too high off the ground for our liking. Note: I was able to donate about 95% of the deck versus sending it to the dump...it took more time in the demo, but saved me money and helped the environment out a bit.
IMG_3091.jpg

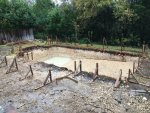
At about a foot down, they hit rock. Excavation took 4.5 days to complete, impressive considering the amount of rock. Backhoe + bobcat to haul off the rock.
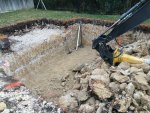
Photo Nov 29, 5 29 00 PM.jpg

Hole complete, bring on the rain.
Photo Dec 03, 8 26 01 AM.jpg

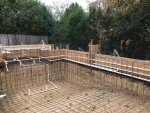
Rebar goes in.
Photo Dec 14, 10 57 35 AM.jpg

Continued in next post...
 
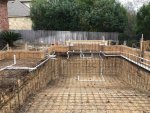
Another rebar shot:
Photo Dec 14, 10 58 02 AM.jpg

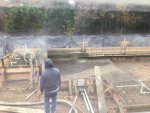
Action shot. The gunite crew left an absolute mess in my backyard. Pretty much about 60% of my yard was covered in 4-8" of gunite. Some parts were busted up by the plumber to continue to run pipes. Yes, the gunite was shot prior to finishing the plumbing...it was just stubbed out. I was not happy, as I wanted to see it under pressure prior to the shoot...but, my plumber was in Miami and we had a window to hit between COLD and rain to shoot the gunite. All is well now, but it created a lot of clean up to get rid of the un-wanted gunite. On a bright note it seemed no rebound was used in this pool!
Photo Dec 15, 10 16 48 AM.jpg

14 days of watering wasn't too bad until it turned cold, 19 degrees cold. Guys told me to keep watering. I did wet vac up any water in the deep end to keep the weep hole clean and from freezing.
Photo Dec 28, 3 39 42 PM.jpg

Picture from last Friday (Friday the 13th). You can see the dark area around the pool which is the waterproof membrane that was applied as we are using glass tile. I know...I know, glass tile for the waterline is a bad idea :) Started off great, perfect 70 degree weather for the install of the waterproofing. This lasted about 1 day and it has now rained on and off for 4 days. Most of the rain has been drizzle. A little stressed as I hope the membrane had enough time to cure...I haven't seen any hazing, etc. so it looks okay.
IMG_3405.jpg

IF THIS RAIN EVER STOPS then the tile and coping will go on. I'll post more on the tile and coping in a follow-up.
 
Your pool looks great and very similar to mine!! When placing your lights, be sure to put one in the tanning ledge. Our PB ignored me when I told him we needed one there. He placed one on either side of it in the pool wall facing away from the house (as they should be) and stuck the 3rd in the swimming lane on the end, which was not approved of by me. It irritates me every time we turn on the lights- our tanning ledge is completely black, not the least bit of light illuminates it.
 
Foosman,

I like it..... Being a Pentair kind of guy, I really like your equipment choices..

You will love ScreenLogic2...

Thanks for posting,

Jim R.
Your guidance and posts helped me see the light! I am unbelievably excited about the equipment and I hope the electrician is prepared for me staring over his shoulder and smiling for the majority of the time he is installing it.
 
Foosman,

If your going to watch your electrician anyway, I suggest the following:

1. Make sure the Intelliflo is on a GFCI by itself. Nothing else can use this power the manual so states... This power does NOT go to, or through, any relays.
2. Make sure the SWCG's transformer power runs through the Filter/pump relay...
3. If you can get to your electrician in time have him run a much bigger feed wire than you need to the EasyTouch breaker panel. You might not need it now, but who knows about the future... Might cost you a couple of bucks out of your pocket, but much less than doing it later.
4. Make sure he installs a pad light over the equipment pad. If so, have it run through the EasyTouch so you can turn it on and off from your PC, phone, etc..


Good Luck with your build,

Jim R.
 
Your pool looks great and very similar to mine!! When placing your lights, be sure to put one in the tanning ledge. Our PB ignored me when I told him we needed one there. He placed one on either side of it in the pool wall facing away from the house (as they should be) and stuck the 3rd in the swimming lane on the end, which was not approved of by me. It irritates me every time we turn on the lights- our tanning ledge is completely black, not the least bit of light illuminates it.
Uh oh. My plumber was hesitant to put a light or return on the ledge due to the limited depth. With 3 lights we were thinking we would get some illumination up to the ledge, but now I'm not holding out much hope. I don't think I will change it now though. Your pool looks great also...fire bowls?!?! Jealous. We will have water bowls. Months of TFP research, including seeing your pool and liked this shape. It fit best with our yard/house footprint. We liked the large spill-over, so we ended up with an 8 foot spillover. We originally had a raised wall along the back (similar to yours but all the way across). Since the pool is already 2' above the ground along the back, we were worried about safety of kids climbing on a wall...so pulled it out.
 
1. Make sure the Intelliflo is on a GFCI by itself. Nothing else can use this power the manual so states... This power does NOT go to, or through, any relays.
>> I don't think he was planning on using a GFCI, good point.
2. Make sure the SWCG's transformer power runs through the Filter/pump relay...
>> I was aware of this one, but not sure I would have checked it.
3. If you can get to your electrician in time have him run a much bigger feed wire than you need to the EasyTouch breaker panel. You might not need it now, but who knows about the future... Might cost you a couple of bucks out of your pocket, but much less than doing it later.
>> I'll discuss this with him. I have to be careful as my main panel is getting close to capacity due to a 11kW solar system. It was upgraded when solar was installed and I don't want to upgrade again. I have a pair of breaker slots free out of 20 total and that's it.
4. Make sure he installs a pad light over the equipment pad. If so, have it run through the EasyTouch so you can turn it on and off from your PC, phone, etc..
>> I was planning a pad light and wondering about how to switch it...nice
 
Replaying the conversation(s) in my head: his concern on the ledge was more for getting a return in there and he finally just told me that a return on a 10'x6' ledge was pretty much worthless. On the lights he thought that with 3 lights, it would be best to position them equally across the pool and the ledge would still get light. I should have thrown this out for a TFP vote, but you guys would have said I need a 4th light :)

The nicheless lights only need 4" of water from the top of the light. What's the issue?
 

Enjoying this content?

Support TFP with a donation.

Give Support
1. Make sure the Intelliflo is on a GFCI by itself. Nothing else can use this power the manual so states... This power does NOT go to, or through, any relays.
>> I don't think he was planning on using a GFCI, good point.
2. Make sure the SWCG's transformer power runs through the Filter/pump relay...
>> I was aware of this one, but not sure I would have checked it.
3. If you can get to your electrician in time have him run a much bigger feed wire than you need to the EasyTouch breaker panel. You might not need it now, but who knows about the future... Might cost you a couple of bucks out of your pocket, but much less than doing it later.
>> I'll discuss this with him. I have to be careful as my main panel is getting close to capacity due to a 11kW solar system. It was upgraded when solar was installed and I don't want to upgrade again. I have a pair of breaker slots free out of 20 total and that's it.
4. Make sure he installs a pad light over the equipment pad. If so, have it run through the EasyTouch so you can turn it on and off from your PC, phone, etc..
>> I was planning a pad light and wondering about how to switch it...nice

On item one I was of course talking about a GFCI circuit breaker for the Intelliflo.

And one more thing... if they have yet to set up your equipment pad, make sure they install the pumps with unions like these... Union.jpg

Jim R.
 
Congrats on the build. Had I known you were at the gunite stage, I could have lent you my hose timer with sprayer that I bought specifically because I knew I wouldn't water religiously - not that you'd need that anymore with all this rain.

Hope it goes well and that you have good luck with everything.

Good to hear from you. I was watering over Christmas break (off for 2 weeks) and most of the time was happy to get a break from the kids: "sorry, Dad has gotta go water the pool again."


Sent from my iPad using Tapatalk
 
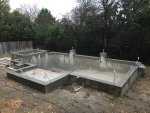
A few plumbing shots. Note: I also ran a few sprinkler pipes in the same trench. Once the patio is in it will cut off easy access to run sprinkler pipes, so I'm re-routing sprinkler pipes now as a few run directly under the patio location. Due to the elevation change, the pipes at the spa are sitting above ground. These will be buried under concrete (patio) and fill dirt/sod.
Photo Jan 19, 2 31 14 PM.jpgPhoto Jan 19, 2 31 34 PM.jpg

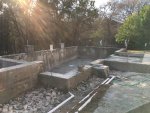
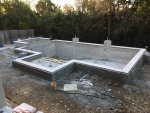
The rain subsided after ~5 days. Pipes coming out of columns were corrected/shifted as they were not centered...good thing I checked/measured these (they drilled out concrete around the pipes and used a heat gun to bend them). On Friday and Saturday they resumed coping/tile install. About a week ago they installed a waterproofing membrane coating. Friday they put on a mortar coat. I think the next step is a thin set that they set the tile in. I asked about a second layer of waterproofing, as you see this in some of the glass tile instructions and he told me that his method is proven to work and I won't need it. They cut and set the travertine coping. These are 1.25" thick pavers as we did not want bull nose and preferred the look over the 2" thick ones. They are 12x24 for all areas that will abut the patio and 16x24 for the raised spa and rear wall of pool. It's starting to feel less like a construction project / job site and more like a pool. The end is in sight!!!
Photo Jan 22, 8 06 41 AM.jpg

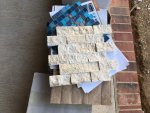
The outside walls of the spa and outside walls of the columns will be clad in 2x4" light split travertine ledgestone. The tile is NPT Jules Rustic Blend. The wife changed tile and ledgestone choices a few times throughout the process, so I'm really glad we always got samples and brought them home. Once the shell was complete and I put the original tile sample and ledgestone down there was an immediate.."No, no no, that's no good." I personally have wanted a blue tile from the start and my wife has been anti-blue, so I'm happy with the outcome. We plan to use a light to medium gray grout to tie in the gray in the tile and give the different colored 1x1" tiles a more monolithic look instead of a typical white grout. I'll be meeting with concrete subs next week to get the patio pour wheels moving.
Photo Jan 22, 8 07 40 AM.jpg
 
How in the world did I miss this build in the beginning?? I love what I see so far!

I love how having the samples at home really helped you to see how they will look and got you what YOU wanted in the end!

Kim:kim:
 
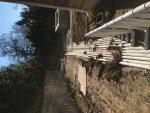
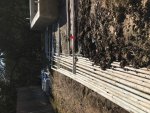
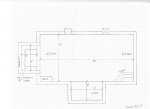
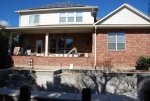
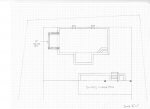
Looking for advice on stairs down from existing covered patio. The sketch below is our current thinking. We will have about a 40" drop from the existing covered patio to the new patio resulting in 6 steps (5 steps with last step being onto the patio). The existing covered patio is narrow (~8 1/2 feet), so our current thinking is to avoid putting up railing across the covered patio as much as possible and use raised planters. The raised planters will be 2' tall and extend out 4' from the house. These will be stone and be capped with the same travertine as the pool. Note: the planned step locations are about where the ladder is leaning against the house in the pic. So...questions: 1) Hand railing or no hand railing coming down the stairs? 2) Are the dimensions of the planters reasonable (2' tall and extending 4' from the house)...this will align with all but the last step. 3) Should we go wider than 4' with the steps, not a big deal to do this? 4) Other thoughts?

Pool and yard fina2l.jpgPool final small.jpg
DSC_0213.jpgDSC_0217.jpg
 
Foos,

To my eye, 4 feet is not wide enough. I think wider would make the stairs look like they were designed to be there, not something added at the last minute.

I'd go with at least 6 feet and maybe 8 feet.

Suggest you mock up something with scrap plywood or cardboard and see what the two designs look like.

Jim R.
 
Wider the better. 8-12'. They will serve as seating. People will sit on them so you want them to be wide enough to walk past them. And railings certainly should go on both sides for safety.
 

Enjoying this content?

Support TFP with a donation.

Give Support
Thread Status
Hello , This thread has been inactive for over 60 days. New postings here are unlikely to be seen or responded to by other members. For better visibility, consider Starting A New Thread.