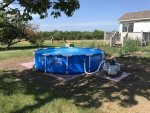
My Over-Engineered 12x30 Intex Install

TankusKC

Bronze Supporter
Jun 21, 2018
21
Kansas City (ish)
Not bad for a weekend's worth of work :)

Started off with an old pool site. There was a small AGP here years ago, and when I had it removed there were still remnants of the rubber mat left behind.

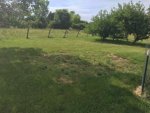
A few years ago I had some grading work done around the house and the guys were "nice enough" to pile the extra dirt on top of this rubber mat. Welcome to weedville.
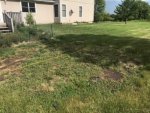
IMG_3884.jpg

IMG_3886.jpg

On Thursday I had a guy come out and level the ground. He dug up what he could of the old matt and laser-leveled the area. Cost: $300
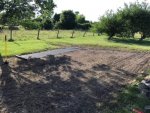
IMG_3911.jpg

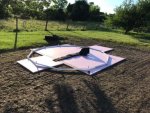
I was concerned about the tire tread marks, but thought the rigid foam I had planned on using for the bottom would even things out. It did - or at least to enough to make me happy :)
IMG_3913.jpg
 
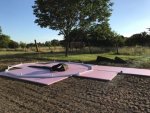
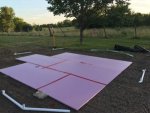
Original plans were to make a 16x16 square with the foam insulation. Once I laid out the frame parts though I realized I could get away with a 12x12 area. Cost: 5 Sheets x $20/Sheet = $100

I used 1" tounge-and-groove Owens Corning Foamular Extruded Polystyrene Insulation (XPS versus EPS) so it was easier to keep together while taping with red Tyvek tape. Cost: $11

Note the curious cow in the background - that's Kelso, one of my pet steers.

IMG_3917.jpg
 
Erm... How do I add more pictures? :confused:
If you've reached your limit, you either a) use some other hosting site -- avoid photobucket since they disabled hotlinking -- or b) become a supporter and get more server space. That's how this place stays open. You might have noticed the refreshing lack of popup ads, and autoplaying videos, and so on.
 
If you've reached your limit, you either a) use some other hosting site -- avoid photobucket since they disabled hotlinking -- or b) become a supporter and get more server space. That's how this place stays open. You might have noticed the refreshing lack of popup ads, and autoplaying videos, and so on.

Gotcha, thanks! This site has been such a help already, I certainly don't mind donating :)
 
Okay, back to the story :)

Getting everything triple-taped. Curious Kelso is really enjoying the show...

IMG_3922.jpg

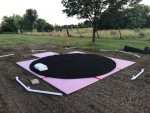
All taped up with a Armor Shield Pool Floor Liner Pad on top. Cost: $35

IMG_3923.jpg

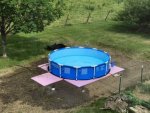
Got it all set up with an inch or two of water in, just to hold it in place while working out out the liner wrinkles.

IMG_3925.jpg

Waiting on Amazon to deliver the new pump and filter. Stay tuned!
 
Kelso is really getting in to the show you were putting on! Good work on everything you have done so far.

While you are working out the wrinkles and waiting for the pump and filter you should add about 1 cup of chlorine each day to keep the algae monster away.. Walk around with a straw broom or boat paddle to stir up the water to mix it up good.

Kim:kim:

Read my mind :) I was just thinking I should do something to keep it from turning green. Thanks for the tip!
 
that looks great. i have one question though, did you put pavers underneath the legs? you can never over engineer in my opinion. i think next year when i get a new Intex pool, i am going to change to the foam under the pool. i have the anti fatigue mats under mine now, and i love them. the problem with the anti fatigue mats are they allow nutsedge to grow through. this year i put down the mats and also the armor shield.
did the name Kelso, come from "That 70's Show?

I considered putting pavers down (even bought them) but decided against it for now. The pool is about half-full and the legs don't seem to be digging into the foam all that much.

Eek! I hope my triple-taped foam keeps the grass from growing through - I would have thought the mats would have been a good barrier!
 

Enjoying this content?

Support TFP with a donation.

Give Support
Weekend #2 in the books!

The good: Got the pool filled up, all of the hoses and adapters connected, put together the pump and filter, added a bag of pool salt, and fired up the SWG.

IMG_3964.jpg

The primary puddle-goers approve.

IMG_3973.jpg

The bad: This thing somehow disconnected from the pool in the middle of the night, dumping out a third of the pool water and letting the pump run dry for several hours :grrrr:

IMG_3964b.jpg

My desire to hard-plumb this is increasing... PVC is so cheap - cheaper than all these connectors and stuff. Probably more reliable, too.

Did my first water test (just a cheapo WalMart strip test), and everything is in range except the FC and TA, which were both on the low end. The SWG is still going through it's shock/boost cycle, so I'll test it again when it's done. Figured I might get a low salt warning due to losing some of the pool water, but haven't seen it yet.

(ETA) Here are some of the problems I encountered:

- It took a bit to figure out how to connect everything... Another user suggested I'd have to cut larger holes into the liner to accommodate the bigger pipes, but instead I just got "Hose Adapter B" to connect the 1.25" nubs to the 1.5" shut-off valves. So it goes: Pump > Hose > Plunger Valve > Adapter B > Pool Liner

- The pump wasn't creating good suction and was making this surging, chugging sound rather than a constant hum. Turns out the O-Ring in the filter basket area wasn't seated properly. Fixed that and made sure the two connections (top and bottom-side) were closed all the way once the area was full of water.

- Somehow the plunger valve got stripped out, causing it to fail. I'm not sure if I tightened it too much or if it was like that before I put it on.
 
Last edited:
Looks good. I think it was me that suggested cutting the hole? (didn't go back and check my messages). I originally bought the exact adapters you have, but ended up cutting the holes and not using them. I was worried about using hose clamps to attach. I'm glad they are working out for you. Less nerve wracking than than cutting a hole in a new pool!

I also had the same problem with the filter basket.

Be sure to update if you decide to hard plumb. Would like to see pics of that. How do you like the over the wall skimmer? Mine works okay, but I find when my pump shuts off some of the stuff floats back out in to the pool. I wonder if a thru wall would do the same? Thinking of upgrading.

I know you're glad to be up and running, and I'm sure the kiddos are loving it!

Hi Scout! Yes, that was you :D I was concerned about the plastic clamps, too, but so far so good. Cutting a bigger hole in the pool wall made me more nervous lol

I've had the same problem with the skimmer. I was thinking of getting some of those sock-like things? Thought maybe they'd keep the bugs trapped... I wonder if an in-wall would have a similar problem - haven't looked into those much though.
 
Hard plumb all of the way! Also dig down under anywhere the water goes into and out of the pool. Go down about 2" and put gravel in the hole. Make sure to go out far enough so when the kids get the water rocking it will catch the splash. Then put pavers over that. Make sure there is a slight slant so the water will go away from the pool to help keep it from washing out the bottom.

Through the wall skimmers have a weir door. When the pump stops pulling the water the door floats back up and traps most of the stuff in the basket.

-basket socks-get these instead: https://www.amazon.com/Disposable-Hair-Spun-Bonded-Polypropylene-White/dp/B002XK2FS0/ref=sr_1_7?ie=UTF8&qid=1530565361&sr=8-7&keywords=hair+nets

LOVE those cute faces! That says "Thanks Dad!" to the max!! I bet they are sleeping good now!!!

Kim:kim:
 
Hard plumb all of the way! Also dig down under anywhere the water goes into and out of the pool. Go down about 2" and put gravel in the hole. Make sure to go out far enough so when the kids get the water rocking it will catch the splash. Then put pavers over that. Make sure there is a slight slant so the water will go away from the pool to help keep it from washing out the bottom.

Ahh, more great tips, thanks!!

LOVE those cute faces! That says "Thanks Dad!" to the max!! I bet they are sleeping good now!!!
This was all Mama power ;) They were pretty beat, and I had a nice sunset soak after they were in bed :whoot:
 
Thread Status
Hello , This thread has been inactive for over 60 days. New postings here are unlikely to be seen or responded to by other members. For better visibility, consider Starting A New Thread.