- May 18, 2014
- 17
- Pool Size
- 12000
- Surface
- Plaster
- Chlorine
- Salt Water Generator
- SWG Type
- Hayward Turbo Cell (T-CELL-5)
Hello everyone. I have a main drain plumbing line leak. It is quite significant. Can't hold 5psi for 30 seconds. Pool company refuses to fix it and just wants to plug the drains with hydraulic cement. This isn't my first pool and I do not want to eliminate the main drain lines if at all possible.
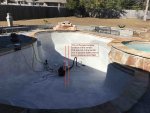
The leak is in the sidewall of the pool. The builder, Blue Haven, ran the main drain plumbing up the sidewall of the pool rather than straight out and then up where I could have gotten to the bottom 90 and possibly fixed it. The proper repair would require jackhammering out the sidewall and bottom to get to the plumbing.
So, I found some information about Pipe-Fuze and called them. They told me that if the plumbing cannot hold 5psi for at least 30 seconds it was too big of a leak for their product to fix. I then found Fix-A-Leak by Marlig Industries out of Ontario, Canada. I contacted them and they said their product might work, but I would have to create a closed loop with my main drain plumbing and run it at a pressure between 5 and 10psi during the process.
My setup:
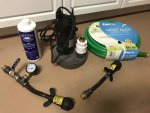
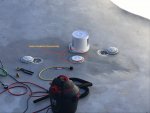
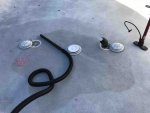
I purchased two 2" bypass plugs that I could connect a garden hose to. I plugged the closest main drain fitting with a 2" compression test plug, then put one of the bypass plugs in the farthest main drain fitting. I removed the pump from the plumping and installed the other bypass plug into the plumbing where the pump was connected. The second bypass plug has a pressure gauge and a ball valve so I can close off the valve to increase pressure. The bypass in the main drain is connected via a garden hose to a submersible pump I have in a large pail that I filled with water. The other bypass is connected to a garden hose that dumps back into the large pail.
Process:
I filled the pail with water and ran the pump for about 30 seconds until it drained the pail. I then repeated this process several times to get all air out of the line. After the air was pushed out by the water I continued running the pump. The leak was so significant under pressure that my garden hose supplying water to the pail could not keep up. So, I filled the pail with water again and dumped in about a quarter of the product (32oz bottle). I repeated this three more times until all of the product was in the line. I then ran the pump a few more times until al the water was clear, then I shut it down. The leak is significant enough that it siphoned all the water out of the pail, so my assumption is that the product is most certainly being sucked into the break.
I let the system sit for about four hours, then I went out and refilled the pail with water and started the pump and had to evacuate all the air from the line. Once this was done I ran the pump with a full pail and it appear to have slowed the leak significantly. I have ordered three more bottles and will repeat this process until the leak stops.
Has anyone else had any long-term success with this product? The company told me that I may have to repeat the process multiple times before it is fixed, but sounded pretty confident I would eventually succeed in repairing the leak. The reviews for this product are either stellar, or miserable.
Thanks for any info!


