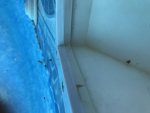
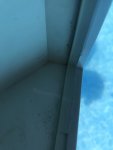
finding water leak near skimmer basket

"Also, why are you trying to seal the joint in between the faceplate and the liner? The back of the liner is what needs to be sealed, not the front in this case."
The gasket (if installed over the wall and liner) keeps the water from getting between the liner and the wall. I guess you don't have to seal the liner to the wall but the butterfly gasket protects the wall from the water that will eventually cause it to rust. The gasket has to be against the faceplate to get a water proof seal. Our Doughboy installation instructions have the gasket between the faceplate and the liner, not between the liner and the wall (on the inside of the pool) and between the outside of wall and skimmer assembly on the outside of the pool.
We don't have any leaks that I can detect.
 
Here's written instructions that might help a little:
chrome-extension://oemmndcbldboiebfnladdacbdfmadadm/http://www.ultramodern.com/wp-content/uploads/2016/06/BUL-153-DOUGHBOY-U-GASKET-INSTALLATION-INSTRUCTIONS-FOR-SKIMMER.pdf
 
Ok, here's another update from my end.

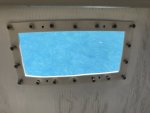
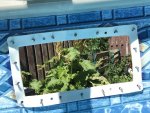
The second coat of rust paint dried overnight on Saturday and I got back at it Sunday morning. First I did a dry fit check of the new butterfly gasket around the edge of the skimmer hole. It lined up well and the screw holes in the liner still lined up with the screw holes in the wall (i.e. the liner did not shift overnight).:
110181

110182


I then proceeded to install the skimmer in place. As I got towards the end of tightening the faceplate screws, I was looking along the edge of the faceplate and I could again see that the gasket was bulging out the side. The faceplate I have for this skimmer has a rounded 90 degree corner all along the inside edge which is supposed to cover the edge of the gasket along the inside of the opening - I wish I had taken a picture of it to share with you but I didn't. Anyway, it seems the inner dimension of the faceplate opening did not account for the added padding along that edge contributed by the butterfly gasket (almost as if it was designed for non-butterfly gasket). Furthermore, the size of the opening in the pool wall also didn't account for the butterfly gasket. The net result was that, instead of the flat part of the faceplate sitting flush on the gasket and the corner of the faceplate rounding the inner edge of the gasket, I was ending up with the inner corner of the faceplate pressing into the flat portion of the gasket causing it to bulge and causing less than ideal contact against the surface of the faceplate. I thought for sure that must have been the original issue that caused the leak in the first place.

So, I took everything apart and removed the gasket. With my dremel, I shaved about 0.05" of material along the edge of the opening in the pool wall - just enough so that I could tightly press the faceplate over the gasket and have the inner corner of the of the faceplate come around the inner border of the gasket and fit within the wall hole. It was still a very tight fit so it took some careful pressing and a few retries but I did get it to fit finally.

After tightening everything with the skimmer mounted, I could see no bulging gasket along the inner edge of the skimmer mouth. I took a couple of shots of it here:
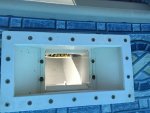
110187

110188

110189


As I said, I really thought the ill-fitting gasket and faceplate had been the source of the original problem and I was feeling a whole lot better about how it was fitting this time around. With everything tightened up, I went ahead and started re-filling the pool. When it was full again, I started the system back up and ran the system overnight to get some circulation and filtration going.

Unfortunately, when I woke up this morning to get ready for work I found that the level dropped. I didn't take a good measurement but I think I had lost a good 3/4 inch maybe more during the overnight hours. And today after work I found that it dropped a bit more as compared to the morning. So, I'm clearly still losing water at roughly the same rate that I was before.

So now, I don't know what to think. Some options that come to mind include:
A. something isn't tight enough or lined up properly in my reinstallation
B. the original skimmer mount and/or faceplate are compromised and I should have replaced them as part of this job.
C. I've been barking up the wrong tree this whole time and the leak is actually coming from somewhere else altogether.

I really don't like all of the guesswork involved here especially since each trial and error attempt takes so much time and effort to get through. I need a better test or measurement to give me a stronger signal that I'm actually working on the right area and not chasing after ghosts.

Should I try an ink test to hopefully see visually where the water is escaping? I've never tried one before so I don't know how effective they are. Any other thoughts on what I should try next? Again, my preference would be to do something that will give me better information on where the actual problem is coming from and then I can focus on that area and do whatever it takes to get it fixed.

Let me know.

Thanks,
Denis
 
I would get some food coloring and use it to test for leaks around the skimmer and around the return. Move very slowly as not to disturb the water so you can track where the food coloring goes. Watch for the color to get sucked into the wall and that will be the location of your leak.

What kind of filter do you have?
 
The food coloring test is very helpful in finding leaks. Slow methodical detective work.
Make sure to also check around the return opening for leaks, possible gasket problem, rust.
 
We did a quick dye test tonight around the skimmer and return. We didn't see any action around the return. In the skimmer area we saw a very slow draw into the mouth of the skimmer almost as if there was a very slow current going in towards the pump but didn't see much being drawn towards the edges of the faceplate which is what I was looking for.

Now for tonight's test, the water level was higher than what we normally keep it. It was near the top edge of the mouth of the skimmer. I don't know if that affected our test in any way. Part of the mystery is that we don't really know how intense the leak is and therefore we don't know how strongly it will pull on the dye.

Bottom line is we found the test to be inconclusive so far. We turned the system back on because we wanted to take another look at suction side plumbing from the skimmer to the pump. We looked for any sign of leakage at each of the joints but found nothing and we're not seeing any air getting into the pump chamber. We were not as thorough on the pressure side plumbing but there's no sign of any water on the concrete anywhere near those hoses and joints.

We're going to leave the system running tonight and we expect the level to drop the better part of an inch by morning. At that point we can stop the pump, close the inlet and outlet valves to the system, let all of the current settle down and try another dye test near the skimmer, return, and along the wall sections that are nearest to where the turf gets saturated with water when the pool is leaking.

This is like hunting for a needle in a haystack.
 
What great detective work. :scratch:
Another thought: check the multi port valve on your filter. Doughboy pools require you have a plug attached at the discharge outlet on the multi port valve while running the filter. If not, water leaks out of it and out the discharge hose. Check the spider gasket and make sure there are no leaks, that it is seated correctly. That could also leak water out of the pool and out the discharge.

Please fill out your signature, with the exact type pool, filter, pump. This would help any one of the mods (or us members) understand what equipment you are using. :goodjob:
 
Last edited:
I'm sorry I didn't catch you mentioning this before. That is a big clue for you to check out.

Right, but unfortunately it's still close enough to where the pool equipment is that it doesn't completely rule out the skimmer, return, and equipment in our hunt. I have a round pool and if you put the skimmer at the 6 o'clock point then the small shed that has the pump and filter is sitting part way between 6 o'clock and 7 o'clock and the saturated turf in a zone roughly in the 7 o'clock - 8 o'clock area. I have a 1.5 foot strip of river rock that runs along the outer perimeter of the pool wall and then grass. The other complication is that I have slight grade to my yard that runs roughly from the 5 o'clock area behind the pool and runs slightly downward in the direction along the tangent line at 6 o'clock.

So in my mind, it's still possible that water is getting out somewhere in the area of the skimmer and following grade downward and collecting where we see it in the 7 o'clock - 8 o'clock area.

My wife did another dye test this morning along the section from the return and skimmer to roughly the 8 o'clock position and found nothing conclusive. We agreed to let the water level drop some more over the course of the day and then do another test tonight. The idea here is that perhaps the draw on the dye is less visible at some water depths and more visible at others all depending on what height along the wall the leak is happening at.
 

Enjoying this content?

Support TFP with a donation.

Give Support
We agreed to let the water level drop some more over the course of the day and then do another test tonight. The idea here is that perhaps the draw on the dye is less visible at some water depths and more visible at others all depending on what height along the wall the leak is happening at.
Have you let the water level drop till it stops? Where did it seem to drop to? If there is a leak in the liner, water loss will stop once it gets to the hole/leak.

Right, but unfortunately it's still close enough to where the pool equipment is that it doesn't completely rule out the skimmer, return, and equipment in our hunt. I have a round pool and if you put the skimmer at the 6 o'clock point then the small shed that has the pump and filter is sitting part way between 6 o'clock and 7 o'clock and the saturated turf in a zone roughly in the 7 o'clock - 8 o'clock area.
Is there water in the equipment shed? Is the saturated area next to the pool, next to the shed, or following the grade downward from the shed?
Have you checked the hoses going from the skimmer to the pump? the filter?
Have you checked the multivalve, discharge port, spider gasket?
These are other items that could be causing lose of water. And maybe more with the equipment turned on.

More detective work. Can I call you Sherlock? :giggle:
 
Well, we might be seeing our first trace of water. It's not as heavy as I was looking for but right now I'll take any evidence I can find. It looks like it might be coming from somewhere near the base of the filter housing. I'm thinking the connection at the outlet towards the heater may be a bit loose.

We did another dye test earlier in the evening but didn't see anything so we decided to turn the system back on and leave it on for a while to hopefully see some evidence of leakage somewhere around the system. We went back out shortly after dusk and found a tiny puddle of water near the base of the filter inside the equipment shed. By that time it was too dark to do any real work on it and we were happy enough to have a clue to go on so we shut the system back down again and left it for the night. We'll do a thorough inspection and check all of the connections in that area when we get our next opportunity to work on it and we'll see where that gets us.
 
  • Like
Reactions: mariane
Thread Status
Hello , This thread has been inactive for over 60 days. New postings here are unlikely to be seen or responded to by other members. For better visibility, consider Starting A New Thread.