DIY - Pool Renovation Orlando

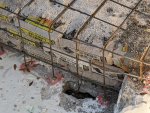
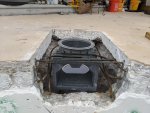
I cut out the old skimmer:

20191103_151413.jpg
20191103_151417.jpg

The old skimmer was very brittle and the "throat" area would snap very easily.
The old skimmer was not concreted in. It just had the 4" slab on top of it.
20191103_154956.jpg
Old skimmer out.
20191208_151712.jpg
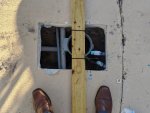
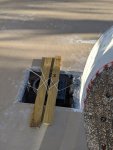
It is hard to see in this photo. But I have the new skimmer zip tied to a piece of wood. This will keep the top of the skimmer flush with my decking. I have not attached the piping yet on this.
IMG_20191216_083218.jpg

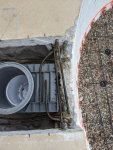
Here you can see the throat of the new skimmer.
IMG_20191216_083221.jpg

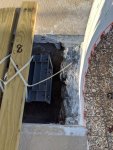
Next to do on the skimmer is glue the PVC pipe to the skimmer and install rebar and it will be ready to be concreted in place.
 
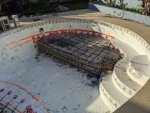
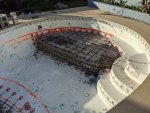
So here you can see where I changed direction from forming the tanning shelf with the block to using bags of concrete.
20191128_093159.jpg

I ended up adding two dump truck (14 tons) of 57 rock to the deep end.
(This part was brutal wheel barreling the rock into my backyard one at a time).

20191120_174800.jpg
This is also when I decided to make it into a play pool.
The Depth should be 4' (old deep end) to 5' (in the middle) to 3.75' (in the shallow end by the tanning shelf).
20191128_093217.jpg
Unfortunately I didn't seem to have taken any pictures of installing the two new main drains, but you can see the are in the center of the pool now and are at the deepest spots. They are 3.5' apart from each other to prevent any suction hazards.
 
Next was time to add rebar.
I purchased 75 - 20' x 3/8" rebar (#3 rebar).

I drilled around the pool in a 12" grid where I wanted the new floor and tanning shelf to go (I drilled 3.5" deep).
I then cut the rebar into 6.5' pieces and epoxied the rebar into the shell.
After letting the epoxy cure for 24 hours I went in and bent the rebar into shape to form the grid.

20191129_125429.jpg
20191129_125435.jpg
20191129_125441.jpg
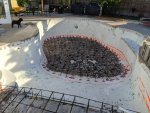
Here you can see all the rebar is not pointing in the direction it needs to be (a grid pattern). From here each piece is bent to match a piece on the other side.
20191129_135402.jpg
20191129_135406.jpg
20191129_135420.jpg
20191129_135428.jpg
 

Attachments

  • 20191129_125429.jpg
    20191129_125429.jpg
    523.9 KB · Views: 25
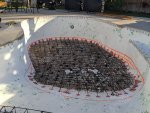
Progress bending and tying the rebar.
Its hard to explain but after bending the rebar you may find places and locations that you need to drill and add additional rebar (in particular the corners). So next time I would have drilled every 6" for the rebar in the 4 corners.

Any splice (adding a piece of rebar to make two pieces attached are overlapped a minimum of 60 times the thickness of the rebar (60 x 3/8" = 22.5" overlap). I ended up overlapping all my laps 24" as it was easier to remember.

I added rebar chairs to hold up the rebar off the rock, but by the time I was done tieing ever piece of rebar (every single overlap is tied 6 times, 3 on each side, plus every intersection of rebar is also tied) the grid is so strong and firm I can walk across it and it hardly deflects.

The rebar was also bonded to the existing rebar in the existing shell of the pool.
 

Attachments

  • 20191205_085214.jpg
    20191205_085214.jpg
    428.8 KB · Views: 30
  • 20191205_085238.jpg
    20191205_085238.jpg
    615.4 KB · Views: 31
  • 20191205_085240.jpg
    20191205_085240.jpg
    582.5 KB · Views: 31
  • 20191205_085302.jpg
    20191205_085302.jpg
    474.7 KB · Views: 32
  • IMG_20191216_083229.jpg
    IMG_20191216_083229.jpg
    624.9 KB · Views: 31
  • IMG_20191216_083235.jpg
    IMG_20191216_083235.jpg
    657.7 KB · Views: 31
  • IMG_20191216_083249.jpg
    IMG_20191216_083249.jpg
    649.9 KB · Views: 30
  • IMG_20191216_083252.jpg
    IMG_20191216_083252.jpg
    656.8 KB · Views: 28
I mentioned that I was going to be adding an autofill and auto drain. I purchased a Pentair T40fw.

This autofill requires a 1.5" equalizer pipe between the pool and the autofill canister.

Here you can see the hole that I drilled through for the equalizer line.
IMG_20191216_083228.jpg

This is hole I cut into the deck for the autofill canister. The autofill has three lines going into it.
1. 1.5" conduit from the pool to the canister. This is used to make the water level in the canister the same as the level in the pool.
2. 3/4" incoming water line. The bottom of the canister has a 3/4" pvc connection to attach to my water supply. I will add a double check, backflow preventer to this line before connecting it to my house water supply. A Fluidmaster toilet valve is installed in the canister later on to turn on and off the water.
3. 3/4" drain line. This comes off the top of the canister and will drain out if the water ever gets that high. I will have this drain to a french drain.
IMG_20191216_083303.jpg

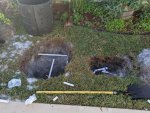
Here you can see two holes just off my deck for the supply water line and the french drain. The hole on the left will have the NDP Flo Well. The drain line will drip into that and soak away.
The water line will be in a irrigation valve box in the hole on the right with a shut off valve. I plan to install a water meter to be able to monitor water consumption in the future.
IMG_20191216_083310.jpg
 
I have a question for the experts: I plan to have two 7.5" Umbrella stand sleeves added to the tanning shelf.
I see three potential ways to install.

1. Have them shot into the gunite.
2. Have a 2.5" piece of PVC shot into the gunite (remove pvc before it dries completely). Then plaster the sleeves in when the plaster is being done.
3. Shoot gunite solid. Drill a hole after the gunite is done where I want the sleeve and then plaster them in.

Which is the best method? @ajw22 @jimmythegreek @Pool Clown
 
Just tell the crew where you want the sleeves and they'll leave you a 4" wide hole that the plasterers can drop the sleeves in when the pool is getting finished up.

No need for pipe or anything like that unless you're pouring the shelf. Im assuming your using gunite?
 

Enjoying this content?

Support TFP with a donation.

Give Support
My resurface guy is coming on Tuesday to lay the tile. He planning on using glass mosaic tile (1"x1" tile in a 3x3 pattern) to make step spotters.

I'm concerned that the glass will scratch or discolor over time. Especially with a metal pool brush which I have used in the past is the algae gets bad.

My water line tile is a plain 6x6 blue ceramic tile.

Is there concern with the glass spotters?
I have cut a couple of the plain blue tiles into 3x3 squares and can use that instead if needed.

Any thoughts?
 
If you have read anything for me you will know I LOVE BLING like glass tile...........but you have a very valid concern :( I would go with the cut ceramic tile. I also think it might look even better than the glass tile as it matches the other tile.

Kim:kim:
 
Thread Status
Hello , This thread has been inactive for over 60 days. New postings here are unlikely to be seen or responded to by other members. For better visibility, consider Starting A New Thread.