First Pool 2nd Season Build

Karlw

0
Sep 1, 2014
24
Sydney/NSW/Australia
Hi,

1st post ever. Fairly new to the whole pool thing. In the middle of summer now (near Wollongong, Australia) being the 2nd season with the pool. Pool is 12’ x 30” round metal frame. Small pool in the scheme of things I know.

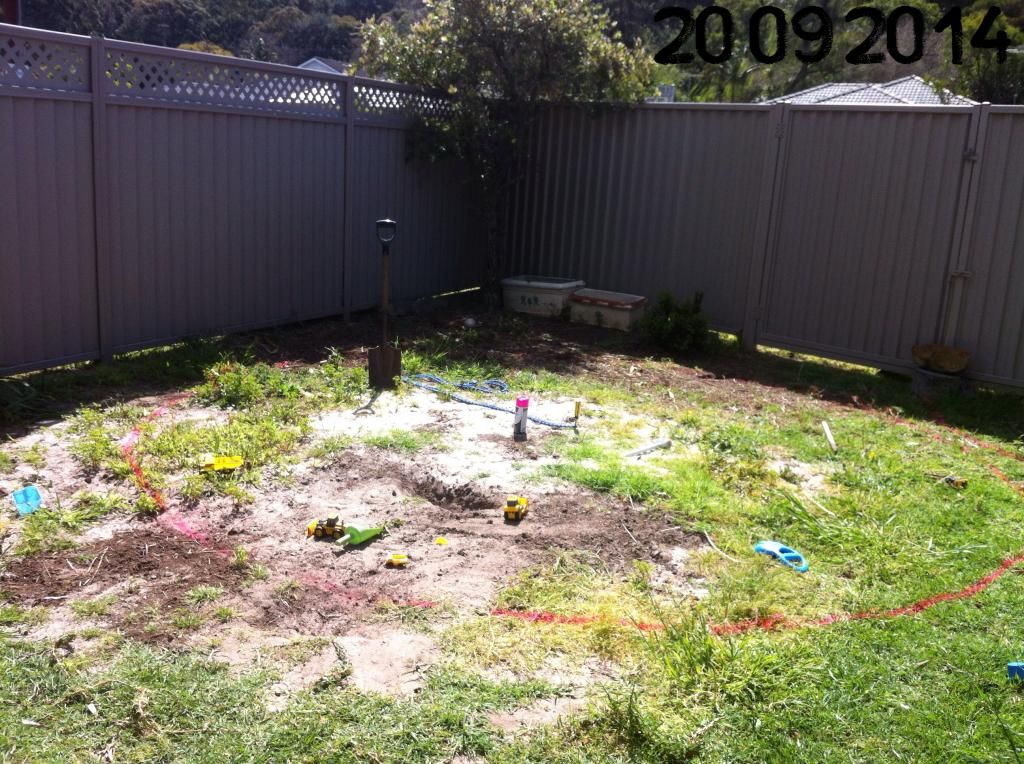
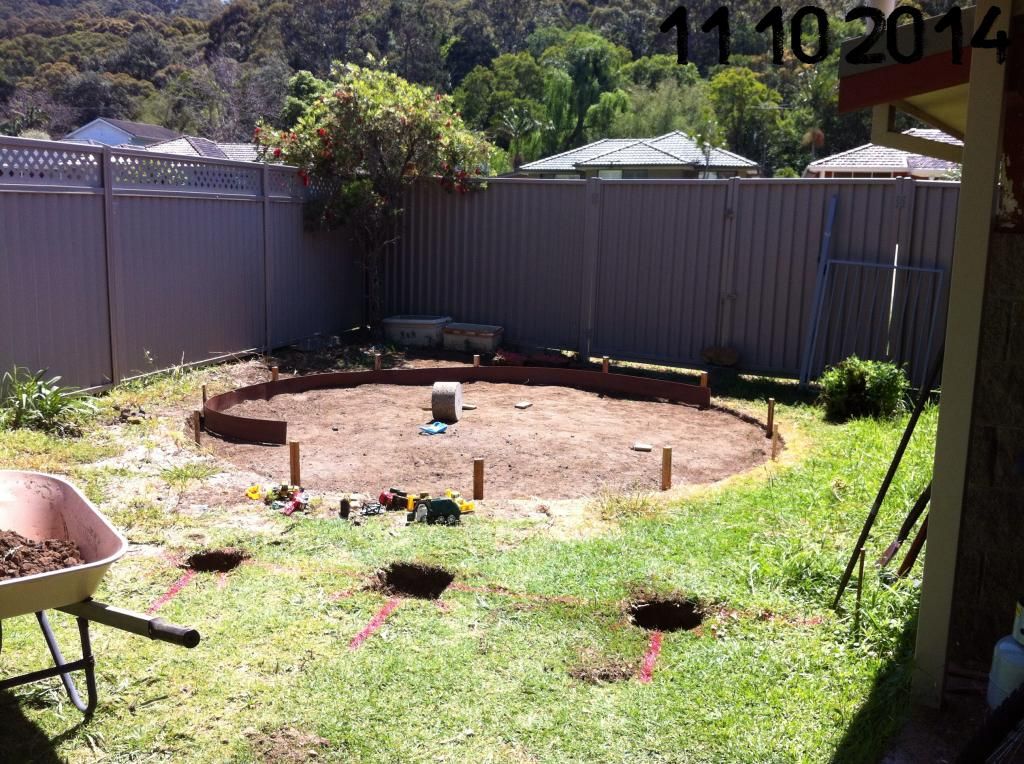
I have created this thread in the hope that it may help others about to embark on the same job. I need to acknowledge the many similar threads on this site that gave me the ideas to do this. In particular this one: http://www.troublefreepool.com/threads/43151-My-2-years-2-pools-build-project-in-pics

OK here goes.

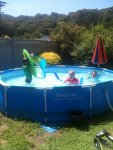
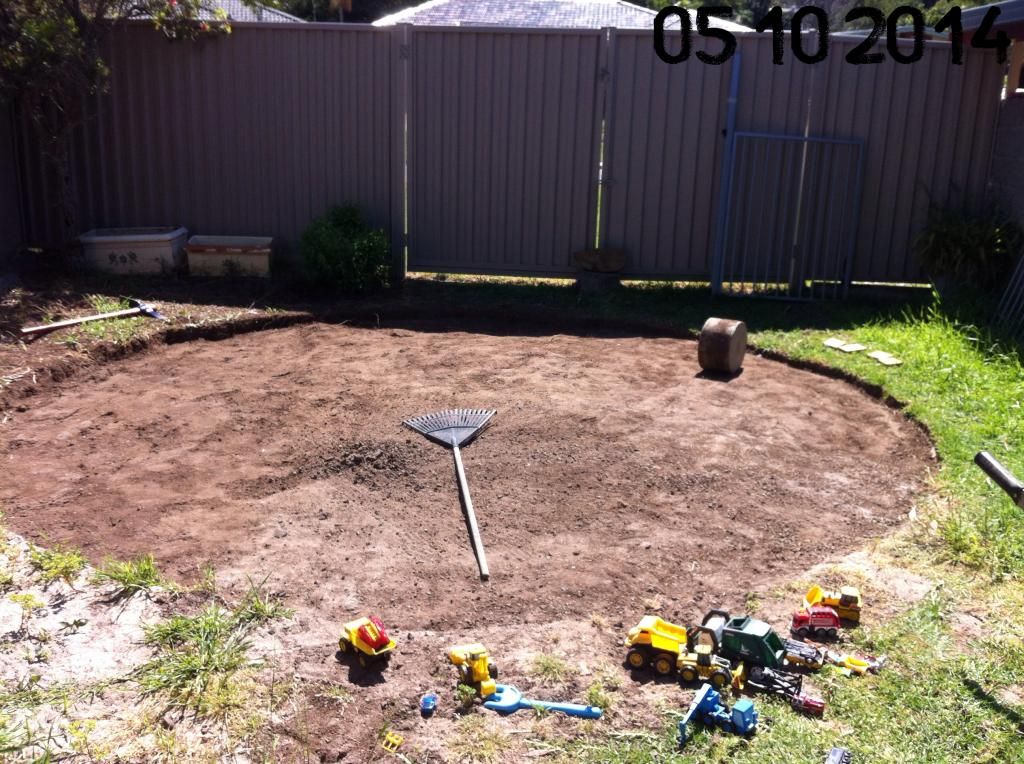
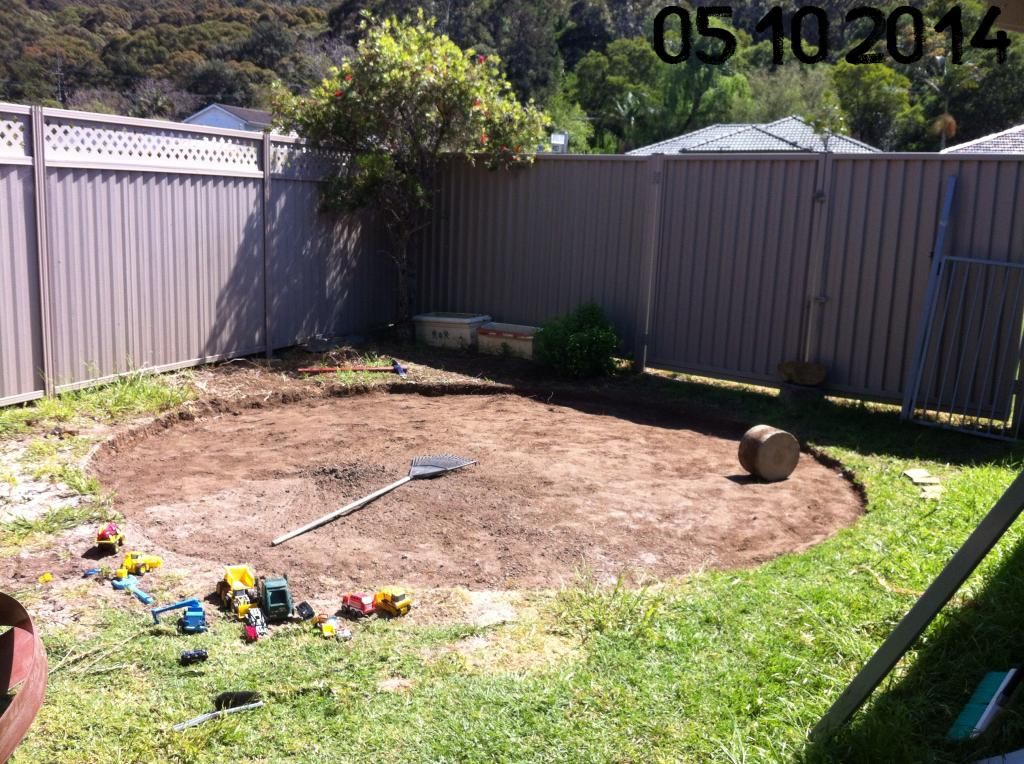
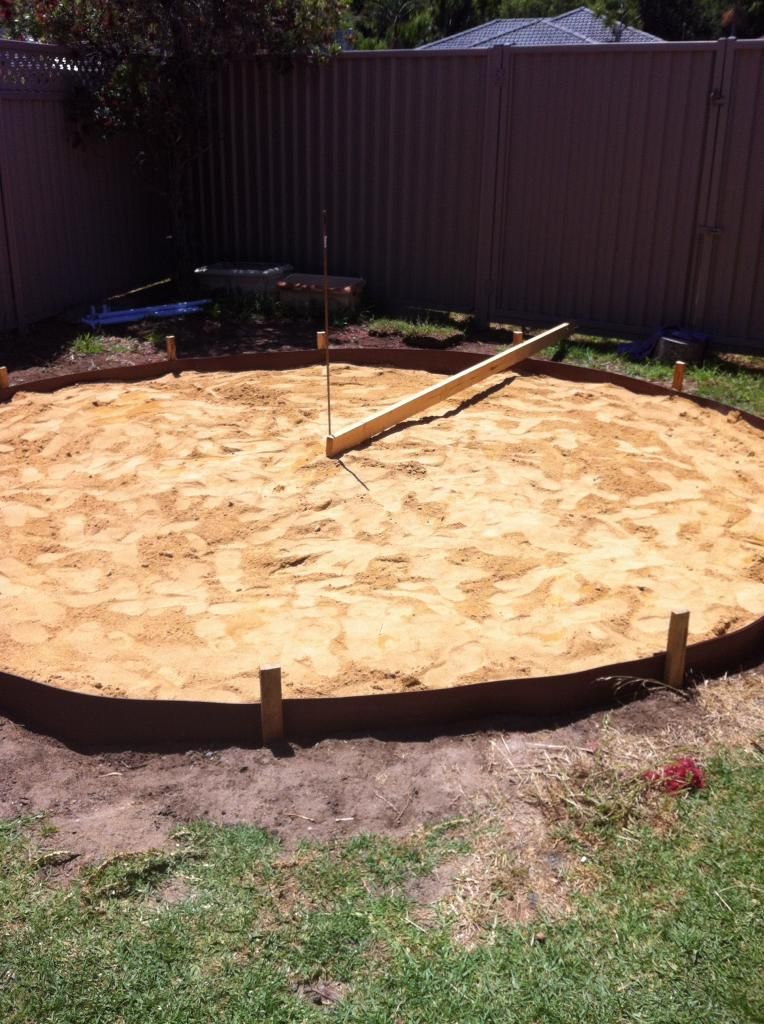
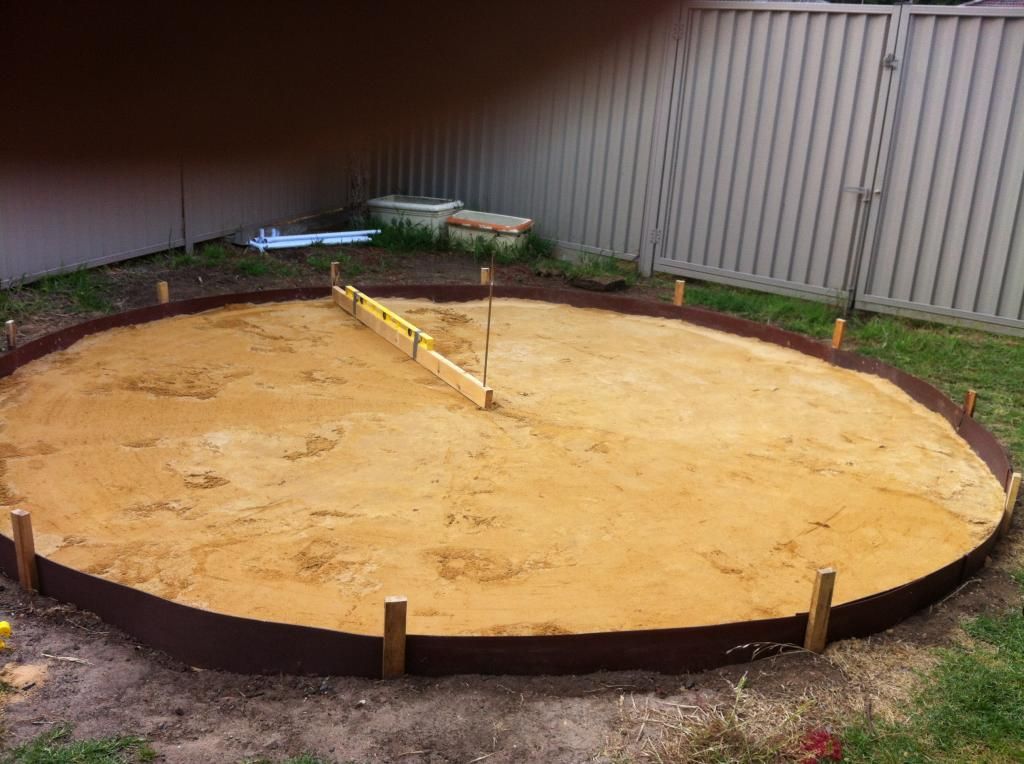
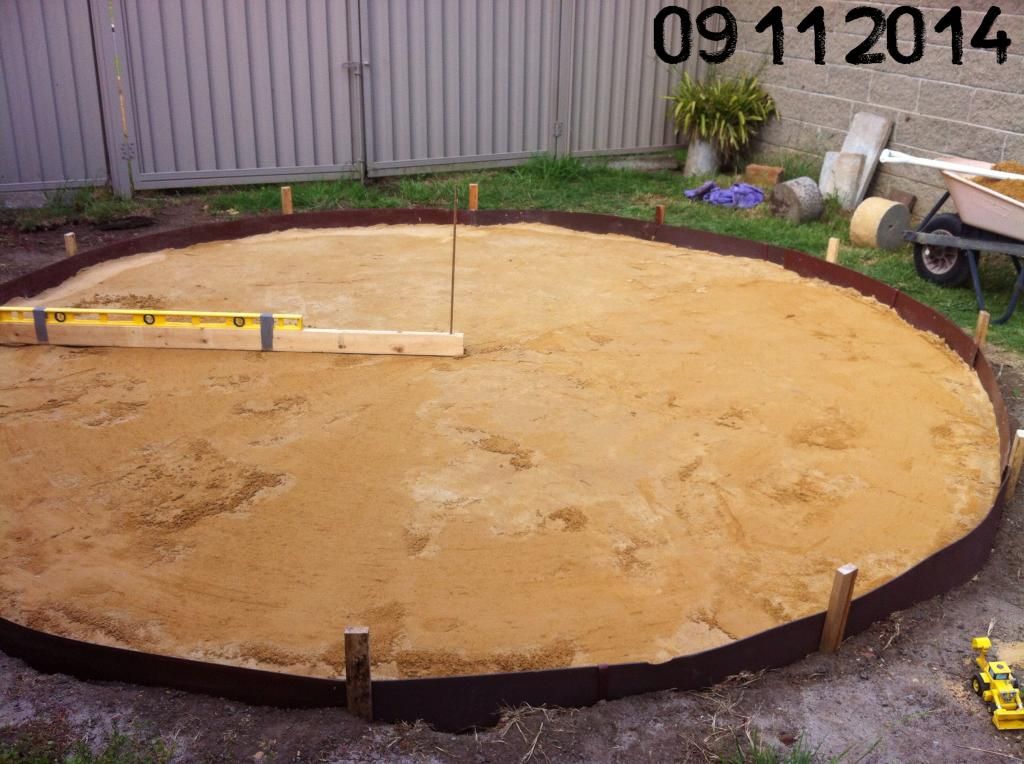
Firstly, last year’s set up. This was really just slapping down the pool on the ground (which we thought was reasonably level) with a cheap tarp underneath. No real site prep – it was just a rush job to get the pool up.
 

Attachments

  • 1.jpg
    1.jpg
    96.1 KB · Views: 237
Thanks for your help Brushpup.....

- - - Updated - - -

That is the only pic I have of last years setup. Whilst it doesn’t look too bad (and we had plenty of fun), there were problems with it:

1. It was about 5” out of level (for a 30” deep pool). I don’t think it was ever a safety issue for this size pool but it sucked nonetheless
2. We only did a very quick inspection for rocks etc and put a cheap tarp underneath. Sharp things (rocks, roots, etc) soon appeared. The liner was never breached however, but it’s worrying when you can feel all those things
3. Without any barrier around the pool, the grass just grows up around the liner and there’s no safe way to cut it. Weed killer might do the job I suppose but then it ends up dead and ugly. So you resort to scissors.
4. The bushes you see in the background look nice in this photo, but actually were quite imposing on the pool area and made it difficult when doing maintenance and getting around outside the pool
5. Without a pool fence, the dog got in amongst it and eventually put her teeth through one of the hoses, and we should have had a pool fence anyway (by law) but it just didn't happen
 
Onto this season. Pool was taken down. I did some clearing of the bushes and other crappy stuff that was growing in the area. Don’t get me wrong I like plants, but they had to go. Then I marked where I wanted the centre of the pool to be, and stuck a big screw driver into the ground. The pool is 12’ diameter and I allowed 1’ extra all around, so a 14’ diameter circle.

As a side note the pool came with a 25W pump with built-in filter. As we all know the pumps that come with these pools are inadequate. I didn’t know this at the time but soon worked it out. I moved to a 45W pump (Intex 604) given to me by a friend which did a better job but still not great. Towards the end of the season I found the Intex 637R (100W) at half price, and have been using this so far this season. For this size pool (about 7000L or 1800 US gal) this pump is perfect. At 1000 gph (pump flow rate) I figure this turns the pool over in about 2 hours. Anyways, height of summer now (2nd season) and I run it 4 hours morning and 4 in the evening. This seems to be enough as the water has been crystal clear for a couple of months. For this pool at least, it even makes vacuuming a pretty straight forward job.
 
Anyway, onto the site prep.

Marking out. Drove a big screwdriver into the ground. Wrapped rope around it and marked the rope (I’m now holding both ends of the rope) with spray paint at the 7’ mark (7’ being the radius for my 14’ circle). A few quick checks and moving the screwdriver once or twice I then knew exactly where I wanted the centre, so I marked out the circle on the ground with the spray paint. You can see my 1 year olds toy diggers in the dirt. They were a prominent feature throughout the work.

3_zps9873b4db.jpg
 
Digging. OK so this represents probably 5 hours work (realistically a day). I was just getting it approx. levelled using a 10’ long 4”x2” with a 4’ level taped to it and just positioning it in various spots to gauge where I had to dig some more. The low side was dug down about 2" and the high side was dug down to be level with the low side. Also compacting as I go (if any filling back required) by rolling a concrete core sample I had lying around (it came with the house which we bought 6 years ago, weighs about 30kgs). Also spent some time getting out any sizable rocks from the top layer.

9_zpsd365528e.jpg


10_zps72e226b0.jpg
 

Enjoying this content?

Support TFP with a donation.

Give Support
Border completed (well sort of). Fence is up and I’ve brought in the brickies sand into the pool area. Kids enjoying the temporary sand pit. Actually the little one had a great time with his trucks and diggers while I was doing this. This wasn’t all the sand I had but about 2/3 of it (which will become clear later). I think I ordered 2 tonne from memory.

16_zps9d7c47fa.jpg


17_zps6913e8e4.jpg
 
Levelling. A bit of preliminary levelling (with the 2x4) and tamping (spraying with water then using my 30kg concrete roller) has been done. A piece of dowel was driven into the ground at the centre (with an extra foot around the pool this doesn’t have to be mm accurate). My 10’ 2x4 is sitting next to the dowel to give me an idea of where to cut it. This will go over the dowel and “spun” around to do final levelling.

21_zpsd0ab1e02.jpg
 
More levelling. I cut my 4x2 down to 7’ give or take. A hole is drilled through the 2” side a few inches from the end. Then the 4’ level is taped to it. Then it is lowered over the dowel. The outer end of the 2x4 is then a few inches short of the installed barrier.

22_zps27ff4bf4.jpg
 
More levelling.
Make no mistake this is hard work and time consuming.
1. Throw some sand down to where you think the low spots are
2. Position yourself behind the 2x4 about half way between the centre and the edge, and whilst on your knees pull the 2x4 towards you whilst applying downward pressure and keeping that bubble centered
3. Carefully remove any sand scraped away by the 2x4 in step 2
4. Move backwards around the circle and repeat steps 1 to 3. It can take an hour to go around once
5. Tamp (I didn’t rent a proper tamper instead I wet the area thoroughly then rolled my concrete roller around and waited for it to dry.
6. Repeat the whole process. The more iterations the better, but after 3 or 4 it get the better of you and I figure the value of continuing diminishes

25_zps18e51acc.jpg
 
Hi Jabooh1,

I only compressed it using the concrete rollers I had. You can see them in the pics. They are actually core samples that were lying in the back yard when we bought the house years ago. I knew they'd do a pretty good job of compacting the sand. Yes a gas powered plate compactor would probably have done a better job but I got there. Once wet and rolled, then dried (a few times over), the sand was well compacted and hard.
 
My dowel broke at ground level from the forces of the 2x4 (my drilled hole wasn’t perfect so as the 2x4 was rotated it wasn’t quite spinning freely. Anyway I hammered the dowel further into the ground then bashed in a length of copper pipe (which I should have done in the first place), and re-drilled the hole in the 2x4. Much better and stronger.

29_zps4cc0c1f8.jpg
 
Position pavers. Satisfied that the site is level I then got out the pool frame. Connect top of frame together and place paver under each upright. In this case centred under the uprights (see my comments in the “What I would do different next time” section, which will come at the end).

31_zpsb5056143.jpg
 

Enjoying this content?

Support TFP with a donation.

Give Support
Thread Status
Hello , This thread has been inactive for over 60 days. New postings here are unlikely to be seen or responded to by other members. For better visibility, consider Starting A New Thread.