Dang Brad... you are getting the pool into shape! I bet you are sore at the end of each day!!!

DIY Pool restoration project
- Thread starter bradisdrab
- Start date
You are using an out of date browser. It may not display this or other websites correctly.
You should upgrade or use an alternative browser.
You should upgrade or use an alternative browser.
SO SORE, but you know, it's worth it!
I don't mind putting in so much work for myself like this. I feel great about being sore and exhausted when I look back on this project and see how far it's come, and how close I am")
I don't mind putting in so much work for myself like this. I feel great about being sore and exhausted when I look back on this project and see how far it's come, and how close I am
In case anyone is reading along for knowledge, I should re-state; I'm not a professional, I'm just learning as I go, and doing my research online as well as speaking to a few pool guys while gathering info/estimates...
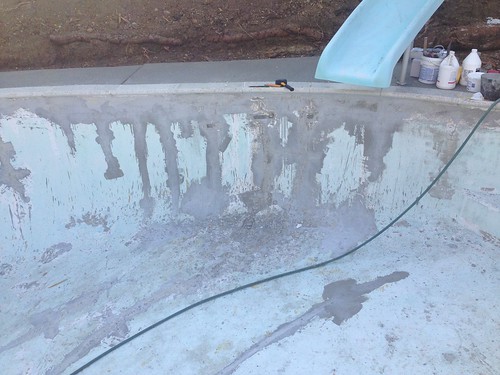
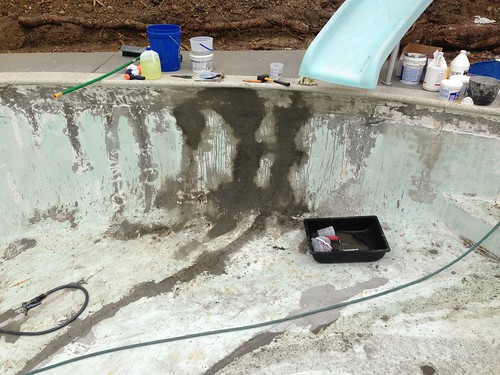
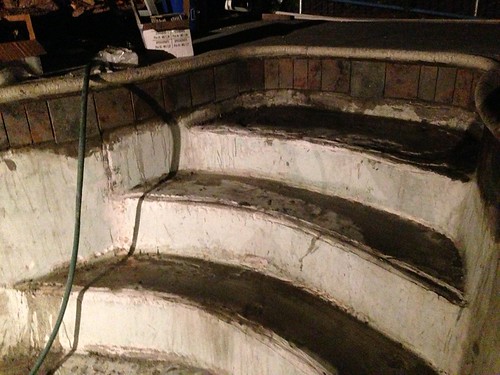
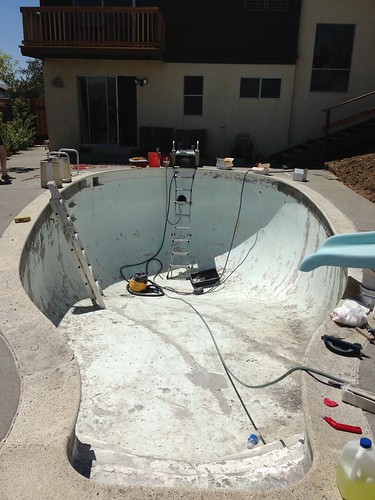
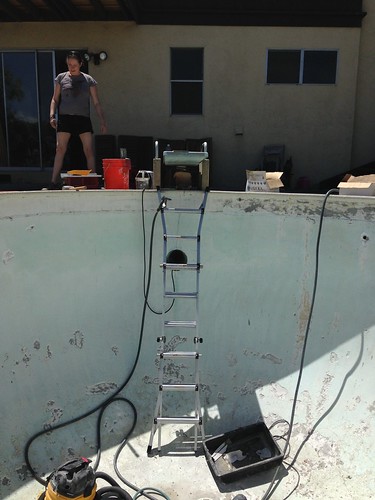
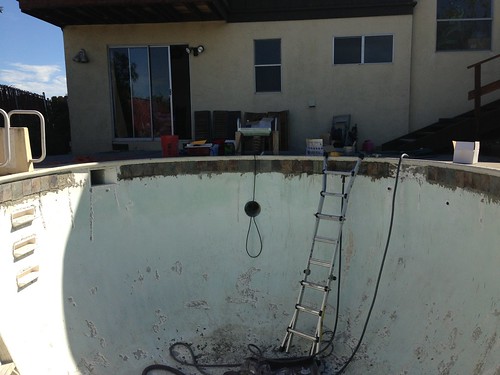
So when I last left off I was here;
 Untitled by bradisdrab, on Flickr
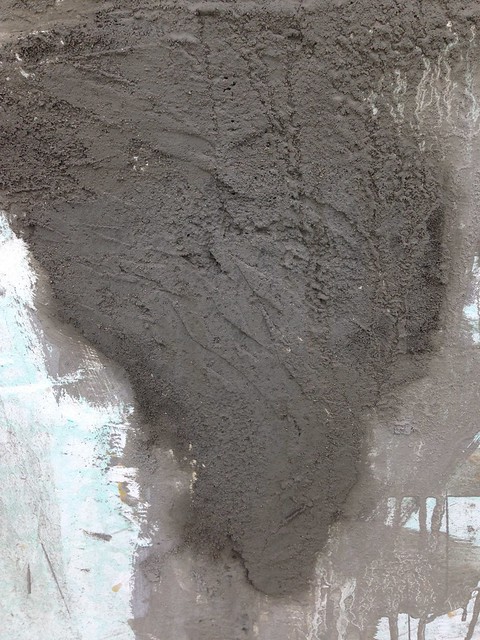
Hydraulic cement patch/seal over the cracks and epoxy/foam. I figure the thinness of the cement will futther seep into the cracks and seal it more, and I made sure to leave a rough texture, so that the next layers would have something to grip.
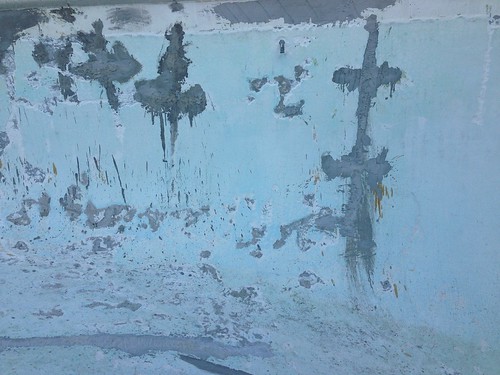
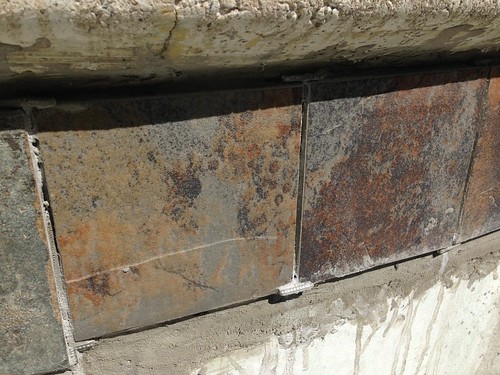
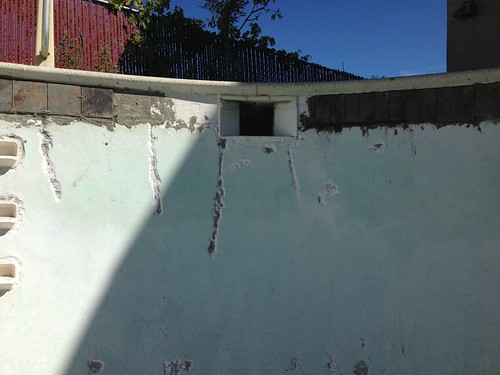
Looking at the surface I started to notice a bit of discoloration;
 Untitled by bradisdrab, on Flickr
A bit of a yellowish tint and some hairline cracking in there;
 Untitled by bradisdrab, on Flickr
NOT GOOD.
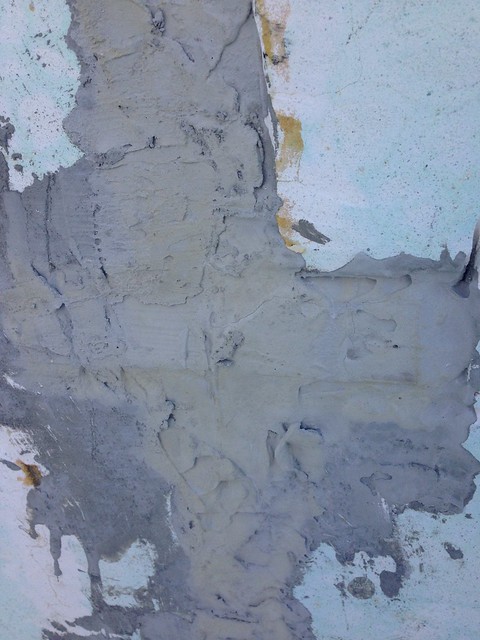
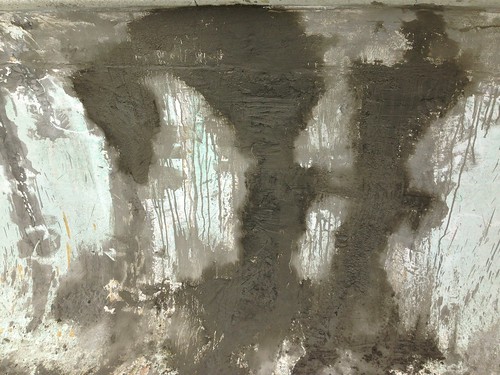
I knew the hydraulic cement wouldn't be structural, but this isn't right, and as soon as I started tapping it with the mallet/chisel I could see what was happening as it sheared off and crumbled;
 Untitled by bradisdrab, on Flickr
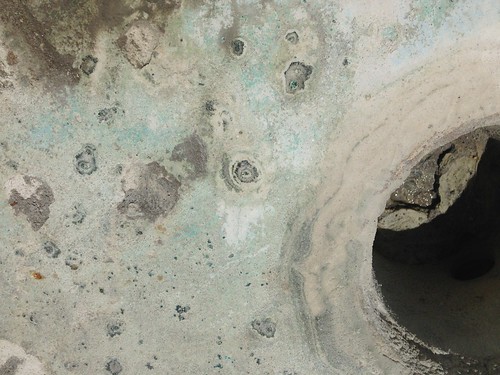
I've never heard of this happening before, but the yellow seemed to be oils leached out of the sealing epoxy, which weakened the hydraulic cement, as well as the cement did not bond to the leftover epoxy much at all, so I set about knocking off all the problem spots to grind down the epoxy even more.
 Untitled by bradisdrab, on Flickr
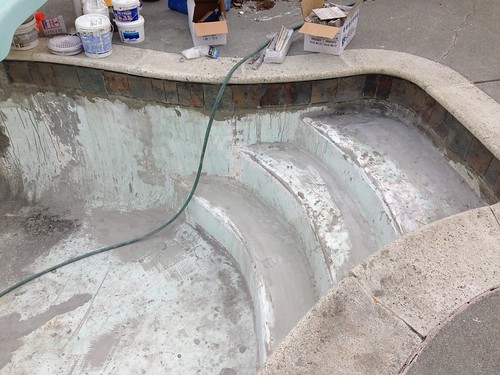
Very discouraging, but I kept at it, removing the bad material and going back down to get the surface epoxy off too. Very discouraging, but I keep telling myself, its better to go through this now then later when its filled with water...
Next I repacked it with a portland/sand mix, which should prove to be a lot stronger, and with the epoxy residue ground away it should provide a much stronger patch;
 Untitled by bradisdrab, on Flickr
I left the texture pretty rough so the replaster would have something to grip.
 Untitled by bradisdrab, on Flickr
Already feeling a bit better about this, and the portland/sand mix is pretty close to what I've been thinking of plastering the whole pool with, so I can see how dark it would end up being, also note the root that'd been hiding under the old deck, no wonder this was beginning to crack!;
 Untitled by bradisdrab, on Flickr
(to be continued...)
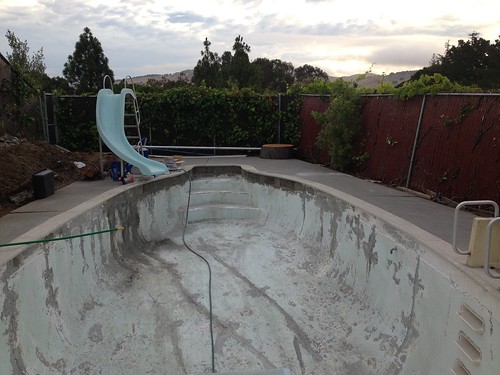
So when I last left off I was here;
Untitled by bradisdrab, on FlickrHydraulic cement patch/seal over the cracks and epoxy/foam. I figure the thinness of the cement will futther seep into the cracks and seal it more, and I made sure to leave a rough texture, so that the next layers would have something to grip.
Looking at the surface I started to notice a bit of discoloration;
Untitled by bradisdrab, on FlickrA bit of a yellowish tint and some hairline cracking in there;
Untitled by bradisdrab, on FlickrNOT GOOD.
I knew the hydraulic cement wouldn't be structural, but this isn't right, and as soon as I started tapping it with the mallet/chisel I could see what was happening as it sheared off and crumbled;
Untitled by bradisdrab, on FlickrI've never heard of this happening before, but the yellow seemed to be oils leached out of the sealing epoxy, which weakened the hydraulic cement, as well as the cement did not bond to the leftover epoxy much at all, so I set about knocking off all the problem spots to grind down the epoxy even more.
Untitled by bradisdrab, on FlickrVery discouraging, but I kept at it, removing the bad material and going back down to get the surface epoxy off too. Very discouraging, but I keep telling myself, its better to go through this now then later when its filled with water...
Next I repacked it with a portland/sand mix, which should prove to be a lot stronger, and with the epoxy residue ground away it should provide a much stronger patch;
Untitled by bradisdrab, on FlickrI left the texture pretty rough so the replaster would have something to grip.
Untitled by bradisdrab, on FlickrAlready feeling a bit better about this, and the portland/sand mix is pretty close to what I've been thinking of plastering the whole pool with, so I can see how dark it would end up being, also note the root that'd been hiding under the old deck, no wonder this was beginning to crack!;
Untitled by bradisdrab, on Flickr(to be continued...)
Man that was a LOT of work! I am with you on thinking at least you found the problem with the HC BEFORE you thought you were done!
Thanks for sharing! This could help someone else from doing the same thing.
Kim
Thanks for sharing! This could help someone else from doing the same thing.
Kim
Wow, I just got off the phone with four different places that deal in SGM products, specifically asking about Diamond Brite, but none of them will sell to an individual, only "pool professionals".
I'm pretty close to giving up on that one, as cool as it looks.
Somewone else mentioned Sider-crete, so I'm starting to warm up to the idea of using one of theirs;
http://www.sider-crete.com/pool-plasters-deck-coatings/
They make a dark grey and speckled black roll-on plaster that look like they could work. I just need to determin if that'd be thick enough, and if it'd be better than just going with the portland/sand mix.
I need to figure this out and make a decision very soon, I'm hoping to have the pool ready and swim-able by Labor day, which means the clock is ticking!
-b
The guys that replastered our pool put a rough coat of bond coat over the entire pool and spa about a day before the new plaster. I guess that's critical.
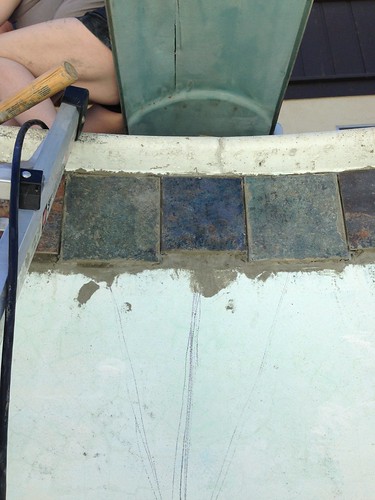
Next is the tile line. This is the fun part, where its becoming about the final look, the aesthetics, and not just the steps needed to fix the structure.
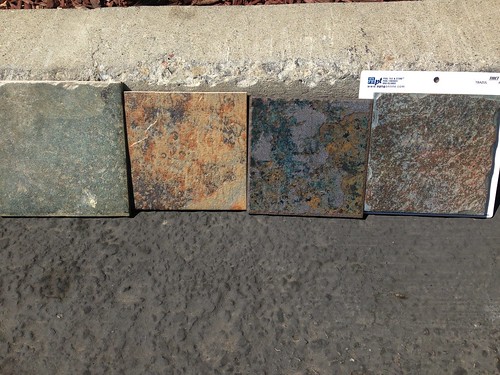
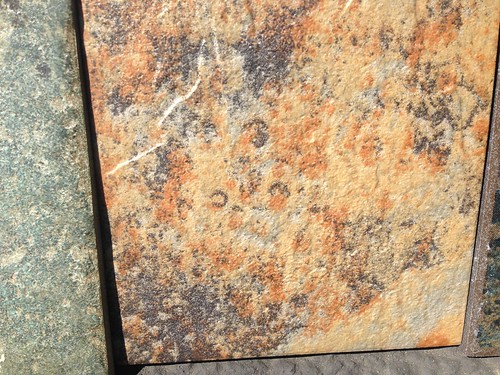
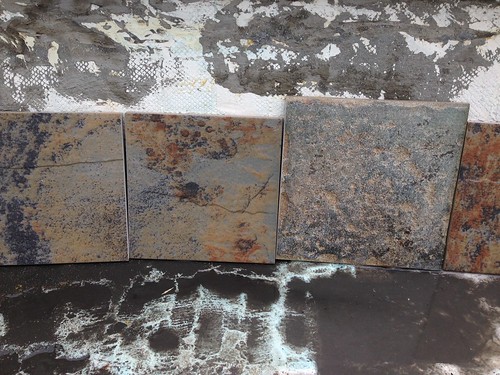
We'd been bouncing ideas around for awhile, and went to about five different places to look at them in person, eventually narrowing it down to four tiles. I put this in the parking lot to get a sun lit picture with light curb to simulate the coping and tar for the dark plaster I'll be using;
 Untitled by bradisdrab, on Flickr
I asked friends and family and the consensus was the third one, with the hint of blue, but at 6x the cost I couldn't rationalize it.
We ended up planning a combination of the first two. These ones were just porcelain tiles, but since we live in CA and don't have to deal with freezing or extremes it shouldn't be such an issue.;
 Untitled by bradisdrab, on Flickr
The green is slightly larger than the rust/orange, so I planned to space them eveny and use it as an accent.
 Untitled by bradisdrab, on Flickr
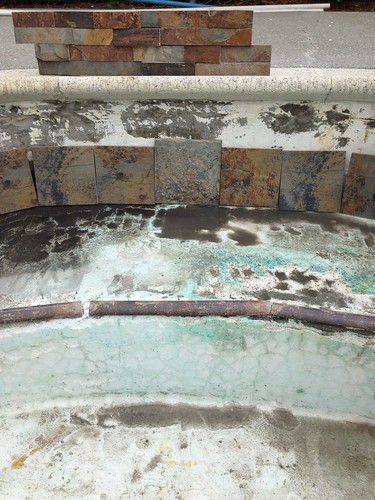
One of the reasons we settled on these is because it would go well weth the slate facade we were thinking of using on the retaining walls around the yard.
 Untitled by bradisdrab, on Flickr
I also grabbed some quarter round for the step edges and such.
Holding it up I could tell the curves were too tight for tiles that large;
 Untitled by bradisdrab, on Flickr
That could only mean one thing, time to head back to Harbor freight!
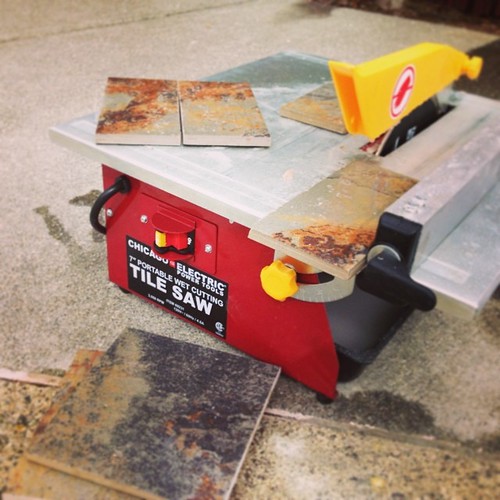 Tile saw! I love being so close to #harborfreight by bradisdrab, on Flickr
I managed to get this tile saw for a deal, and started chopping some of the tiles in half to fit the curve, it ended up getting pretty late the first night when I finished putting up the first tiles,
 Untitled by bradisdrab, on Flickr
but I managed to get pretty far considering I started late and had to make a few supply runs;
 Untitled by bradisdrab, on Flickr
I used 1/8 plastic spacers, and if I'd had it to do over again I'd have pulled them back out as the mortar dried rather than leaving them in to dry,
 Untitled by bradisdrab, on Flickr
but overall I'm happy with how it was coming along;
 Untitled by bradisdrab, on Flickr
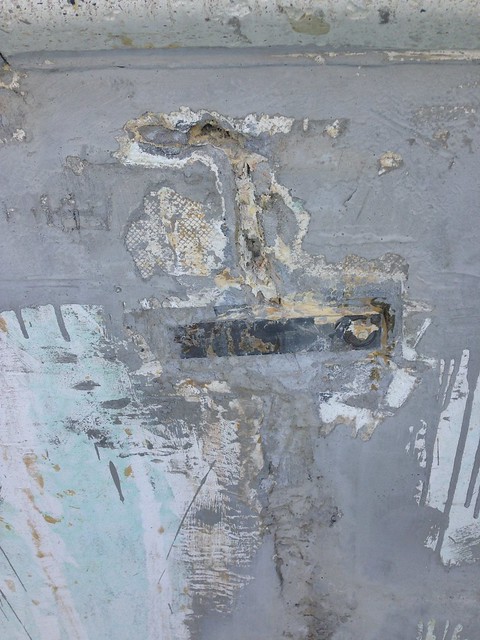
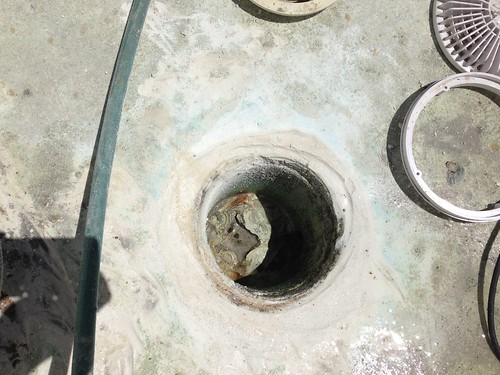
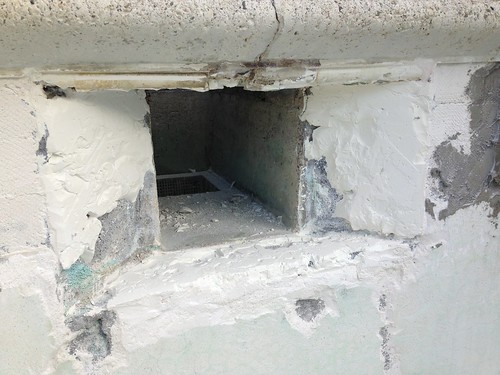
Next was the main drain, I've heard it didn't *need* to be replaced, but I figured while I was updating everything else, why not?;
 Untitled by bradisdrab, on Flickr
I pulled it out, and some of the plaster around it was still a bit funky;
 Untitled by bradisdrab, on Flickr
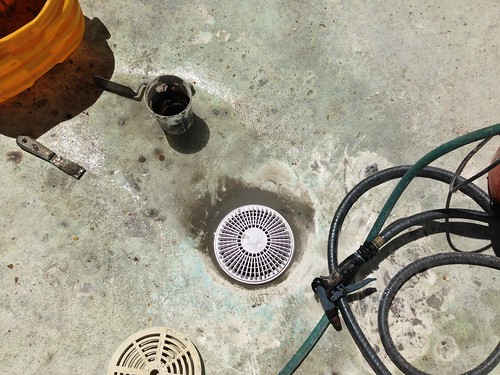
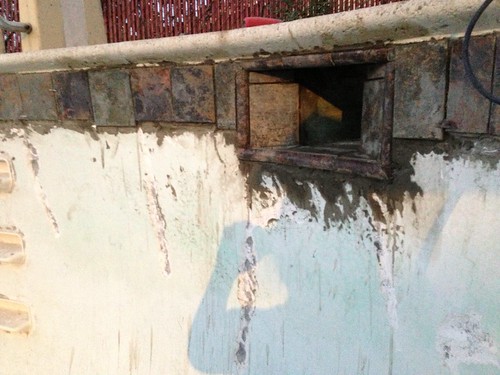
I ground out the bad stuff and prepped it for the new cover;
 Untitled by bradisdrab, on Flickr
and cemented it into place;
 Untitled by bradisdrab, on Flickr
Another solid day's work, with some help from my friend Kyle, and we'd managed to get most of the way across the pool.
 Untitled by bradisdrab, on Flickr
My fiance Leslie made some time to help with the tile for the deep end and saved me a ton of time, since I could stay on the ladder and she could prep, mix mortar, cut tiles, or pass me whatever tool I needed.
 Untitled by bradisdrab, on Flickr
Its hard to tell in the photos, but I realized at this stage that the pool itself isn't centered/symetrical. the diving board, light and drain don't line up with the steps. I'm not overly troubled by this, but its an interesting observation, and something to keep in mind for lining up the last of the tiles.
Since it was a favorite we placed the blue tile in the center as an accent and worked the pattern out to the sides from there. That way we wouldn't end up with an offset tile.
 Untitled by bradisdrab, on Flickr
We worked until we reached the skimmer ;
 Untitled by bradisdrab, on Flickr
Wasn't sure what to do about the skimmer, all along had been trying to convince myself to leave it tiled white, because it seemed like a lot of work;
 Untitled by bradisdrab, on Flickr
But deep down I knew I'd always look at it and regret not going the extra mile, and Leslie was there to encourage me, so I chiseled it out;
 Untitled by bradisdrab, on Flickr
We figured out the cuts and got it done in a couple hours, and even used some of the bullnose to make it a bit more slick looking;
 Untitled by bradisdrab, on Flickr
The last of the quarter round bullnose I put as planned onto the steps;
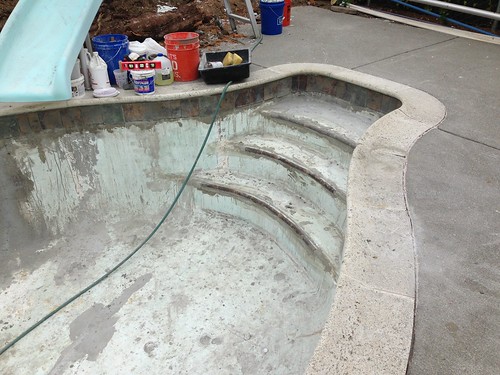 Untitled by bradisdrab, on Flickr
And this is where I am at now!
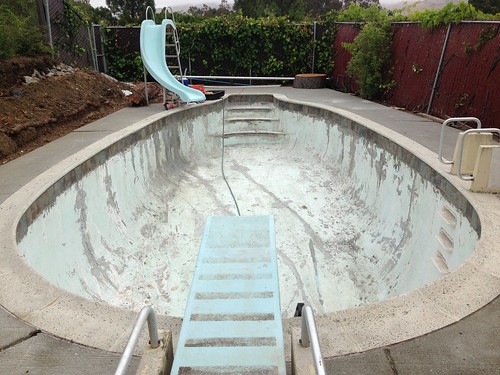 Untitled by bradisdrab, on Flickr
The tile is all there and I'm planning to clean it up and grout it this weekend, hoping to replaster very soon...
We'd been bouncing ideas around for awhile, and went to about five different places to look at them in person, eventually narrowing it down to four tiles. I put this in the parking lot to get a sun lit picture with light curb to simulate the coping and tar for the dark plaster I'll be using;
Untitled by bradisdrab, on FlickrI asked friends and family and the consensus was the third one, with the hint of blue, but at 6x the cost I couldn't rationalize it.
We ended up planning a combination of the first two. These ones were just porcelain tiles, but since we live in CA and don't have to deal with freezing or extremes it shouldn't be such an issue.;
Untitled by bradisdrab, on FlickrThe green is slightly larger than the rust/orange, so I planned to space them eveny and use it as an accent.
Untitled by bradisdrab, on FlickrOne of the reasons we settled on these is because it would go well weth the slate facade we were thinking of using on the retaining walls around the yard.
Untitled by bradisdrab, on FlickrI also grabbed some quarter round for the step edges and such.
Holding it up I could tell the curves were too tight for tiles that large;
Untitled by bradisdrab, on FlickrThat could only mean one thing, time to head back to Harbor freight!
Tile saw! I love being so close to #harborfreight by bradisdrab, on FlickrI managed to get this tile saw for a deal, and started chopping some of the tiles in half to fit the curve, it ended up getting pretty late the first night when I finished putting up the first tiles,
Untitled by bradisdrab, on Flickrbut I managed to get pretty far considering I started late and had to make a few supply runs;
Untitled by bradisdrab, on FlickrI used 1/8 plastic spacers, and if I'd had it to do over again I'd have pulled them back out as the mortar dried rather than leaving them in to dry,
Untitled by bradisdrab, on Flickrbut overall I'm happy with how it was coming along;
Untitled by bradisdrab, on FlickrNext was the main drain, I've heard it didn't *need* to be replaced, but I figured while I was updating everything else, why not?;
Untitled by bradisdrab, on FlickrI pulled it out, and some of the plaster around it was still a bit funky;
Untitled by bradisdrab, on FlickrI ground out the bad stuff and prepped it for the new cover;
Untitled by bradisdrab, on Flickrand cemented it into place;
Untitled by bradisdrab, on FlickrAnother solid day's work, with some help from my friend Kyle, and we'd managed to get most of the way across the pool.
Untitled by bradisdrab, on FlickrMy fiance Leslie made some time to help with the tile for the deep end and saved me a ton of time, since I could stay on the ladder and she could prep, mix mortar, cut tiles, or pass me whatever tool I needed.
Untitled by bradisdrab, on FlickrIts hard to tell in the photos, but I realized at this stage that the pool itself isn't centered/symetrical. the diving board, light and drain don't line up with the steps. I'm not overly troubled by this, but its an interesting observation, and something to keep in mind for lining up the last of the tiles.
Since it was a favorite we placed the blue tile in the center as an accent and worked the pattern out to the sides from there. That way we wouldn't end up with an offset tile.
Untitled by bradisdrab, on FlickrWe worked until we reached the skimmer ;
Untitled by bradisdrab, on FlickrWasn't sure what to do about the skimmer, all along had been trying to convince myself to leave it tiled white, because it seemed like a lot of work;
Untitled by bradisdrab, on FlickrBut deep down I knew I'd always look at it and regret not going the extra mile, and Leslie was there to encourage me, so I chiseled it out;
Untitled by bradisdrab, on FlickrWe figured out the cuts and got it done in a couple hours, and even used some of the bullnose to make it a bit more slick looking;
Untitled by bradisdrab, on FlickrThe last of the quarter round bullnose I put as planned onto the steps;
Untitled by bradisdrab, on FlickrAnd this is where I am at now!
Untitled by bradisdrab, on FlickrThe tile is all there and I'm planning to clean it up and grout it this weekend, hoping to replaster very soon...
hyperionguy
LifeTime Supporter
I have several comments:
1) You have an awesome view and I'm envious
2) I never knew a tree could do that kind of damage to a pool. That tree must have persistent roots. The pool I grew up with has been surrounded and covered by huge oak trees about 8-10 feet from the pool and had no problems for almost 40 years so far (my parents still live there).
2) I never knew a pool that badly damage was recoverable
3) You are a H E Double L (site blocked the other innocent word) of a man for taking on this project and doing such an awesome job for a self-proclaimed non-expert. There should be a beer commercial made about you.
4) I'm not a fan of the 3rd tile. If you are looking for a blended look, I actually like the 4th tile better. The 3rd is just too close to the plaster color for my taste. However, the choice you went with is even better IMO. I prefer the contrast. And when you said it would better match your coping, that sealed the deal for me.
This is a great thread. Thank you.
Wow! That is some great work there! Got of LOVE Harbor Freight!
Thanks for letting us come on the ride!
Ki
Thanks for letting us come on the ride!
Ki
Augie56
0
Superb dedication and work! Can't wait to see the finished product! Swimming by Labor Day???
Keep it up!
Keep it up!
- Jan 21, 2014
- 1,069
- Pool Size
- 20000
- Surface
- Plaster
- Chlorine
- Salt Water Generator
- SWG Type
- Pentair Intellichlor IC-40
This is amazing. Your hard work is very commendable. And this thread is a great one to follow. When you are done with yours, do you want to come to TX and work on mine? And kudos to the fiancé for assisting. -Karen
Thanks everyone for all the kind words and encouragment!
I went back and forth a lot about the plaster, and had a lot of trouble sourcing it, but finially made some progress and made a decisive move!
I talked to the guy I'm ordering my pumps and equipment through and had him contact the Diamond brite distributors, since they weren't willing to sell to me directly as an individual. Its going to work, he was able to order it for me, so now I've now got 45 bags of Onyx sand set to be delivered tomorrow morning!
As wjr75 recommended I'm also getting a couple kits of a bond coat to apply first, from what I've read that'll be the best way to go, since I'm not going to chip all of the old plaster out.
This will be my last weekend of prepping the surface, cleaning the tiles and adding the grout. I'm very excited and COMPLETELY overwhelmed imagining myself mixing and troweling it all on there. Guess I'm gonna need to get back to Harbor freight and pick up their cement mixer
in the mean time I'll be reading up on plastering tips, and looking at the installation videos and datasheets for the plaster itself
http://www.sgm.cc/html_Pool/Distributors/installation_videos.html
cheers,
-brad
Plaster tip from me------------------pain meds, beer, and hot bath with Epsom salts!
When I was working on the finish coat of drywall in my pool house a friend was with me one day and wanted to give it a try. I got her set up on a small wall. I showed her how I was doing it. Seemed easy to me so................let her have a go at it. I ended up sanding her wall back down and redoing it
I am telling you this just in case you have anyone helping you. Make sure to check their work often. Better to only have to redo a little instead of a huge area.
I can't wait to hear about how it goes.
Good luck!
Kim
Fantastic. You are a braver man than I!
A couple of suggestions.
Before you plaster make sure all of your plumbing is in to the pool and all the way back to the pad. Then flow test and pressure test it. Make sure the conduit back from the light is unobstructed.
If you are replacing the light you want to do that now and just set it on the side of the pool with the slack cable while you plaster. Its much easier to run the light cable to the junction box while the pool is empty.
Even if you have friends helping, I find it works best to pick up a laborer from outside Home Depot for the day. You could put him on the mixer (a thankless job if there ever was one) and you could concentrate solely on the pool.
Oh finally you need to make yourself some of the long spiked shoes to walk on the unset plaster.
Wowser.
What a great job you're doing.
I love the retro shape & style of your pool. I bet it looks AMAZING when you're finished.
What a great job you're doing.
I love the retro shape & style of your pool. I bet it looks AMAZING when you're finished.
Boom.
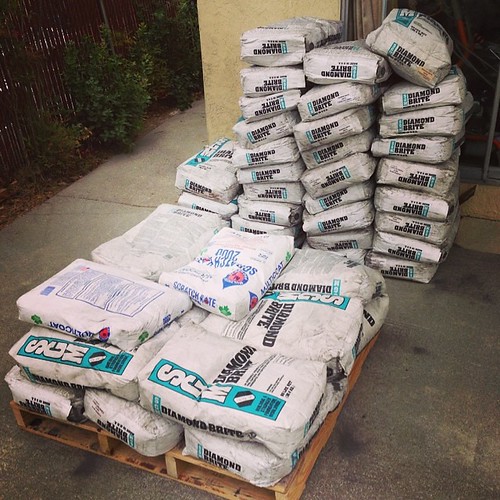 So. Much. Cement. by bradisdrab, on Flickr
It looks like even more bags in person. I'm still overwhelmed thinking about doing it all. With 45 bags to do, I'm unsure how long each will take to mix/apply this is going to be a lot of work... It may definitely be worth it to get some extra labor especially if I'm to do it in a day or two total. But yeah, like Kim was saying, I'd hate to create more work by letting someone do it and it not being up to my standard :/
Great advice and suggestions!
I had someone come through and pressure test the old plumbing before, so it should be good. I was pretty worried about that, but knew I could rip up the deck and replumb if need be, but very glad I didn't need to.
The old light was not too hard to replace, I was concerned that the conduit was compromised, but after working the cord back and forth a bit with some wire lube the new one came right through I haven't kept the new color-changing LED on for very long, because I don't want to over heat it, but I'm pretty excited about how it'll look in the water...
Spiked shoes are a good one, I keep forgetting about those
cheers,
-b
So. Much. Cement. by bradisdrab, on FlickrIt looks like even more bags in person. I'm still overwhelmed thinking about doing it all. With 45 bags to do, I'm unsure how long each will take to mix/apply this is going to be a lot of work... It may definitely be worth it to get some extra labor especially if I'm to do it in a day or two total. But yeah, like Kim was saying, I'd hate to create more work by letting someone do it and it not being up to my standard :/
Great advice and suggestions!
I had someone come through and pressure test the old plumbing before, so it should be good. I was pretty worried about that, but knew I could rip up the deck and replumb if need be, but very glad I didn't need to.
The old light was not too hard to replace, I was concerned that the conduit was compromised, but after working the cord back and forth a bit with some wire lube the new one came right through
I haven't kept the new color-changing LED on for very long, because I don't want to over heat it, but I'm pretty excited about how it'll look in the water...Spiked shoes are a good one, I keep forgetting about those
cheers,
-b
I also saw a thread that the guys taped large, square pieces of foam to their shoes. You can buy the foam at a fabric store.
Just know you will be throwing the shoes and clothes away when you are done LOL or you can keep them for "yucky" work but must promise you will NEVER wear them out the front door!
OKay here is my idea. You DO need help. They help with be the mixer and gofer. Have them mix the first batch with you watching and giving input. That way it will be consistent with ONE person mixing it. You put it on.
I would also do a "test" piece. Open and mix a small amount of the stuff. Have a piece of plywood that you can put the stuff on so you can find your best technique. What tool works for you? Do you go this way or that way? How fast do you have to go before it starts to be unworkable?
I started my finish drywall with a small 3" inch roller. I was just going to use it for the corners and such. My plan was to use a normal roller for the bigger areas. Wellllllllllllll I found I really liked how the 3" roller worked and looked. The larger one was not as easy and it just did not look the same. Soooooooooo I finished drywalled our 750 sq. foot pool house using a 3" roller!!!!!!!!!! But hey I had all summer and I had the music cranked up and the pool was waiting for me when I needed to jump in to cool off! I kept the little roller. It has a special place in the pool house!
It can be done. You just need to find your way. PLEASE take pics!
Kim
Thread Status
Hello , This thread has been inactive for over 60 days. New postings here are unlikely to be seen or responded to by other members. For better visibility, consider Starting A New Thread.